This site is supported by our readers. We may earn a commission, at no cost to you, if you purchase through links.
Mastering the art of hemming knit fabric by hand is not just about skill, but also about understanding the unique behavior of knit materials. You’re about to embark on a journey that combines artistic skills with a deep knowledge of fabrics and a keen attention to detail.
From selecting the right tools to executing precise stitches, this guide will equip you with essential tips and techniques for achieving a flawless finish. Whether you’re an experienced sewist or a curious beginner, learning how to hem knit fabric by hand will elevate your sewing projects to new heights of craftsmanship and innovation.
Table Of Contents
Key Takeaways
- Pre-wash and press the knit fabric before hemming to ensure a clean finish and accurate sizing.
- Use a ballpoint needle and threads with elasticity, such as wooly nylon or Eloflex, to accommodate the stretch of knit fabrics.
- Employ hand sewing stitches that allow for stretch, like the basic catch stitch or herringbone catch stitch, to prevent puckering and maintain fabric elasticity.
- Finish the hem by pressing it and consider using knit stay tape or hemming tape on the wrong side for additional stabilization.
How to Hem Knit Fabric by Hand
To hem knit fabric by hand, simply fold the edge over, sew along the edge with a needle and thread, and then press gently. Consider using hemming tape on the wrong side to prevent puckering for a more polished finish.
Preparing the Fabric
Essential Tips & Techniques
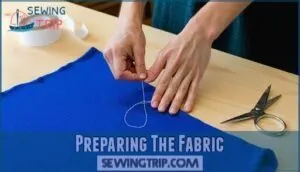
When it comes to hemming knit fabric by hand, the preparation stage is crucial for achieving a professional-looking finish. Before you even thread your needle, taking the time to properly press and fold the edge of your fabric can make all the difference.
Stabilizing the hem with knit stay tape, such as the White 1/2 Fusible Knit Stay Tape from Field’s Fabrics, ensures that your fabric maintains its shape and doesn’t stretch out of place during the sewing process.
This preparatory step isn’t just about precision; it’s about setting the foundation for a hem that looks as good as it functions, providing both durability and a clean aesthetic to your garment.
Pressing Before Hemming
Before diving into the world of hemming knit fabrics, let’s talk about a crucial first step: pressing before hemming.
Think of your iron as your trusty sidekick in this adventure, with pressing tools and iron techniques as your secret weapons. The right temperature settings are your map, guiding you through the terrain of knit fabric without causing any damage.
This step is like laying down the foundation of a house; it sets the stage for everything that follows. By pressing your fabric, you’re not just flattening it; you’re also marking your territory, showing those seam allowances who’s boss.
It’s a bit like whispering to the fabric, promising it a future of crisp, clean lines. So, grab your needle and thread, but first, let’s make sure that fabric is as smooth as a calm sea before we set sail on our stitching journey.
Folding the Edge Over
When folding the edge over in preparation for hand hemming your knit fabric, think of it as setting the stage for a flawless performance. This step is where your fabric’s character shines through, and your attention to detail paves the way for a masterpiece.
Imagine you’re gently persuading the fabric to take its final form, coaxing the edge to fold with the precision of a seasoned artist. This isn’t just about folding; it’s about understanding the unique dialogue between your hands, the fabric weight, and the anticipated stitch tension.
Whether you’re aiming for a stretch fabric hemming that moves with grace or a twin needle finish that sings in harmony, this initial fold is your foundation. It’s a simple act, but one that carries the weight of your project’s success. So, fold with intention, setting the stage for the hand sewing magic to follow.
Stabilizing With Knit Stay Tape
Stabilizing your knit fabric with knit stay tape is like giving your project a secret backbone, ensuring it doesn’t dance out of line the moment you look away. Think of it as your fabric’s invisible best friend, offering support without stealing the spotlight.
Before diving into the hand sewing arena, pre-washing your fabric is a must to avoid any post-project surprises. When it comes to interfacing options, consider the weight and stretch of your fabric to pick a companion that complements rather than competes.
Choosing the right tools isn’t just about picking the sharpest needle in the pack. A ballpoint needle will glide through your knit fabric like a hot knife through butter, avoiding any unwanted fabric tug-of-war.
Thread choice is equally pivotal; opt for something that can stretch without snapping, keeping your stitches as flexible as your fabric.
Now, onto the main event: hand sewing techniques. The basic catch stitch and its more decorative cousin, the herringbone catch stitch, are your go-tos for ensuring your hem doesn’t wave goodbye the first time you wear it.
These stitches offer the stretch and flexibility needed to maintain the integrity of your knit fabric.
Seam allowance impact and stitch length considerations are the unsung heroes of hemming. A generous seam allowance gives you room to maneuver, while the right stitch length can mean the difference between a hem that holds and one that folds.
After all is said and done, a final press can work wonders, transforming your project from homemade to handmade. If you’re looking to achieve that impeccably smooth finish, hemming tape can be your secret weapon, ensuring your stitches lay flat and stay hidden, like a ninja in the night.
Choosing the Right Tools
When hemming knit fabric by hand, selecting the right tools is crucial for achieving a professional and durable finish.
Opt for a ballpoint needle, which has a rounded tip designed to slide between the knit fibers rather than piercing through them, preventing damage to the fabric.
For thread, polyester or a specialty stretch thread like wooly nylon or Eloflex is recommended because these threads have the elasticity needed to move with the knit fabric, ensuring your stitches don’t pop when the fabric stretches.
Selecting the Correct Needle
After prepping your fabric with a press and a fold, it’s time to dive into the heart of hand hemming knit fabrics: selecting the right needle.
Think of your sewing kit as an artist’s palette, where each needle type and size paints a different stroke on your fabric canvas. For knit fabrics, you’re looking for a needle that’s both a sharp performer and a gentle glider.
Enter the ballpoint needle, your go-to for weaving through knits without snagging or breaking the yarns. It’s like choosing the right dance partner for a smooth waltz across the fabric.
But don’t forget about the sharp needle for those moments when precision is key, especially for delicate details. And remember, using a single thread of all-purpose thread will keep your stitches neat and tidy.
So, grab your sewing kit, and let’s thread our way to a masterpiece!
Choosing the Right Thread
After picking the perfect needle, it’s time to thread the needle with your chosen thread, a crucial step in the art of hemming knit fabrics by hand.
- Thread Weight: Opt for a thread that complements the fabric’s weight. Lighter threads for delicate fabrics and heavier threads for robust materials ensure your stitches blend seamlessly.
- Thread Color: Match the thread to your fabric for an invisible finish or choose a contrasting color for a bold statement. The right color thread can either hide your stitches or turn them into a feature.
- Thread Type: Polyester threads are versatile, strong, and suitable for most fabrics, including knits. For a more authentic or specific look, silk or cotton threads might be your go-to.
- Thread Brand and Tension: High-quality brands like Gütermann or Mettler offer reliability and consistency in your stitching. Adjust thread tension to avoid puckering, ensuring smooth, even stitches.
Hand Sewing Stitches for Knit Fabric
When it comes to hand sewing knit fabric, mastering the right stitches can elevate your sewing projects from homemade to handcrafted with a professional touch. The Basic Catch Stitch and Herringbone Catch Stitch are two essential techniques that promise not only durability but also the flexibility needed for knit fabrics.
The Basic Catch Stitch is straightforward, involving a small stitch forward, then inserting the needle a few stitches back before pulling the thread through and repeating the process. This stitch is ideal for securing hems and seams in knit fabrics, ensuring they stretch without breaking.
On the other hand, the Herringbone Catch Stitch adds an extra layer of strength and aesthetic appeal. It follows a similar process to the Basic Catch Stitch but includes an additional step where the needle is inserted a few stitches forward on the alternate side, creating a herringbone pattern.
This variation is particularly useful for areas that require more reinforcement or for decorative purposes.
Both stitches offer the flexibility and durability needed for knit fabrics, making them invaluable for anyone looking to achieve a professional finish by hand. Whether you’re hemming a heavy knit sweater or adding a decorative touch to a stretchy fabric, these stitches will ensure your project looks polished and stands the test of time.
Basic Catch Stitch
After picking the perfect needle and thread, it’s time to dive into the art of the basic catch stitch, a true ally in your sewing arsenal.
Picture this: you’re about to give a heavy knit fabric a hem that’s not just functional but also invisible, like a magician concealing his tricks. The catch stitch, with its criss-cross pattern, is your wand. It’s not just about connecting fabric; it’s about creating a seam that moves with you, stretching and bouncing back without a hint of strain.
This stitch isn’t just a technique; it’s a dance between the fabric and thread, where each step is a stitch forward and then a playful leap back. It’s the secret handshake between durability and flexibility, making it a go-to for hemming stretch fabric by hand.
So, grab your needle, and let’s stitch a spell that binds the fabric with resilience and grace. Remember, every stitch you make is a step towards mastering the craft, turning the ordinary into extraordinary.
Herringbone Catch Stitch
After mastering the basic catch stitch, you’re ready to dive into the herringbone catch stitch, a gem in the treasure chest of hand sewing stitches.
This stitch, akin to the basic catch stitch but with an extra twist, is your secret weapon for hemming stretch fabrics, heavy fabrics, and those tricky lined garments or curved hems.
Picture the herringbone catch stitch as the Swiss Army knife in your sewing kit: versatile, reliable, and a bit of a show-off with its criss-cross pattern. It’s not just about joining fabric; it’s about creating items that move with you, that stand the test of time, and that look as good as they feel.
So, grab your needle and thread, and let’s add some flair to your hem knit fabric projects. With each stitch, you’re not just sewing; you’re weaving durability, flexibility, and a touch of elegance into your creations.
Finishing Techniques
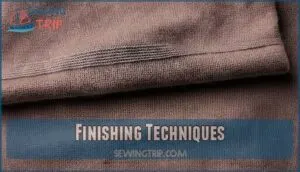
After you’ve carefully hand-sewn your knit fabric hem using the catch stitch or herringbone catch stitch, it’s crucial to give your project the finishing touches it deserves.
Pressing your hem upon completion ensures a crisp, professional look, enhancing the overall appearance and longevity of your garment.
Additionally, applying hemming tape to the hem’s wrong side can prevent your stitches from puckering, ensuring a smooth and stretch-compatible finish.
These final steps are essential in achieving a polished and durable hand-hemmed knit fabric, showcasing your attention to detail and mastery over fabric manipulation.
Pressing After Completion
After you’ve mastered the catch stitch, it’s time to put the cherry on top of your hand-sewn hem with a proper press. You’ll want to set your iron to the right temperature—too hot and you’ll singe your masterpiece, too cool and the hem will look like it’s been through a hedge backward.
For knit fabrics, you’re aiming for a low to medium heat, so think of the iron’s dial as a volume knob and turn it down to avoid a fabric meltdown.
Before you press, lay a pressing cloth over your work to shield it from direct heat. This is like sending your fabric to the spa instead of the sauna—gentle steam, no scorching. Use steam wisely to relax the fabric, not drench it. Imagine you’re coaxing the fabric into shape, not wrestling it into submission.
And remember, when you’re pressing stretch fabrics, it’s like petting a cat—you want to go with the grain, not against it, to avoid stretching or distorting your hem. Use fabric clips to hold everything in place if needed, and mark your territory with a washable pencil to ensure precision.
This final touch will make your hem look like it was done by a serger, even if it’s just you, a needle, and a double thread.
Using Hemming Tape for Smooth Finish
After pressing your hem to perfection, it’s time to give it that smooth, seamless finish that’ll make your knit creations look like they came straight from a high-end boutique. Enter the hero of our story: hemming tape. This little wonder can be your secret weapon, ensuring your hems aren’t just durable but also have that professional touch.
- Choose Your Tape Wisely: Not all tapes are created equal. Pick one that’s compatible with your fabric to avoid any sticky situations.
- Measure Twice, Cut Once: Precision is key. Measure the length of your hem and cut your tape to match. Remember, a stitch in time saves nine, but a well-measured tape saves the day.
- Iron with Confidence: With your tape in place, press down with your iron. Don’t rush this step; a good press makes all the difference.
- Test for Strength: Give your hem a gentle tug to ensure the tape has bonded well. If it holds, you’ve just crossed the finish line with flying colors.
Armed with these tips and your newfound knowledge, you’re ready to tackle any hemming challenge that comes your way. Remember, practice makes perfect, and with each hem, you’re not just sewing fabric; you’re crafting confidence.
Frequently Asked Questions (FAQs)
How to fix a stretched-out knit hem?
To fix a stretched-out knit hem, weave elastic thread through the hem’s edge using a needle with a large eye. Work from the wrong side, ensuring the thread is evenly distributed for a snug fit without puckering.
This method revives the hem’s elasticity, making your garment snug and stylish once more.
Can I hem knits without a sewing machine?
Yes, you can hem knits without a sewing machine. Imagine this: 90% of your wardrobe is knit fabric, yet not a single piece frays at the hem.
With a needle, thread, and a bit of patience, you can create invisible, stretchy hems on your knit garments. Dive into the art of hand stitching with techniques like the catch stitch or blind hem stitch.
It’s like painting with thread—each stitch a brushstroke that secures and beautifies your fabric.
No serger? No problem. Welcome to the tailor’s canvas, where your hands wield the power to transform knit fabric into meticulously hemmed masterpieces.
Best thread type for hand hemming knits?
For hand hemming knits, you’re in for a treat with wooly nylon or Eloflex thread. These stretchy threads are like magic wands, ensuring your hems stretch without a hitch, keeping your creations comfy and durable.
Dive in, and let the stitching adventure begin!
How to hem knits without puckering?
To hem knits without puckering, use a walking foot.
Stabilize with tissue paper.
Press seams with steam.
Avoid stretching the fabric while sewing.
Adjusting hem tension for different knit fabrics?
To avoid a hemming horror show with different knit fabrics, you’ll need to play the tension game like a maestro.
For lightweight knits, dial down the tension to avoid puckering; for heavier knits, you might need to tighten it up to keep things smooth.
Conclusion
Embarking on the art of hemming knit fabric by hand requires a blend of skill, fabric knowledge, and precision.
As you prepare your fabric, choose the right tools, and master stitches like the basic and herringbone catch stitch, you become equipped to achieve a professional finish.
With these techniques mastered, you are now ready to hem knit fabric by hand. This ensures that your sewing projects are not only functional but beautifully crafted.

