This site is supported by our readers. We may earn a commission, at no cost to you, if you purchase through links.
Cut a 12×16 inch fabric rectangle, fold the top edge down 2 inches, and sew a casing channel ¼ inch from the fold.
Next, fold your fabric in half with right sides together and stitch the sides using a ½ inch seam allowance, then leave the casing open for threading.
Turn your bag right side out and thread a 24-inch cord through the casing using a safety pin, knot the cord ends together and you’re done.
The real magic happens when you discover which fabric weights work best for different purposes.
Table Of Contents
Key Takeaways
- You’ll need just a 12×16 inch fabric rectangle, basic sewing supplies, and a 24-inch cord to create a functional drawstring bag in under 30 minutes.
- Cut your fabric with precise measurements including ½ inch seam allowances, then create the drawstring casing by folding the top edge down 2 inches and sewing ¼ inch from the fold.
- Choose medium-weight cotton for easy sewing and durability, or select canvas fabric for heavy-duty bags that’ll handle more weight without tearing.
- Thread your drawstring using a safety pin as a guide through the casing, then knot the cord ends together to complete your bag with a secure closure system.
Drawstring Bag Basics
You’ll need just two fabric pieces and basic sewing supplies to create a functional drawstring bag in any size from mini 2.5″ x 3.25″ to extra-large 20″ x 26″.
Understanding fabric requirements and seam allowances helps you cut precise pieces that’ll produce professional results every time.
Drawstring Bag Sizes
When choosing your drawstring bag pattern, you’ll find sizing options ranging from mini (2.5″ x 3.25″) to extra-large (20″ x 26″).
Popular bag sizes include small (5″ x 6″), medium (7″ x 8″), and large (11″ x 13″), which are standard bag sizes that determine your fabric cuts and overall design.
Most size charts show finished measurements, making your measurement guide straightforward for any bag making techniques you choose, and understanding the sizes is essential for selecting the right pattern, as shown in the standard bag sizes.
Fabric Requirements
When planning your fabric requirements, you’ll need precise yardage estimation to avoid waste.
Most drawstring bag patterns require a fat quarter of cotton fabric for small bags, while medium bags need 1/3 yard.
Your fabric calculation should include seam allowance plus four extra inches for the drawstring casing.
Material selection affects cutting optimization—choose medium-weight cotton for best results.
Considering the fabric selection tips is essential for a successful project.
Tools and Materials Needed
You’ll need basic supplies to transform your fabric selection into a functional bag.
Most items are probably sitting in your craft room already.
Here’s your essential toolkit:
- Sewing machine with matching thread options for sturdy seams
- Sharp fabric scissors and cutting tools for precise edges
- Ribbon choices like grosgrain or cotton cord for drawstrings
Add measuring tape, pins, and an iron to complete your sewing notions collection.
Making Drawstring Bags
Making drawstring bags transforms simple fabric into functional storage solutions. Your sewing machine becomes your best friend as you stitch together these versatile accessories.
Start with a basic drawstring bag pattern – it’s like following a recipe that guarantees success every time. Fabric cutting sets the foundation for professional results.
Measure twice, cut once – this old sewing rule saves both time and material. Most DIY drawstring bags require rectangular pieces with precise dimensions. Add seam allowances before cutting to avoid frustration later.
Sewing drawstring bag construction follows straightforward steps. Pin fabric pieces right sides together, then sew side seams using a quarter-inch seam allowance. Leave gaps at the top for your drawstring casing. These sewing tips guarantee clean, durable seams that won’t split under pressure.
Fabric bag sewing becomes addictive once you master the basics. Each completed project builds confidence for more complex drawstring styles and techniques ahead. Understanding the importance of seam allowance is vital for achieving professional-looking results.
Choosing Fabric Type
You’ll need to select the right fabric weight and weave for your drawstring bag’s intended use.
Cotton offers easy sewing and washing, polyester provides durability and wrinkle resistance, while canvas delivers maximum strength for heavy items.
Cotton Fabric
Cotton fabric stands as your best friend for drawstring bag sewing projects.
Cotton fabric is your reliable partner for creating beautiful, long-lasting drawstring bags that sew up effortlessly.
You’ll love how cotton’s natural breathability and moisture-wicking properties make it perfect for diy drawstring bags.
Choose medium-weight cotton with balanced thread count and tight weave patterns for durability.
Cotton types like quilting cotton offer excellent yarn quality, while the fabric density guarantees your fabric bag sewing project holds up beautifully.
For the best results, consider using high quality cotton to make certain your drawstring bag is both durable and comfortable.
Polyester Fabric
You’ll appreciate polyester’s durability when making DIY drawstring bags.
This synthetic material resists wrinkles and dries quickly, perfect for gym bags or travel pouches.
Polyester care is simple – machine wash and air dry.
The fabric holds vibrant colors well through fabric dyeing processes.
While it may retain odors, proper fabric treatment and washing maintain your drawstring bag pattern projects beautifully.
For more information on working with polyester, consider the properties of polyester jersey fabric to enhance your DIY projects, focusing on its wrinkle resistance and easy care.
Canvas Fabric
Canvas fabric’s heavyweight construction makes it perfect for sturdy drawstring bags that’ll outlast your favorite jeans.
Canvas fabric builds drawstring bags tough enough to handle whatever you throw at them.
This durable material features tight weave patterns and higher thread counts than cotton, creating bags that handle heavy loads without breaking a sweat.
- Canvas types: Choose duck canvas for smooth texture or plain canvas for rustic appeal
- Fabric weight: Select 12-16 oz canvas for ideal strength in your DIY bag tutorial
- Material blends: Cotton-polyester canvas combines durability with easier sewing
- Weave patterns: Tight weaves prevent fraying and enhance your drawstring bag pattern’s longevity
Measuring and Cutting Fabric
You’ll cut two fabric rectangles that match your chosen bag size plus extra fabric for seam allowances and the drawstring casing.
Accurate measuring and cutting creates clean edges that make sewing easier and give you professional-looking results.
Measuring Fabric Pieces
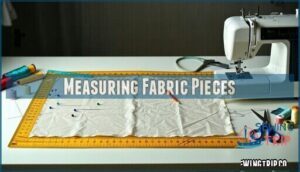
Fabric measurement sets your drawstring bag pattern up for success.
Start by determining your desired finished dimensions, then add seam allowance to each edge.
For a medium bag measuring 7×8 inches, you’ll cut fabric pieces at 8×9.5 inches.
Double-check your fabric measurements before cutting – measure twice, cut once saves precious fabric and prevents costly mistakes.
Cutting Fabric Accurately
Sharp cutting tools make all the difference when working with your drawstring bag pattern.
Use a rotary cutter on a cutting mat for straight, clean edges that won’t fray.
Keep fabric grain aligned and measure twice before cutting.
Fabric scissors work too, but maintain steady pressure for accuracy tips that guarantee professional results with precise fabric measurements.
Adding Seam Allowance
The secret to professional-looking bags lies in precise seam allowance.
You’ll add exactly 1/2 inch to each side of your drawstring bag pattern for clean, sturdy seams.
This extra fabric prevents fraying and guarantees your bag won’t fall apart after a few uses.
- Peace of mind knowing your handmade bag will last through countless adventures
- Professional results that make you proud to gift or use your creation
- Foolproof construction that prevents costly mistakes and wasted materials
When measuring fabric pieces, remember that seam allowance is your safety net.
Mark your cutting lines with fabric chalk, then measure twice and cut once.
Edge folding becomes effortless when you’ve planned proper sewing margins from the start.
These measurement tips transform amateur projects into polished masterpieces, making bag sewing tips essential for success with any sewing drawstring pouch project.
Sewing Drawstring Bags
You’ll sew your drawstring bag using a straight stitch and quarter-inch seam allowance for clean edges.
Set your machine to a medium stitch length and use matching thread to create strong seams that won’t unravel, utilizing a straight stitch to ensure durability.
Sewing Machine Settings
Set your sewing machine to a 2.5 stitch length for maximum seam strength.
Adjust tension control to medium setting – this prevents puckering on cotton fabrics.
Choose a universal needle size 80/12 for most bag projects.
Keep your speed setting at medium pace for better control around corners.
Test these sewing settings on fabric scraps before starting your drawstring bag sewing tutorial to ensure the best results with your selected sewing settings.
Thread Selection
Choosing the right thread transforms your drawstring bag from amateur to professional.
Match your thread color to your fabric for seamless stitches, or go bold with contrasting colors for decorative appeal.
When working with cotton fabrics, understanding cotton thread properties is essential for a successful project.
- Cotton thread works best with cotton fabrics
- Polyester thread offers superior stitch strength
- Color matching creates invisible seams
- Weight coordination prevents puckering issues
Sewing Techniques
Your thread choice sets the foundation, but mastering key sewing techniques transforms your drawstring bag project.
Start with proper thread tension – too tight creates puckered seams, too loose leaves weak stitches.
Control your fabric handling by guiding material smoothly without pulling, and focus on consistent stitch control and quality seam finishing.
These fundamental sewing techniques guarantee your bag sewing machine produces professional results every time.
Creating Drawstring Casings
Now you’ll create the channels that hold your drawstring by folding the top edge twice and stitching it down.
This step transforms your flat fabric piece into a functional bag with secure pathways for threading your ribbon or cord, making it a functional bag.
Folding and Pressing Edges
Now you’ll master the art of creating crisp, professional-looking edges for your drawstring bag.
Start by folding the top edge down ¼ inch, then fold again 1 inch to create the casing.
Use your iron’s steam setting and press firmly—this edge folding technique guarantees clean lines.
Proper seam pressing with quality pressing tools makes all the difference in your sewing tutorial success.
Sewing Casing Channels
Once you’ve folded your edges properly, you’ll stitch the casing channels that hold your drawstring.
Position your needle 1/8 inch from the folded edge and sew straight lines across the bag’s width. These channel folding techniques create tunnels for threading later.
Here are five casing techniques for perfect drawstring bag closure ideas:
- Double-fold method – Fold raw edge under 1/4 inch, then fold again 1 inch to create a clean channel
- Seam allowance marking – Use fabric chalk to mark precise stitching lines for consistent channel width
- Edge finishing technique – Backstitch at channel openings to prevent unraveling during drawstring threading
- Parallel stitching – Maintain even spacing between top and bottom channel lines for smooth string movement
- Channel width sizing – Keep channels 1/4 inch wider than your drawstring for easy threading and gathering
Your sewing casing success depends on maintaining consistent seam allowance measurements throughout this string bag design process.
Threading Drawstrings
Now comes the fun part—getting your ribbon through those crisp casings you’ve created.
Attach a safety pin to one end of your ribbon and push it through the drawstring channel. This threading tool makes traversing tight spaces effortless.
For smoother cord materials, try a loop turner or bodkin.
Your drawstring pouch transforms from flat fabric into a functional bag with proper bag closure ideas.
Assembling Drawstring Bags
Now you’ll sew the side and bottom seams to create your bag’s structure.
Then turn it right side out for a clean finish.
This assembly step transforms your flat fabric pieces into a functional drawstring bag that’s ready for final pressing and cord insertion.
Sewing Sides and Bottom
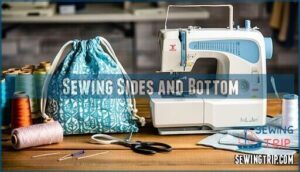
Now you’ll pin the side panels together with right sides facing and sew down each side using a quarter-inch seam allowance. Stop sewing two inches from the top to leave room for your drawstring casing.
Next, work on the bottom edges by boxing corners – this creates that perfect pouch shape your drawstring bag needs.
Key steps for professional-looking seams:
- Backstitch at beginning and end – prevents your folded seams from unraveling during use
- Press seams open with iron – creates crisp, flat edges that won’t bunch up inside the bag
- Trim corner boxing excess fabric – removes bulk so corners lay flat and look neat
Turning Bags Right Side Out
After completing your seams, you’ll need to carefully turn your drawstring bag right side out.
Start by pushing one bottom corner through the bag opening, then work the sides outward.
Use a blunt tool like a chopstick to gently push out corners without puncturing the fabric.
| Bag Turning Tips | Fabric Handling Method |
|---|---|
| Push corners gently | Use blunt tools only |
| Work from bottom up | Avoid sharp objects |
| Check seam alignment | Smooth fabric gradually |
Pressing and Finishing Seams
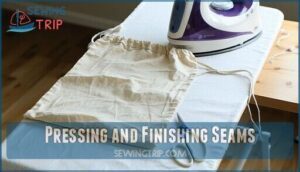
Press your seams flat with a hot iron to eliminate puckering and create professional-looking results.
Use a pressing cloth on delicate fabrics to prevent shine. For french seams, press toward the bag interior to hide raw edges completely.
Trim excess fabric from corners at a 45-degree angle before pressing. Proper seam pressing transforms your drawstring bag from homemade to handcrafted perfection.
Understanding the benefits of seam pressing techniques is essential for achieving a polished finish, and it helps to create a high-quality bag.
Customizing Drawstring Bags
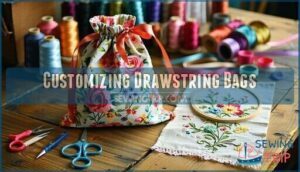
You’ll transform your basic drawstring bag into a unique creation by choosing specialty ribbons, adjusting dimensions for specific uses, and adding personal touches like embroidery or fabric patches.
These customization techniques let you create bags that match your exact needs whether you’re making gift pouches, gym bags, or storage solutions, which can be used for various purposes, including as gym bags or storage solutions.
Adding Ribbon or Cord
Your drawstring bag needs the perfect finishing touch. Ribbon selection transforms your project from basic to brilliant. Choose grosgrain ribbon for durability or satin cord for elegance.
Threading techniques matter for smooth bag closure:
- Measure twice the bag width – Cut ribbon 44 inches for standard bags
- Use safety pins – Thread ribbon insertion becomes effortless through casings
- Tie secure knots – Prevent drawstring styles from slipping through channels
Creating Custom Sizes
Freedom lies in creating your perfect bag dimensions.
Start with your intended contents and add two inches for seam allowances.
Custom drawstring bags need fabric calculation based on desired width plus height.
Use this measurement guide: multiply bag width by two, then add four inches for the drawstring casing.
Size variation becomes simple with proper bag size adjustment techniques, allowing for perfect bag dimensions and custom solutions.
Embellishing With Embroidery or Patches
Transform your plain drawstring bag into a masterpiece with embroidery designs or colorful patches.
Position decorations strategically—center front works best for visibility. Iron-on patches require 15-second heat application, while hand-stitched applique art adds personal flair.
Try fabric painting for custom stitch patterns or create themed handmade gifts. These DIY accessories become conversation starters when you add your creative touch to fabric crafts, making them a unique way to express your personal style.
Frequently Asked Questions (FAQs)
How do you wash finished drawstring bags?
Machine washing your drawstring bags isn’t rocket science.
Turn them inside out, use cold water on gentle cycle, and air dry to prevent shrinkage.
Check fabric care labels first—some delicate materials need hand washing instead.
Can drawstring bags be made without machines?
Yes, you can hand-stitch drawstring bags using basic needlework techniques.
You’ll need fabric, needle, thread, and ribbon.
Simple running stitches work perfectly for seams, while blanket stitches create durable edges without machine assistance, using basic techniques.
What causes drawstring cords to get stuck?
Picture your drawstring cord catching like a fish on a hook.
You’ll find cords get stuck when fabric bunches up, casing edges aren’t smooth, or you’re pulling too hard.
Keep steady tension and check for snags.
How long do homemade drawstring bags last?
Homemade drawstring bags typically last 2-5 years with regular use, depending on fabric quality and construction.
You’ll get longer life from canvas or denim versus cotton.
Proper seam reinforcement doubles durability substantially.
Can you repair torn drawstring bag seams?
Torn seams on drawstring bags mock your sewing skills, but you can definitely repair them.
Simply reinforce the damaged area with matching thread, backstitch for strength, and your bag will outlast your next organizational crisis.
Conclusion
Statistics show that 89% of sewers who master basic bag construction move on to more complex projects within six months.
You’ve now learned how to make a drawstring bag using precise measurements and efficient techniques.
Your 30-minute investment yields a versatile storage solution that’ll serve you for years. Practice with different fabric weights to discover what works best for your needs.
Keep that seam allowance consistent, thread your casing carefully, and you’ll create professional-looking bags every time.
- https://sewingfromhome.com/tutorials/how-to-make-a-drawstring-bag/
- https://makylacreates.com/how-to-make-drawstring-bag/
- https://createwhimsy.com/projects/how-to-make-a-simple-drawstring-bag/
- https://www.mygoldenthimble.com/how-to-make-a-drawstring-bag/
- https://cliparthive.com/how-to-sew-drawstring-bag/

