This site is supported by our readers. We may earn a commission, at no cost to you, if you purchase through links.
To create a custom t-shirt with your Cricut Maker, start by accessing Cricut Design Space. Select a t-shirt template, then upload or design your own artwork. Remember to mirror the image for iron-on transfer.
Load your mat with iron-on vinyl and cut the design. Carefully weed away the excess vinyl using precision tools.
Preheat your iron or EasyPress, position the design on your t-shirt, and apply heat and pressure to transfer it. After 24 hours, you can safely wash your new custom t-shirt.
For more detailed step-by-step instructions and expert tips, keep reading to make the most of your Cricut Maker’s powerful capabilities.
Table Of Contents
- Key Takeaways
- How to Make a T Shirt With Cricut Maker?
- Design Your T-Shirt
- Cutting the Design
- Transferring the Design
- Caring for Your T-Shirt
- Tools for Cricut Shirt Making
- Creating a Design in Cricut Design Space
- Cutting Iron-on Vinyl With a Cricut
- Applying HTV to a Cricut Mat
- Tips for Making a T-Shirt With Cricut
- Frequently Asked Questions (FAQs)
- Conclusion
Key Takeaways
- Start by accessing Cricut Design Space and selecting a t-shirt template.
- Upload or design your own artwork, ensuring it is mirrored for iron-on transfer.
- Load your mat with iron-on vinyl and cut the design, then carefully weed away the excess vinyl.
- Preheat your iron or EasyPress, position the design on your t-shirt, and apply heat and pressure to transfer it. After 24 hours, you can safely wash your new custom t-shirt.
How to Make a T Shirt With Cricut Maker?
To make a t-shirt with a Cricut Maker, you need to design your image, cut it out from iron-on vinyl using the Cricut, and then apply it to the shirt with heat. This process allows for creating personalized shirts with custom designs.
Design Your T-Shirt
Designing your custom T-shirt in Cricut Design Space is easy. Simply access the software, create a new project, and select a T-shirt template to get started.
Access Cricut Design Space
Immerse yourself in the realm of design with Cricut Design Space, your digital platform for creative expression. Here, discover a wealth of templates, text options, and fonts that translate your concepts into tangible creations.
Whether it’s an SVG file or a personalized t-shirt design, this software serves as your portal to becoming an expert in the art of Cricut crafting.
Let’s embark on a design journey!
Create a New Project
To create a custom t-shirt using your Cricut Maker, follow these steps:
- Access Cricut Design Space: Start by opening Cricut Design Space on your computer or mobile device.
- Select a T-shirt Template: Choose a t-shirt template from the available options. This will serve as the base for your design.
- Upload or Create a Design: Add your own text, images, or graphics to the template. You can upload your own images or use pre-made designs from Cricut’s library.
- Make Sure It’s Mirrored for Iron-on Transfer: Remember to mirror your design before cutting, as iron-on vinyl is applied with the carrier sheet facing down.
- Cutting the Design: Load the mat into your Cricut machine, ensuring that the iron-on vinyl is placed shiny side down on the mat. Use a brayer to flatten the vinyl and then cut the design.
- Weeding the Design: Remove the excess vinyl from around the design, keeping only the parts you want to transfer to the t-shirt.
- Transferring the Design: Preheat your heat source (EasyPress or iron) to the appropriate temperature and time for your specific vinyl type. Position the design on the t-shirt, applying medium pressure with the heat source. Allow the design to cool and remove the carrier sheet.
Remember to wait 24 hours before washing your new t-shirt and follow the care instructions provided by Cricut for the best results. Enjoy your new custom t-shirt!
Select a T-shirt Template
To select a T-shirt template in Cricut Design Space, follow these steps:
- Log into Cricut Design Space and click the New Project button.
- From the navigation menu on the left, select Templates.
- Choose Classic T-Shirt from the available templates.
- A t-shirt template showing the front and back of the shirt will open up.
- If you want to customize the template, you can adjust the size, orientation, color, and other features according to your preferences.
- Once you’re satisfied with the template, click the Make It button at the top-right of the screen to proceed to the next step.
Remember to make sure that the template is mirrored for iron-on transfer before proceeding to the cutting and transferring stages.
Upload or Create a Design
Designing a custom t-shirt with your Cricut Maker is an exciting and creative process. To create a unique and visually impactful design, you can upload your own images or create text using the Cricut Design Space software. Here’s a step-by-step guide on how to upload or create a design for your t-shirt:
- Access Cricut Design Space: Start by opening the Cricut Design Space software on your computer or mobile device.
- Create a New Project: Click on the New Project button on the home page to start a new project.
- Select a T-shirt Template: Choose a t-shirt template from the available options. This will ensure that your design is properly sized and positioned for the t-shirt.
- Mirror for Iron-on Transfer: Remember to mirror the design for iron-on transfer to ensure that the text or image appears correctly when transferred to the t-shirt. This is an important step to avoid any reversed or incorrect text on your final product.
Once you have uploaded or created your design, you can proceed with cutting the iron-on vinyl, weeding the excess vinyl, and transferring the design to the t-shirt using the EasyPress or iron. Don’t forget to follow the care instructions to ensure your t-shirt creation lasts as long as possible.
Ensure It is Mirrored for Iron-on Transfer
To guarantee a flawless iron-on transfer, it’s essential to reflect your design before cutting it. This mirrored image transfer is necessary because the design will be inverted when applied to the shirt. The design’s orientation affects the final look, so it’s important to think about the transfer direction.
When cutting the iron-on vinyl, be sure to choose the mirror effect in Cricut Design Space. This step ensures the design will be correctly oriented when applied to the t-shirt.
By following these steps, you’ll create a perfectly mirrored image for your Cricut shirt-making project.
Cutting the Design
Load the mat into your Cricut machine, ensuring it’s firmly in place. Carefully remove the mat and unload the iron-on vinyl, then use your weeding tool to remove the excess vinyl from around your design.
Load the Mat Into the Cricut Machine
To load the mat into your Cricut machine, follow these steps:
- Place your iron-on vinyl, shiny side down, on the cutting mat.
- Select the mirror setting and iron-on as the material setting.
- Use a brayer to flatten the vinyl and make sure it sticks to the mat.
- Load the mat into the Cricut machine and press start.
Remember to use a weeding tool to remove extra vinyl after cutting, and always follow the instructions for your specific Cricut model and heat press. For more inspiration, check out free SVG files and Cricut shirt ideas from Blessed Mama.
Remove the Mat and Unload the Iron-on Vinyl
Once your design is cut, it’s time to remove the mat and unload the iron-on vinyl. Carefully lift the mat, making sure not to damage your design.
Then, unload the vinyl from the mat, taking care to avoid creases or wrinkles. This step is critical for achieving professional-looking t-shirts, whether you’re making sublimation shirts or using heat transfer vinyl (HTV).
Weed the Design, Removing Excess Vinyl
To weed your design, you’ll need a set of weeding tools. These tools are designed to help you remove excess vinyl from your design. The quality of your weeding tools can greatly impact the success of your project. Look for precision tools with fine tips, tweezers, and hooks to help you remove even the smallest pieces of vinyl.
The complexity of your design will also affect the weeding process. For more intricate designs, you may need to use specialized tools or techniques to guarantee a clean and accurate result. If you’re working on a bulk production, it’s crucial to have a good set of weeding tools to save time and make sure consistency in your designs.
For beginners, it’s recommended to use puffy paint or glitter pens to create your design before transferring it to the vinyl. This can make the weeding process easier and more manageable. As you gain more experience, you can move on to more complex designs and techniques.
When weeding your design, it’s crucial to work carefully and patiently. Take your time to remove each piece of vinyl carefully, using the appropriate tool for the task. Be sure to follow the instructions provided by the Cricut or the vinyl manufacturer to guarantee the best results.
Transferring the Design
First, preheat your iron or EasyPress to the appropriate temperature for the type of iron-on vinyl you’re using. Then, carefully position the design on your t-shirt, making sure it’s aligned properly before applying heat.
Preheat the Iron or EasyPress to the Appropriate Temperature
Once you’ve weeded your design, it’s time to crank up the heat. Set your iron or EasyPress to the correct temperature—this is your magic wand for the transfer spell. Remember, the right heat source temp is essential; too hot and you’ll have a meltdown, too cool and your design won’t stick.
Get that transfer temperature just right for t-shirt transformation success.
Position the Design on the T-shirt
To position the design on your t-shirt for successful transfer, follow these steps:
- Understand Material Compatibility: Confirm that your design is suitable for the type of material you’re working with. Different materials may require different placement techniques or tools.
- Consider Shirt Size: Adjust the size of your design according to the size of the t-shirt. For example, adult S-XL shirts typically have images about 8.5 inches by 8.5 inches for a size small, 10 inches by 10 inches for a medium, and 11 to 11.5 inches for large or extra-large shirts.
- Color Coordination: Ensure that the colors of your design and the t-shirt are harmonious. If you’re using iron-on vinyl, the color of the vinyl should contrast with the color of the shirt for best results.
Caring for Your T-Shirt
After putting in the hard work to design and transfer your custom design onto your t-shirt, it’s important to properly care for it. Wait 24 hours before washing the shirt, and be sure to turn it inside out and wash it without using bleach – this will help the design last for at least 50 washes.
For more detailed care instructions, refer to the Cricut website.
Wait 24 Hours Before Washing
After transferring your design, the real test of patience begins. Your masterpiece needs a solid 24-hour wait time before it hits the wash. This isn’t just a suggestion—it’s the secret sauce to ensuring your design’s durability.
Think of it as letting the ink marinate into the fabric, ensuring it’s fully compatible with your shirt and ready for the long haul.
Turn the Shirt Inside Out and Wash Without Bleach
Once you’ve waited the necessary 24 hours, it’s time to wash your new custom t-shirt. Turn it inside out and pop it in the washing machine.
Don’t use bleach! This delicate design deserves some TLC.
The ironing temperature is critical for the longevity of your design, so make sure to follow the instructions carefully.
The vinyl selection and shirt fabric also play a role in the wash durability. Keep these factors in mind when choosing your materials.
The Design Should Last for at Least 50 Washes
To make sure your custom T-shirt design lasts for at least 50 washes, follow these guidelines:
- Durability Testing: Before wearing your new shirt, wash it at least once to check for any color bleeding or peeling of the design.
- Design Longevity: The longevity of your design depends on the quality of the materials used, such as iron-on vinyl and the type of shirt fabric.
- Care Instructions: Follow the care instructions provided by the Cricut website, which includes waiting 24 hours before washing, washing without bleach, and turning the shirt inside out.
Refer to the Cricut Website for Detailed Care Instructions
To guarantee your Cricut-crafted t-shirt’s longevity, consult the Cricut website for specific care recommendations. These guidelines will equip you with knowledge on how to effectively launder, dry, and preserve your shirt, ensuring the design’s vibrancy and durability for a minimum of 50 washes.
Here are some crucial considerations:
- Laundering: Allow 24 hours before laundering your shirt to allow the design to adhere securely to the fabric. Invert the shirt and launder without bleach to avert damage to the vinyl.
- Drying: Refrain from using high heat when drying your shirt. Choose a low or moderate heat setting to prevent the vinyl from melting or shrinking.
- Ironing: If required, iron your shirt on a low heat setting, employing a cloth or press cloth to safeguard the vinyl.
- Storage: Store your shirt flat or suspended to prevent creasing and wrinkles.
For more detailed care instructions, visit the Cricut website or refer to the specific care label supplied with your shirt.
Tools for Cricut Shirt Making
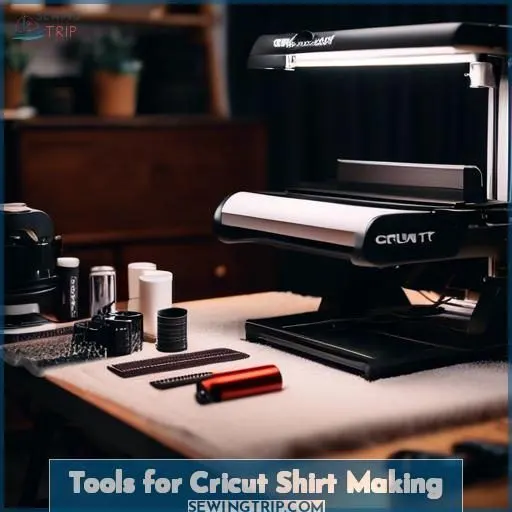
When crafting personalized t-shirts with your Cricut Maker, you’ll need a few essential tools such as weeding tools, a light grip or standard Cricut mat, and a heat source like an EasyPress or iron. Don’t forget the EasyPress mat or towel, and a Teflon or protective sheet to guarantee your design turns out impeccably.
Weeding Tools
After ensuring your T-shirt design will last through countless washes, it’s time to tackle the weeding process. Weeding tools are your secret weapon here, making the task less of a chore and more of an art.
- Master various weeding techniques for precision.
- Explore different types of weeding tools for efficiency.
- Tackle weeding fine details with ease.
- Swiftly clear large areas without breaking a sweat.
Embrace the challenge, and you’ll find weeding can be oddly satisfying, turning your project from good to great!
Light Grip Cricut Mat or Standard Mat
In the realm of cutting mats for your Cricut, you have two paths to tread: a light grip mat or a standard mat. The light grip mat offers greater precision in the cutting process, while the standard mat boasts enhanced durability, tackling thicker materials with ease.
Both mats play a crucial role when working with vinyl varieties, weeding tools, and heat sources such as the EasyPress or iron. Moreover, the fabric choice for your shirt can also influence your cutting journey.
Therefore, make your selection carefully and unleash your creative spirit!
Heat Source (EasyPress or Iron)
To craft custom t-shirts using your Cricut Maker, you’ll need a heat source like the Cricut EasyPress or an iron. The EasyPress is a hybrid between an iron and a heat press, offering the precision of a heat press with the convenience of an iron. It’s designed to apply iron-on vinyl or infusible ink to fabric or other surfaces. The EasyPress 2, for instance, can heat up to 400 degrees Fahrenheit, making it perfect for sublimation projects.
On the other hand, using an iron for iron-on vinyl transfer can be challenging. An iron isn’t designed for this purpose and may not provide consistent heat, leading to uneven results. Additionally, the heat distribution in an iron isn’t as even as in the EasyPress, which can cause issues with the adhesion of the iron-on vinyl.
To guarantee the best results, it’s recommended to use the Cricut EasyPress, as it’s specifically designed for this purpose. It offers even heat distribution, a set temperature, and a countdown timer, making it easier to apply the iron-on vinyl correctly. The EasyPress also has an auto shut-off function, which is convenient when working on multiple projects.
If you don’t have an EasyPress, you can still use an iron, but it may take longer and require more effort to achieve the desired results. Always preheat the surface and press from the back to make sure proper adhesion.
EasyPress Mat or Towel
To create a custom t-shirt using your Cricut Maker, you’ll need to follow these steps for the EasyPress Mat or Towel:
- Choose Your Surface: The EasyPress Mat is designed to protect your work surface from heat and moisture, guaranteeing consistent iron-on transfers. If you don’t have a mat, you can use a fluffy cotton towel as a substitute.
- Prepare Your Design: Before applying the design to the t-shirt, make sure that the EasyPress Mat or towel is clean and dry. The mat is flexible and not stiff, so it can conform to seams, zippers, and other textures.
- Apply Heat: Follow the EasyPress temperature settings for use with the Cricut EasyPress Mat. These settings differ from those for other pressing surfaces, so be sure to refer to the Heat Guide or Cricut Heat app for the appropriate settings.
- Press and Hold: Once the EasyPress is heated to the correct temperature, place the design on the towel or mat, making sure it’s straight and centered. Apply gentle pressure and hold for the recommended time, usually around 30 seconds.
- Remove the Design: After pressing, allow the design to cool slightly before peeling off the backing. If desired, you can press the design one more time with the EasyPress to ensure a secure bond.
Teflon or Protective Sheet
Teflon sheets and protective sheets are essential tools for heat transfer processes, including those using the Cricut Maker. These heat-resistant, reusable sheets protect the heating element of your press from ink and other debris, ensuring a clean and efficient process.
Teflon sheets are available in various sizes, such as 20 x 25, 18 x 22, 16 x 20, 15 x 15, and 14 x 16, and are used with MATES adhesives and Heat Seal Patches.
They’re also used in other industries, such as oil and gas, where they’re applied as a coating on fabrics and downhole tools to prevent wear and tear.
Creating a Design in Cricut Design Space
In Cricut Design Space, you can easily add text to your design and select the perfect font to suit your style. Adjust the size of your text with a quick click of the double arrow, and use the attach button to keep your text elements together as a cohesive design.
Add Text and Select Font
Adding text to your design in Cricut Design Space is like giving your T-shirt a voice. Here’s how to make it sing:
- Select Text to sprinkle your canvas with words.
- Explore the font library to find the perfect style that screams you.
- Play with text alignment and curvature for a design that flows.
- Experiment with text spacing and layering for depth and drama.
Use Double Arrow to Adjust Text Size
To adjust the text size in Cricut Design Space, you can use the double arrow icon located next to the text box. Clicking on it will allow you to increase or decrease the font size to your desired level. This feature is particularly useful when you want to make sure the design is placed and the color combinations look good on your t-shirt.
Additionally, you can use layering techniques to create more complex designs, such as adding text over images or combining different fonts for a unique look. Remember to mirror your design for iron-on transfer before cutting and applying it to your t-shirt.
Use Attach Button to Keep Text Together
To keep text together in Cricut Design Space, you can use the Attach tool. This feature holds the elements of your design in place when you send them to the cutting mat, ensuring that the layout remains the same on the mat as it does on the canvas. You can find the Attach tool in the Layers panel in the bottom right-hand corner of the screen or in the right-click menu.
Use it whenever you want to freeze the position of two or more shapes relative to each other, so they’re cut out in the same position. Additionally, you can use Attach to add a Draw line or a Score Line on top of a shape, so your Cricut knows to write and score on top of the shape, rather than on a separate mat.
This tool is particularly useful when you need to maintain the spacing and alignment of your design elements for a more professional look.
Cutting Iron-on Vinyl With a Cricut
To cut iron-on vinyl with your Cricut machine, first turn on the mirror setting and select iron-on as your material. Then, place the shiny side of the vinyl down on your Cricut mat, use a brayer to flatten it out, and load the mat into your machine.
Turn on Mirror Setting
To make sure your iron-on vinyl design is correctly mirrored for transfer, you need to activate the mirror setting in Cricut Design Space. Here’s a step-by-step guide:
- Open Cricut Design Space.
- Start a new project and choose a T-shirt template.
- Upload or create your design, making sure it’s mirrored for iron-on transfer.
- Enable the mirror setting in the design settings.
Now, let’s move on to loading the mat and choosing the material settings.
Select Iron-on as Material Setting
To guarantee a flawless iron-on transfer, select the suitable vinyl type and heat settings in Cricut Design Space. This will assist you in avoiding problems such as peeling or fading.
Recall to flip your design for iron-on transfer and utilize a carrier sheet to shield your design during the cutting process.
For glitter vinyl, be certain to employ a heat source that can manage the additional heat essential for a successful transfer.
Place Iron-on Vinyl Shiny Side Down on Mat
After choosing iron-on as your material setting, it’s time to position your vinyl properly. Remember, the glossy side of your iron-on adhesive should face down on the mat. This is vital for a successful transfer.
- Iron-on adhesive: Make sure the glossy side is down.
- Vinyl selection: Choose the appropriate type for your project.
- Mat type: Use the right mat for your vinyl.
- Design placement: Position carefully for easy weeding later.
This step sets the foundation for a seamless cutting process, paving the way for your creative masterpiece to emerge.
Use Brayer to Flatten Vinyl
To ensure the best outcomes when working with vinyl for your Cricut projects, it’s imperative to adequately prepare the vinyl before cutting. One of the essential steps in this process is using a brayer to flatten the vinyl. The brayer is a tool designed to help vinyl and cardstock adhere to the cutting mat, eliminating wrinkles, kinks, bubbles, and puckers. Here’s a step-by-step guide on how to use a brayer to flatten vinyl:
- Position the vinyl on the cutting mat with the paper liner side down.
- Smooth the vinyl with a scraper or brayer tool to remove any air bubbles and ensure the vinyl is flat.
- Load the cutting mat into the Cricut machine.
- In Cricut Design Space, choose the appropriate vinyl material settings and load the correct blade into the machine.
- Press the Start button to begin cutting.
Load Mat Into Cricut Machine
To load your mat into the Cricut machine, follow these steps:
- Confirm that your material settings are correct for iron-on vinyl.
- Align your cutting blade and adjust the blade depth based on the vinyl thickness.
- Place your iron-on vinyl, shiny side down, on the mat.
- Use a brayer to flatten the vinyl and remove any air bubbles.
- Load the mat into the Cricut machine and cut your design.
Applying HTV to a Cricut Mat
To apply HTV to a Cricut mat, you’ll need to make certain of proper adhesion, vinyl placement alignment, and material compatibility. Here’s a step-by-step guide:
- Clean the Mat: Before applying HTV, clean the mat with warm water and soap. Dry it thoroughly to avoid any residual moisture that could affect the adhesion.
- Prepare the HTV: Cut your HTV design using the Cricut machine, ensuring it’s mirrored for iron-on transfer. Weed the excess vinyl, leaving only the design you want to transfer.
- Apply HTV to the Mat: Place the shiny side of the HTV down on the mat, making certain it’s aligned correctly with your design. Use a brayer or a rolling pin to flatten the vinyl, ensuring it’s well-adhered to the mat.
- Transfer Temperature Optimization: Preheat your heat source (EasyPress or iron) to the appropriate temperature for the specific HTV you’re using. This temperature will vary depending on the brand and type of HTV.
- Pressure Control: Apply medium pressure when using an iron or gentle pressure when using an EasyPress. Press the HTV onto the t-shirt, making certain it’s evenly applied and covers the entire design.
- Cool and Remove: Allow the design to cool before removing the carrier sheet. Be careful not to touch the design until it has completely cooled to avoid any smudging or damage.
Tips for Making a T-Shirt With Cricut
When creating custom t-shirts with your Cricut, be sure to utilize premium cotton shirts for optimal outcomes. Additionally, verify that the fabric can endure the high temperatures necessary for iron-on transfers. Preheat the shirt prior to applying the design to enhance the bond.
Use High-quality Cotton Shirts for Best Results
To guarantee your custom t-shirts endure, opt for premium cotton shirts. The fabric’s resilience is essential for the longevity of your design.
Select the appropriate vinyl type for your project, taking into account factors such as shirt size options and design placement. For multi-color designs, make sure the vinyl you choose can withstand the heat and pressure required for the transfer process.
Make Sure the Shirt Material Can Withstand High Heat
After selecting a premium cotton shirt, it’s essential to verify that its fabric composition is adequate for the purpose. Not all fabrics are identical with respect to heat tolerance and vinyl adhesion. A shirt’s resilience depends on its capacity to withstand heat without resistance. Conceive of it as identifying a suitable partner for your vinyl – compatibility is paramount.
Preheat the Shirt Before Applying the Design
Before applying the design, preheat your shirt to achieve the best results. For home shirts, use an iron set to medium heat.
For bright colors or layering designs, use a cool iron to prevent color transfer.
If using vinyl types like Siser Easyweed or Fame Crafts HTV, preheat the shirt first to avoid creases and blisters.
This simple step can significantly enhance the final appearance of your custom t-shirt.
Use a Cool Peel to Remove the Liner
For optimal outcomes when crafting a T-shirt with your Cricut Maker, it’s crucial to employ a cool peel for liner removal. Consider these three pointers:
- Select an appropriate cool peel: Opt for a cool peel compatible with your Cricut Maker and the heat source used (EasyPress or iron).
- Prepare the cool peel: Prior to application, verify that the cool peel is clean and free of debris. This prevents any unwanted residue from transferring to your shirt.
- Remove the liner cautiously: Apply the cool peel to the liner and gently peel it away from the shirt material. Avoid dragging the cool peel across the shirt, as this may damage the design.
Frequently Asked Questions (FAQs)
What is the recommended temperature for applying heat transfer vinyl (HTV) to a t-shirt using the EasyPress 2?
When applying HTV to a tee, the secret sauce is in the EasyPress 2 – crank that baby up to 315°F and you’ll be smooth sailing through the heat transfer process, my friend. Just don’t forget to press firmly and savor that perfect print.
Can I use a regular iron instead of the EasyPress 2 for transferring HTV to a t-shirt?
Sure, you can use a regular iron instead of the EasyPress 2 – just make sure to crank up the heat, apply firm pressure, and take your time for those crisp, professional-looking HTV transfers. It’ll take some finesse, but you’ve got this!
How long should I press the EasyPress 2 on each side of the t-shirt to ensure proper heat transfer?
Ah, the EasyPress 2 is the way to go! Press each side of your tee for 30 seconds with firm, even pressure. This guarantees the heat transfers the design flawlessly. Piece of cake, my friend!
What is the recommended time to wait before washing a t-shirt with HTV design for the first time?
Wait 24 hours before washing your snazzy new Cricut-crafted tee. This gives the design time to fully bond with the fabric, so your sweet shirt stays looking fresh for countless wears and washes.
Can I use the same iron-on vinyl for multiple t-shirt designs, or should I purchase new vinyl for each project?
You’re in luck – that versatile iron-on vinyl can be your new best friend! Feel free to reuse it across multiple projects, just be sure to mirror the design each time. Set free your creativity without breaking the bank.
Conclusion
With your Cricut Maker in hand, the realm of bespoke t-shirt design is yours to conquer. Ignite your creativity, and let your personalized designs illuminate the canvas of your t-shirts.
Whether you’re an experienced crafter or just embarking on your journey, the step-by-step instructions and expert guidance provided will lead you through the process of creating captivating Cricut Maker t-shirts that mirror your distinctive style.
Embrace the potential of this versatile tool and enhance your wardrobe with unique, custom-designed t-shirts.

