This site is supported by our readers. We may earn a commission, at no cost to you, if you purchase through links.
 Learning how to make cushion covers is simpler than you’d think – it’s basically creating a fabric envelope for your pillow insert.
You’ll measure your cushion, add an extra inch on all sides for seam allowances, then cut two fabric pieces.
The envelope closure method works best for beginners: hem one edge of each piece, overlap them by about four inches, and sew around the perimeter.
This creates an opening that lets you slip the insert in and out easily.
Cotton and linen fabrics work great for most projects, though you’ll want something sturdier for outdoor cushions.
The real magic happens when you discover fabric combinations that completely transform your space.
Table Of Contents
Key Takeaways
- Choose the right fabric and prepare it properly – You’ll want cotton or linen for durability and comfort, and don’t skip prewashing to prevent shrinkage and color bleeding after your covers are finished.
- Measure accurately and add seam allowances – Measure your cushion insert precisely, then add 1-2 inches to each dimension for seam allowances, plus extra length for envelope-style closures that don’t need zippers.
- Master the envelope closure method for beginners – You’ll create a fabric envelope by hemming one edge of each piece, overlapping them by 4 inches, then sewing around the perimeter for an easy slip-on design.
- Focus on professional finishing techniques – Use sharp cutting tools, maintain consistent seam allowances, clip corners at 45-degree angles, and press seams flat to achieve store-bought quality results.
Best Fabrics for Cushion Covers
You’ll want to choose fabrics that balance durability with comfort, since your cushion covers need to withstand daily use while feeling good against your skin.
Cotton remains the top choice because it’s breathable, washable, and comes in countless patterns, though linen offers elegant texture and polyester works best for outdoor cushions that face weather challenges, providing comfort.
Choose fabrics that balance durability with daily comfort—your cushions should feel as good as they look.
Inserts for Cushion Covers
Selecting the right cushion inserts transforms your DIY project from amateur to professional.
You’ll need to choose between foam inserts, fiberfill, and other pillow inserts based on your comfort preferences.
Consider these essential insert materials:
- Memory foam – Superior shape retention and custom support
- Polyester fiberfill – Lightweight with excellent fill power
- Hypoallergenic options – Bamboo or synthetic materials for sensitive users
Your cushion inner directly impacts comfort and longevity.
Handmade covers often feature traditional weaving techniques that enhance durability.
Custom inserts sized two inches larger than covers create that coveted plump appearance designers love.
The Basic Supplies
You’ll need five essential tools to create professional cushion covers. Start with a reliable sewing machine, sharp fabric scissors, and an accurate tape measure for precise cuts.
Choose medium-weight fabrics like cotton or linen that hold their shape beautifully. For year-round comfort, consider the fabric’s seasonal use.
| Essential Tools | Measuring Tools | Fabric Types |
|---|---|---|
| Sewing machine | Tape measure | Cotton fabric |
| Fabric scissors | Quilting ruler | Linen canvas |
| Sewing kit | Seam gauge | Upholstery weight |
Thread selection and zipper types complete your setup.
How to Make Cushion Covers

Creating your own cushion covers transforms plain pillows into custom decor pieces that perfectly match your style and budget.
You’ll follow four essential steps: measuring your insert accurately, cutting fabric with proper seam allowances, using a cutting guide for standard sizes, and completing the sewing process with professional techniques.
This process allows for custom decor pieces that reflect your personal style, making it easy to enhance any room’s aesthetic without breaking the bank.
Measure The Insert
Measuring your cushion inner accurately sets the foundation for a perfect fit.
Grab a measuring tape and record the width, length, and thickness of your cushion form.
Don’t forget the plumpness allowance – add an extra inch to each dimension so your cover won’t look stretched tight like a drum skin.
Proper techniques for measuring cushion inserts guarantee a professional finish.
Cut The Fabric
Sharp fabric shears make all the difference when cutting fabric for your cushion covers.
Align your fabric grain properly and mark your seam allowance with chalk before cutting. A rotary cutter works great on straight lines and helps minimize waste.
See a wide selection of fabric cutting tools online.
Keep your pattern placement consistent across pieces to guarantee professional results and proper fabric selection pays off here, using sharp fabric shears.
Cutting Guide for Common Sizes
Now that you’ve measured your insert, let’s tackle the cutting dimensions that’ll make or break your cushion cover tutorial.
For square dimensions, add one inch to each side – so an 18×18 pillow needs 19×19 fabric pieces. Rectangular cuts follow the same rule: measure length and width, then add that vital seam allowance.
Round templates require careful tracing, while custom shapes demand extra precision when cutting fabric. Always use sharp rotary cutters for clean edges.
This DIY cushion cover foundation guarantees your cushion cover sewing project fits perfectly without puckering or loose corners. Choosing the right fabric is essential, and you can even explore hypoallergenic material options for sensitive individuals, ensuring a perfect fit.
Sewing Instructions
Ready to transform your fabric into a professional-looking cushion cover? Follow these essential sewing steps for success:
- Seam allowances – Maintain consistent ½-inch margins throughout your project
- Zipper insertion – Use a zipper foot for clean, straight installation
- Corner clipping – Trim excess fabric at angles to eliminate bulk
- Hemming methods – Create double-fold hems for durability
This step-by-step guide guarantees your sew cushion cover project turns out perfectly.
For zipper insertion, consider using a specialized sewing foot.
Master these piping techniques and you’ll create cushion cover sewing masterpieces every time.
Design Ideas for Cushion Covers
Creative pattern mixing transforms ordinary cushions into conversation pieces that reflect your unique style.
Start with neutral base colors like cream or gray, then layer in bold accent cushions featuring geometric patterns, florals, or abstract designs.
Color palettes work best when you repeat two or three tones throughout your space—think navy, coral, and gold for a sophisticated look.
Texture combinations add visual depth without overwhelming your decor.
Pair plush velvet with crisp cotton, or combine smooth linen with nubby weaves.
Embellishment techniques like embroidery, piping, or decorative trim elevate basic covers into designer-quality pieces.
Seasonal themes keep your space fresh year-round.
Switch to warm oranges and burgundies for fall, then bright pastels for spring.
These cushion cover ideas let you experiment with fabric patterns and decorative elements.
Remember, successful cushion cover design comes from balancing bold statements with cohesive color stories throughout your room.
Step 1: Prewash Fabric
Now that you’ve gathered design inspiration, it’s time to prepare your fabric properly. Prewashing fabric prevents unwelcome surprises later—nobody wants cushion covers that shrink after the first wash! This essential step involves more than just tossing fabric in the machine.
Smart preparation today saves you from cushion cover disasters tomorrow—prewashing is your fabric insurance policy.
Start by washing your fabric in warm water using your regular detergent. This process handles shrinkage allowance, color bleeding prevention, and dye setting all at once. After washing, tumble dry on medium heat, then iron while slightly damp for wrinkle prevention and fabric softening.
Different fabrics need different fabric care approaches. Cotton and linen handle hot water well, while delicate materials require gentle cycles. Always wash dark colors separately to prevent bleeding onto lighter fabrics.
Here’s why proper prewash fabric preparation matters:
- Peace of mind knowing your covers won’t shrink unexpectedly
- Professional results from properly prepared materials
- Time savings from avoiding do-overs
- Color confidence with no bleeding surprises
Step 2: Cut Foam
Precision matters when cutting your cushion inner to the perfect size.
Start by measuring your cover’s interior dimensions, then subtract one inch from each side for a snug fit.
Choose the right foam density based on your needs—firm for support, medium for comfort.
| Foam Type | Density (lbs/ft³) | Best Use | Cutting Tool | Scrap Utilization |
|---|---|---|---|---|
| Memory Foam | 3-5 | Comfort cushions | Electric knife | Small inserts |
| High-Density | 2-3 | Firm support | Serrated knife | Corner reinforcement |
| Polyurethane | 1-2 | Budget option | Kitchen knife | Layering foam |
Use sharp cutting tools for clean edges.
Save scraps for layering foam or extra cushion support in corners.
Step 3: Cut Fabric
After your foam has compressed, it’s time to transform measurements into reality. Spread your fabric flat on a clean surface, ensuring the grain direction runs parallel to your cutting mat. This step separates amateur projects from professional-looking covers.
Mark your measurements with dressmakers chalk, adding that essential 1-inch seam allowance on all sides. A rotary cutter paired with a quilting ruler delivers razor-sharp edges that scissors simply can’t match. Pattern placement matters—align your design elements before cutting to avoid wonky prints. To maintain fabric stability, cut parallel to selvage.
Follow these cutting essentials for success:
- Use sharp cutting tools for clean edges
- Double-check measurements before cutting
- Keep fabric grain consistent throughout
- Minimize fabric waste with smart layout planning
- Mark seam allowances clearly with chalk
Accurate cutting sets the foundation for covers that’ll make your neighbors jealous.
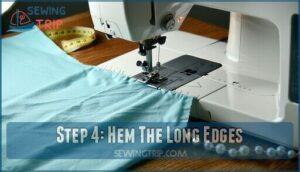
Step 4: Hem The Long Edges
Your fabric pieces need clean, finished edges to prevent fraying and give your cushion covers a professional appearance. Start by folding each long edge over twice, creating a double-turned hem that’s about half an inch wide.
This hemming technique hides raw edges completely and provides durability. Pin the folded edges in place, then stitch close to the inner fold using a straight stitch on your sewing machine.
Keep your seam allowance consistent – about an eighth inch from the fold works perfectly. For thicker fabrics, you might need to adjust your stitch length slightly.
| Hemming Method | Fold Width | Best For |
|---|---|---|
| Double-turned hem | 1/2 inch | Cotton, linen fabrics |
| Blind hemming | 3/4 inch | Heavy upholstery materials |
| Single fold | 1/4 inch | Lightweight fabrics |
| French seam | 5/8 inch | Delicate materials |
| Serged edge | No fold | Stretch fabrics |
These sewing techniques guarantee your cushion covers look store-bought rather than homemade, ensuring a finished look with clean edges and a professional finish.
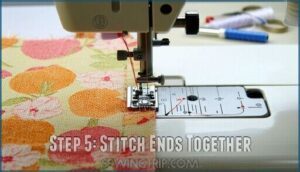
Step 5: Stitch Ends Together
Creating professional seam-connections requires careful attention to detail when assembling pieces.
Position your fabric with right sides together, overlapping short ends by 3-4 inches. Your sewing machine should use medium thread tension with a straight stitch for most fabrics. Maintain consistent seam allowances of ½ inch throughout the process.
Here’s your step-by-step approach for sewing edges effectively:
- Pin edges carefully – Align raw edges and match any pattern lines before starting
- Use backstitch reinforcement – Begin and end each seam with several reverse stitches
- Check thread tension – Adjust if stitches appear loose or overly tight
- Apply edge finishing – Use zigzag stitch along raw edges to prevent fraying
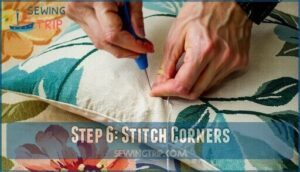
Step 6: Stitch Corners
Corner reinforcement transforms your cushion cover from amateur to polished perfection.
Start by aligning your sewn seams precisely at each corner intersection.
Pin these meeting points together, then stitch across with a strong backstitch to secure the joint.
For mitered corners, trim excess fabric at a 45-degree angle, leaving about half-inch seam allowance.
This prevents bulk and creates crisp edges.
When assembling pieces with curved corners, clip small notches into the seam allowance every quarter-inch.
This allows the fabric to bend smoothly without puckering.
For piping attachment at corners, ease the trim around curves by gently stretching the bias tape.
Finish all sewing edges with a zigzag stitch to prevent fraying.
These corner techniques guarantee your cushion cover maintains its shape and withstands regular use beautifully.
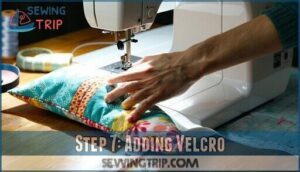
Step 7: Adding Velcro
Adding Velcro transforms your cushion covers into adaptable, user-friendly pieces that’ll save you countless hours. This industrial strength fastener creates a secure closure that withstands daily use while keeping your covers looking fresh.
Here’s your step-by-step approach:
- Choose the right Velcro placement – Position 3/4-inch strips along the cushion’s back edge, spacing them 4-6 inches apart for ideal grip without bunching.
- Master secure stitching techniques – Pin the hook side to your furniture frame and the loop side to your cover, then stitch around all edges using a straight stitch for maximum hold.
- Consider Velcro alternatives – Weather-resistant options work best for outdoor cushions, while standard versions handle indoor use perfectly.
This closure longevity approach beats buttons and zippers every time. Your DIY sewing project becomes instantly more professional, and these sewing tutorials prove that smart fasteners make all the difference in cushion covers.
Frequently Asked Questions (FAQs)
How to make a good couch cushion cover?
Custom cushion covers boost home decor value by 30-40%. Measure your couch cushions, add seam allowance, choose durable upholstery fabric, cut pieces, sew with zipper closure, and enjoy professional-looking results.
How to smooth out the inside of a cushion cover?
You’ll want to turn your finished cover inside out, then use a seam ripper or blunt tool to gently push out corners and edges.
Press seams flat with an iron for professional-looking results.
What makes a good cushion cover?
Like a reliable friend, good cushion covers combine durable, washable fabric with proper fit.
You’ll want hypoallergenic materials, secure closures, and weather-resistant options for outdoor use.
Quality construction prevents fraying and maintains shape over time, ensuring the covers remain in good condition and provide long-lasting comfort with durable materials.
How do I choose the right fabric for my cushion cover?
Choose cotton for durability and breathability, or linen for elegant texture.
Consider your cushion’s use—outdoor covers need weather-resistant polyester.
Avoid loose, fuzzy fabrics that irritate skin.
Always pick washable, stain-resistant materials for easy maintenance.
Are cushion covers easy to make?
Yes, cushion covers are beginner-friendly projects. Envelope-style covers require basic straight stitching and no zippers. You’ll need fabric, scissors, and a sewing machine. Most covers take 30-60 minutes to complete.
What size to cut fabric for cushion cover?
Measure your cushion’s width and length, then add 1-2 inches to each dimension for seam allowances.
For envelope-style covers, you’ll need extra fabric length—typically adding 10-12 inches for proper overlap closure.
How to make a seat cushion cover without a zip?
Create an envelope-style cover by cutting fabric pieces with extra length for overlap.
Hem the back opening edges, layer pieces with right sides together, sew around edges, then turn right-side out, which involves complete concepts like sewing and turning the fabric.
How much bigger should a cushion cover be than the cushion?
Surprisingly, you’d think bigger is better, but cushion covers should actually match your cushion’s exact measurements.
Add just 1-2 inches total for seam allowances—any more creates wrinkles and sloppy fits.
What size cushion or pillow insert should I buy?
Choose a cushion insert that’s 2 inches larger than your finished cover dimensions. For an 18-inch cover, buy a 20-inch insert. This creates that plump, professional look you want.
How do I get a tailored, professional look for my cushion covers?
Perfect seams happen when you add piping along edges, use an invisible zipper, and press every fold.
Clip corners at forty-five degrees, then turn covers inside-out for crisp edges that’ll make guests wonder where you bought them, utilizing techniques like these to achieve complete concepts in your work.
Conclusion
Mastering how to make cushion covers transforms your living space without breaking the bank.
You’ve learned the essential techniques, from selecting the right fabrics to creating professional-looking seams.
Whether you’re revitalizing tired throw pillows or crafting outdoor cushions, these skills will serve you well.
Start with simple cotton fabrics and basic envelope closures, then experiment with patterns and textures.
Your newfound sewing confidence will inspire countless home decorating projects ahead, and with practice, you’ll be able to tackle more complex tasks, making your home a reflection of your personal style with professional-looking seams.
- https://www.youtube.com/channel/UC20VPPA5QzahwwRwCITG5pg
- https://www.oneroomchallenge.com/orc-blog
- http://www.sellfabric.com/duck-12-oz.aspx
- https://www.sailrite.com/YKK-Zipper-5-Coil-Continuous-White
- https://www.marrakeche.com/complete-guide-to-handmade-pillow-covers/?srsltid=AfmBOorzaDBM4j6fJQ20ww7H8v2MSnIcVuyeTMwTf5DeiyM8GBlvQhj6


