This site is supported by our readers. We may earn a commission, at no cost to you, if you purchase through links.
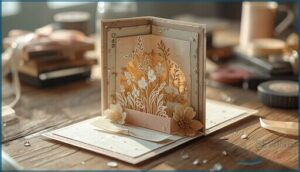
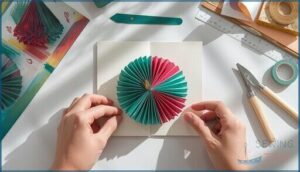
A folded piece of cardstock becomes something else entirely the moment a paper structure rises from it—suddenly, it’s not a card anymore, it’s a tiny theater. Pop-up cards have that effect on people: the recipient gasps, the maker grins.
What most beginners don’t realize is that the mechanics behind that wow moment are surprisingly straightforward, built from just a few repeatable folds and cuts. You don’t need a craft room full of supplies or years of paper art experience to pull it off.
Learning how to make a pop-up card for beginners starts with understanding a handful of core techniques, then layering in your own creative choices from there.
Table Of Contents
Key Takeaways
- You only need a few basic supplies — cardstock between 200–300 gsm, sharp scissors, a scoring tool, and some glue — to make your first pop-up card work beautifully.
- The core mechanics behind every pop-up card come down to just two techniques: the box pop-up (two parallel cuts on a fold) and the V-fold (a folded piece attached along the center crease).
- Getting the details right matters — keep pop-up elements shorter than half the card height, apply glue only to tabs, and always test the fold before anything dries.
- An A2 card (4.25 x 5.5 inches) is the ideal starting size for beginners because it fits standard envelopes, uses paper efficiently, and keeps the mechanism easy to control.
Essential Supplies for Pop Up Cards
Before you make your first fold, it helps to know what you’re actually working with. The good news is you don’t need a craft store’s worth of supplies to get started.
A handful of the right tools makes all the difference, especially once you understand how to sew knit fabrics on a regular sewing machine without fighting the stretch.
Here’s what you’ll want to have on hand.
Choosing The Right Cardstock and Paper
Your cardstock choice can make or break your pop-up card before you even pick up scissors.
For card making, aim for these weights:
- 200–220 gsm – ideal for beginner practice runs
- 250–300 gsm – best for sturdy, displayable pop-up card bases
- 80–120 gsm – perfect lightweight layers for texture effects and decoration
- Acid-free, lignin-free – essential for archival quality keepsakes
Fold with the grain direction for clean, crack-free results.
For more details on selecting the right papers, consider the importance of paper weight and specialty types.
Adhesives and Glues for Secure Assembly
Once your paper is sorted, the right adhesive makes all the difference. White glue and PVA bond pop-up tabs firmly, with drying times around 20–30 minutes. Double-sided tape offers instant adhesive strength for flat panels, while Nuvo drops add decorative dimension.
For keepsake cards, archival quality, acid-free options protect against yellowing. Master these bonding techniques and your glue types, and every fold holds with confidence.
If you want to explore further into glue selection, this guide to covers key adhesive properties and alternatives.
Scissors, Cutting Tools, and Scoring Tools
Now that your adhesives are ready, sharp scissors and precise cutting tools keep every edge clean. Standard 8-inch scissors handle card bases well, while small detail scissors tackle tight corners. An Exacto knife with a fresh blade selection pairs perfectly with a cutting mat for clean slots.
Score fold lines using a bone folder or scoring tool, and always follow basic tool safety — cut away from your body.
Decorative Materials and Embellishments
Once your cuts are crisp and clean, the real fun begins. Washi tape creates quick borders and backgrounds, while glitter effects from glitter glue pens add sparkle without the mess.
Try sequin decor, gem embellishments, or epoxy accents near butterfly and flower decorative elements to make scenes pop. Nuvo drops and adhesive-backed die cuts finish everything neatly — no extra glue needed.
If you’re just starting out, pairing these decorative touches with the right tools makes a real difference — check out this guide to sewing scissors for beginners to make sure your kit is set up before you dive in.
Selecting Envelopes for Finished Cards
Choosing the right envelope protects everything you’ve built. Since pop-up cards add thickness, standard sizing rules don’t always apply — so here’s what to keep in mind:
- Match A2 envelopes to 4.25 x 5.5 inch cards
- Go one size up for any raised pop-up elements
- Stay under 0.25 inches thick to meet postal rules
- Choose square flaps for bulkier DIY greeting cards
- Use peel-and-seal closures to protect delicate card making techniques
Basic Pop Up Card Mechanisms Explained
The magic of a pop-up card lives in its mechanism — that clever fold or cut that makes something spring to life the moment someone opens it.
A pop-up card’s magic lives in its mechanism — the clever fold that makes something spring to life
As a beginner, understanding a few core techniques gives you the foundation to build just about anything. Here’s a look at the main mechanisms you’ll want to know.
Simple Box and Step Pop Up Techniques
The box pop up is one of the most beginner-friendly card making techniques you’ll ever try. Two parallel cuts along your card’s inner fold create a small platform — that’s your pop up depth at work.
Step folding builds on this by adding more platforms at different distances. These card layering and mechanism alignment basics reveal endless box design possibilities for your pop up cards.
V-Fold and Pivot Mechanisms
Once you’ve mastered the box technique, V fold basics open a whole new world of pop up card engineering. A V fold is simply a piece folded in half and attached along the card’s center crease — when the card opens, it rises dramatically. Here’s how these mechanisms work in pop up design:
- V fold angle controls height — narrow angles sit low, wider angles reach outward
- Asymmetric V folds tilt your pop up piece left or right for active compositions
- Pivot arm mechanics add rotation, making figures swing as the card opens
- Mechanism combos layer both techniques so elements rise and move simultaneously
Test everything before gluing.
Using Pre-Made Dies Vs. Hand Cutting
Pre-made dies are a breakthrough for pop up card precision — one pass through a die cutting machine gives you clean, identical shapes every time, which is perfect for batch projects.
Hand cutting techniques stay unbeatable for custom silhouettes and one-off designs.
Beginners can start with scissors and cardstock to keep craft budgeting low, then invest in dies once your paper crafting ambitions grow.
Common Mistakes and How to Avoid Them
Even small slips in card crafting techniques can unravel a beautiful pop up card fast. Watch for these common traps:
- Folding Errors & Paper Warping: Score before you fold, and always follow the paper grain to avoid cracked spines or rippled bases.
- Adhesive Issues: Apply glue only on tabs — sealing moving parts kills mechanism alignment instantly.
- Card Stability: Test-close before glue dries.
Step-by-Step Guide to Making a Pop Up Card
Now that you know how the mechanisms work, it’s time to actually build your card. The process breaks down into three clear stages, and each one builds on the last.
Here’s exactly what to do, step by step.
Preparing and Folding The Card Base
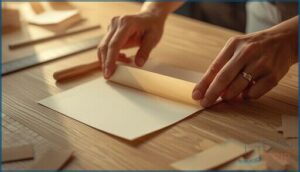
Think of your card base as the stage — everything else performs on top of it. Start with an A6 sheet, about 9 by 6.25 inches, and fold it in half. Before you fold, check the grain direction by gently bending the cardstock both ways.
Score along the fold line using scoring tools, then burnish firmly for clean base creasing. Your pop-up card is ready to build.
Creating and Attaching The Pop Up Element
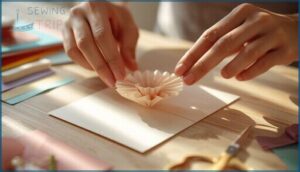
With your card base ready, it’s time to bring your pop up designs to life. Cut your pop up element no larger than 2 inches square, keeping element sizing in check so it closes flat.
Apply glue only to the end tabs, never the center body. This attachment method, central to all paper crafting projects, lets your shape spring forward cleanly when the card opens.
Decorating The Card Inside and Out
Now that your pop-up element is secured, decorating brings your handmade card designs to full life. Choose color schemes that feel cohesive inside and out, then layer your paper crafting ideas thoughtfully.
- Add card embellishments like rhinestones or pearls to open corner spaces
- Use distress inks for texture effects on inner background panels
- Stamp greetings on 1 by 3.75 inch strips for clean design layouts
- Wrap ribbon behind sentiments to finish DIY cards beautifully
Creative Ideas for Beginner Pop Up Cards
Once you’ve nailed the basics, the fun part begins — deciding what to actually make. Pop-up cards work for just about any occasion, and there are more creative directions to explore than you might expect.
Here are some ideas to spark your imagination and get you started.
Theme Inspiration for All Occasions
Every occasion has a perfect PopUp Card waiting to be made. Birthday Ideas like a single bold cake or floating balloons keep things festive and simple. Wedding Cards shine with soft blush hearts or tiered designs. Holiday Themes and Seasonal Designs lend themselves to trees, snowflakes, or pumpkins.
These Handmade Card Designs double as Gift Inspirations — personal, creative, and genuinely unforgettable.
Using Templates and Printable Designs
Templates take the guesswork out of making pop up cards, especially when you’re just starting out. Most printable designs come in PDF format sized for standard letter or A4 paper — print at 100 percent scale so your cutting guides stay accurate.
Always check the licensing terms before you start crafting for beginners, since some designs are personal use only while others allow selling finished cards.
Personalizing With Messages and Art
Personalization is where your card truly comes alive. Handwritten Notes tucked inside add warmth no printed text can match — try calligraphy or bold markers for visual punch.
Pop Up Letters spelling out a name make striking focal points, while Themed Illustrations and Photo Integration tie everything to the occasion.
These Card Making Tips and Greeting Card Ideas transform simple Handmade Greetings into unforgettable PopUp Card Designs, even when Crafting for Beginners.
Fun Projects for Kids and Families
Family Crafts become memorable when you turn Card Making into a playful challenge—set a timer, assign roles, and let siblings trade their Pop Up Designs.
Creative Play shines with Kid Art themes like rockets or monsters, and quick DIY Craft Projects using stickers or foam shapes.
These Creative Activities for Children transform Handmade Greeting Cards into keepsakes, sparking imagination and teamwork.
Tips and Troubleshooting for Pop Up Card Success
Even the best pop-up cards sometimes need a little adjusting before they’re just right. Knowing what to tweak — and what to watch out for makes the whole process a lot smoother.
Here are the most useful tips to keep your card looking clean and working perfectly.
Adjusting Pop Up Size and Placement
Getting pop up sizing right is honestly where paper crafting starts to click. A tab cut about 1 inch long creates a clean, confident lift without stressing the fold.
Keep these element placement rules in mind:
- Keep pop ups shorter than half the card height
- Center mechanisms along the card’s fold line
- Leave 0.25 inch clearance from side edges
- Test card depth by closing slowly before gluing
- Trim tall shapes so corners clear the envelope
Preventing Bulky or Misaligned Cards
Bulk is the silent enemy of a clean pop-up card. For card thickness, stick to 80–110 lb card stock for your base and lighter paper for inner layers.
Adhesive control matters too — use tape runners instead of wet glue to prevent warping.
Solid folding techniques and careful layer alignment keep your mechanism balance steady, so your pop-up card closes flat every time.
Simple Fixes for Common Beginner Issues
Even the best pop-up card makers hit a snag — and that’s totally okay. Most beginner problems have quick, simple solutions once you know what to look for.
- Fixing Folds: Run a bone folder firmly along weak creases
- Correcting Cuts: Glue a cardstock strip behind any slit that’s too long
- Repairing Tears: Patch torn tabs with a small cardstock piece
- Glue Cleanup: Wipe fresh squeeze-outs immediately with a damp cotton swab
- Visual Fixes: Cover crooked elements with patterned paper panels
These crafting techniques keep your handmade card making on track without starting over.
Frequently Asked Questions (FAQs)
What supplies do I need for pop-up cards?
You don’t need much to get started. Grab some card stock, scissors, glue, a scoring tool, and decorative paper, and you’re ready to build your first pop up card.
How many stamps are needed for a pop-up card?
For most pop-up cards, one Forever stamp does the job — but if your card stock adds weight or thickness past 25 inches, you’ll likely need a nonmachinable stamp instead.
What kind of paper is used for pop-up cards?
Cardstock around 200–300 gsm works best for pop-up card bases, while lighter paper manages the moving parts.
Decorative paper adds flair, and good paper engineering keeps every fold crisp and clean.
How to make a very easy pop-up card?
Start with an A5 card base folded in half, cut two parallel slits on the fold, push the tab inward, and you’ve got a clean pop-up ready to decorate.
What paper is best for pop-up cards?
For pop-up cards, 80 lb cover cardstock around 216 gsm hits the sweet spot — stiff enough to hold its shape, flexible enough to fold cleanly without cracking.
How do I store pop-up cards?
Store your finished pop-up cards flat, using archival boxes and climate control to preserve delicate protection.
Flat stacking and card organization keep them safe and ready to impress whenever the moment calls.
Can pop-up cards be mailed safely?
Yes, pop up cards can be mailed safely. Keep your finished card flat, under 25 inches thick, and within standard letter dimensions to avoid a nonmachinable surcharge or extra postage fees.
How do I fix broken pop-up elements?
Like patching a kite mid-flight, fixing a broken pop up card is simpler than it looks. Reinforce torn pieces with double-sided tape, reattach loose elements carefully, and re-score weak folds.
Whats the ideal card size for beginners?
For easy handling and workspace fit, an A2 card — 25 by 5 inches — gives you the perfect mechanism balance. It’s paper efficient, matches standard envelopes, and keeps your pop up card manageable.
How long does a pop-up card take?
A simple pop up card takes about 15 to 30 minutes for most beginners. Overall, expect closer to 45 minutes your first time as you learn the folds.
Conclusion
The real secret behind how to make a pop up card for beginners isn’t hidden in complicated tools or fancy supplies—it lives in the fold itself. Every cut you make teaches your hands something new.
Every pop-up that rises clean and crisp proves you’ve moved from guessing to knowing. That shift doesn’t take long, but it changes everything.
Start simple, stay curious, and let each card you finish become the foundation your next one builds on.

