This site is supported by our readers. We may earn a commission, at no cost to you, if you purchase through links.

Empty everything onto a large surface and sort into categories: threads, needles, scissors, measuring tools, and notions.
Create designated homes for each category based on frequency of use—keep daily essentials like scissors and measuring tape within arm’s reach.
Store threads in clear containers or racks where you can see colors instantly.
Use vertical storage like pegboards for tools and rolling carts for portable organization.
The secret isn’t buying fancy organizers; it’s creating systems that make putting things away as simple as grabbing them.
Smart storage solutions can turn even the tiniest spaces into efficient sewing headquarters.
The key is to create an environment where everything has its designated home and is easy to access, making your sewing experience more enjoyable and efficient.
Table Of Contents
- Key Takeaways
- Sewing Room Organization Ideas
- Purging and Prioritizing Sewing Notions
- Organizing Sewing Thread in a Rainbow Pattern
- Organizing Sewing Needles
- Organizing Scissors and Measuring Supplies
- Dollar Tree Storage Containers for Sewing Supplies
- Organizing Sewing Supplies in Containers
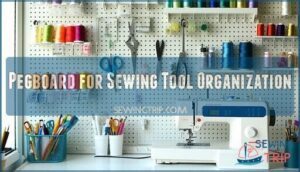
- Pegboard for Sewing Tool Organization
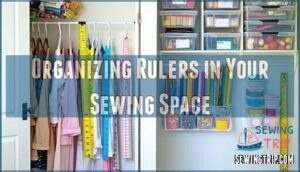
- Organizing Rulers in Your Sewing Space
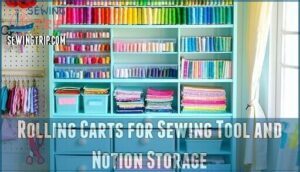
- Rolling Carts for Sewing Tool and Notion Storage
- Frequently Asked Questions (FAQs)
- Conclusion
Key Takeaways
- Start with a complete inventory – Empty everything onto a large surface and sort into categories like threads, needles, scissors, and measuring tools to see what you’re working with
- Create designated homes based on frequency – Keep daily essentials, like scissors and measuring tape, within arm’s reach, while storing less-used items in labeled containers or drawers
- Use vertical storage solutions – Install pegboards for tools, wall-mounted thread racks for color visibility, and rolling carts for portable organization that maximizes your space
- Focus on systems over fancy organizers – Make putting things away as simple as grabbing them by using clear containers, proper labeling, and logical groupings that work for your specific workflow
Sewing Room Organization Ideas
Creating a functional sewing room starts with smart space-saving tips that transform chaos into calm.
Transform any unused area into your creative haven using DIY storage solutions that work within your budget.
Start by installing pegboards on walls to maximize tool visibility—hang scissors, rotary cutters, and measuring tools where you can grab them instantly.
Transform your sewing chaos into organized bliss with smart pegboard placement that puts every tool exactly where you need it.
For fabric organization, use clear bins sorted by color or project type.
Store fabric rolls vertically like files in a cabinet, making selection effortless.
Pattern storage becomes simple with magazine holders or banker boxes labeled by garment type.
Rolling carts provide mobile storage for frequently used sewing supplies, moving where you need them most.
Mount shelves above your workspace for thread spools arranged by color.
Keep cutting mats and rulers hanging on walls to prevent warping.
Consider ergonomic workspace design to prevent strain during long projects.
Remember, an organized sewing room isn’t just about storage—it’s about creating a space where your creativity flows freely without hunting for supplies, using DIY storage solutions and mobile storage to achieve a functional sewing room with clear bins and pegboards for maximum efficiency.
Purging and Prioritizing Sewing Notions
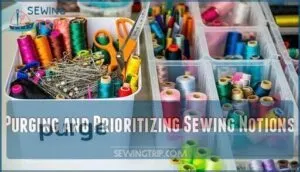
Before diving into storage solutions, tackle the elephant in the room: purging your sewing notions. This essential first step transforms chaos into clarity and makes organizing infinitely easier.
Clear out the clutter before you organize – it’s the game-changer that makes everything else click into place.
Start by gathering all your sewing supplies in one place. You’ll likely discover duplicate tools hiding in different drawers and forgotten notions tucked away in corners.
Now comes the tough love part – be ruthless about what stays and what goes.
- Notion Expiration: Toss dried-up glues, rusted pins, and broken measuring tools
- Duplicate Tools: Keep only your best scissors and measuring supplies
- Functional Assessment: Test zippers, elastic, and thread for quality
- Sentimental Value: Preserve special items but store them separately
- Donation Options: Give usable supplies to local schools or craft groups
This purging process isn’t just about decluttering – it’s about creating space for what truly matters. Selecting the best sewing notions will substantially improve your sewing quality. Focus on keeping high-quality tools you actually use rather than hoarding "just in case" items. Your future self will thank you when every notion has purpose and accessibility.
Organizing Sewing Thread in a Rainbow Pattern
Looking at your thread collection doesn’t have to feel overwhelming. Start by gathering all your thread spools and sorting them by color family. This initial step transforms chaos into manageable groups.
The ROYGBIV system works perfectly for thread organization. Arrange your thread storage solutions in rainbow order: red, orange, yellow, green, blue, indigo, and violet. Within each color group, place lighter shades on top and darker ones below for maximum visual appeal.
Color coordination makes thread selection effortless. You’ll spot the perfect shade instantly instead of digging through jumbled spools. Thread display becomes part of your sewing room’s charm when arranged in rainbow pattern.
Consider using clear containers or rotating thread racks to showcase your rainbow order. To maximize space, consider wall mounted options. This thread organization method keeps everything visible and accessible. Your thread spools become a colorful focal point that inspires creativity while maintaining practical functionality for your sewing projects.
Organizing Sewing Needles
Three simple steps will transform your needle chaos into an organized system that saves time and frustration.
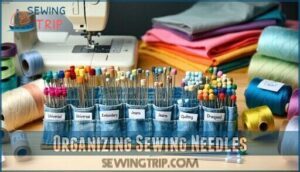
- Magnetic needle storage keeps metal needles secure and prevents them from scattering across your workspace
- Needle case options like fabric organizers with labeled pockets make sorting by type effortless
- Labeling needle types with painter’s tape helps you grab the right needle without second-guessing
Start with needle size sorting by grouping universal, jeans, embroidery, and quilting needles separately. Within each category, arrange sizes from smallest to largest. A dedicated sewing notions organizer with clear pockets works perfectly for this system.
Label everything using painter’s tape and permanent markers. Include both size and type on each label. This prevents the guessing game that slows down your projects. For thread organization, consider categorizing threads by color for easy matching.
Replace damaged needles immediately and dispose of them safely in a small container. Bent or dull needles create poor stitches and can damage fabric. Your sewing supplies organization improves dramatically when you maintain quality sewing tools. Proper needle storage in pin cushions or magnetic holders protects the eyes from damage while keeping your workspace tidy.
Organizing Scissors and Measuring Supplies
Now that you’ve sorted your needles, it’s time to tackle your cutting tools. Your scissors display deserves the same careful attention. A standing file or magazine holder works perfectly for organizing different types of shears. Give each pair its own slot to prevent blade damage and keep edges sharp.
Create measuring toolkits by storing tape measures, seam gauges, and curve rulers in a customized wall file. Roll vinyl tapes and secure with binder clips for easy access. This rotary cutter storage system keeps all your measuring supplies within arm’s reach. Proper technique and care will guarantee longevity.
| Tool Type | Storage Method | Organization Tip |
|---|---|---|
| Fabric Shears | Individual slots in standing file | Keep blades separated to prevent dulling |
| Thread Snippers | Small compartments or magnetic strips | Group by size for quick selection |
| Measuring Tools | Wall-mounted file organizer | Sort by frequency of use |
| Rotary Cutters | Dedicated drawer with blade guards | Store safely with safety locks engaged |
With your sewing tools organized this way, you’ll cut and measure with confidence every time, using your organized sewing space to improve your work.
Dollar Tree Storage Containers for Sewing Supplies
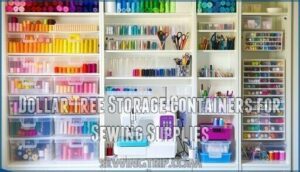
After organizing your cutting tools and measuring supplies, your next challenge is finding affordable storage that won’t break the bank. Dollar Tree offers the perfect solution with budget-friendly storage containers that’ll transform your sewing chaos into organized bliss.
At just $1.25 each, these clear containers provide incredible value for DIY sewing storage. You’ll discover everything from mini storage boxes perfect for bobbins to larger bins that accommodate multiple thread spools. The transparent design lets you spot what you need instantly – no more digging through opaque containers wondering where you stashed those special buttons.
Here’s what you’ll find for creative Dollar Tree organization:
- Plastic shoeboxes – ideal for thread storage sorted by color
- Clear plastic bins – perfect for buttons, zippers, and elastic
- Small parts organizers – excellent for needles, pins, and bobbins
- Tackle boxes – great for scissors, rotary cutters, and rulers
- Cosmetic cases – handy for machine feet and accessories.
Container repurposing ideas are endless when you think creatively. You can also find sewing kits available at Dollar General, providing essential tools for various projects. These affordable organization tips help you maximize space while keeping everything visible and accessible.
Organizing Sewing Supplies in Containers
Smart containers transform sewing chaos into organized bliss.
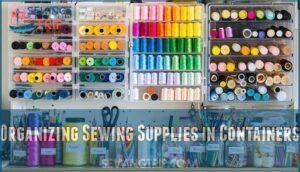
Clear storage containers let you spot thread colors instantly, while compartmentalized plastic bins with adjustable dividers keep buttons and snaps sorted.
Tackle boxes make excellent portable storage for traveling projects, and stackable bins maximize vertical space optimization.
Label everything clearly – your future self will thank you.
Use transparent drawer units for thread spools, arranging them in rainbow patterns for quick selection.
Mason jars hold needles and small notions beautifully, while wheeled storage bins roll supplies wherever you’re working.
Create labeling systems that work for you.
Group similar items together: cotton threads in one container, polyester in another.
Foam inserts protect delicate spools from tangling.
For ultimate organization, dedicate separate containers for each supply type – one for measuring tools, another for cutting supplies, and a third for specialty feet and bobbins.
Consider using a vintage tackle box for your tools and notions.
Pegboard for Sewing Tool Organization
Pegboard Layout transforms your sewing room into a masterpiece of efficiency. You’ll maximize space maximization by utilizing vertical wall areas that typically go unused.
Install pegboard panels where you can easily reach frequently used tools during your sewing sessions. Effective Tool Placement puts scissors, rotary cutters, and measuring tools within arm’s reach.
Hang thread spools on hooks for quick color selection. Position small containers on pegboard shelves to corral buttons, pins, and needles. Reserve prime real estate for daily-use items while rotating seasonal supplies.
Customization Options let you adapt your pegboard organization as projects change. Add magnetic strips for metal tools, roll holders for ribbon, and specialized hooks for oddly shaped supplies. Mobile Pegboards on wheels bring sewing tool storage wherever you need it.
Pegboard accessories can greatly enhance the functionality. Your pegboard becomes a functional artwork displaying colorful threads and vintage tools. Group similar sewing supplies together for visual appeal while maintaining practical access.
This flexible system grows with your collection, keeping everything visible and organized. It allows for maximization of space and creates a masterpiece of efficiency in your sewing room.
Organizing Rulers in Your Sewing Space
Those long rulers can turn your sewing space into chaos if you’re not careful. Here’s how to tame them without breaking the bank.
Hanging Rulers works great for quick access. Install a tension rod in your closet and use pant hangers to display different Ruler Types. You’ll see everything at a glance.
For Ruler Storage on shelves, grab clear under-bed containers. They’re perfect for organizing by size and keeping dust away. Label each container so you won’t waste time hunting.
DIY Racks offer another Space Saving solution. Mount a vertical magazine file on your wall and store rulers upright in separate dividers. This keeps them organized and prevents warping. A yardstick is essential to guarantee straight, even hemlines.
These sewing storage methods transform ruler chaos into organized sewing room organization. Your sewing tool storage will thank you, and you’ll spend more time creating instead of searching through cluttered sewing supplies.
Rolling Carts for Sewing Tool and Notion Storage
Beyond rulers and measuring tools, rolling carts transform your sewing organization game completely. These mobile storage solutions let you wheel your supplies wherever creativity calls, whether that’s the kitchen table or your dedicated craft room.
Choose carts with smooth-glide drawers and adjustable shelving to customize your sewing storage. The top surface doubles as mobile cutting space, while locking casters provide stability during intense stitching sessions.
Cart placement becomes strategic when you create craft room zoning – park different carts in designated areas for specific tasks.
Here’s how to maximize your rolling cart setup:
- Top tier: Thread spools, scissors, and daily-use sewing notions for instant access
- Middle drawers: Fabric scraps, patterns, and portable projects in clear containers
- Bottom shelf: Heavy items like cutting mats and reference books for stability
Cart customization options include adding pegboard sides for hanging tools or magnetic strips for needles. Storing notions in clear containers helps with quick identification.
Small spaces benefit most since you can roll everything away when not sewing, keeping your living areas clutter-free while maintaining organized sewing supplies.
Frequently Asked Questions (FAQs)
What does every sewing room need?
You’ll need proper lighting, good storage solutions, a comfortable cutting surface, thread organization, and essential tools like scissors, pins, and measuring tools within easy reach.
How to organize your sewing pattern?
Like a well-organized recipe box, sort your sewing patterns by type in banker boxes or magazine holders.
Use comic book storage boxes to prevent creasing, and label everything clearly for quick access, which helps to keep your patterns in good condition.
Where to keep sewing stuff?
Store sewing supplies in pegboards, mason jars, tackle boxes, and drawer dividers. Use wall-mounted solutions, clear containers, and repurposed items like ice cube trays for bobbins to maximize space.
How to organize fabric by weight or season?
Group fabrics by weight using separate containers—lightweight cottons together, medium-weight denim separately, heavy canvas apart.
Label each container clearly.
For seasonal organization, dedicate specific bins to spring/summer versus fall/winter fabrics, using separate containers and labeling them to ensure clear distinction between the seasons.
Best storage solutions for large quilting hoops?
Like a compass guiding lost travelers through dense forest, wall-mounted racks and pegboards offer salvation for wayward quilting hoops.
Mount horizontal wooden strips with adjustable pegs, or repurpose coat racks to display hoops vertically, keeping them accessible yet organized.
How to prevent fabric from fading in storage?
Keep fabric away from direct sunlight and fluorescent lights by storing it in dark closets or opaque containers. Acid-free tissue paper between layers prevents color bleeding and fading over time.
What containers work best for elastic and trim?
Think of elastic and trim like tiny snakes waiting to escape – they need secure containers.
Clear plastic storage boxes with snap-tight lids work perfectly, keeping everything visible and contained.
You can also repurpose tackle boxes for portability.
How to organize sewing machine manuals and warranties?
Create a dedicated folder or binder for manuals and warranties, organizing them alphabetically by machine model or brand.
Place frequently referenced documents in clear sheet protectors for easy access and durability.
Conclusion
Transforming your sewing chaos into organized bliss isn’t rocket science—it’s about creating smart systems that work for you.
When you learn how to organise sewing supplies properly, you’ll spend more time creating and less time hunting for materials.
Start with a complete inventory, designate homes for each category, and use vertical storage solutions like pegboards and rolling carts.
Remember, the goal isn’t perfection but functionality that makes your sewing experience smoother and more enjoyable, with the ultimate aim of achieving organised bliss.
- https://www.youtube.com/watch?v=Ptn9jLQ1YLY
- https://sameday.dollartree.com/store/dollar-tree/products/54654937-closet-essentials-collapsible-storage-container-9-x-9-x-8-inch-1-each
- https://domestically-designed.com/turn-dollar-store-bins-stylish-storage/
- https://www.reddit.com/r/sewing/comments/1gn2a53/storage_containers_for_spools/
- https://www.dollartree.com/closet-essential-collapsible-storage-container-1-ct/237659

