This site is supported by our readers. We may earn a commission, at no cost to you, if you purchase through links.
 Crafting a pillow by hand is a rewarding project that adds a personal touch to your home decor. You’ll master the art of hand sewing and create a unique piece that reflects your style.
Whether you’re a seasoned stitcher or a beginner, this guide will walk you through the process, from selecting the right materials to executing the final ladder stitch closure.
Embrace the satisfaction of DIY as you learn how to sew a pillow by hand, transforming fabric and thread into a cozy creation.
Yes, you can sew a pillow by hand. To do this, cut fabric to size, pin right sides together, sew around leaving an opening for the pillow form, then insert the form and hand sew the opening closed using a ladder stitch.
Table Of Contents
Key Takeaways
- Preparing the fabric properly before sewing, including washing, drying, measuring, cutting, and ironing, is crucial to ensure the final product does not shrink and has a professional finish.
- When cutting the fabric, adding a seam allowance and cutting on the bias or parallel to the selvage edges are important steps for fitting the pillow form correctly and ensuring clean cuts.
- Pinning the fabric right sides together with an appropriate seam allowance and choosing the right needle and thread color are essential for a neat sewing process and a visually appealing result.
- Using a ladder stitch for hand sewing the pillow closed provides an invisible finish, making the stitching less noticeable and giving the pillow a more polished appearance.
Gathering Materials and Preparing the Fabric
Embarking on the journey of hand-sewing a pillow, the first step is akin to gathering your tools before a grand adventure. Imagine yourself as a craftsman, about to create a masterpiece. Your canvas? The fabric.
But not just any fabric will do. You’re on a quest for the perfect material that speaks to you, be it the sturdy embrace of cotton canvas or the rustic charm of burlap.
Before you cut, treat your fabric like a cherished book, giving it the care it deserves. Washing and drying it first isn’t just a chore; it’s a ritual that prepares your canvas, ensuring it won’t shrink or warp after your masterpiece is complete.
Now, it’s time to measure twice and cut once. Precision here is your best friend, guiding you to ensure that every inch is accounted for, leaving no room for error.
Ironing your fabric isn’t just about smoothing out wrinkles; it’s about setting the stage, ensuring your fabric is as ready as you’re to start this journey. And when you fold your fabric, it’s not merely a fold; it’s a strategic move, aligning edges and corners, ensuring everything is in perfect harmony for the next step.
So, gather your materials with care, measure with precision, and iron with purpose. Your journey in creating a hand-sewn pillow is about to begin, armed with the right tools and a heart full of creativity.
Cutting the Fabric to Size
Now that you’ve gathered your materials, it’s time to cut your fabric to size. First, lay your fabric out flat, ensuring it’s free of wrinkles. If you’re using a patterned fabric, consider the design placement now; it’s like setting the stage for a show-stopping performance.
Measure your pillow form and add a seam allowance—typically a half-inch on each side will do the trick.
Next, mark your fabric. If you’re feeling bold, you can cut on the bias for a bit of drama in the drape, but for most pillows, keeping the grain line parallel to the selvage edges is your best bet. It’s like the fabric’s backbone, keeping everything straight and true. Cut your fabric with confidence, but don’t rush—precision is your friend here.
Remember, a well-cut fabric leads to a pillow that looks like it’s been to finishing school—neat, tidy, and oh-so-elegant.
Pinning and Sewing the Sides
Once you’ve got your fabric cut to the perfect size, it’s time to get down to the nitty-gritty of pinning and sewing the sides. Think of your needle as your trusty sidekick and the thread as the unsung hero that’ll hold it all together.
Choose a needle size that’s just right—not too big to leave gaping holes, and not too small to make threading a chore. Your thread choice should be like a chameleon, blending seamlessly with your fabric.
Now, let’s talk seam allowance. You’ll want to give yourself enough room to maneuver, so aim for about a half-inch from the edge. It’s like giving yourself a little breathing room—enough to keep things comfortable but not so much that your pillow looks baggy.
Start with a straight stitch, as straight as an arrow, keeping it consistent for a clean look. And don’t forget the backstitch at the beginning and end of your sewing journey—it’s the anchor that keeps your stitches from unraveling like a poorly kept secret.
As you sew, imagine you’re on a leisurely stroll, not a race. Take your time to ensure each stitch is as perfect as the last, and you’ll end up with sides that are stronger than a friendship forged in childhood.
When you’re done, you’ll have a pillow that’s not just a comfy headrest but a testament to your hand-sewing prowess.
Inserting the Pillow Form
Once you’ve stitched up three sides of your pillow, it’s showtime for the pillow form.
First, ensure your fabric choice is a snug fit for the pillow size; a tight embrace makes for a plump, inviting cushion.
Now, gently fold the insert like a taco and ease it into its fabric shell. It might play hard to get, but with a bit of coaxing, it’ll settle into place. If you encounter any resistance, don’t fret—troubleshooting is part of the fun.
Wiggle and adjust until the insert placement is just right, filling out each corner for that perfect, cloud-like poof.
As you prepare for the finishing touches, remember: a well-st■ pillow is the crown jewel of any cozy nook.
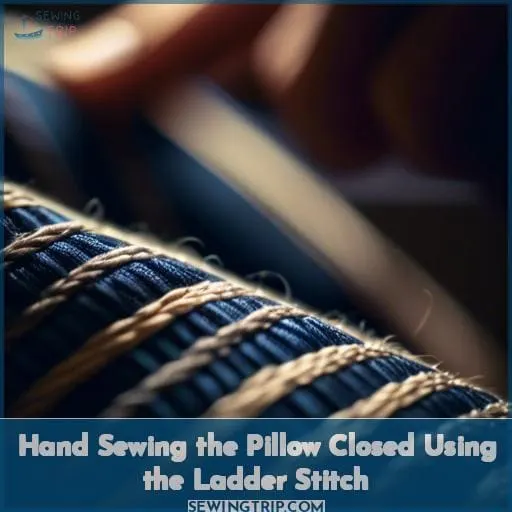
Hand Sewing the Pillow Closed Using the Ladder Stitch
Alright, let’s dive into the grand finale of your pillow-making adventure: sealing the deal with a ladder stitch. Imagine you’re a magician, and your wand is a needle threaded with a color that whispers, I was never here.
You’re about to perform the final act that leaves the audience (or anyone admiring your pillow) baffled at the seamless finish.
First, ensure your needle’s position is just right, emerging from the fabric’s fold, as if it’s peeking out to say hello. This is where the dance begins. You’ll take your needle across to the opposite fold, diving in and out with about a quarter-inch of fabric on its back.
Now, here’s where the rhythm picks up. Move back to the starting side, directly across from where you last emerged, and repeat. As you add more stitches, you’re building a ladder, but not just any ladder—a magical, invisible one.
Keep the thread tension consistent; too loose, and your ladder turns into a saggy hammock, too tight, and it puckers like it’s seen a ghost.
Once you’ve reached the end of your fabric’s open gap, it’s time for the grand reveal. Gently pull the thread, and watch as your ladder pulls the fabric together, disappearing like a secret passage in a mystery novel.
If you’ve matched your thread well, this seam becomes your decorative stitch’s invisible cloak.
And there you have it, a pillow that looks like it was sewn by the elves themselves. Remember, practice makes perfect. If at first, you don’t s쳮d, laugh it off, and try again. After all, every stitch you make is a step up your own ladder of sewing mastery.
Frequently Asked Questions (FAQs)
How can I adjust the size of my pillow if I’ve cut the fabric too large or too small?
Cutting your fabric too big or small isn’t the end of the world; it’s a chance to get creative!
If it’s too large, trim it down or add pleats for a chic, tailored look.
Too small? Seamlessly piece together extra fabric, or introduce a contrasting border for a pop of flair.
So, grab your scissors or extra fabric, and let’s turn that oops into a masterpiece!
What are some common mistakes to avoid when choosing fabric for a hand-sewn pillow?
Avoid choosing fabrics that are too thin, stretchy, or fray easily, as they can complicate sewing and durability.
Steer clear of boring, basic patterns; instead, opt for textures and colors that pop.
Can I add decorative elements like buttons or embroidery to my pillow, and if so, at what stage should this be done?
Like a chef adding the final garnish to a masterpiece dish, you can indeed adorn your pillow with buttons or embroidery. It’s best to add these decorative elements after sewing the main parts of the pillow but before the final closure.
This timing allows you to easily access the fabric without obstruction, ensuring your embellishments are both secure and perfectly placed. Whether it’s the intricate dance of needle and thread for embroidery or the precise placement of buttons, consider this the secret sauce that transforms a simple pillow into a work of art.
How do I choose the right type of thread and needle for different fabric types when sewing a pillow by hand?
Choose your thread and needle based on fabric type:
For light fabrics, use fine needles and cotton or polyester thread.
For heavy fabrics, opt for thicker needles and strong threads like upholstery or denim thread.
What are the best practices for maintaining and cleaning hand-sewn pillows, especially those with delicate fabrics or fillings?
To keep your hand-sewn pillows in tip-top shape, treat ’em like your favorite delicate sweater.
For those with sensitive souls—think silk or vintage fabrics—spot clean with a gentle touch and a mild soap.
Got a pillow that’s seen better days? Dive into a hand wash with cool water, but play it cool with the detergent.
For the love of fluffiness, avoid wringing out those precious pillows; let them air dry, basking in their own time.
And remember, a little TLC goes a long way, especially when it comes to keeping those cozy companions fresh and clean.
Conclusion
Nearly 70% of American households include some form of DIY crafting, with sewing being a popular pastime.
You’ve just joined this creative community by learning how to sew a pillow by hand. From selecting fabric to the final ladder stitch, you’ve crafted a cozy addition to your space that’s uniquely yours.

