This site is supported by our readers. We may earn a commission, at no cost to you, if you purchase through links.
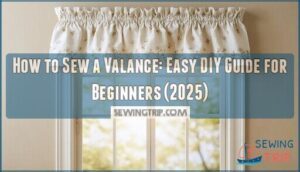 Learning how to sew a valance transforms your windows from basic to beautiful in just one afternoon.
Start by measuring your window width, adding 6-8 inches for fullness. Cut your fabric with 1-inch seam allowances on all sides.
Hem the bottom and sides first, then create a rod pocket by folding the top edge down 3 inches and stitching straight across. For gathered styles, use a longer fabric piece and scrunch it onto your rod.
The beauty lies in choosing fabrics that complement your room’s personality—from crisp linens for modern spaces to florals for cottage charm. Master these basics, and you’ll discover clever shortcuts that professional seamstresses swear by.
Table Of Contents
- Key Takeaways
- Supplies Needed to Sew a Valance Curtain
- Measuring for Your Valance
- Step-by-Step Guide to Cutting Your Fabric
- Sewing Techniques for Creating a Valance
- Tips for Finishing Your Valance
- How to Make a Window Valance From a Table Runner
- DIY Modern Valance Ideas
- Top 5 Cordless Electric Scissors for Sewing
- Essential Tools for Sewing a Valance
- How to Sew a Valance Without a Sewing Machine
- Frequently Asked Questions (FAQs)
- Conclusion
Key Takeaways
- Measure accurately before cutting – You’ll need your window width plus 6-8 inches for fullness, with 1-inch seam allowances on all sides to ensure a proper fit and professional results.
- Master the rod pocket technique – Create a functional rod pocket by folding the top edge down 3 inches and stitching straight across, which allows your valance to hang properly on the curtain rod.
- Choose fabric that complements your space – Select materials like cotton, linen, or polyester blends that match your room’s style, from crisp linens for modern looks to florals for cottage charm.
- Use proper hemming for polished edges – Create double-fold hems by pressing the edges twice (first a quarter-inch, then one inch) and stitch close to the fold for clean, professional-looking borders.
Supplies Needed to Sew a Valance Curtain
Everything starts with the right tools and materials. For successful valance sewing, you’ll need fabric selection that complements your room’s aesthetic—cotton, linen, or polyester blends work best.
Essential sewing tools include a reliable sewing machine, sharp fabric scissors, and measuring tape for precise dimensions. Choose thread choices that match your fabric color perfectly.
Don’t forget ironing techniques—a good iron creates crisp seams and professional-looking results. Basic supplies like straight pins, rulers, and fabric markers complete your toolkit for creating beautiful window treatments, which involves the right sewing machine.
Measuring for Your Valance
Before diving into your valance project, accurate window measurements form the foundation of professional results.
Poor measuring techniques can derail even the most carefully planned design.
Here’s your essential measuring checklist:
- Window Measurements – Record exact frame width and height
- Valance Depth – Determine coverage (typically 12-18 inches)
- Rod Pocket – Plan 2-3 inches for hardware accommodation
- Hem Allowance – Add 5 inches width, 3 inches length
- Fabric Calculation – Multiply width by 1.5-2.5 for fullness
Start with your window measurement at the mounting point.
For gathered styles, fabric measurement requires multiplying your base width for proper draping.
Factor in measurement adjustments for rod pocket depth and hem allowances before cutting.
These calculations guarantee your valance achieves the desired aesthetic while fitting perfectly.
Step-by-Step Guide to Cutting Your Fabric
Now that you’ve measured your window, it’s time to cut your fabric with precision.
Proper fabric measurement and cutting tools make all the difference in achieving professional results.
Start by laying your fabric flat on a large, clean surface.
Use a rotary cutter or sharp fabric scissors for precision cutting.
Mark your measurements with fabric chalk, adding seam allowances to all sides.
For sewing patterns, align the fabric grain properly to prevent distortion.
| Cutting Step | Key Points |
|---|---|
| Fabric Layout | Lay flat, align patterns, check grain direction |
| Measuring Techniques | Use rulers, add seam allowances, mark clearly |
| Precision Cutting | Sharp tools, steady strokes, follow marked lines |
Remember these valance sewing tips: always cut conservatively—you can trim excess, but you can’t add fabric back.
For sewing for beginners, practice on scraps first to perfect your technique before cutting your final pieces.
Sewing Techniques for Creating a Valance
Now you’ll move from cutting to the actual construction phase where your valance takes shape.
These fundamental sewing techniques will transform your cut fabric into a polished window treatment that looks professionally made.
Hemming The Edges
Crisp folded hems transform raw fabric edges into polished, professional-looking borders.
Create double-fold hems by pressing each edge twice—first a quarter-inch, then one inch.
Edge stitching close to the fold secures your work perfectly.
For quick fixes, hem tape offers a no-sew solution.
Master these hemming basics, and you’ll craft valances with sewn edges that rival store-bought designs.
Understanding hemming techniques is essential for achieving professional-looking results.
Creating Pleats or Ruffles
After perfecting your hems, you’ll want to add visual interest through pleats or ruffles. These Decorative Edges transform basic valance designs into stunning focal points.
Pleat Styles offer structured elegance:
- Box pleats create raised, architectural folds using three times the finished width
- Knife pleats fold fabric in one direction for streamlined sophistication
- Gathered ruffles use basting stitches pulled tight for soft, romantic texture
Fabric Folding techniques vary by style. For pleats, fold fabric edges to center lines and press with hot iron. Ruffle Techniques require long basting stitches at 5mm intervals—pull gently to create desired fullness.
Sewing Tricks include using elastic thread in your bobbin for consistent gathering. Remember: gathered valance styles need 1.5 to 2 times window width for proper fullness. Press each fold before final stitching to maintain crisp lines.
Tips for Finishing Your Valance
Your sewn valance needs the right finishing touches to look professional.
These sewing tips transform basic fabric into polished window treatments that rival store-bought options.
Focus on these key valance finishing elements:
- Press all seams flat – Use medium heat and steam to create crisp edges that won’t buckle or pucker
- Add decorative trim – Attach piping, fringe, or ribbon along bottom edges for visual weight and style
- Check rod pocket alignment – Verify even spacing so your valance hangs straight without bunching
Different valance styles require specific hemming techniques.
Double-fold hems work best for most fabric choices, while lightweight materials need narrow rolled hems.
Your sewing valances project succeeds when you match finishing methods to your chosen fabric weight and texture.
How to Make a Window Valance From a Table Runner
Transform any decorative table runner into a stunning window valance with this fabric upcycling technique.
Turn everyday table runners into custom window treatments in minutes—no sewing required.
This DIY home project requires no sewing skills and creates beautiful window decor in minutes.
- Measure your window width – Select a table runner 1.5 times wider than your window frame for ideal fullness
- Create the rod pocket – Fold the top edge over 2-3 inches and secure with no-sew hem tape or stitch witchery
- Position and drape – Thread your curtain rod through the pocket and adjust the fabric for even coverage
- Fine-tune the look – Arrange gentle folds or pleats along the rod for a polished, custom appearance
This repurposed textiles approach transforms ordinary table runners into elegant window treatments, proving that effective DIY valance projects don’t always require traditional sewing methods.
Using a no-sew technique with budget friendly materials can help create a beautiful and affordable window valance.
DIY Modern Valance Ideas
Modern valance styles break free from traditional curtain constraints, offering sleek alternatives for contemporary home decor.
Choose minimalist fabrics like linen or cotton for clean lines, or select bold geometric patterns for statement pieces. DIY window valance projects using foam board create structured box styles, while fabric choices in neutral tones complement existing window treatments.
Your sewing tips should focus on precise measurements and straight edges. These modern valance designs transform ordinary windows into design focal points without overwhelming your space.
For beginners, understanding basic sewing pattern diy concepts is essential to create beautiful and functional window treatments.
Top 5 Cordless Electric Scissors for Sewing
Cordless electric scissors revolutionize fabric cutting for your DIY window valance project.
These cutting machines eliminate hand fatigue while delivering precise cuts through multiple fabric layers.
Top cordless scissors for sewing home decor projects:
- Workpro W125199A – Dual blade system cuts thick denim and cardboard with 3.6V lithium-ion power
- SakerPlus GJ62172 – 220 RPM motor handles materials up to 1/4" thick with LED lighting
- Pink Power HG2043 – 2-hour battery life with 90-minute recharge time for extended sessions
These electric cutters feature safety switches and ergonomic grips.
Battery indicators prevent mid-project interruptions.
Choose fabric shears with interchangeable blades for versatility across different materials when creating your valance.
When selecting the best cordless electric scissors, consider the electric scissors features that suit your sewing needs.
Essential Tools for Sewing a Valance
You’ll need the right tools to create a professional-looking valance that transforms your window from ordinary to extraordinary.
Beyond your basic sewing supplies, specialized equipment like power saws, dowel rods, and staple guns will help you achieve clean lines and secure installations that last.
PORTER-CABLE 14-Inch Chop Saw
Beyond basic fabric shears, you’ll need precision cutting tools when crafting your DIY window valance. The PORTER-CABLE 14-inch chop saw delivers exceptional wood cutting capabilities with its powerful 15-amp motor spinning at 3,800 RPM.
This robust power tool handles dowel rods and curtain hardware with professional-grade accuracy. Chop saw safety remains paramount—the integrated spark deflector protects you while maintaining clear sight lines.
The quick-release clamp secures materials at precise angles up to 45 degrees, perfect for custom bracket installations. Metal cutting becomes effortless with proper saw blades, allowing you to customize hardware components.
This valance sewing guide wouldn’t be complete without emphasizing proper sewing tools and techniques. The heavy-duty steel base minimizes vibration, ensuring clean cuts every time. Whether you’re trimming wooden mounting brackets or preparing metal hardware, this chop saw transforms your workspace into a precision cutting station for any valance project.
For ideal results, consider using a Porter Cable Saw for your woodworking needs.
Wooden Dowel Rods for Crafts
When crafting your DIY valance, wooden dowels serve as the backbone for professional-looking curtain installations. These versatile craft sticks provide the structural support your fabric needs while remaining lightweight and easy to work with.
You’ll find wooden dowels essential for creating custom curtain rod solutions that perfectly fit your window measurements.
Here’s what makes wooden dowels perfect for valance projects:
- Precise measurements – Cut dowels to exact window width for perfect fit
- Smooth finish – Natural wood surface prevents fabric snags and tears
- Lightweight strength – Supports fabric weight without bending or breaking
- Cost-effective solution – Affordable alternative to expensive curtain hardware
These craft essentials integrate seamlessly with rod fittings and brackets, giving you complete control over your valance design. Whether you’re following a valance sewing guide or creating your own DIY valance pattern, wooden dowels adapt to any style.
They’re particularly useful when standard curtain rods don’t match your specific needs or aesthetic vision. The use of wooden dowels in wooden dowel applications is a key factor in their popularity among DIY crafters.
YEAHOME Upholstery Staple Gun Kit
Precision transforms your sewing project when you’ve got the right fastening power at your fingertips.
The YEAHOME Upholstery Staple Gun Kit delivers professional-grade attachment for valance fabric to mounting boards, eliminating the guesswork from DIY window treatments.
For heavy-duty projects, considering an upholstery sewing machine is vital for handling thick fabrics.
This heavy-duty tool secures your valance fabric with confidence, offering versatility that’ll make your sewing machine jealous.
- Staple Gun Uses: Attach fabric to wood valance boards and secure batting layers
- Kit Component Quality: All-steel construction handles 1000 staples per type without jamming
- Upholstery Project Ideas: Perfect for headboards, cushions, and window treatment mounting
- Staple Size Guide: D, U, T, and pin staples accommodate various fabric weights
- Alternative Staple Guns: Adjustable power levels work on both delicate and heavy materials
The ergonomic grip and quick-reload design keep you working efficiently, while the tool’s precision guarantees your valance stays put for years.
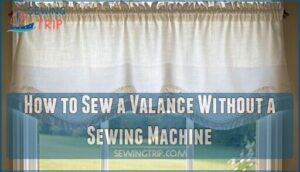
How to Sew a Valance Without a Sewing Machine
You don’t need expensive equipment to craft a professional-looking DIY valance. Hand stitching and fabric glue offer reliable alternatives that deliver stunning results without the machine hassle.
Creating beautiful valances doesn’t require a sewing machine—just the right techniques and a bit of creativity.
Fusible tape creates permanent, washable bonds when ironed between fabric layers. Simply position the tape along your hem fold, press with a hot iron, and you’ll get crisp edges that rival machine-sewn finishes.
Here’s your no sew valance toolkit:
- Iron on hem tape for clean, professional edges
- Fabric glue for securing decorative trims and appliques
- Double-fold hems to prevent fraying on raw edges
- Velcro strips for removable rod pocket installation
- Rotary cutter for precise, straight fabric cuts
DIY window valance projects become manageable when you master these techniques. Create accordion pleats by folding fabric in one-inch increments, then secure with fusible tape. For gathered styles, hand-baste with needle and thread, pulling gently to achieve your desired fullness.
Your valance without sewing machine will look custom-made when you focus on precise measurements and clean finishing techniques.
Frequently Asked Questions (FAQs)
Can you sew a valance?
Like threading a needle with purpose, you’ll transform fabric into window art.
Measure your window width, add hemming allowances, cut precisely, fold edges, create rod pockets, and stitch clean seams for professional results.
How do you sew a valance in a sewing machine?
You’ll feed fabric through your machine after measuring, cutting, and pinning edges.
Start by hemming sides and bottom with straight stitches, then create a rod pocket by folding and stitching the top edge precisely.
How do you sew a reversible window valance?
Create reversible valances by sewing two coordinating fabrics together, right sides facing, leaving an opening for turning. Once turned inside-out, you’ll have a professional dual-sided window treatment.
How do you make a window valance?
Picture crisp fabric cascading elegantly across your window frame.
Measure your window width, add five inches.
Cut fabric, fold edges inward, iron creases, then sew straight stitches.
Create a rod pocket at the top for hanging, using the sewn fabric to make it easy to hang.
How do you sew a valance Hem?
Fold your valance’s raw edge inward half an inch, then fold again one inch.
Press with iron, pin securely, and stitch a straight line quarter-inch from the inner fold for professional results.
Should you make your own window valance?
Making your own window valance is like threading a needle with your eyes closed initially, but you’ll master the craft quickly.
You’ll save money, achieve perfect measurements, and customize colors to match your décor precisely.
It’s surprisingly straightforward once you understand the basics.
What are the three types of valance?
You’ll encounter three main valance types: straight, gathered, and swag.
Straight valances offer clean, streamlined lines perfect for modern spaces.
Gathered valances create soft, ruffled texture with fabric fullness.
Swag valances drape elegantly with curved, flowing design elements.
How many yards of fabric do you need for a valance?
Fabric yardage requirements aren’t a one-size-fits-all equation.
You’ll typically need 1-2 yards for standard windows, depending on your desired fullness and gathered effect.
Multiply your window width by 5-5 for proper draping.
Are valances in style anymore?
Valances remain stylish when executed thoughtfully.
They’re still in style in 2025 regarding window valances and work well to soften a minimalist space with clean drapery framing.
Today’s styles often feature sleek lines and neutral palettes that complement modern design.
How far should a valance extend past the window?
Professional designers know that 80% of window treatments fail because they’re improperly sized.
Your valance should extend 2-4 inches beyond each side of your window frame for ideal visual balance and light control.
Conclusion
Ironically, you’ve just discovered that learning how to sew a valance requires no advanced degree in textile engineering.
You’ve mastered measuring, cutting, and stitching techniques that transform ordinary fabric into custom window treatments.
Your rod pocket creation skills now match professional standards, and the hemming and pleating methods you’ve learned guarantee clean, polished results.
Whether you chose gathered styles or modern designs, you’ve proven that knowing how to sew a valance transforms any room affordably and efficiently.
- https://benartex.com/fabric-gallery/?collection_id=24141
- https://www.brewersewing.com/search.aspx?ctl00$Search$SearchBox=mettler%2050%20wt
- https://www.onlinefabricstore.com/makersmill/different-ways-to-hem-fabric/
- https://www.youtube.com/watch?v=046lt1Cu0Ys
- https://weallsew.com/hemming-three-different-ways/


