This site is supported by our readers. We may earn a commission, at no cost to you, if you purchase through links.
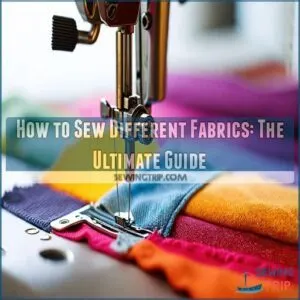
For stretchy materials, like jersey, use a zigzag stitch to keep the seams flexible.
Heavy fabrics, such as denim, need a strong needle—your regular one might just snap in defeat!
Always experiment with a scrap first; it’s like a dress rehearsal for your needle and thread.
A silicon spray on the needle helps it glide smoothly, much like butter on toast.
And when combining fabrics, don’t skimp on pins; more is indeed merrier.
Curious for more tricks up the sleeve?
Table Of Contents
- Key Takeaways
- Choosing The Right Fabric
- Essential Tools and Materials for Sewing
- Preparing Fabric for Sewing
- Techniques for Sewing Different Fabrics Together
- Overcoming Common Sewing Challenges
- Working With Lightweight Fabrics
- Sewing Bottom Weight Fabrics
- Understanding Seam Allowance
- Techniques for Sewing Two Pieces of Fabric Together
- Finishing Touches and Troubleshooting
- Frequently Asked Questions (FAQs)
- Conclusion
Key Takeaways
- You’ll need different needles and stitch lengths for different fabric weights; heavier fabrics require stronger needles and longer stitches.
- Pre-wash your fabrics to avoid shrinkage and color bleeding after you’ve sewn your project.
- Adjust your machine’s tension and stitch length to prevent puckering and ensure even fabric feed, especially with stretchy or delicate materials.
- Master basic seam finishes like French seams or serged edges for a professional look and to prevent fraying.
Choosing The Right Fabric
Choosing the right fabric is like finding the perfect dance partner—it can make or break the whole sewing experience.
You’ll want to think about whether a natural or synthetic fiber suits your project.
You’ll also want to take fabric weight and structure into account for the best results.
Natural Vs. Synthetic Fibers
Choosing the right fabric can feel like a balancing act.
Natural fibers like cotton and wool are breathable and comfy, while synthetic ones like polyester resist wrinkles.
To help you decide, consider:
- Purpose – What’s it for?
- Care – Easy wash?
- Feel – Soft or slick?
- Sustainability – Eco-friendly?
Fabric Weights and Their Impact on Sewing
Regarding sewing, fabric weight is your trusty sidekick.
Lightweight chiffon demands delicate needle sizes and shorter stitch lengths, ensuring the fabric drapes beautifully.
To prevent shrinkage and color bleeding, pre-washing techniques are a must.
Heavyweights like denim need strong needle types, longer stitches, and ample seam allowance.
Remember to master pressing techniques for crisp seams.
Each choice
Fabric Structure and Type
Imagine you’re choosing fabric like shopping for ice cream; you’ve got weave types, fabric blends, and texture variations to keep in mind.
The fabric structure, like plain or twill weave, affects durability and drape.
Fabric type—whether natural or synthetic—impacts ease of sewing.
Explore combinations to find what suits your project, understanding fabric characteristics and weight are key.
Essential Tools and Materials for Sewing
Get ready to transform your sewing nook into a powerhouse of creativity by assembling essential tools and materials.
From trusty sewing machines to cleverly chosen needles, you’ll feel like the superhero of your own fabric-filled adventure.
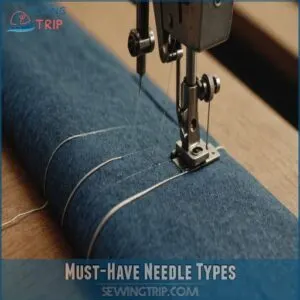
Must-Have Needle Types
Ever felt like sewing could use a gear shift? Needle types are your toolbox’s secret weapons.
Universal needles, which can be found online at stores like universal needles marketplace, tackle most sewing projects, while denim needles power through thick fabrics.
Use a ballpoint needle for knits, and go for a microtex needle on
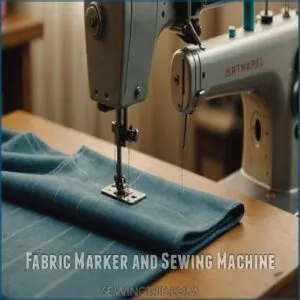
Fabric Marker and Sewing Machine
You’ll definitely need a trusty sewing machine, and don’t forget a fabric marker, as well as other essential sewing tools for beginners.
Choose a machine from reliable brands like Singer or Brother.
Regular machine maintenance is key.
Experiment with different fabric marker types—washable markers are great for temporary markings.
Simple projects, like tote bags, are perfect beginner sewing projects!
Mastering fabric handling takes practice, but you
Preparing Fabric for Sewing
Before you start sewing, make sure your fabric is washed, ironed, and smoothly laid out—no one likes threads twisting like a pretzel.
Once that’s done, mark your pattern pieces with precision, because no one wants a shirt that only fits a giraffe.
Washing and Drying Fabric
Facing fabric shrinkage after sewing? Check those fabric care labels first.
Use the right water temperature to avoid surprises like unintended doll clothes.
For stubborn stains, act fast with a bit of elbow grease.
Choosing proper drying methods is key—some fabrics enjoy air drying, while others prefer the tumbling fun of a dryer.
Always handle with care!
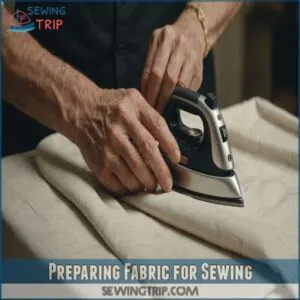
Ironing and Cutting Fabric
Before diving into sewing bliss, press your fabric flat to banish stubborn wrinkles.
This helps reveal the fabric grain, making it easier to slice with your trusty cutting tools.
You can use a sturdy ironing board to help you achieve a smooth, wrinkle-free surface.
Mind the fabric weight as you adjust your pressing techniques.
With fabric characteristics in mind, embrace ironing tips to align your pattern perfectly—precision here saves headaches later!
Marking Pattern Pieces
Once your fabric is ironed and cut, it’s time to work on marking pattern pieces.
Grab your pattern marking tools and choose a transfer method that suits your fabric type.
Accurate placement is key—align everything like you’re playing Tetris.
Marking techniques vary, so embrace your inner artist and scribble away, keeping those sewing patterns spot-on!
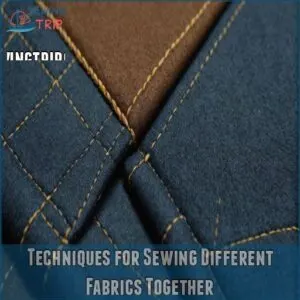
Techniques for Sewing Different Fabrics Together
Sewing different fabrics together can feel like figuring out a puzzle with moving pieces, but don’t worry, you’ll get there.
With the right techniques, like adjusting stitch length and tension, you’ll breeze through those tricky combinations with ease and maybe even a little flair.
Adjusting Stitch Length and Tension
Imagine this: your sewing machine humming along, but you’re tugging at the fabric.
Adjusting stitch length and tension changes everything.
Light fabrics prefer shorter stitches, around 1.5 mm, while heavyweights need longer ones, up to 4.0 mm.
Loosen tension for delicate fabrics, tighten for thick, sturdy materials.
To ensure the best results, consider the unique properties of natural fibers like breathable cotton fabrics, which can affect the sewing process. Experiment with the needle size for your fabric type to achieve seamless projects.
Special Techniques for Stretchy Fabrics
You’ll often find yourself wrestling with stretchy fabrics.
Don’t fret!
Here’s how to conquer them:
- Use a ballpoint needle to prevent snags.
- Employ a stretch stitch for flexibility.
- A walking foot helps to feed fabric evenly, preventing puckering.
These three simple steps will make sewing stretchy fabrics a breeze!
Handling Delicate or Heavyweight Fabrics
Tackling delicate or heavyweight fabrics involves a bit of finesse.
Your fabric choice determines the needle size and stitch length.
When sewing a floating silk or sturdy denim, adjust your stitch length and experiment with the correct pinning techniques.
Engage your iron; pressing methods help seams meet like old friends, adding polish to your project.
Overcoming Common Sewing Challenges
Sewing can feel like a puzzle with pieces that don’t quite fit, especially when fabrics start slipping or puckering at the seams.
Don’t worry; mastering these common challenges is easier than turning a tangled bobbin into a masterpiece with a few handy tricks!
Handling Puckering and Mismatched Seams
Creating perfect seams isn’t just about pinning fabric and hitting the pedal.
When facing puckering and mismatched seams, focus on using the right needle size for your fabric weight, and adjust your stitch length and tension.
Hand-baste before sewing to align everything perfectly.
Remember, sewing’s a dance—sometimes it needs a little practice to get in step!
Dealing With Fabric Slippage
After mastering mismatched seams, slippery fabrics might still have you slipping in frustration.
Imagine wrestling an eel while sewing!
To minimize shrinkage and prevent water marks on silk, you should gently pre-wash silks.
Combat this by using stabilizers or Sewing Tape for grip.
Lower your Presser Foot pressure to accommodate delicate materials, and consider a specialized foot for
Troubleshooting Common Issues
While fabric slippage can send your project sideways, let’s chat about common sewing hiccups.
Got puckering seams? Adjust the stitch length and tension, and try a finer needle.
Mismatched seams? Pin well and baste if needed.
Your needle selection can make or break a seam, so choose wisely.
Remember, every stitch teaches you something new!
Working With Lightweight Fabrics
Sewing lightweight fabrics like chiffon and voile can feel like trying to catch a breeze—they’re a bit tricky but rewarding.
Lightweight fabrics like chiffon and voile can be tricky to sew, but the results are rewarding.
By selecting the right needle and thread, and using tools like a walking foot, you can transform these delicate materials into beautiful creations.
Choosing The Right Needle and Thread
So, you’ve conquered those pesky sewing challenges? Great! Now, let’s talk about needles and thread for lightweight fabrics. You’ll want to use:
- A fine needle (size 60/8 or 70/10).
- A lightweight thread – don’t want to weigh down your pretty fabric!
- Adjust your stitch length and tension for a perfect finish. It’s all about balance, my friend.
Using a Walking Foot or Overlocker
Ever feel like your sewing machine’s giving you the limp handshake?
Swap in a walking foot for smooth fabric feeding; it’s magic for knits.
Or, grab an overlocker for speedy, neat seams on stretchy fabrics, keeping things looking sharp.
With the right sewing techniques, adjusting stitch length and tension gets easy-peasy.
Problem? Solved!
Tips for Sewing Chiffon or Voile
Working with chiffon or voile can feel like trying to catch a butterfly—delicate and tricky.
Preventing fraying is key, so use French seams or a rolled hem.
Sewing tips like selecting the right fabric type and using high-quality pins for precise stitching can help, and handling fabric slippage with tissue paper beneath the fabric helps, and stabilization with spray or starch keeps your stitches smooth.
Your project’s beauty will match your patience!
Sewing Bottom Weight Fabrics
For sewing bottom weight fabrics like denim or canvas, you’ll need a strong needle to tackle the task.
Picture yourself stitching a pair of jeans with ease and confidence, thanks to your tough, trusty denim needle!
Using a Denim or Heavy-Duty Needle
Sewing bottom weight fabrics like denim? You’ll need a heavy-duty needle, size 110/18, to tackle those thicker projects.
Here’s a quick checklist to get you started:
- Needle Size: Bigger is better for thick fabrics.
- Stitch Length: Adjust to 3.0–4.0 mm for smooth seams.
- Machine Settings: Make sure everything’s aligned for good sewing techniques.
Tips for Sewing Canvas or Denim
You’re ready for thicker fabrics.
Get your denim needle selection right; size 100/16 is your friend for both canvas and denim.
For more on working with canvas, check out some expert tips on sewing canvas.
Consider interfacing options to add structure.
To avoid frayed edges, raw edge finishing is key—try zigzag stitches.
Carefully **seam
Understanding Seam Allowance
Understanding seam allowance guarantees your fabric pieces stay securely stitched, even if you’ve had a little too much coffee while cutting.
Thread is often the unsung hero of sewing projects, with the right choice depending on factors like fabric weight and type, such as using cotton-wrapped polyester thread for heavier fabrics, giving you room to adjust and perfect your sewing projects without unnecessary panic.
Calculating Seam Allowance
Many patterns suggest a standard 5/8-inch seam allowance, but you can customize it!
Knowing your seam allowance is key; here’s why:
- Prevents mistakes: Gives you wiggle room.
- Adds strength: Creates a sturdy seam.
- Matches patterns: Makes sure you get consistent results.
- Allows for adjustments: Fixes sizing issues.
Understanding seam allowance basics is important for successful sewing projects, regardless of your sewing machine or needles.
Marking and Cutting Seam Allowance
Tackling seam allowance is important for any sewing guide.
Use seam allowance tools like rulers or chalk for marking accuracy.
For cutting techniques, fabric scissors work wonders.
Remember, allowance variations depend on your project, so double-check your pattern.
Think of seam allowance as a safety net ensuring all pieces fit perfectly, giving you freedom to tweak as needed.
Techniques for Sewing Seam Allowance
Grasping seam allowance is essential as it makes sure seams are both flexible and durable.
Begin by choosing the right seam allowance for your project.
To accurately measure seams, consider using a high-quality Sewing Ruler tool.
Key tips include:
- Seam allowance basics: Follow pattern guidelines accurately.
- Tools to use: A ruler and sewing pencil make sure neat
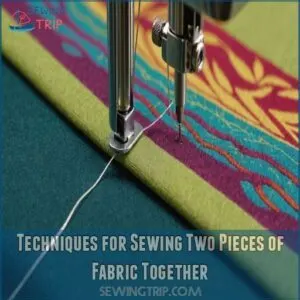
Techniques for Sewing Two Pieces of Fabric Together
When sewing with various fabrics, it’s essential to understand the basics of hand stitches and machine sewing techniques, such as those outlined in the guide on how to sew, to achieve professional-looking results. When you’re sewing two pieces of fabric together, you’ll want to master a few essential techniques to make your project look professional.
Stitch-and-Flip, Sew-and-Trim, or the classic French Seam, each method has its own charm and usefulness, just like picking the right tool for the job.
Sewing Together Method (Stitch-and-Flip)
After wrapping your head around seam allowance, let’s get hands-on with the stitch-and-flip method.
Line up your fabric pieces with right sides together, sew along the edge, and flip one side over.
Press carefully to set your seam.
This method, with its variations, keeps your project smooth and aligned, perfect for tackling common errors in sewing fabrics.
Sewing Apart Method (Sew-and-Trim)
Moving on from stitching and flipping, the Sewing Apart Method (Sew-and-Trim) provides neat finishes for diverse fabric types.
Explore its charm with these steps:
- Wide Stitch: To sew different fabrics together effectively, consider their compatibility and adjust your needle size and thread accordingly by choosing the right tools for the job. Sew fabric pieces together, leaving seam allowances.
- Trim Edges: Snip one side of raw edges.
- Press and Topstitch: Press open, then run a topstitch for polished seams.
French Seam Method
You’ve mastered the sew-and-trim, now meet the French seam method, your secret for a polished, professional touch.
Ideal for delicate fabrics, start by sewing the wrong sides together with a small seam allowance.
For a foolproof approach, choose a thread color that matches the fabric’s dominant color, preferably a darker shade a darker shade for a foolproof choice.
Flip, and sew again with a larger allowance.
It’s like magic for finishing edges—voilà, no raw edges!
| Step | Action |
|---|---|
| Step 1 | Sew wrong sides together |
| Step 2 | Trim seam allowance |
| Step 3 | Flip fabrics |
| Step 4 | Sew right sides together |
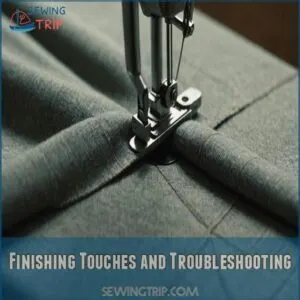
Finishing Touches and Troubleshooting
Now that you’ve sewn your masterpiece, let’s talk about those finishing touches – pressing those seams perfectly is key!
We’ll also cover some common sewing snafus and how to fix them, so don’t worry if you’ve encountered a few bumps in the road.
Pressing and Finishing Seams
With seams sewn, enhancing their look involves pressing and finishing.
Imagine ironing as the magic wand making seams crisp and professional.
Here’s how you can get it done:
- Use the Right Iron: Different fabrics mean different heat settings.
- Press, Don’t Iron: Gently press to avoid distortion.
- Seam Finishes: Choose zigzag or serged edges for a neat look.
Tips for Perfecting Your Sewing Technique
Perfecting your sewing technique is like finding the sweet spot on a guitar’s fretboard.
Sharpen your skills with these tips: adjust sewing machine settings for smooth seams, and select threads wisely.
Handling fabrics correctly makes a difference, too.
Practice pressing techniques and seam finishing for a polished look.
| Tip | Benefit |
|---|---|
| Adjust machine settings | Smoother stitching |
| Use correct needle/thread | Improved seam quality |
| Master pressing | Professional finish |
Frequently Asked Questions (FAQs)
How do you sew a fabric?
Imagine stitching a patch on your favorite jeans.
First, pick the right needle, make sure your thread matches, and use a sewing machine or hand-stitch.
Pin the fabric precisely, sew along the seam allowance, and finish neatly.
Can you sew 2 pieces of fabric together?
Absolutely, you can sew two pieces of fabric together by aligning the edges, pinning them, and using a sewing machine or needle and thread.
Remember, use the right needle and stitch length for your fabric type!
How to sew two pieces of fabric together by hand vs Machine?
For hand sewing, use a running stitch or backstitch.
A sewing machine‘s speed and evenness make it easier, especially for straight seams.
Choose your method based on your project and skill level!
How do you make a good sewing pattern?
Making a sewing pattern is like crafting a map, requiring precision and attention to detail, just like following pattern guides found online here, to transform fabric into garments.
First, draft your design on paper, using precise measurements.
Add seam allowances and notations for easy reference.
Test it with inexpensive fabric, adjusting until it fits perfectly.
How do you sew delicate fabrics?
Sewing delicate fabrics requires a gentle touch.
Use a fine needle and silk thread, reduce tension, and employ a slightly longer stitch length.
Prevent slippage by pinning frequently or using a stabilizer like tissue paper.
What are some alternatives to sewing?
Like finding shortcuts through a maze, there are several alternatives to sewing.
You can use fabric glue for quick fixes, iron-on adhesive for hems, or even decorative pins and clips for non-permanent style changes.
How do you sew different types of fabric together?
To sew different fabrics together, match needle types to fabric weights, and use appropriate stitches like stretch or zigzag for elasticity.
Pin frequently to avoid shifting, and adjust your tension and stitch length for smooth seams.
What are the easiest fabrics to learn to sew?
Start with cotton; it’s forgiving and doesn’t slip, perfect for beginners chasing mastery.
Linen is another solid choice, easy to handle despite wrinkles.
Avoid stretchy or slippery fabrics until you’ve nailed the basics.
Happy sewing!
How to sew difficult fabrics?
Sewing tricky fabrics can be a breeze if you use a Teflon foot for grip, reduce presser foot pressure, and cut using sharp scissors.
Pin regularly, and apply seam tape to stop sliding—it’s like magic!
How to distinguish different fabrics?
Is it smooth like silk, rough like linen, or stretchy like jersey? Look closely—notice the weave. That’ll help you identify it! It’s like a fabric detective game.
How to prevent fabric fading after washing?
To prevent fabric fading after washing, always turn clothes inside out, use cold water, and add a cup of vinegar or salt to the wash.
Avoid the sun’s sizzling rays by air drying indoors when possible.
What fabrics are best for beginners?
When you’re starting out in sewing, consider using cotton or poly-cotton blends.
They’re forgiving, handle well, and don’t slip around much.
This makes them perfect for practicing your stitches without pulling your hair out in frustration!
How to choose fabric for seasonal wear?
Choosing fabric for seasonal wear involves considering climate and activity.
For hot summer months, opt for breathable cotton or linen.
In cold, cozy up with wool or fleece.
Fall and spring enjoy versatile blends for unpredictable weather!
Whats the best fabric for durability?
For unbeatable durability, go for canvas or denim.
These heavyweight champions can take a licking and keep on ticking, making them perfect for projects needing toughness, like bags or workwear.
They’ll outlast any lightweight option!
How to store fabrics to avoid damage?
Tidy fabric storage keeps chaos at bay.
Fold neatly and stack by type in a cool, dry space.
Skip plastic; use breathable bins or shelves.
Add cedar blocks to ward off pesky moths.
Happy organizing!
Conclusion
Mastering how to sew different fabrics is like becoming a fabric whisperer; each cloth has a story to tell.
Your sewing journey, filled with tests and triumphs, leads to beautiful creations.
Remember, every fabric has its own quirks—treat stretchy or heavyweight outfits with care.
Embrace the process, enjoy experimenting, and refine your skills with each project.
Whether you’re sewing denim or chiffon, your confidence will grow, turning challenges into seamless successes.
Now, go create magic with your needle!

