This site is supported by our readers. We may earn a commission, at no cost to you, if you purchase through links.
 You’ll transform your sewing game with simple household items and clever tricks.
Use aluminum foil to sharpen dull scissors, dental floss for heavy-duty stitching, and soap slivers to mark fabric.
Store pins on a magnetic wrist cushion, clean your machine with pipe cleaners, and prevent thread tangles by running it through dryer sheets.
Thread your needle easier by spraying the thread end with hairspray to stiffen it.
These how to sew hacks turn everyday objects into powerful crafting tools that save time and frustration.
From using ice cubes to remove gum from fabric to employing hair straighteners for precise seam pressing, smart sewers know that innovation lies in unexpected places, and using simple household items can make a big difference, with clever tricks that enhance the sewing experience, and provide powerful crafting tools.
Table Of Contents
Key Takeaways
- You’ll save money and frustration by using household items like aluminum foil to sharpen scissors, dental floss for heavy-duty stitching, and soap slivers to mark fabric instead of buying specialized tools.
- You can prevent common sewing headaches by running thread through dryer sheets to stop tangles, storing pins on magnetic wrist cushions for easy access, and using steel wool pin cushions that automatically sharpen your pins.
- You’ll achieve professional results with simple tricks like spraying thread ends with hairspray for easier needle threading, using washi tape as straight-line guides, and leaving your needle down when pivoting corners.
- You can maintain your tools and workspace efficiently by cleaning your sewing machine with pipe cleaners, using bicycle pumps instead of expensive canned air, and organizing threads with toe separators for quick color identification.
Essential Sewing Hacks
You’ll transform your sewing game with these essential hacks that tackle the most common frustrations every crafter faces.
From keeping your scissors razor-sharp to organizing pins like a pro, these simple tricks will save you time and headaches on every project, and help you master sewing.
Sharpening Scissors
Beyond the standard scissor sharpening methods, try cutting through folded aluminum foil multiple times—it’s like giving your blades a mini spa day!
This simple blade maintenance trick cleans and refines the cutting edge while removing built-up residue.
For needle sharpening, store them in steel wool pin cushions.
Your scissors maintenance routine just got easier with these edge refining techniques.
Organizing Pins
With scattered pins everywhere, you’ll spend more time hunting than sewing.
Smart pin storage keeps your workspace tidy and your fingers safe from surprise pricks.
- Magnet Bowls: Hot glue magnets to shallow bowls for instant pin and needle pickup
- Steel Wool Pin Cushions: Create pin cushion creation using steel wool stuffing for automatic pin and needle sharpening
- Toe Separator Storage: Use foam toe separators as clever needle organizers for different sizes
- Ribbon Necklaces: Wear magnetic pin holders on ribbons to keep essential sewing kits within arm’s reach
Cleaning Sewing Machines
Your sewing machine works hard, but it can’t clean itself! Keep your trusty companion running smoothly with these simple machine cleaning tricks.
| Cleaning Tool | Best For | Pro Tip |
|---|---|---|
| Pipe cleaner in coffee stirrer | Hard-to-reach spots | Creates perfect cleaning wand |
| Bicycle pump | Debris removal | Cheaper than canned air |
| Small brush | Lint and thread bits | Use gentle circular motions |
Regular sewing machine maintenance prevents costly repairs and keeps your stitches perfect.
Proper sewing machine cleaning is essential to extend the life of your machine.
How to Sew Hacks

Master these fundamental sewing hacks and you’ll wonder how you ever crafted without them. Smart sewers know that the right techniques can transform frustrating projects into smooth sailing adventures.
These sewing tips and fabric hacks will revolutionize your creative process.
Here are three essential sewing shortcuts every crafter should master:
- Thread the needle backwards – Pull both thread ends through the eye together instead of struggling with single strands
- Use washi tape as your guide – Stick it parallel to your seam line for perfectly straight stitching every time
- Leave your needle down – Always keep it in the fabric when pivoting for sharp, professional corners
These stitch secrets and thread tricks will save you countless hours of rework and frustration. Understanding sewing hacks is vital for improving overall sewing efficiency and quality.
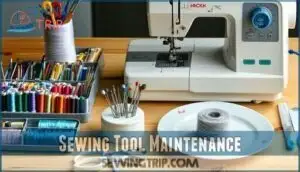
Sewing Tool Maintenance
Your sewing tools work harder when they’re properly maintained, and a few simple hacks can keep them performing like new for years.
From using steel wool to keep pins sharp to cleaning your iron with salt and vinegar, these maintenance tricks will save you time and frustration in your next project.
Using Steel Wool
Here’s your steel wool hack that’ll change everything.
Use steel wool as a pin cushion – it’s like magic for pin sharpening and needle care. Every time you push pins through, the steel wool naturally sharpens them.
This prevents fraying and keeps your tools razor-sharp. It’s one of those brilliant sewing tricks that costs pennies but delivers professional results.
Your pins will glide through fabric like butter. For effective tool maintenance, consider using steel wool products to keep your sewing kit in top condition.
Cleaning Irons
Your iron collects grime faster than you’d think.
Mix equal parts salt and vinegar to create a natural cleaning paste that cuts through stubborn buildup on the soleplate. This mixture works wonders for scale removal and restores your iron’s steam function.
For tight spaces between buttons, grab your hair straightener – it’s perfect for precision pressing where your regular iron can’t reach.
Extending Thread Spool Life
Your thread stash doesn’t have to become a tangled mess that makes you want to scream.
Keep spools organized with toe separators for easy color identification and thread selection. Use serger thread to reinforce regular thread for extra strength.
Store bobbins properly to prevent thread tangle prevention nightmares. Clean spools regularly and consider yarn alternatives for heavy-duty projects.
Smart spool management and fiber preservation techniques will save you money and frustration.
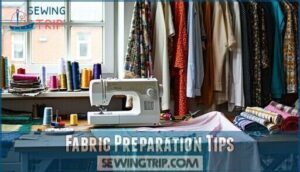
Fabric Preparation Tips
Proper fabric preparation can save you hours of frustration and prevent your finished projects from looking homemade.
These simple prep steps will transform your sewing results from amateur to professional-quality every time.
Preventing Shrinkage
Smart sewers know that Pre Washing your fabric is the ultimate Shrinkage Control trick.
Wash cotton and linen fabrics before cutting to remove up to 10% potential shrinkage.
Use lukewarm water and gentle cycles for ideal Fiber Care.
This simple Fabric Prep step prevents your finished project from becoming a doll-sized disaster after its first trip through the laundry.
Minimizing Fraying
Nothing ruins a sewing project faster than fabric edges that unravel like a dropped ball of yarn.
When you’re working with fabrics prone to fraying, these fray prevention techniques will save your sanity and your seams:
- Use pinking shears – Cut fabric with these zigzag-edged scissors to naturally prevent fraying along raw edges
- Apply zigzag stitching – Sew along fabric edges before construction for effective edge sealing and fabric stabilizing
- Try serger finishing – Create professional seam finishes that lock threads in place while trimming excess fabric
- Use fray-check liquid – Apply this clear solution to cut edges for instant fray reduction on delicate fabrics
These hem hacks and seam finishing methods transform potentially frustrating fabric fraying into a manageable step in your sewing process.
Identifying Fabric Grain
Finding the fabric grain doesn’t require detective skills—just look for clues!
The selvage edge runs parallel to the lengthwise grain, while the cross grain stretches perpendicular.
Clip into the selvage and pull a loose thread to reveal the cross-grain direction.
Understanding fabric orientation and grain lines guarantees your projects hang correctly and wear beautifully over time.
Sewing Techniques Explained
You’ll master three essential sewing techniques that transform your projects from amateur to professional. These methods solve common stitching problems while creating cleaner, more durable results every time.
Double Needle Stitching
Perfect for professional-looking hems, the double needle thread hack creates two parallel stitches that won’t break when fabric stretches.
You’ll need two thread spools feeding through separate guides to one bobbin.
Proper stitch tension prevents tunneling between lines, and this sewing technique mimics store-bought garments and reduces sewing time by 40% on finishing work, making it a great way to achieve a professional-looking finish.
Gathering Fabric
Fabric gathering transforms flat material into beautiful ruffles and texture through strategic thread manipulation. Whether you’re creating elegant curtains or playful skirt details, mastering fabric ruching opens endless creative possibilities.
Here’s how to gather fabric like a pro:
- Zigzag over yarn – Place yarn along your seam line and sew zigzag stitches over it without catching the yarn
- Use crochet thread – Substitute regular thread with stronger crochet thread to prevent breaking during gathering
- Adjust thread tension – Loosen your upper thread tension slightly for easier fabric manipulation
- Pull gently – Gather by pulling the yarn or bobbin thread, distributing ruffles evenly as you work
- Secure with backstitching – Lock your gathers in place with a few backstitches before continuing your project
This stitch technique creates uniform pleats without the frustration of broken threads during ruffle creation.
Sewing Perfect Corners
When you’re ready to pivot, leave that needle down and lift your presser foot.
This corner technique creates razor-sharp turns every time.
Rotate your fabric carefully, keeping seam allowance consistent.
Lower the foot and continue stitching.
Your binding will look professionally finished with crisp corner turning, making your turning projects shine with perfect stitch alignment and flawless edge finishing.
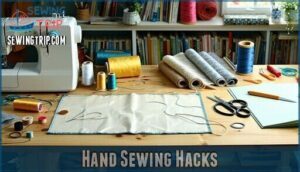
Hand Sewing Hacks
Hand sewing doesn’t have to be a tangled mess of frustration and crooked stitches. These simple tricks will transform your handwork from amateur hour to professional-level precision in no time.
Preventing Thread Tangles
Thread tangles can turn your sewing project into a frustrating mess faster than you can say "knot again!"
Start without tying knots by folding your thread in half and pulling both ends through the needle’s eye. This double needle thread hack prevents tangles from the get-go.
For ultimate Thread Management and Tangle Prevention, use serger thread—it’s stronger and smoother than regular thread, giving you better Fiber Control and improved Sewing Efficiency throughout your project.
Using Wax on Thread
Strengthening your thread with wax transforms hand sewing from frustrating to fabulous.
Simply run thread across a candle or beeswax block before threading your needle. This thread coating prevents fraying and tangling while making needle threading easier.
The wax application creates stronger stitches that won’t snap under pressure, making your hand sewing techniques more reliable and professional-looking.
Creating Uniform Stitches
Want perfect hand sewing every time? Mark your finger with evenly spaced dots using a washable marker. This creates a natural stitch guide for consistent stitch length and spacing.
Your finger becomes a measuring tool, ensuring uniform stitches without constantly checking rulers. Practice basic hand sewing stitches using sewing tutorials, focusing on maintaining steady fabric tension and thread control for professional-looking results.
Mastering consistent stitches is essential for achieving uniform and professional-looking seams in various hand sewing projects.
Sewing Organization Ideas
A well-organized sewing space can transform your crafting experience from chaotic to completely enjoyable.
You’ll spend more time creating and less time hunting for that one specific thread color when everything has its perfect place, making the experience completely enjoyable.
Storing Bobbins
Tackle bobbin chaos by turning toe separators into instant bobbins storage—no more tangled mess.
Stack bobbins by color for easy thread organization. If you’re feeling crafty, make a bobbins case from an old mint tin.
These simple storage solutions keep your sewing supplies tidy and your sewing kit streamlined. Smart sewing organization means you’ll always find the right bobbin fast, with easy thread organization being key to efficient sewing.
Organizing Threads
Transform your sewing space with smart thread organization tricks.
Create a thread organizer using an old picture frame and dowel rods for easy access to every color.
Store spools by color coding them in clear containers or use toe separators for bobbin storage.
This fiber sorting system prevents tangles and saves time hunting for the perfect shade during projects.
Effective thread management involves using a thread organizer system to keep your workspace tidy, ensuring a more efficient and organized sewing experience with smart solutions.
Creating a Sewing Kit
Building your perfect sewing kit doesn’t have to be overwhelming. Start with these Sewing Essentials and expand as your skills grow:
- Sharp fabric scissors – designate these for fabric only
- Assorted pins and needles – store in magnetized bowls for easy access
- Quality thread in basic colors – organize with dowel rod systems
- Measuring tools and seam ripper – essential Sewing Notions for precision work.
Smart Tool Storage keeps your Sewing Supplies accessible and your Fabric Stash organized.
Creative Sewing Solutions
Sometimes you need solutions that go beyond basic sewing techniques, and that’s where creative problem-solving saves the day.
These clever hacks will help you tackle tricky repairs, transform old materials into something new, and handle challenging sewing situations with confidence.
Upcycling Old Fabrics
Beyond throwing away worn-out clothes, fabric recycling transforms forgotten textiles into treasures.
Material upcycling saves money while reducing waste – you’ll cut clothing expenses by 20% while keeping 92 million tons of textile waste from landfills.
| Project Type | Materials Needed | Time Required |
|---|---|---|
| Tshirt upcycling into tote bags | Old t-shirts, scissors, needle | 30 minutes |
| Denim patches for repairs | Worn jeans, fabric glue, thread | 15 minutes |
| Pillow covers from old sheets | Bedding, sewing machine, zipper | 45 minutes |
Garment refashioning breathes new life into closet casualties.
Turn men’s shirts into dresses, create grocery bags from worn tees, or add denim patches to strengthen weak spots.
Textile reuse isn’t just trendy – it’s practical sewing for beginners seeking sustainable solutions.
It’s about reducing waste and promoting creative recycling.
Using Bias Tape
Bias tape becomes your secret weapon for professional-looking sewing finishes without the fuss. This versatile fabric edging transforms raw edges into polished details, making hemming techniques a breeze for beginners and pros alike.
Here’s how to master bias tape applications:
- Create emergency "fake hems" – Apply bias tape over raw edges when you’re short on time or fabric for traditional hemming techniques
- Achieve crisp fabric edging – Use continuous bias tape making methods to get perfectly even sewing finishes on curves and straight edges
- Handle tricky fabrics – Let bias tape be your go-to sewing accessory for fabrics that fray easily or won’t hold a traditional hem
Attaching Buttons
Don’t let loose buttons drive you crazy! For button security that lasts, use dental floss instead of regular thread—it’s stronger and won’t break under stress.
Apply clear nail polish over your button threads to lock them in place. When choosing thread, match it to your fabric weight, not just color.
For proper button placement, mark spots with pins first. Smart button storage keeps spares handy inside coat sleeves.
To achieve professional results, understanding thread selection techniques is essential for a durable and long-lasting attachment.
Sewing Machine Maintenance
Your sewing machine works hard, so it deserves some TLC to keep running smoothly. These simple maintenance tricks will save you from frustrating breakdowns and keep your stitches looking perfect.
Cleaning With Pipe Cleaners
Your sewing machine’s tight spots need attention, and pipe cleaners are perfect cleaner tools for the job.
These flexible sewing accessories reach feed dogs, bobbin cases, and presser feet where lint loves to hide.
Machine cleaning becomes simple when you use pipe cleaner tips to dislodge debris removal challenges.
Keep several handy in your sewing organization kit—they’re reusable and work better than compressed air for stubborn thread bits stuck in corners.
Regular maintenance using proper pipe cleaner tools can help extend the life of your sewing machine with proper care.
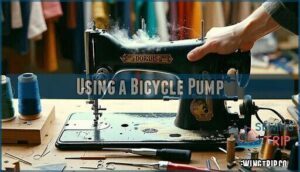
Using a Bicycle Pump
Canned air costs add up fast, but your trusty bicycle pump works just as well for sewing machine cleaning.
This air compression method blasts away lint and debris from hard-to-reach spots without breaking the bank. Your pump maintenance routine just got a serious upgrade with these bike pump tips for debris removal.
- Target tight spaces – Pump air into bobbin cases, tension discs, and threading paths where lint loves to hide
- Use short bursts – Quick puffs prevent overwhelming delicate machine parts while still providing effective cleaning power
- Check pump pressure – Test on fabric scraps first to verify that your air compression won’t damage sensitive components
- Clean pump nozzle – Wipe down the tip between uses to avoid transferring dirt back into your machine
Preventing Thread Breakage
Thread breakage happens when you least expect it, right in the middle of your masterpiece. Thread Conditioning with wax or hairspray creates stronger fibers for Breakage Reduction.
Strong thread saves your sanity when everything else falls apart.
Check your needle size—wrong needles create Weak Spot Identification issues. Proper tension settings prevent Tangle Control problems while maintaining Fray Prevention.
| Problem | Solution |
|---|---|
| Frayed thread ends | Spray with hairspray or dip in beeswax |
| Thread snapping | Use correct needle size for fabric weight |
| Tangled thread | Check machine tension and thread path |
| Weak thread spots | Apply wax coating for thread strengthening |
These sewing tips and tricks work for both machine and sewing without a machine projects, improving sewing efficiency through better needle organization.
Advanced Sewing Hacks
You’ll discover professional-level techniques that take your sewing skills from basic to brilliant in minutes.
These advanced tricks include using unexpected tools like hair straighteners for precision pressing and creating stunning textured designs that’ll make people think you’re a sewing wizard.
Sewing Invisible Zippers
Before diving into zipper alignment, you’ll want to master fabric preparation for seamless invisible zipper installation.
These zippers disappear into seams when done right, creating professional finishes that’ll make you feel like a sewing rockstar.
- Use specialized zipper feet for precise stitching along zipper teeth
- Press seam allowances open before installing for cleaner alignment
- Pin zipper face-down on fabric’s right side for invisible stitches
- Test zipper functionality before completing final seam construction
Creating Textured Designs
Transforming ordinary fabric into stunning textile art doesn’t require expensive materials. You can create gorgeous textured surfaces using simple techniques and everyday supplies.
| Technique | Materials Needed |
|---|---|
| Punch Needle textures | Punch needle tool, yarn |
| Fabric Embell gathering | Decorative threads, elastic |
| Sewn Details layering | Multiple fabric scraps |
| Create ruffle effects | Gathering fabric, stitch guide |
| Quilting Tips dimension | Batting, contrasting threads |
Try gathering fabric with elastic thread for instant texture, or layer different materials for depth. These techniques turn basic projects into showstoppers by adding a unique dimension to your work!
Using Hair Straighteners for Sewing
Your hair straightener isn’t just for styling—it’s a secret weapon for seam pressing and fabric smoothing.
These iron alternatives heat up in seconds, making them perfect for tight spaces like collars and cuffs.
Try this hair straightener hack: press bias tape and narrow hems with precision. Just test temperature settings first to avoid scorching delicate fabrics.
Frequently Asked Questions (FAQs)
Are sewing tips & hacks for beginners useful?
Beginner sewing tips save you tons of frustration and rookie mistakes.
They’ll teach you clever shortcuts like using binder clips on thick fabrics and keeping scissors sharp with aluminum foil cuts.
How many sewing hacks are there?
Picture yourself struggling to thread a needle for the tenth time – there’s definitely a hack for that.
The exact number of sewing hacks varies widely, but you’ll find hundreds across different sources.
From using hairspray to stiffen thread ends to repurposing steel wool as pin cushions, the creative solutions are endless and constantly growing.
Can sewing hacks change the way you sew?
Sewing hacks can absolutely revolutionize your approach.
They’ll streamline tedious tasks, solve common problems faster, and introduce clever shortcuts you never knew existed.
You’ll work more efficiently and enjoy the process much more, with sewing hacks that will streamline tedious tasks.
How many sewing hacks will change your life?
Ready to transform your sewing game?
These twelve game-changing hacks will revolutionize how you tackle every project.
You’ll discover steel wool pin cushions, freezer paper patterns, and hair straightener pressing tricks that’ll save time and frustration.
What are some easy sewing hacks?
Keep sharp fabric scissors handy on a ribbon necklace, use washi tape as sewing guides, and apply clear nail polish over button threads to prevent popping.
Are sewing hacks your weakness?
Actually, sewing hacks are my sweet spot! I’ve got tons of clever tricks up my sleeve, from using steel wool as pin cushions to threading needles with hairspray-stiffened thread.
What’s the hardest thing to sew?
Picture trying to sew a vintage leather jacket with metal studs—you’ll need heavy-duty needles, special thread, and serious patience.
Leather’s your toughest opponent because it doesn’t forgive mistakes, requires specialized tools, and one wrong stitch creates permanent holes you can’t fix.
How to fix broken zippers quickly?
Try lubricating the zipper with bar soap, candle wax, or petroleum jelly.
Gently work the slider up and down.
For stuck zippers, use pliers to carefully realign the slider tracks or replace a broken slider entirely.
Whats the best seam ripper technique?
When you need to "undo" your stitching mistakes, slip your ripper’s point under every third or fourth stitch, then lift gently. You’ll cut through threads without damaging fabric underneath.
How to sew stretchy fabrics properly?
Stretchy fabrics need a ballpoint needle and zigzag stitches to prevent breaking.
Use tissue paper underneath for stability, stretch gently while sewing, and finish seams with a serger or zigzag stitch.
Conclusion
Transforming your sewing skills doesn’t require expensive tools—just creativity and these how to sew hacks.
You’ve discovered that everyday items like aluminum foil, dental floss, and soap can revolutionize your crafting experience.
From sharpening scissors to preventing thread tangles, these simple solutions save time and money.
Whether you’re threading needles with hairspray or pressing seams with hair straighteners, you now have 50+ clever tricks at your fingertips.
Start implementing these game-changing tips today and watch your sewing projects transform from frustrating to fabulous.

