This site is supported by our readers. We may earn a commission, at no cost to you, if you purchase through links.

The real magic happens when you get creative. Try adding contrasting linings, decorative stitching, or even zippers for extra security. With a little practice, you’ll be sewing in pockets like a pro. Ready to take your sewing skills to the next level? Let’s explore some advanced pocket techniques next.
Table Of Contents
- Key Takeaways
- Essential Tools for Sewing in Pockets
- Creating a Custom Pocket Pattern
- Preparing Your Garment for Pocket Installation
- Cutting and Prepping Pocket Pieces
- Attaching Pockets to Garment Openings
- Sewing Different Types of Pocket Styles
- Finishing Touches for Sewn-in Pockets
- Troubleshooting Common Pocket Sewing Issues
- Enhancing Pockets With Decorative Elements
- Advanced Techniques for Professional-Looking Pockets
- Frequently Asked Questions (FAQs)
- Conclusion
Key Takeaways
- If you’ve ever struggled with where to put your phone, adding pockets can be a lifesaver. Start by choosing a sturdy fabric, such as denim or canvas, and follow precise steps, like aligning your pattern with the fabric grain. Trust me, it’s like following a treasure map—you’ll hit the jackpot with neat, functional pockets.
- Don’t underestimate the importance of tools. Grab a seam ripper and a measuring tape; they’re your trusty sidekicks in this sewing adventure. Think of them like wizards’ wands—difficult to conquer without them! You’ll be pinning and cutting with the precision of a master chef slicing vegetables.
- Feeling adventurous? Try sewing zippers or using contrasting pocket linings to add some flair. It’s a bit like adding sprinkles to a sundae—unexpected yet delightful. Experimenting with decorative stitches can also add a personalized touch that’s sure to impress.
- Sewing different styles, like inseam or patch pockets, lets you customize your clothes further. Keep in mind that each pocket type solves different issues, from holding keys securely to making plain clothes pop. It’s like being a fashion detective—finding the right solution for each garment challenge.
Essential Tools for Sewing in Pockets
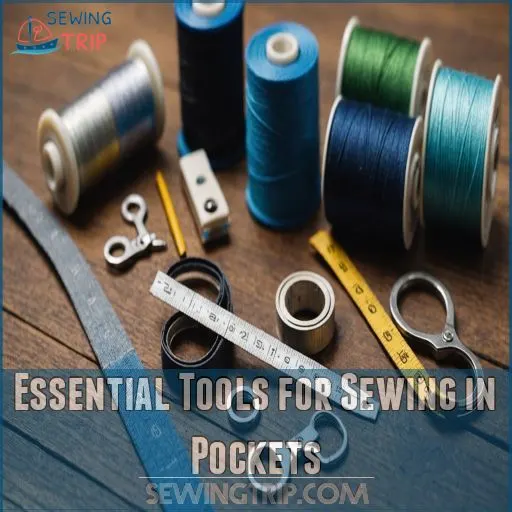
You’ll need the right tools to sew pockets like a pro.
From fabric selection to thread choices, and measuring tools to seam rippers, having the essentials on hand will make your pocket-adding adventure a breeze.
Fabric Selection for Pockets
The secret’s in the fabric, folks!
When selecting pocket material, think durability meets style. You’ll want a sturdy weave that can take the heat – literally.
Denim and canvas are your best bets. For a touch of luxury, consider a wool-silk blend. It’s wrinkle-resistant and drapes beautifully.
Remember, your pocket fabric should complement your garment’s weight and texture. Don’t be like me and choose based on color alone – you might regret it! This is a key point to keep in mind for a sturdy weave.
Sewing Machine and Thread Choices
Ready to rev up your sewing machine for pocket perfection? You’ll want an all-purpose polyester thread for most projects.
Choose thread weight based on fabric thickness – lighter for delicate fabrics, heavier for denim.
Match thread color to your garment or go bold with contrasting hues.
Don’t forget to adjust your bobbin tension and needle size accordingly.
With the right setup, you’ll be sewing like a pro in no time, achieving the right setup!
Measuring Tools and Marking Implements
Now that you’ve got your sewing machine humming, let’s talk about the unsung heroes of pocket-making: measuring tools and marking implements. You’ll feel like a pocket-sewing wizard with these in your arsenal, and a good set of tools is especially important for beginners.
Having the right tools can make all the difference in achieving accurate cuts and preventing fraying, and investing in high-quality options like rotary cutters and self-healing mats will revolutionize your fabric cutting experience.
- Measuring tape: Your trusty sidekick for precise pocket placement
- Tailor’s chalk: For leaving temporary marks that vanish like magic
- Water-soluble marking pencils: Perfect for those who prefer a cleaner slate
Remember, accuracy is your best friend in pocket making. No one wants a lopsided secret stash!
Cutting Tools and Seam Rippers
Armed with the right cutting tools, you’ll slice through your pocket-sewing projects like a hot knife through butter.
Let’s check out the essential arsenal for your sewing adventures:
| Tool | Use | Safety Tip |
|---|---|---|
| Fabric Shears | Precise fabric cutting | Keep away from paper |
| Rotary Cutter | Quick, straight cuts | Always retract blade |
| Seam Ripper | Removing stitches | Use finger-friendly blades |
| Cutting Mat | Protects surfaces | Replace when worn |
Remember, a sharp tool is a safe tool. Keep your blades in top shape for smooth sailing in your pocket-making voyage!
Creating a Custom Pocket Pattern
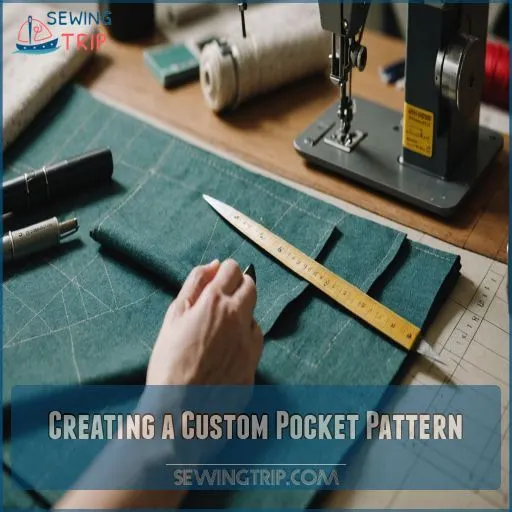
You’re about to become a pocket-pattern pro, transforming ordinary garments into storage-savvy masterpieces.
With a few simple steps, you’ll craft custom pockets that fit your hand like a glove and add a personal touch to your favorite clothes.
Drafting a Basic Pocket Shape
With your tools at the ready, let’s roll up our sleeves and craft your perfect pocket! Drafting a basic pocket shape is like sketching out your dream hideaway for treasure. You’ll create a custom pattern that’s uniquely yours, opening up a world of pocket possibilities.
Here’s how to get started:
- Trace your hand for a natural pocket width
- Experiment with depth for different uses (snack-sized or book-worthy?)
- Play with corners: rounded for softness, square for structure
- Consider lining options for a secret pop of personality
Sizing Pockets for Different Garments
Let’s take your pocket pattern up a notch! Different garments need different-sized pockets.
For dresses, aim for pockets measuring about 6" square. Consider the garment type, fabric weight, and your hand size when deciding on pocket dimensions.
For example, a flowy sundress might benefit from larger inseam pockets, while fitted trousers could rock sleek side-seam pockets.
Remember, the perfect pocket is like Goldilocks’ porridge – not too big, not too small, just right! It should be like finding the perfect fit – the pocket should be just right.
Adding Seam Allowances to Patterns
Now that you’ve sized your pockets, it’s time to add seam allowances to your pattern.
This extra space around the edges is your ticket to a perfect fit. Grab a transparent ruler and decide on your allowance width – typically 1-2cm for most seams.
Remember, different fabrics might need different allowances. For example, silk chiffon works best with narrow seams to avoid bulk.
Ready to give your pockets some breathing room?
Adjusting Patterns for Specialized Pocket Styles
After nailing those seam allowances, it’s time to jazz up your pockets!
Want angled pockets that’ll make heads turn? Simply tilt your pattern at the desired angle.
For hidden pockets, trace your original pattern, then add a secret opening.
Flap pockets? Draw a flap shape above the pocket opening.
Remember, pocket dimensions can make or break your garment, so measure twice, cut once!
Preparing Your Garment for Pocket Installation
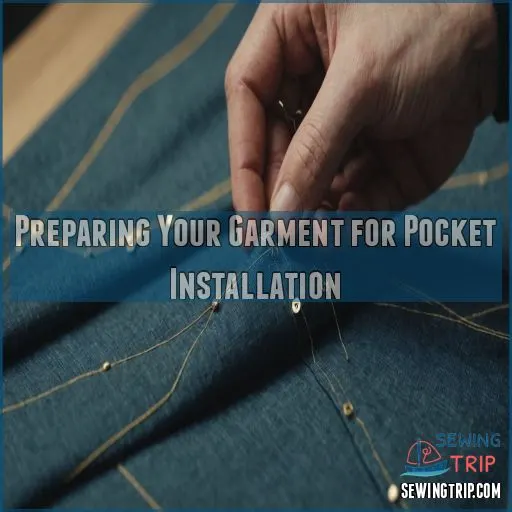
You’re about to turn your pocket-less garment into a storage-savvy masterpiece.
Before you start stitching, you’ll need to prep your clothing by finding the perfect pocket spot.
Marking it clearly, and carefully opening up any existing seams – it’s like creating a cozy new home for your keys and phone right on your favorite outfit, a cozy new home.
Identifying Optimal Pocket Placement
Pinpointing the perfect pocket placement is like finding the sweet spot in billiards – it’s all about balance and function.
You’ll want to keep in mind:
- Garment style: Tailor placement to complement the overall design
- Body mechanics: Position pockets where they’re easy to access
- User comfort: Avoid areas that might cause discomfort or muscle imbalance
Remember, sewing is creative, so trust your instincts. With practice, you’ll develop a keen eye for pocket positioning that’s both practical and stylish.
Marking Pocket Openings on Garments
You’ve found the perfect pocket placement, so let’s get marking!
Grab your trusty disappearing pen or chalk marker – they’re like magic wands for sewers.
On your garment’s right side, draw a straight 4" line for the pocket opening. Add dots 1/2" in from each end – these’ll be your cutting guides.
Remember, precision is key here, so take your time. It’s like drawing a treasure map, but the X marks your future pocket!
Opening Existing Seams for Pocket Insertion
Now that you’ve marked your pocket openings, it’s time to get your seam ripper out and open those seams!
Grab your trusty seam ripper and channel your inner surgeon – we’re about to perform a little garment surgery .
Carefully unpick the stitches between your placement pins, going about an inch past each mark.
Remember, sewing is fun and empowering, so take your time and enjoy the process of giving your garment a pocket makeover!
Reinforcing Areas Around Pocket Openings
After opening seams for pocket insertion, keep the fabric intact by reinforcing pocket openings.
Follow these pocket reinforcement techniques:
- Use bar tacks: Prevent pocket tears with these durable zigzag stitches.
- Apply interfacing: It strengthens fabric around openings.
- Reinforce corners: Triangle stitches offer durability.
- Choose stitch types wisely: Different stitches add flair and resilience.
Embrace these methods; sewing is an art!
Cutting and Prepping Pocket Pieces
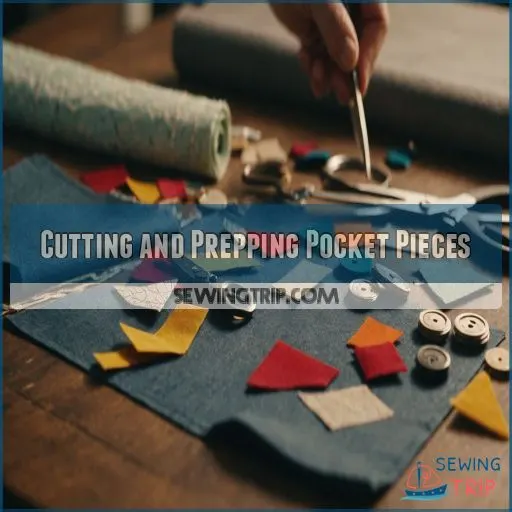
Cutting and prepping your pocket pieces is an important first step in sewing them into your garment.
Lay out your fabric efficiently, cut the pieces with precision, interface them for stability, and press and shape the components.
These simple techniques will set you up for pocket-sewing success.
Laying Out Fabric for Efficient Cutting
Laying out fabric efficiently means respecting the fabric grain. Align your pattern pieces with the lengthwise grain for strength and style.
Aim for pattern matching while minimizing waste to maximize yield—an artist’s balancing act!
Imagine sewing a tote bag or zipper pockets with precision. Remember, sewing is therapeutic and a passion worth every moment.
| Term | Description |
|---|---|
| Fabric Grain | Direction of threads in fabric |
| Pattern Matching | Aligning designs across pieces |
| Cutting Layout | Arrangement of pattern on fabric |
| Minimizing Waste | Efficient use of fabric space |
Cutting Pocket Pieces With Precision
To make sure you get precise pocket pieces, start by aligning your pattern with the fabric grain.
This keeps your pocket from going wonky. Use sharp scissors—like a sculptor with a superpower—to follow the pattern accurately.
Remember, adding a seam allowance is key; it’s like giving your pockets a comfort zone.
Consider pocket decoration for a personal touch. Sewing truly is a lifestyle and requires sharp scissors.
Interfacing Pocket Pieces for Stability
Interfacing pocket pieces gives them the backbone they need, just like spinach for Popeye.
Choosing between fusible and sew-in interfacing depends on weight considerations and pocket shape impact.
Place interfacing strategically on the pocket pieces for extra stability.
Whether you’re working with cotton or jersey, the right interfacing type will make sure your pockets won’t sag or stretch out.
Pressing and Shaping Pocket Components
Think of pressing and shaping pocket components as sculpting fabric into the perfect shape.
- Pressing tools like a tailor’s ham for those tricky curves.
- Smart fabric choice—wool holds shapes well.
- Ironing techniques—use steam to set shapes.
These steps will make your pockets look sharp and professional.
Attaching Pockets to Garment Openings
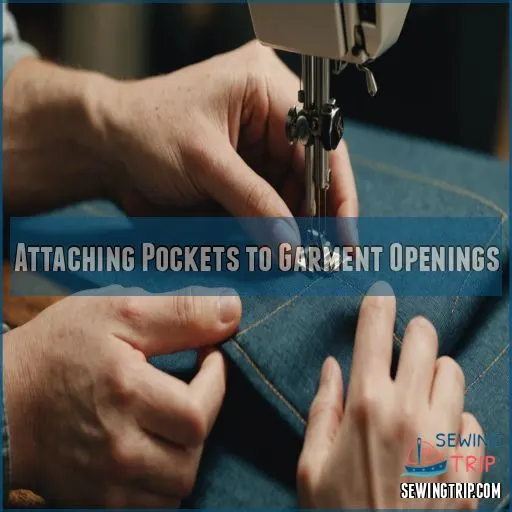
Attaching pockets to garment openings can transform your clothes from ordinary to practical wonders.
With a few strategic pins and stitches, you’ll secure those pockets snugly, ready to hold all your essentials—just don’t blame them if they can’t find your keys!
Pinning Pockets in Place
Imagine: you’ve cut your pocket pieces and now it’s pinning time.
Align the fabric carefully, ensuring perfect pocket placement. Use reliable pinning techniques to keep everything steady, securing pins firmly.
Prevent shifting by double-checking alignment, like guiding a wayward toddler. Remember, your goal is a seamless, functional pocket; precision here saves you headaches later.
Happy pinning!
Sewing Pocket Edges to Garment Seams
Carefully pin the pocket to the garment, aligning the edges.
Sew along the side and bottom seams, pivoting at the corners. Be sure to stitch 1/8" from the fabric’s edge for a polished look.
When sewing the side seam, sew up to the pocket, pivot, and sew around the pocket’s perimeter.
Press the seam allowances to finish like you would after sewing curves
.
Reinforcing Pocket Corners for Durability
Reinforce pocket corners with bartack stitching for durable pocket construction.
Start by using a zigzag stitch set at 0.2mm length and 3-3.5mm width.
This strengthens pocket stress points, preventing fabric from tearing over time, especially with heavy use.
For added flair, try an X stitch or triangle for both function and style—a handy trick for any garment upgrade, which adds durable pocket construction and heavy use functionality.
Pressing Seams for a Professional Finish
To finish your pockets like a pro, use pressing tools thoughtfully—consider fabric type and seam allowance.
Don’t skip pressing; it’s essential for that sleek look. Iron with precision, and avoid pressing mistakes like stretching fabric.
Remember, a firm pressing ham can hug those curves, giving you the control needed for a seamless finish. Your pockets will thank you!
Sewing Different Types of Pocket Styles
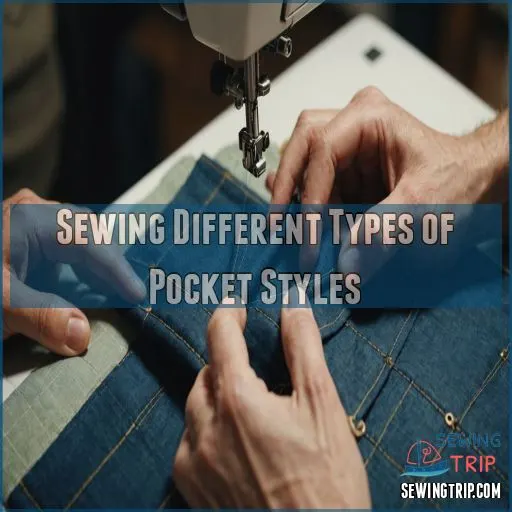
When it comes to sewing different pocket styles, you’ll find options from discreet inseam pockets perfect for skirts to practical patch pockets for casual outfits.
Whether you’re adding a neat welt pocket to a structured jacket or a secure zippered pocket for extra safety, each style brings its own flair and functionality to your garments.
Inseam Pockets for Dresses and Skirts
Installing inseam pockets in dresses and skirts adds flair and function. Begin by deciding pocket placement—think about where your hands naturally rest.
Cut your pockets to fit comfortably, allowing both style and functionality. Attach them, aligning with side seams.
Understitch edges for durability, ensuring your pockets handle daily use. Voilà, your confidence-boosting secret is stitched in with flair and function.
Patch Pockets for Casual Wear
Patch pockets add charm and practicality to casual wear. Envision them as square or rectangular panels sewn onto your garment with care, often using a thinner material for a more subtle look.
To add an extra layer of strength, consider using a sturdy topstitch or zig-zag stitching.
Experiment with patch pocket placement and infuse flair using pocket embellishments or contrasting pocket fabrics. Play with pocket size and shape to suit your style, and remember, these pockets make your outfit both functional and fun.
Welt Pockets for Tailored Garments
Ever wondered how to add that polished touch to your custom garments?
Welt pockets are your secret weapon. Welt pocket placement and construction is crucial—ensure they’re symmetrical and neatly finished for professional flair.
Experiment with welt pocket variations; it keeps designs fresh.
Zippered Pockets for Added Security
Zippers add extra security to your pockets, keeping valuables safe.
Here’s how to sew them in:
- Position the zipper behind the pocket opening and fuse it in place with fusible tape.
- Sew close to the edge, raising the presser foot to move the zipper pull out of the way.
- For a professional finish, topstitch around the pocket opening.
Finishing Touches for Sewn-in Pockets
To give your sewn-in pockets a professional finish, focus on neat topstitching and carefully trim excess fabric for clean edges.
Test the pocket’s functionality by checking the fit, ensuring it can safely hold essentials like your phone or favorite snack, which is key to the pocket’s functionality.
Topstitching for Decorative Accents
Let’s give your pockets a snazzy finish with topstitching! Choose contrasting thread to highlight your design or blend in with matching hues. Use patterns like crisscrosses to add flair.
Here’s a table of ideas:
| Technique | Thread Choice | Stitch Pattern |
|---|---|---|
| Straight | Contrasting | Simple lines |
| Triple Stitch | Matching | Crosshatch |
| Decorative Stitch | Bold, colorful | Wavy lines |
Stitch creatively!
Trimming and Grading Seam Allowances
To achieve neat pocket edges, remember to trim and grade seam allowances with care.
Trimming basics involve cutting excess fabric, reducing bulk, and ensuring your seam lines stay smooth. Use grading techniques by layering the seam allowance to create clean pocket finishes.
It’s like customizing a puzzle to fit perfectly, making your pockets shine with clean pocket finishes .
Pressing Completed Pockets
Perfectly pressed pockets are the cherry atop your sewing sundae.
Use these steps to maintain that crisp finish:
- Choose the right pressing tools: Try a tailor’s clapper or seam roll.
- Test on fabric scraps: Prevent surprises.
- Shape the pocket: Achieve symmetry.
- Know fabric types: Avoid melting mishaps.
Testing Pocket Functionality and Fit
Check the pocket depth with a trusty pen; it should fit comfortably yet not get lost.
Walk around or maybe dance to make sure weight distribution doesn’t make your pocket sag awkwardly.
Try retrieving an object to make sure easy access.
Troubleshooting Common Pocket Sewing Issues
Even the most skilled stitchers face hiccups when sewing pockets, but don’t worry—common problems have straightforward fixes.
Whether you’re dealing with puckered seams or pockets that gape wider than a yawn, a few adjustments can get your project back on track, and help you overcome these common problems with a few adjustments.
Fixing Puckered Pocket Seams
Ugh, those pesky pockets!
Don’t worry, we’ve got your back. First, check your seam allowance – it might be too narrow, causing fabric to pucker.
Try using a slightly larger needle size and adjusting your tension. Pressing the seams can also help smooth things out.
With a little finessing, you’ll have those pockets looking sharp in no time!
Adjusting Pocket Depth and Width
To adjust pocket depth and width, focus on three key factors:
- Pocket depth impact: Consider what you’ll carry; deeper pockets hold more but can sag.
- Pocket width effect: Avoid overly wide pockets; they can distort garment lines.
- Sizing for comfort: Make sure hands fit comfortably, with alterations for fit as needed.
When choosing a pocket style, you can opt for a patch pocket, which is simple and versatile, or a welt pocket, which is sleek and professional – learn more about sewing a pocket. It’s also essential to measure for proper pocket placement to make sure a comfortable fit.
Remember, design considerations are essential.
Repairing Torn Pocket Corners
When your pocket corners tear, don’t worry—reinforcing corner seams is easier than it sounds.
Start by choosing repair materials like sturdy thread and iron-on patches.
Patch the torn fabric carefully, ensuring a snug fit. This will prevent future tears and keep your pockets functional. A little patience and attention to detail go a long way!
Resolving Pocket Gaping Problems
Solving pocket gaping involves tackling fabric tension and seam allowances.
Choose sturdy pocket linings to manage stretch, and consider adjusting pocket placement to reduce pull.
Reinforcement techniques like adding interfacing or twill tape at the pocket edges can help prevent unwanted gape.
As a bonus, sewing humor tells us: "It’s all in the details, seamsters!" (Source).
Enhancing Pockets With Decorative Elements
Ready to make your pockets pop?
By adding decorative elements like contrasting linings, unique stitching, and playful trims, you can transform a plain pocket into a standout feature that adds personality to any garment.
Note: No changes were made as there was only one paragraph provided.
Adding Contrasting Pocket Linings
Imagine surprising someone with a pocket that pops! With contrasting pocket linings, you can achieve that.
Here’s how:
- Fabric choices: Select a lining fabric like silk or cotton for durability and feel.
- Lining techniques: Secure lining with precise stitching, similar to those used in sewing tucks designs sewing tucks designs
.
- Color combinations: Choose complementary colors for visual impact.
- Contrasting styles: Go bold for a statement piece.
Incorporating Decorative Stitching on Pockets
Ever considered enhancing pockets with decorative stitching? Use pocket stitching techniques to add flair with contrasting thread colors or embroidery designs.
Try a vintage pocket style for a dash of nostalgia or explore decorative buttonholes for extra charm.
For a unique touch, consider adding a monogram with embroidery stitches for monogramming clothes, like a split stitch for clean lines or a running stitch for a simple yet elegant look. With these touches, your pockets will be as stylish as they’re functional—it’s sewing that truly stands out!
Embellishing Pockets With Trims and Appliques
Elevate your pockets with decorative trims and appliques!
Start by selecting complementary fabrics, ribbons, or lace.
Then, sew them onto your pockets using these three easy steps: Position the trim or applique where desired, pin it in place, and stitch along the edges to secure.
Add a touch of personality to any garment!
Creating Unique Pocket Shapes and Designs
Start your pocket adventure by exploring creative shapes like hearts or stars.
With thoughtful pocket placement, you can transform a dress or jacket. Add flair using pocket embellishments such as embroidery or trims.
Try incorporating pocket flaps or closures for added style and function. Sewing unique pockets gives your garments personality and a practical twist, making them truly yours, adding a special practical twist.
Advanced Techniques for Professional-Looking Pockets
Ready to elevate your sewing skills with pockets that look professionally finished?
Let’s explore advanced techniques, like using French seams for smooth interiors and installing invisible zippers, to give your garments a polished touch.
French Seams for Clean Pocket Interiors
Mastering French seams gives your pockets a crisp, polished interior, a technique you can learn about in the key sewing techniques section
.
Start by sewing wrong sides together with a narrow seam, then flip, press, and sew right sides to enclose raw edges.
Lightweight fabrics like cotton lawn work best for this technique.
For a professional finish, use a 3/8-inch seam allowance for the first seam to remain invisible on delicate fabrics, especially when working with sheer or lightweight materials like chiffon, silk, and linen – perfect for enclosing raw edges.
Adjust your sewing machine settings for precision, and don’t forget to troubleshoot common issues like puckering when working with thick denim fabrics
.
Bound Seams for High-End Garments
Bound seams transform your garments into high-end masterpieces. Unlike French seams, bound seams encase raw edges with fabric, offering strength and elegance.
Consider this when selecting fabric, as texture affects the look.
Here’s a quick tip list:
- Opt for bias binding
- Allow extra seam width
- Focus on neat edges
- Add finishing touches
Enjoy creating a professional appearance!
Invisible Zipper Installation in Pockets
You’ve conquered bound seams, now turn your attention to installing invisible zippers in pockets.
Carefully consider zipper placement and make sure the zipper length suits your pocket size.
Zipper insertion requires a steady hand and patience.
Use a hidden zipper foot for precision, and sew the pocket lining carefully to avoid bunching.
Master this, and your secret pockets will impress!
Lining Pockets for Added Durability
Lining pockets can dramatically boost durability, making them last longer. Choose your lining material wisely. Consider its wear resistance and suitability for the pocket type.
To avoid common mistakes, use:
- Moleskin: Soft and tough.
- Cotton drill: Strong, versatile option.
- Rip-stop fabric: Prevents rips.
- Fleece: Adds warmth and comfort.
Frequently Asked Questions (FAQs)
How do you sew a pocket on a dress?
Imagine your dress as a blank canvas.
You start by pinning pocket pieces on the side seams, sewing edges together with a 5/8-inch allowance.
Reinforce the openings, press the fabric, and voilà, pockets ready! .
Can you sew a pocket into your next project?
You can sew a pocket into your next project.
Start by deciding where you want it.
Cut and pin your pocket fabric, stitch along the seams, and presto – you’ve got yourself a handy pocket.
How do you sew inseam pockets?
Grab your fabric and align pocket pieces along the side seams.
Pin them in place, sew around edges, pivot at corners, and voila, hidden magic!
Make sure the edges are neat by finishing raw edges with a zig-zag stitch or using alternative serger-free techniques like pinking shears
.
Why is it important to sew different types of pockets?
Sewing different types of pockets enhances a garment’s function and style, providing versatility and personal touch.
Each pocket type suits specific needs, from securing items to adding decorative detail, ensuring your clothes are both practical and unique.
How to sew in seam pockets?
Imagine sewing as painting a hidden door.
Align pocket pieces with the garment’s side seam, pin them together, and sew around.
Press seams to lay flat, ensuring pockets invisibly blend in, like secret compartments in your clothing.
What stitch is used for pockets?
You’ll typically use a straight stitch to sew pockets onto your garment, stitching 1/8" from the edge for a clean, professional look. Don’t forget to reinforce the corners for extra durability!
How to stitch a side pocket?
Match the side seams, pin pockets, and sew with a ⅜" seam allowance.
When reaching the pocket, pivot and stitch around the curve.
Press seams toward the front.
Voilà, you’ve added a tidy side pocket!
How do I add pockets to anything?
To add pockets to anything, first cut two pocket shapes from fabric.
Pin them to your garment’s sides, aligning seams.
Sew around the pocket, ensuring it’s secure.
Turn it right side out, press, and you’re done!
How do I choose the right fabric for pockets?
Choosing fabric for pockets is like picking a trusty sidekick.
Opt for sturdy, non-stretchy materials like denim or canvas.
Avoid bulk by selecting lighter fabrics if your main material is thick.
Have fun with hidden prints too!
Can pockets be added without a sewing machine?
You can easily add pockets without a sewing machine by using iron-on adhesive tape or liquid fabric glue, ideal for projects requiring a sewing machine accessory
.
Choose non-fraying materials like felt, and simply glue the pocket sides and bottom to your garment (Source).
What basic stitches are best for pocket sewing?
Start with a running stitch for temporary positioning, then use a backstitch for strength along pocket edges.
Make sure corners are reinforced with small triangular stitches for durability.
This combo’s as reliable as your favorite jeans!
How do I make pockets more durable?
Enhancing pocket durability involves reinforcing seams with double stitching, using sturdy fabric like denim, and adding interfacing for extra strength.
Consider lining your pockets, too, as this can prevent wear and tear over time (Source).
Can I add pockets to non-clothing items?
Pockets aren’t just for clothes – you can add them to bags, journals, and even furniture!
With a little creativity, you can transform any item into a pocket-friendly companion.
The possibilities are endless!
Conclusion
Ever wondered why some garments look extra finished? It might be those pockets!
Armed with these pro secrets on how to sew in pockets, you’re ready to upgrade your wardrobe like a true designer. From choosing the right fabric to mastering different pocket styles, you’ve got the tools to create practical and stylish additions.
Get started, experiment a little with those decorative touches, and watch as your sewing projects stand out. Go ahead, make those pockets pop, and add a stylish touch to your garments.

