This site is supported by our readers. We may earn a commission, at no cost to you, if you purchase through links.
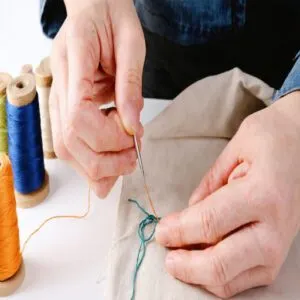 To sew with a needle and thread, start by choosing the right needle and thread for your fabric—thin for delicate fabrics, thicker for sturdy ones.
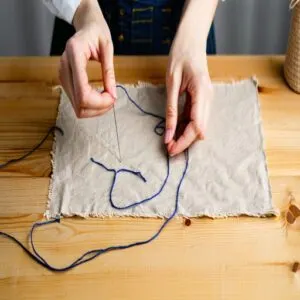
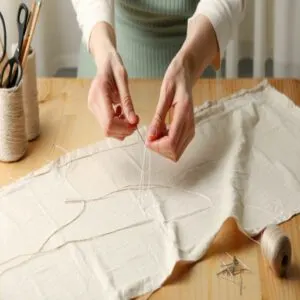
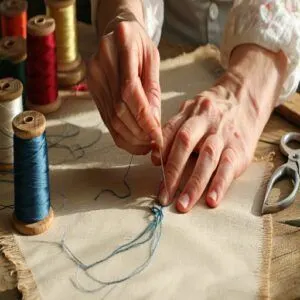
Cut a thread about the length of your forearm and thread it through the needle’s eye. Knot one end by looping it and pulling tight.
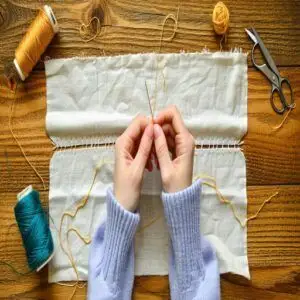
For a simple running stitch, poke the needle through the fabric, pull it up, and repeat in small, even stitches. Secure the thread with a knot when you’re done.
Practice holding the fabric steady and keeping stitches consistent—mastery comes quickly! Want seamless edges? A quick whip or slip stitch does wonders.
Table Of Contents
- Key Takeaways
- Essential Sewing Tools and Materials
- Threading a Needle: Tips and Techniques
- Tying Knots: Securing Your Thread
- Basic Hand Sewing Stitches
- Advanced Stitches for Decorative and Functional Purposes
- Proper Sewing Techniques and Best Practices
- Finishing Touches: Securing and Hiding Stitches
- Troubleshooting Common Sewing Issues
- Sewing Projects for Beginners
- Frequently Asked Questions (FAQs)
- Conclusion
Key Takeaways
- Choose the right needle and thread combination for your fabric; use thinner needles and threads for delicate fabrics and thicker ones for sturdy materials.
- Master basic stitches like the running stitch, backstitch, and whip stitch to handle common repairs and create durable seams.
- Thread your needle cleanly and securely by trimming the thread end, knotting it properly, and using tools like a needle threader if needed.
- Always maintain consistent stitch length and thread tension, and keep tools like scissors, measuring tape, and a seam ripper in your kit for professional results.
Essential Sewing Tools and Materials
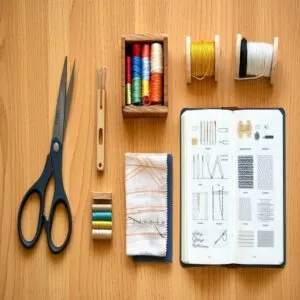
You’ll need just a few basic tools to start your sewing journey, including sharp scissors, proper needles for your fabric type, sturdy thread that matches your project, and a trusty measuring tape.
Whether you’re fixing a loose button or creating something new, these essential items will help you tackle any sewing project with confidence.
Needles and Thread Types
Picking the right needle and thread combo can make or break your sewing project.
Here’s what experienced sewers always check:
- Match your thread weights to your fabric – lighter threads for delicate silks, heavier ones for denim
- Choose needle sizes (1-12) based on your fabric type – smaller numbers mean bigger needles
- Consider thread colors that either blend in or stand out for decorative effect
For everyday projects, grab all-purpose polyester thread and universal needles (size 8-10).
They’re like the Swiss Army knife of sewing!
Understanding sewing needles is important for a successful project.
Scissors and Cutting Tools
When you’re diving into sewing, having the right cutting tools makes all the difference.
Think of your scissors as precision instruments – each type has its own superpower.
Keep these essentials in your kit:
- Fabric shears: Your primary weapon against cloth, keep these razor-sharp and fabric-only
- Pinking shears: The zigzag experts that prevent fraying edges
- Thread snips: Small but mighty embroidery scissors for precise thread trimming
For high-quality results, it’s vital to choose high-quality sewing fabric tools.
Remember: Treat your cutting tools like fine kitchen knives – they’ll stay sharp longer.
Measuring and Marking Tools
Now that your scissors are ready, let’s get precise with your measurements.
A flexible measuring tape wraps perfectly around curves, while sewing gauges and rulers keep your lines straight as an arrow.
For accurate measurements, using a measuring tape is essential for sewing projects.
Mark your fabric with tailor’s chalk or fabric markers – they’ll vanish when you’re done.
Keep a pincushion loaded with pins nearby to hold pieces in place, and always have a seam ripper handy for those oops moments.
Fabric Selection and Preparation
Starting your sewing journey? Let’s pick the perfect fabric types. Cotton, linen, and flannel are your best friends – they’re stable and forgiving for beginners learning basic sewing techniques.
For a closer examination of needle and thread selection, explore this helpful needle selection guide.
Before threading that first needle, always pre-wash your chosen fabric to prevent future shrinkage surprises. A quick iron removes wrinkles and helps analyze the weave pattern. Different fiber contents need specific thread weights, so match them carefully for the best results.
Threading a Needle: Tips and Techniques
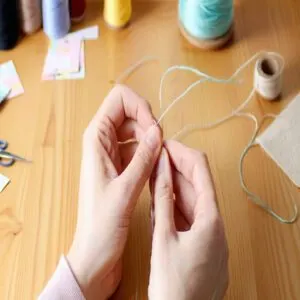
Threading a needle doesn’t have to feel like an impossible mission.
A few tricks can turn this tiny task into a quick win:
- Trim the thread cleanly with sharp scissors; this helps it glide through the needle eye with ease.
- Try a thread conditioner—it smooths frayed ends and improves grip.
- Use a needle threader for those hard-to-see needle eyes.
It’s like a secret weapon for threading speed and precision!
A little prep goes a long way in conquering needle threading frustration.
Tying Knots: Securing Your Thread
Securing your thread with the right knot is the first step to making your stitches last.
Whether you’re using a single strand or doubling up, a strong knot keeps everything in place and avoids frustrating slips.
Single Thread Knots
Single-thread knots are straightforward yet essential for secure fastening.
To tie one, wrap the thread around your finger, roll it into a loop, and pull tight.
Looking for options? Here’s a quick breakdown:
| Knot Name | Uses | Strength |
|---|---|---|
| Simple Loop Knot | Basic sewing projects | Medium |
| Slip Knot | Adjustable for quick fixes | High |
| Overhand Knot | General-purpose stitching | Strong |
Master these for hassle-free thread management!
Double Thread Knots
Double thread knots are like giving your stitching a safety net.
They strengthen your seams and are perfect for high-tension areas.
Here’s how to tie one:
- Double your thread and thread both ends through the needle.
- Loop the thread around your finger and roll it into a secure knot.
- Tighten it snugly to guarantee maximum knot security.
Ideal for thick fabrics!
Loop and Slip Knot Methods
In the context of knot security, loop and slip knots are game changers.
A loop knot is perfect for creating consistent thread loops, while a slip knot works wonders for quick adjustments.
Here’s a quick comparison:
| Knot Type | Best For |
|---|---|
| Loop Knot | Steady thread control |
| Slip Knot | Quick adjustments |
| Single Thread | Light tasks |
| Double Thread | Heavy-duty stitching |
| Needle Threader | Easier threading steps |
Master these techniques to elevate your sewing!
Basic Hand Sewing Stitches
Learning a few basic hand sewing stitches gives you the tools to fix rips, hem clothes, or create small projects.
With just a needle, thread, and a little patience, you’ll be stitching like a pro in no time.
Running Stitch
The running stitch is the bread-and-butter of hand sewing basics. It’s quick, versatile, and ideal for beginners.
The reasons for its versatility include:
- Works on almost any fabric choice, from light cotton to heavy canvas.
- Easy to master, just thread your needle, weave in, out, repeat.
- Adjust stitch length for different jobs—longer for basting, short for stronger seams.
Focus on stitch consistency and controlled thread tension for professional results.
Backstitch
Mastering the backstitch is your next step to sewing precision. It’s all about strong seams and control.
The process involves a few key steps:
- Pull up your needle at the starting point.
- Take a small stitch backwards into the fabric.
- Bring the needle up one stitch-length further ahead.
- Push it through the end of the previous stitch.
It’s a simple yet reliable technique!
Straight Stitch
Once you’ve got the backstitch down, let’s focus on the trusty straight stitch.
It’s simple, neat, and a must-know for hand sewing.
Follow these steps:
- Start: Thread your needle, knot the end, and push it up through the fabric from the underside.
- Stitch: Insert the needle 1/4" ahead, then pull through.
- Finish: Tie off securely.
Stitch consistency keeps seams strong!
Basting Stitch
The basting stitch is your go-to for temporary stitching and a must-know in any sewing tutorial.
It’s perfect for fabric preparation, holding pieces in place while you adjust stitch length or check fit.
This simple stitch is easy to remove and saves time when hand sewing. To master various stitches, understanding basic hand stitching is essential for beginners.
Remember: keep thread tension light and focus on smooth, even stitches. Use it to test ideas before committing with more permanent sewing techniques.
Advanced Stitches for Decorative and Functional Purposes
When you’re ready to take your sewing skills up a notch, advanced stitches can add both beauty and strength to your projects.
Learn how to master stitches like the blanket, whip, zig-zag, and slip stitch to create decorative finishes or durable seams that stand the test of time.
Blanket Stitch
Master the blanket stitch for a decorative edge.
Pull thread near the fabric’s edge, create diagonal stitches, and loop the thread.
Adjust stitch length and thread tension for ideal stitch quality.
This versatile stitch is perfect for edging, appliqué, and visible mending, making it a great addition to your hand sewing techniques.
Whip Stitch
When it’s time for edge sewing or fabric joining, the whip stitch is your go-to. It’s quick, simple, and versatile.
Just align your fabric edges, thread your needle, and follow these steps:
- Sew in a spiral motion over the fabric edge.
- Maintain even stitch tension for a neat finish.
- Use for seam reinforcement or crafting soft toys.
Understanding the stitch differences is essential for selecting the right technique for your project.
This hand sewing technique gives projects a polished, durable edge while keeping everything snug and tidy.
Zig-zag Stitch
Zig-zag stitches let you handle tricky fabrics like stretch or fray-prone ones—no sewing machine needed.
Here’s how:
- Poke your needle from the wrong side.
- Angle it diagonally 1/4 inch and pull through.
- Reinsert into the first hole.
- Repeat, forming zig-zag patterns.
Great for elastic waistbands or embellishing fabrics with flair and durability!
Slip Stitch
The slip stitch is your go-to move for invisible seams and clean finishes.
Start by threading a needle and knotting the end. Bring the folded fabric edges together, then “slip” your needle through the fold, grabbing just a few threads.
Repeat in small, even movements, keeping consistent stitch tension. This technique creates a seamless effect, perfect for hemming or joining fabrics discreetly.
Hand sewing tips don’t get sleeker than this!
Proper Sewing Techniques and Best Practices
In the context of sewing, holding the needle and fabric correctly and keeping your stitches even are game changers.
Add a thimble for finger safety, and figure out what feels natural whether you’re right- or left-handed.
Holding The Needle and Fabric
When holding the needle and fabric, comfort is key.
Keep a relaxed grip and steady hand to maintain control.
Follow these steps:
- Needle grip: Pinch the needle midway for balance and smooth motion.
- Fabric control: Keep fabric taut but not stretched; use your non-dominant hand.
- Thread tension: Gently guide thread to maintain stitch alignment.
Maintaining Consistent Stitch Length
How do you keep your stitch control razor-sharp?
Start by drawing stitch guidelines with a washable pen. Focus on steady needle movement and match your rhythm to fabric stretch and thread tension.
Practice hand sewing techniques until stitches are uniform.
Use this guide:
| Fabric Type | Stitch Length | Needle Size |
|---|---|---|
| Lightweight | Short | Size 8-9 (Sharps) |
| Medium Weight | Medium | Size 10-12 (Universal) |
| Heavyweight | Long | Size 14-16 (Jeans) |
Using a Thimble for Protection
Protect your fingers—it’s time to meet the thimble, your armor against needle pricks! Though it may feel strange at first, it’s worth it for tough fabrics and longer sessions.
- Choose materials like metal, leather, or silicone.
- Look for a snug fit without wiggle.
- Use the tip to push needles safely.
- Avoid thumb-sized versions unless you need one.
- Try ergonomic designs for extra comfort.
Right-handed Vs. Left-handed Sewing
Once you’ve got your thimble, think about hand dominance.
For right-handers, the needle and thread move smoothly from right to left.
Lefties? It’s the opposite—start on the left and stitch to the right.
This is sewing ergonomics at work.
Adjust your angle, relax your grip, and practice with hand sewing needles till it feels natural.
Ambidextrous? You’ve got built-in flexibility!
Finishing Touches: Securing and Hiding Stitches
Securing and hiding stitches might seem like small finishing steps, but they’re key to a polished, long-lasting project.
You’ll learn how to neatly tie off threads, tuck away loose ends, and strengthen seams to keep your work looking clean and professional.
Ending a Seam
Ending a seam neatly locks in your work and guarantees it lasts.
Follow these steps:
- Stitch back over the last two stitches to secure.
- Tie a small thread knot close to the fabric.
- Trim thread trimming close for a clean look.
- Double-check knot security before finishing.
- Press and flatten the seam for a professional touch.
Hiding Knots and Thread Tails
Hiding knots and thread tails like a pro is easier than you think.
Here’s how:
- Bury the knot between fabric layers for a seamless look.
- Weave thread tails into nearby stitches for secure Thread Management.
- Trim excess thread close to the surface using sharp scissors.
- Add Hidden Stitches to conceal everything neatly, making your sewing project truly polished.
Reinforcing Weak Points
Now that those knots are out of sight, it’s time to strengthen your work.
Weak seams or thread breakage shouldn’t ruin your masterpiece! To further guarantee a flawless project, learning to hide sewing mistakes is essential for beginners.
Here’s how to reinforce high-stress spots:
| Area | Reinforcement Method | Why It Works |
|---|---|---|
| Seams | Double stitching | Boosts stitch security |
| Corners | Tight knotting | Prevents fraying |
| Buttonholes | Bartack stitches | Avoids thread wear |
| Pockets | Add interfacing | Keeps fabric reinforced |
These tricks are your safety net!
Troubleshooting Common Sewing Issues
When sewing doesn’t go as planned, it’s easy to feel frustrated,
but most problems have simple fixes.
Whether it’s tangled thread, uneven stitches, or a seam gone wrong,
understanding the causes helps you get back on track quickly.
Dealing With Tangled Thread
Tangled thread driving you nuts? It happens to everyone, but you can fix it fast. Here’s how:
- Use thread conditioners like beeswax or silicone to prevent knots.
- Keep thread ends clean—frayed ends are troublemakers.
- Untangle gently; forcing a knot only makes it worse.
- Watch your thread tension—too tight or loose creates chaos.
Stay calm, untangle, and keep stitching!
Fixing Uneven Stitches
Uneven stitches can be tricky, but here’s how you smooth them out like a pro:
- Slow your sewing speed: Rushing often leads to uneven stitching.
- Control stitch tension: Hold fabric firmly, avoiding excessive pull that can stretch your seams.
- Pick the right needle angle: It keeps stitches consistent.
- Check fabric stretch: Secure it taut, wrinkle-free, for even results.
To achieve professional-looking seams, understanding sewing machine maintenance is essential for preventing common issues.
Removing and Redoing Stitches
Mistakes happen, but fixing them is simple.
Use a seam ripper to slide under each stitch and cut the thread cleanly. Pluck loose threads with tweezers, leaving your fabric neat.
Here’s a quick guide:
| Tool | Purpose | Use |
|---|---|---|
| Seam ripper | Stitch removal | Cuts threads cleanly |
| Tweezers | Thread cleanup | Pulls out loose strands |
| Magnifier (optional) |
Now, redo your seam confidently.
Sewing Projects for Beginners
Starting with beginner-friendly projects is the best way to build your skills and confidence.
You can try fixing small tears, hemming pants, or sewing simple items like a pouch or a bookmark to practice basic techniques.
Simple Repairs and Mending
Time to fix what’s broken! With a needle, thread, and patience, you’ll handle:
- Fabric tears: Stitch edges together with a strong backstitch.
- Seam fixes: Reinforce loose seams with neat running stitches.
- Hole patches: Add stylish patches using a whipstitch.
- Thread breaks: Re-thread and secure ends tightly.
- Fallen hems: Reattach with small, consistent slip stitches.
Mending’s simple and keeps clothes lasting longer!
Creating Small Accessories
Feeling confident with basic stitching? Let’s put those skills to fun use by tackling easy sewing projects for small accessories.
These are perfect for beginners and don’t take forever. Try these ideas:
| Project | Skill Level | Approx. Time |
|---|---|---|
| Coin Pouches | Easy | 1-2 hours |
| Bag Charms/Key Chains | Very Easy | 30 minutes |
| Purse Making | Moderate | 2-3 hours |
Pick a fabric you love, add flair with embroidery, buttons, or creative zipper pulls!
Hemming and Basic Alterations
Hemming and making basic alterations can save your wardrobe and make clothes fit like a dream.
Try these quick fixes:
- Shorten long pants: Fold fabric, measure the seam allowance, and use hemming techniques for a clean finish.
- Take in baggy shirts: Adjust seams with basic stitches for garment fitting.
- Fix torn seams: Use simple sewing instructions to restore durability fast!
Frequently Asked Questions (FAQs)
How do you sew with a needle and thread for beginners?
85% of people say they’d love to fix clothes at home, but don’t know how.
Start simple: thread the needle, knot the end, and use basic stitches like running or backstitch to sew seams easily.
How do you set up a needle and thread for sewing?
Grab your needle and thread.
Snip a thread twice your needed length, trim the end cleanly, and push it through the needle’s eye.
Pull through, knot tightly at the end, and you’re ready!
How to sew on a patch with needle and thread?
Position the patch, pin it in place, and thread your needle.
Use a whipstitch or running stitch along the edges, keeping stitches tight and even.
Knot securely when done, and trim excess thread.
How to knot a needle and thread?
Wrap the thread around your finger, roll it into a small loop, and pull tightly to secure.
For double knots, repeat the process.
Practice guarantees the knot’s snug and secure every time.
How to thread a needle and sew?
Threading a needle feels like catching light in a jar.
Snip the thread clean, push it through the needle’s eye, and pull a tail.
For sewing, keep stitches even, tight, and purposeful.
Is there a trick to thread a needle?
Pinch the thread between your fingers, leaving a tiny bit exposed, and guide it through the needle’s eye.
A needle threader helps too—just pull the loop through, and you’re ready to go!
How do you sew something together with a needle?
Start by pinning your fabric together.
Push the needle through from one side, pull the thread tight, and repeat with small, even stitches.
Keep the tension consistent, and watch your edges stay perfectly aligned.
How to stitch a wound with a needle and thread?
Stitching a wound is no joke–it’s like playing surgeon for real.
Use a sterilized needle and thread, carefully sew small, even stitches across the wound, and keep tension balanced.
Always seek professional help when possible.
How do I choose the right thread thickness?
Pick thread thickness based on your fabric.
For light fabrics, use finer thread like 40wt; for thicker materials, go heavier, like 30wt.
Match thread strength to fabric durability, and you’ll get clean, lasting seams.
Can I sew without a thimble?
You can sew without a thimble, but your fingers might take a beating, especially with thick fabric.
If needles keep pricking you, try wrapping tape around your fingertip or using a rubber grip instead.
Conclusion
Sewing with a needle and thread might feel tricky at first, but take it stitch by stitch, and you’ll see how simple it can be.
Start with the basics: threading your needle, tying knots, and practicing a straight running stitch.
Before long, you’ll mend clothes, create seams, and maybe even personalize projects, whether you’re hemming pants or adding flair to fabric, knowing how to sew needle and thread opens a world of creative possibilities.
Ready to try?

