This site is supported by our readers. We may earn a commission, at no cost to you, if you purchase through links.
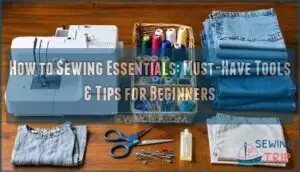 Mastering how to sewing essentials starts with gathering the right tools for your creative journey.
You’ll need various needles: medium-weight for general projects, denim needles for tough hems, and ball-point needles for stretchy fabrics.
Quality pins with ball heads make handling easier and prevent fabric snags.
Don’t overlook maintenance tools like fray check and sharp scissors for trimming seam allowances.
Always press your seams for professional results and replace needles regularly—they’re cheaper than ruined fabric.
Start with simple projects like hair scrunchies before tackling complex quilts.
The secret lies in understanding which tools work best for specific fabrics and techniques, and this is key to achieving professional results with your sewing, by using the right tools for the job, such as denim needles and ball-point needles.
Table Of Contents
Key Takeaways
- Match your needles to fabric type – You’ll prevent skipped stitches and fabric damage by using denim needles for heavy materials, ball-point needles for stretchy fabrics, and universal needles for medium-weight projects.
- Maintain your tools regularly – You should replace needles after 8-10 hours of sewing, press seams for professional results, and use fray check to prevent unraveling at stress points.
- Start with simple projects – You’ll build confidence and master basic techniques by beginning with hair scrunchies or pillowcases before attempting complex quilts or garments.
- Invest in quality basics – You need sharp fabric scissors, long pins with ball heads for easy handling, measuring tape, and a reliable sewing machine rather than fighting with old, temperamental equipment.
Sewing Essentials
Starting your sewing journey doesn’t require an arsenal of supplies, but the right sewing essentials make all the difference.
Your sewing kit should include quality sewing tools like sharp fabric scissors, measuring tape, and pins. Choose appropriate thread types for your fabric choices – cotton thread works well for most projects.
Basic sewing supplies include needles, seam rippers, and marking tools. Don’t forget measuring techniques require rulers and gauges, while ironing boards help create professional finishes.
These sewing basics form your foundation for success.
Needles
You’ll need different needle types to handle various fabrics and projects successfully. The right needle makes the difference between smooth stitching and frustrating problems like skipped stitches or fabric damage.
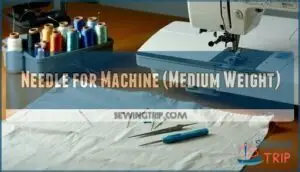
Needle for Machine (Medium Weight)
Choosing the right machine needle for medium weight fabrics sets the foundation for successful sewing projects. A size 80/12 universal needle works perfectly for cotton, linen, and polyester blends – your go-to choice for most everyday sewing.
Machine Needle Tips for medium weight fabrics require matching needle size to your fabric’s thickness. Thread Tension stays balanced when you pair the correct needle with appropriate thread weight. Sewing Speed should remain moderate to prevent needle bending or breaking.
Key considerations for medium weight fabric needles:
- Size 80/12 universal needles handle cotton and linen beautifully
- Replace needles after 8-10 hours of sewing time
- Match thread weight to prevent skipped stitches
- Keep spare needles handy for quick changes
- Store needles in original packaging to prevent dulling
Fabric Selection determines your needle choice – medium weight fabrics like quilting cotton, chambray, and canvas all thrive with this versatile size. A needle threader makes threading easier, especially with embroidery or specialty threads. These sewing essentials form the backbone of your sewing machine needles collection. Understanding needle size basics is essential for achieving professional results in your sewing projects.
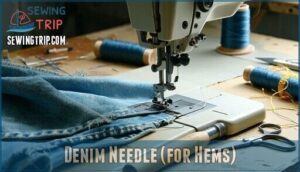
Denim Needle (for Hems)
Heavy-duty denim demands specialized sewing needles that won’t buckle under pressure.
Size 100/16 denim needles feature reinforced blades and sharp points designed to penetrate thick fabric layers without deflection or breakage.
These needles prevent skipped stitches and needle snapping that plague standard needles on heavyweight materials.
For denim hems, pair your needle with polyester or cotton-blend thread for maximum durability.
Fresh needles guarantee clean penetration through multiple fabric layers.
When hemming thick seams, use a mallet to flatten bulky areas before stitching, making your needle’s job easier and your results professional.
Using the right denim sewing needles is vital for achieving professional-looking results.
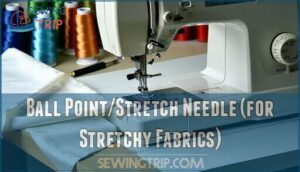
Ball Point/Stretch Needle (for Stretchy Fabrics)
Ball point needles are your secret weapon for conquering stretchy fabrics.
Their rounded tips slip between fibers instead of piercing them, preventing runs and snags in knit fabrics.
Unlike sharp needles that can damage stretch material, ball point needle creates smooth stitches without distorting fabric tension.
Choose size 70/10 for lightweight knits or 90/14 for heavier materials.
When fabric selection includes spandex blends or jersey knits, these sewing machine needles prevent skipped stitches.
Pair them with stretch stitches like zigzag for best results.
Your sewing knits will thank you as needle thread glides effortlessly through material.
These specialized sewing needles cost slightly more but save hours of frustration when working with t-shirts, leggings, or activewear.
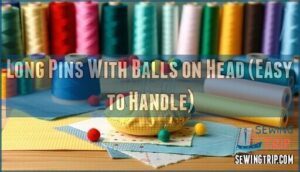
Long Pins With Balls on Head (Easy to Handle)
Pin Types with colored ball heads offer superior control compared to traditional flat-head pins.
You’ll find them easier to grasp and manipulate while positioning fabric pieces.
These sewing pins won’t disappear into your material like standard varieties, making them perfect for pattern cutting and fabric alignment.
The colorful heads create visual markers on your work surface, helping you track pin placement during complex projects.
They slide smoothly into any pin cushion and resist getting lost in fabric folds.
When you’re managing multiple fabric layers, these sewing tools provide the grip you need for precise positioning without the frustration of fumbling with tiny pin heads.
They are ideal for situations where precise positioning is crucial, making them a valuable asset for any sewing project.
Maintenance
Proper maintenance keeps your sewing machine running smoothly and extends its lifespan substantially. You’ll prevent costly repairs and frustrating project delays by following simple care routines.
Don’t Use Old Machine
While proper needles get you started, your machine’s age can make or break your sewing journey.
Don’t let vintage machines sabotage your creative dreams—invest in reliability that won’t fight you.
Vintage machines over 15 years old create more sewing errors than success stories.
These mechanical dinosaurs lack modern tension controls and struggle with fabric damage from inconsistent stitching.
Old parts break down frequently, leading to skyrocketing maintenance costs that’ll drain your wallet faster than thread through a needle.
Modern sewing machines offer reliability that vintage models simply can’t match.
Today’s sewing machine basics include automatic tension, consistent stitch quality, and fewer breakdowns.
Smart sewing machine maintenance starts with choosing equipment that won’t fight you every step.
When your machine replacement becomes necessary, you’re investing in smoother sewing machine care and fewer headaches.
Don’t let nostalgia sabotage your creativity—your projects deserve better than temperamental old machinery that turns simple tasks into frustrating ordeals.
Investing in a new sewing machine can greatly improve your overall sewing experience.
Press Seams
Creating professional seam pressing transforms your work from amateur to expert-level finished products.
Mastering seam pressing requires the right approach and understanding of how heat and pressure work together:
- Set your iron to the correct fabric temperature – cotton needs high heat, synthetics require lower settings
- Use a pressing cloth on delicate fabrics to prevent shine and scorching damage
- Press seams open or to one side depending on your pattern’s specific instructions
- Apply vertical pressure instead of dragging the iron across seam allowances
- Steam lightly for stubborn creases but avoid over-wetting the fabric
Your seam creaser and presser foot work together to create sharp, clean lines that stay put.
Snap Needle
The right needle makes all the difference when your sewing machine hits thick fabric layers. You’ll want to swap needles based on your project’s demands—your machine will thank you for it.
| Needle Type | Best For |
|---|---|
| Denim | Heavy fabrics, hems |
| Ball Point/Stretch | Knits, stretchy materials |
| Universal Medium | Most woven fabrics |
Smart sewers keep these sewing essentials handy alongside needle threaders and fabric cutters. Quality sewing needles prevent skipped stitches and fabric damage.
Remember: dull needles cause more problems than they solve, so consider needle sharpening or replacement regularly. These sewing basics form your foundation, while proper sewing supplies and tools elevate every project from good to professional-grade results.
Trim Seam Allowance
After completing your needle work, seam allowance trimming becomes your next power move for professional results. You’ll grab your sewing scissors and cut away excess fabric beyond the stitching line, typically leaving about 1/4 to 5/8 inch depending on your project.
This seam trimming technique prevents bulk and creates cleaner edges that won’t show through your finished garment. For heavyweight fabrics, reduce the seam allowance even more to eliminate unnecessary thickness.
Sharp fabric cutting tools make this sewing technique effortless, while proper edge finishing prevents future seam ripping headaches. Mastering the art of sew trim techniques is essential for achieving polished and professional-looking seams.
Fray Check
Fray Check becomes your fabric’s best friend when you’re determined to make your projects last. This liquid fray preventor creates an invisible shield that stops threads from unraveling at cut edges and stress points.
Here’s how to master Fray Prevention effectively:
- Apply sparingly – A tiny drop on fabric edges prevents fraying without stiffening the material
- Test first – Try Fray Repair solutions on fabric scraps to check for discoloration or texture changes
- Target vulnerable spots – Focus on buttonholes, pocket corners, and seam intersections where fabric stress occurs
- Choose your weapon – Clear liquid sealers work for most fabrics, while Fabric Seal sprays cover larger areas quickly
Smart sewers know that Edge Binding isn’t always practical for every project. When you can’t serge or pink your edges, liquid fray preventors from your sewing supplies arsenal save the day.
Keep this essential among your sewing notions – it’s cheaper than replacing damaged garments. Remember these sewing tips: apply before washing and allow complete drying for maximum Seam Finishing protection.
Projects
Once you’ve mastered the basics, you’ll want to practice your skills with hands-on projects that build confidence.
These beginner-friendly projects—hair scrunchies, leather thimbles, and simple quilts—teach essential techniques while creating useful items you’ll actually want to keep or give as gifts.
Hair Scrunchies
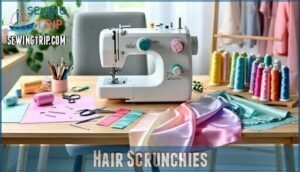
Hair scrunchies make perfect beginner sewing projects using basic sewing supplies and simple sewing tutorials.
Choose fabric choices like cotton or silk that complement your style. Cut fabric strips and elastic bands to size, then sew into tubes.
Thread elastic through using safety pins. These scrunchie materials create stylish hair ties quickly.
Experiment with sewing patterns and different textures – velvet works beautifully for winter accessories while lightweight options suit everyday wear.
Leather Thimble
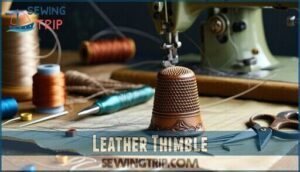
Creating your own leather thimble transforms finger protection into a personalized sewing tool.
Crafting a custom thimble puts personal style at your fingertips while protecting them perfectly.
Select thick, supple leather that won’t crack under pressure. Cut a pattern that fits snugly around your middle finger, allowing room for comfortable movement.
Use strong thread like waxed linen for durability. Stitch the seams with a running stitch, keeping edges aligned for professional results.
Consider adding decorative tooling or embossing before assembly. This custom sewing accessory provides superior grip and protection during hand sewing projects, making those tough fabrics manageable while showcasing your leather crafting skills.
Quilts
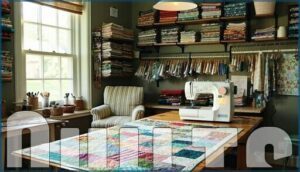
Quilting transforms fabric scraps into treasured heirlooms that’ll warm hearts for generations.
You’ll discover endless possibilities when you master essential quilting tools and techniques that bring your creative vision to life.
Essential elements for successful quilting:
- Quilt Patterns – Choose from traditional blocks like log cabin or nine-patch for your first project
- Fabric Selection – Mix coordinating colors and prints while maintaining consistent fabric weight throughout
- Batting Choices – Select cotton for breathability, polyester for warmth, or wool for lightweight quilts
- Binding Techniques – Master straight-grain binding for durability or bias binding for curved edges
Your sewing kit should include rotary cutters, cutting mats, and quilting rulers for precise measurements.
Quality sewing supplies make the difference between frustration and joy.
Start with simple sewing patterns before tackling complex designs.
Remember, quilting rewards patience – each stitch builds toward something beautiful that’ll outlast trends and seasons.
Exploring quilting home decor projects can help you find inspiration for your next creation.
Frequently Asked Questions (FAQs)
What are the essentials for sewing?
Threading your creative needle, you’ll need these sewing fundamentals: sharp fabric scissors, measuring tape, pins, quality thread, machine needles, seam ripper, iron, and fabric. Master these tools first.
What is the easiest thing to sew as a beginner?
Start with pillowcases – they’re rectangular, use straight seams, and you’ll practice essential skills like hemming. Then try napkins or placemats for more practice before tackling garments.
What is the most essential equipment in sewing?
Over 80% of beginner sewers quit due to inadequate tools.
Your most essential equipment? Sharp fabric scissors, sewing needles, thread, pins, seam ripper, and measuring tape.
These six fundamentals release your creative potential and guarantee project success.
What type of fabric should I use for my project?
Choose fabric based on your project type and skill level.
Cotton works well for beginners – it’s forgiving and easy to handle.
Match fabric weight to your project’s purpose and consider drape requirements.
How often should I get my sewing machine serviced?
View On Amazon
Your sewing machine needs professional servicing annually or after 100-200 hours of use. Between services, clean lint regularly, oil moving parts monthly, and replace needles frequently to maintain peak performance.
What is the difference between pinking shears and fabric scissors?
Coincidentally, you’re not alone in wondering about these cutting tools.
Pinking shears create zigzag edges that prevent fabric fraying, while regular fabric scissors make straight cuts.
You’ll use fabric scissors for most cutting tasks and pinking shears specifically for finishing raw edges on seams.
What is the best way to store needles and pins?
Pin cushions and magnetic trays keep needles and pins organized safely. Store them in containers with tight lids to prevent spills. Keep different sizes separated for easy access during projects.
What are the best brands for sewing supplies?
Seventy-five percent of sewers purchase supplies from multiple brands to achieve superior results.
Brother, Singer, Janome, Babylock, and Juki dominate 2025’s market.
Gutermann or Coats & Clark threads work perfectly for most projects, while mixing brands guarantees you’ll find the right tool for every task, ensuring the best outcome.
What fabrics work best for beginner sewers?
Cotton and flannel are ideal for beginners because they’re stable, forgiving, and easy to handle.
They don’t slip or stretch like tricky fabrics, making them perfect for mastering basic techniques while building confidence.
How do you choose the right thread weight?
Thread weight drastically impacts your sewing success.
Choose lightweight (50-60) for delicate fabrics, medium (30-40) for everyday projects, and heavy (20) for topstitching or jeans.
Match thread weight to fabric weight for perfect tension.
Conclusion
Surveys show that 70% of beginning sewers abandon their first project due to inadequate tools and preparation.
Now that you’ve learned how to sewing essentials work together, you’re equipped for success.
Start with quality basics: proper needles for your fabric type, sharp scissors, and maintenance supplies like fray check.
Remember to press seams and replace needles regularly.
Begin with simple projects like scrunchies before advancing to complex quilts.
These fundamental tools and techniques will transform your sewing from frustrating struggle to enjoyable craft.

