This site is supported by our readers. We may earn a commission, at no cost to you, if you purchase through links.
When sewing a kimono, you’ll want to start by selecting lightweight fabrics like silk or cotton.
Measure your body precisely, adding a 1.3cm seam allowance, and use tailoring chalk to mark clean lines.
Cut your pieces carefully, respecting the fabric’s grain and using sharp scissors for crisp edges.
Pin and sew side seams with care, creating French seams or using bias tape for a professional finish.
Fold and stitch sleeves painstakingly, pressing seams open to create sharp, clean lines.
Your attention to detail will turn simple fabric into an elegant kimono that tells a story of craftsmanship and creativity.
Table Of Contents
Key Takeaways
- You’ll need lightweight fabrics like silk or cotton, ensuring proper drape and movement for your kimono, with 2-3 yards typically required for a basic design.
- Master precise measurements and seam techniques, including adding a 1.3cm seam allowance and using sharp scissors to create clean, professional edges that’ll elevate your DIY garment.
- Choose your sewing tools wisely, gathering essentials like a measuring tape, quality needles, matching thread, and (optionally) a sewing machine to transform your fabric into a stylish kimono.
- Pay special attention to finishing techniques like French seams, bias tape, or zigzag stitching to prevent fraying and create a polished, runway-worthy look that showcases your craftsmanship.
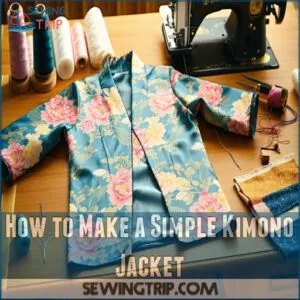
How to Make a Simple Kimono Jacket
Ready to transform a piece of fabric into a stylish kimono jacket that’ll turn heads this season?
You’ll be surprised how easy it’s to create a professional-looking garment with just a few simple sewing techniques and some basic materials.
What You Will Need
From your sewing corner to the cutting table, explore the art of kimono crafting with the right tools.
Grab 2-3 yards of flowing silk or cotton fabric that’ll dance with every movement.
Sharp fabric scissors, straight pins, a trusty measuring tape, and color-matched thread are your kimono sewing squad.
A fabric marking pen, crisp iron, and your sewing machine (or nimble hands) complete the arsenal for your DIY adventure.
Having a reliable sewing machine tool is essential for a successful project.
Step 1: Measure
Crafting a stunning kimono starts with precise body measurements.
You’ll need a flexible tape measure to capture your unique dimensions, adding a 1.3cm seam allowance for that perfect fit.
Fabric calculation is an art of liberation, where your body becomes the canvas and measurements the brush.
- Feel the tape glide across your shoulders
- Breathe in the promise of a custom garment
- Trace your curves with intentional precision
- Imagine the kimono taking shape
- Embrace the freedom of creating your own style
The process involves a series of steps that lead to the creation of a custom garment.
Step 1: Mark The Fabric
Before diving into the fabric-marking journey, spread out your pre-washed material on a smooth, wrinkle-free surface.
Your kimono sewing pattern is your roadmap to precision, using fabric marking tools, carefully transfer measurements with the accuracy of a master craftsman.
Remember, each mark tells a story of your upcoming garment, choose lightweight fabrics that’ll drape beautifully, ensuring your kimono moves like poetry in motion.
Pay attention to detail – these initial marking techniques are the foundation of your DIY kimono masterpiece, take your time and let creativity guide your hands.
Step 2: Cut Out Your Kimono
Now that you’ve marked your fabric, it’s time to bring your kimono to life.
Grab those sharp fabric scissors and steady your hands, as precision is your best friend when cutting out kimono patterns.
Follow your carefully drawn lines, respect the seam allowances, and watch as your fabric transforms into the beginnings of a beautiful garment that’ll soon hug your shoulders just right, with the help of sharp fabric scissors.
Step 3: Cut Out The Front of Your Kimono
After sketching your layout from the previous step, you’ll now liberate your kimono’s shape by cutting its front panels.
Find your fabric’s center and draw a crisp vertical line from top to bottom – this becomes your kimono’s front opening.
Mark 2 inches below the top fold. Then sketch gentle curves extending 3 inches on each side, creating a flattering V-neckline that’ll make your unique style pop.
Step 4: Sew The Seams
Now that your fabric pieces are prepped, pin those upside-down "L" shapes together like puzzle pieces waiting to connect.
Grab your machine or needle and start stitching with a precise ½" seam allowance, working from the bottom edge upward.
Pro tip: give extra attention to those sleeve corners—they’re the architectural anchors of your kimono’s structure.
Press each seam open immediately, transforming rough edges into crisp, professional lines that’ll make your DIY project shine.
Step 5: Stitch The Raw Edges
After securing your seams, it’s time to prevent fraying and give your kimono a pro finish.
Grab your sewing machine and run a tight zigzag stitch along each raw edge, hugging the fabric’s border.
Want that runway-worthy look? Try French seams or bias tape to transform those rough edges into a polished masterpiece that’ll make your handmade kimono sing.
Fabric Options for Your DIY Kimono Robe
When choosing fabric for your DIY kimono robe, you’ll want to select lightweight, breathable materials that drape beautifully and move with your body.
Cotton, silk, and chiffon are perfect options that’ll help you create a comfortable and stylish garment that looks like it came straight from a boutique.
Step 1: How Much Fabric Do You Need?
Ready to craft your dream kimono? Let’s crack the fabric yardage code!
Your kimono journey starts with smart fabric calculation.
Here’s what you’ll need to know:
- Measure twice your height for generous, flowing fabric
- Pre-cut options range from 40" x 55" for hip-length to 40" x 65" for longer styles
- Always add extra fabric for pattern matching and unexpected adjustments
To get started, you can find a free diy kimono pattern online to help guide your project.
Pro tip: In kimono sewing, it’s better to have fabric to spare than come up short mid-project.
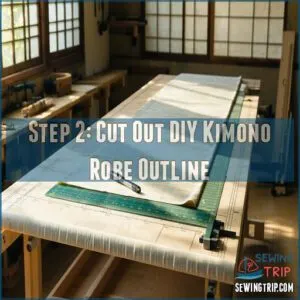
Step 2: Cut Out DIY Kimono Robe Outline
Your cutting compass now points to precision! Grab that ruler and fabric pen to chart your kimono’s course with surgical accuracy.
Map out these key steps for a flawless outline:
- Trace seam allowances 1.3cm from fabric edges
- Align body panel cuts with fabric’s natural grain
- Sculpt armhole curves with laser-sharp attention
- Validate measurements before making irreversible cuts
To guarantee accuracy, mastering fabric cutting tips is essential for a successful DIY project.
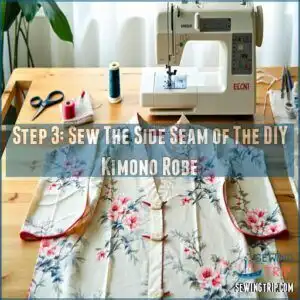
Step 3: Sew The Side Seam of The DIY Kimono Robe
Now that you’ve cut your pattern, it’s time to bring your kimono sewing techniques to life.
Pin those fabric pieces right sides together, embracing the art of robe construction.
Slide your sewing machine into gear, using a straight stitch with a 1.3cm seam allowance that’ll make your DIY dream feel professional.
Press those seams open with an iron, then seal the deal by finishing raw edges with a zigzag stitch – your kimono fabric will thank you.
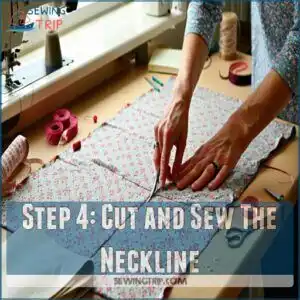
Step 4: Cut and Sew The Neckline
With your fabric laid out, begin neckline shaping—the heart of your kimono’s personality.
Mark a graceful curve about 2 inches below the fold, letting your creativity guide the line.
Whether you’re dreaming of a classic V-neck or a gentle rounded collar, pin carefully and sew with a precise 1/2-inch seam allowance.
Press flat for that crisp, professional finish that screams handmade elegance.
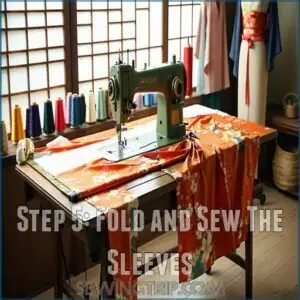
Step 5: Fold and Sew The Sleeves
Crafting kimono sleeves transforms fabric into wearable art, where precision meets creativity.
Master these sleeve-sewing techniques with confidence:
- Iron the top sleeve edges inward by 1/2 inch, creating crisp folds.
- Align pins parallel to the fabric edge for stable positioning.
- Select a straight stitch 1/4 inch from the folded margin.
- Verify sleeve dimensions against your body’s measurements.
- Smooth out any potential ripples or uneven stitching.
Your kimono sleeves will now drape elegantly, revealing your newfound sewing prowess, and showcasing wearable art with crisp folds.
How to Make a Kimono
Ready to transform fabric into a statement piece that screams personal style? Your kimono-making journey starts here! Whether you’re inspired by Japanese traditions or modern fashion trends, creating a kimono is easier than you might think.
- Grab your measuring tape and get precise body measurements
- Select fabrics that flow like liquid silk
- Learn basic sewing techniques that bring your vision to life
- Embrace imperfections as part of your unique design
Sewing a kimono isn’t just about following a pattern—it’s about releasing your inner designer.
You’ll want lightweight materials like cotton or rayon that move gracefully with every step. Pro tip: Pre-wash your fabric to prevent unexpected shrinkage after your masterpiece is complete.
Think of your kimono as a canvas, where each stitch tells a story of creativity and craftsmanship. No fancy sewing machine? No problem. With patience and practice, you’ll soon be rocking a one-of-a-kind garment that turns heads.
For a simple and stylish project, consider exploring easy diy kimono options to enhance your sewing skills.
DIY Kimono Top Supplies and Tools
Begin your kimono-making adventure with the right gear and a spark of creativity! Your DIY kimono journey starts with collecting the perfect toolkit that’ll transform simple fabric into a flowing masterpiece.
- Measuring Tape: Your blueprint for precision
- Sharp Fabric Scissors: Clean cuts are your best friend
- Sewing Needles: Choose quality for smooth stitching
- Thread: Match or contrast boldly
Pro Tips for Kimono Success:
- Pre-wash your fabric to prevent future surprises
- Invest in good sewing needles for different fabric weights
- Keep your measuring tape and fabric markers handy
Fabric Recommendations:
- Silk for luxurious drape
- Lightweight cotton for breathability
- Chiffon for ethereal movement
- Rayon for that perfect flow
Your sewing machine isn’t mandatory, but it’ll make your kimono sewing pattern come to life faster. Whether you’re a beginner or seasoned crafter, these tools are your passport to creating a stunning DIY kimono top that screams personal style.
Understanding how to make a kimono is vital for a successful project, as it involves careful selection of fabric, precise measuring, and precise sewing techniques.
How to Sew a Kimono Cardigan
Ready to transform your fabric into a stylish kimono cardigan that’ll turn heads?
With just a few simple measurements, strategic cutting, and precise sewing techniques, you’ll create a versatile wardrobe piece that showcases your DIY skills and personal flair.
This will allow you to have a versatile wardrobe piece.
KIMONO TOP INSTRUCTIONS
Let’s begin your kimono top adventure where creativity meets craftsmanship.
Your journey starts with understanding core sewing techniques that transform simple fabric into a stunning garment.
When selecting kimono patterns, prioritize lightweight fabrics that drape beautifully.
These sewing techniques will help you craft a professional-looking kimono top that reflects your personal style and skill level.
Master these basics, and you’ll be rocking your DIY creation in no time!
STEP 1: Prepare The Fabric and Draw The Kimono Sewing Pattern
Roll up your sleeves and prep for your kimono sewing journey! Selecting the right fabric sets the stage for a stunning DIY kimono cardigan.
You can find various kimono fabric options online.
Your toolkit for pattern making should include:
- Lightweight, flowing fabric like silk or chiffon
- Precise measuring tape for body dimensions
- Tailoring chalk for crisp pattern markings
- Sharp fabric scissors to guarantee clean cuts
Accurate measurements and careful fabric selection are your secret weapons in creating a perfectly fitted kimono that moves with grace and style.
STEP 2: Fold The Fabric
Carefully spread your fabric on a clean, flat surface, ensuring right sides are together.
Delicate kimono fabric like silk or chiffon requires extra care during folding.
Pin the edges gently to prevent shifting and maintain precision in your kimono sewing pattern.
Smooth out any wrinkles and align the fabric edges carefully.
Double-check your folding techniques, keeping wrong sides facing outward.
This essential step sets the foundation for a perfectly crafted kimono, ensuring your fabric preparation is spot-on for the upcoming cutting phase, which is crucial for a perfectly crafted kimono.
STEP 3: Cut Out The Front Opening
Grab your fabric scissors and get ready to transform your kimono sewing pattern, where creating the perfect front opening is where magic happens in kimono construction.
Here’s your step-by-step guide to cutting like a pro:
- Fold fabric precisely down the center
- Measure 2 inches from top fold
- Sketch a gentle, symmetrical curve
- Check alignment before cutting
- Trim with confidence, respecting fabric’s grain
Understanding the how to sew kimono techniques is essential for a professional finish.
Your front opening sets the stage for a stunning kimono that’ll turn heads and showcase your DIY prowess. Precision is your best friend here, as it ensures a flawless and beautiful outcome.
STEP 4: Measure and Cut Out The Neck Opening
Craft your kimono’s personality with precision neckline shaping.
Mark two strategic points: 2 inches down from the top fold, and 3 inches out on each side.
These measurement accuracy guidelines transform your fabric into a wearable masterpiece.
Your cutting techniques determine the kimono jacket’s character – whether a classic curve, deep V-neck, boat neck, or square cut.
Each style whispers a different story, inviting creativity into your sewing journey.
Neckline Style Best For
KIMONO HEMMING OPTIONS
After perfecting your kimono’s silhouette, it’s time to give those edges some personality.
Your hemming choices can transform a simple garment into a stunning piece.
Here are five killer techniques to elevate your kimono:
- Rolled hems for whisper-light finishes
- French seams for pro-level cleanness
- Bias binding for smooth curved edges
- Raw edge looks for modern flair
- Invisible hand-sewn hems for timeless elegance
Frequently Asked Questions (FAQs)
How Much Fabric Do I Need to Make a Kimono?
You’ll need 5-6 meters of fabric for a traditional kimono.
Choose lightweight cotton or silk, pre-wash to prevent shrinkage, and factor in your body measurements to guarantee a perfect, comfortable fit that moves with you.
What Are the Best Techniques for Hemming a Kimono?
Master clean kimono hems by trying rolled or French binding techniques.
Test different methods on scrap fabric, ensuring smooth edges that drape beautifully and showcase your sewing skills with professional-looking finished seams.
What Kind of Interfacing Should I Use When Sewing a Kimono?
As your fabric whispers stories of transformation, choose lightweight, soft fusible interfacing for your kimono.
Opt for knit or woven interfacing that won’t stiffen the garment, ensuring your creation moves gracefully with each elegant step, using soft fusible interfacing to achieve this.
What is the Best Way to Clean and Care for a Homemade Kimono?
Hand wash your homemade kimono in cool water with mild detergent.
Check color-fastness first, avoid wringing, and air dry flat away from direct sunlight.
Spot clean when possible to preserve delicate fabrics.
How to make a kimono step by step?
Grab your scissors and fabric!
Measure your body, cut pattern pieces precisely, sew with a ½" seam allowance, and press seams open.
Create a V-neckline, finish raw edges, and transform your fabric into a stunning, personalized kimono.
How many yards of fabric do I need to make a kimono?
You’ll need 2-3 yards of lightweight fabric like silk or cotton for a basic kimono.
Your size, style, and desired fit will influence the exact amount.
Always pre-wash to prevent future shrinkage.
How do you put on a kimono step by step?
Slip on your kimono, left side first, crossing panels at the front.
Slide arms into sleeves, adjust shoulders, and secure with an obi belt.
Make certain of smooth, even draping for an elegant finish.
How long does a kimono take to make?
You’ll whip up a beginner’s kimono in 2-5 hours , depending on your sewing skills. Simple patterns fly by quickly, while intricate designs demand more patience and precision.
How to sew a kimono?
Threads of creativity weave your kimono to life.
Measure carefully, select lightweight fabric, cut precise L-shaped pieces, sew with ½" seam allowance.
Finish edges with zigzag stitch, and press seams open for a professional, elegant garment.
How do you sew a kimono sleeve?
Position your sleeve rectangle (typically 45cm x 45cm) carefully.
Align the center of the sleeve with the shoulder seam, pinning precisely.
Sew with a ½" seam allowance, pressing open immediately for crisp, professional-looking lines, using a technique that results in clean finish.
Conclusion
Discover your inner fashion designer as you master the art of how to sewing kimono, your handmade masterpiece awaits, transforming simple fabric into a stunning garment that reflects your creativity.
With practice, you’ll confidently stitch seams, select perfect fabrics, and create kimono designs that turn heads.
Remember, every stitch tells a story—your unique craftsmanship will shine through, embrace the journey, learn from each project, and watch your sewing skills soar to new heights of elegance.

