This site is supported by our readers. We may earn a commission, at no cost to you, if you purchase through links.
You’ll cut your pattern pieces carefully, then sew the shoulder seams first – think of it as building the foundation of a house.
Next, you’ll finish the neckline and armholes with bias tape or a facing.
The side seams come together like puzzle pieces, creating the body shape.
Don’t forget to hem the bottom for that polished look.
Start with cotton fabrics since they’re forgiving for beginners.
Your first top might not be perfect, but each stitch teaches you something new about fit and construction techniques.
Table Of Contents
Key Takeaways
- You’ll want to start with cotton fabrics and simple patterns since they’re forgiving for beginners and help you master basic construction techniques without overwhelming complexity.
- You should sew shoulder seams first to create your foundation, then finish necklines and armholes with bias tape before connecting side seams – this sequence prevents fitting issues.
- You need to adjust your sewing machine’s thread tension and use the right needle type for your fabric – ballpoint needles for knits, universal needles for cotton, and sharp needles for delicate fabrics.
- You can’t expect perfection on your first try, but each project teaches you something new about fit and construction – focus on clean seams, proper pressing, and accurate measurements rather than Instagram-worthy results.
Sewing Tops for Beginners
Starting your first beginner sewing top feels overwhelming, but it’s actually quite straightforward. You’ll want simple sewing patterns for beginners that focus on basic shapes and minimal pieces.
Simple patterns and basic shapes make your first sewing top surprisingly manageable—no overwhelm, just straightforward success.
Essential tools include sharp scissors, pins, and a reliable sewing machine. Fabric selection matters – cotton works best for your first easy sew top since it’s forgiving and doesn’t stretch.
Pattern simplicity beats complexity every time. Don’t worry about fitting issues initially; focus on mastering straight seams.
For best results, adjust thread tension for balanced stitches. This top sewing tutorial approach builds confidence through small wins.
Preparing to Sew a Top
Getting your fabric and pattern ready is like setting up your workspace before cooking – it makes everything that comes next much easier.
You’ll cut your pattern pieces carefully and mark important spots on your fabric so you can sew with confidence and get professional-looking results.
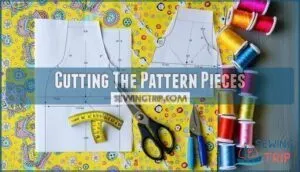
Cutting The Pattern Pieces
Lay your fabric flat with the right side facing down. Place your sewing patterns following the pattern layout guide, matching grain lines to prevent fabric shifting.
Pin each piece securely or use pattern weights. Sharp fabric scissors guarantee cutting accuracy – dull blades create jagged edges.
Cut a test piece from scraps first to check pattern sizes and seam allowances before cutting your main fabric. Remember to mark pattern notches, as ignoring to mark notches can misalign seams and affect the overall seam allowances. This step is crucial for ensuring a proper fit and avoiding jagged edges. By following these steps, you can ensure accurate cutting.
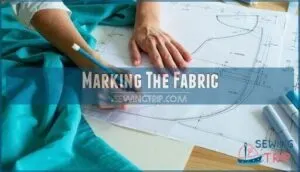
Marking The Fabric
Accurate marking transforms your fabric cutting from guesswork into precision. Use fabric chalk or washable markers to transfer essential marks from your sewing top pattern. These marking tools help you place darts, notches, and construction lines exactly where they belong.
Precision marking turns fabric chaos into sewing confidence—every mark matters for professional results.
Proper marking guarantees access to essential sewing supplies.
- Feel confident knowing every stitch will align perfectly
- Experience the satisfaction of professional-looking results
- Enjoy stress-free sewing with clear visual guides
- Celebrate precise top sewing techniques that impress
- Build excitement for your finished, well-constructed garment
Assembling The Top
Now you’ll put your cut pieces together to create the main shape of your top.
This step connects the front and back pieces at the shoulders, then finishes the neckline and armholes so they won’t fray or stretch out.
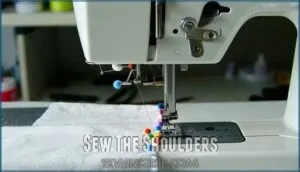
Sew The Shoulders
Once you’ve cut your pattern pieces, it’s time to join the front and back together.
Place pieces right sides facing and pin shoulder seams carefully. Different shoulder seam types require specific techniques for stabilizing shoulders properly.
Sew using a straight stitch, backstitching at each end. Press seams open to prevent puckering.
This foundation step guarantees proper fitting shoulders and prevents future gaps. Lightweight knits are ideal, according to this cowl neck tutorial, which is a key step for a cowl neck and ensures a good fit.
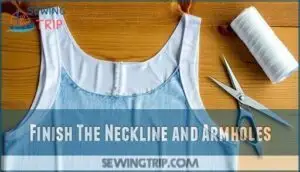
Finish The Neckline and Armholes
Transform raw necklines and armholes into polished perfection using bias binding or facing techniques.
Stretch the binding gently around curves, pinning every few inches. For sleeveless tops, neckband options include folded bias tape or purchased binding.
Consider using pre-made binding tape for a quicker finish. Master these armhole finishes by practicing on scraps first.
Decorative edges add personality—try contrasting colors or patterned binding for custom flair.
Hemming and Side Seams
Hemming and seaming marks the moment your fabric pieces finally become a wearable top. Start with your bottom hem by folding the raw edge up ½ inch, then fold again to create a clean finish. Press with your iron and topstitch close to the inner fold edge.
For side seams, pin your front and back pieces together with right sides facing. Match up the armpit points and hem edges perfectly before sewing. Consider using pinking shears to prevent fraying.
- Use a ⅝-inch seam allowance for consistent professional finishes
- Backstitch at the beginning and end to secure your seams
- Press seams open or toward the back for curved hems
- Try different hem types like blind hems or twin-needle finishes
These sewing techniques create the foundation of well-constructed tops. Side seam styles can vary, but consistency in your sewing seams makes all the difference in achieving those coveted professional finishes.
Perfecting Your Technique
Now that you’ve built your first top, it’s time to refine your skills and tackle trickier fabric choices.
You’ll learn how to adjust patterns for a better fit and master the key differences between sewing stretchy knits and stable woven fabrics.
Adjusting The Pattern
Your top might need tweaks for a perfect fit.
Start with bust adjustments by adding or removing width at side seams. Length alterations are simple—just shorten or lengthen at the hemline.
Check shoulder slope by trying on your muslin first.
Sleeve adjustments follow similar principles. Fit evaluation helps you master pattern drafting and creates sewing patterns that work for your unique body shape.
Sewing Knits Vs. Woven Fabrics
After adjusting your pattern, you’ll face a fabric fork in the road. Knit fabrics stretch like your favorite t-shirt, while woven fabrics stay put like a crisp button-down.
This fabric stretch difference changes everything about your sewing approach. One key difference is that knit fabrics stretch easily along the width.
- Needle types: Use ballpoint needles for stretch fabric to prevent snags, sharp needles for nonstretch fabric
- Stitch selection: Choose zigzag or stretch stitches for knit fabrics, straight stitches work perfectly for woven fabrics
- Seam finishes: Knit fabrics need flexible seams, while woven fabrics require different pattern adaptation techniques
Troubleshooting Your Sewing
When your sewing machine starts acting up or your stitches look wonky, don’t panic – most problems have simple fixes you can tackle yourself.
Learning to spot and solve common issues like loose threads, puckered seams, or uneven topstitching will save you time and keep your sewing projects looking professional.
Checking Thread Tension
Getting your sewing machine tension dialed in correctly makes all the difference between perfect seams and messy disasters.
Check your tension dial before starting any project – grab both threads above and below your presser foot and give them a gentle tug. If the top thread pulls through easily, you’ve got loose tension that needs adjusting.
Balanced stitches happen when threads lock together in the fabric’s center, not on top or bottom surfaces. Remember that fabric thickness affects tension requirements, so test different settings on scraps first.
Proper bobbin tension paired with correct upper tension creates professional-looking results every time. Understanding how to adjust the top thread tension is key to achieving this balance.
Practicing Topstitching
Perfect topstitch tension makes all the difference in your top sewing project.
Start by adjusting your sewing machine settings – use a slightly longer stitch length and reduce thread tension for smooth, even lines. Needle selection matters too; choose a topstitching needle for best results.
Practice decorative topstitching on fabric scraps first, focusing on edge alignment along seams and hems. Keep your stitching speed steady and guide fabric gently without pulling.
These sewing tips transform amateur work into professional-looking tops. Watch sewing tutorials for visual guidance, then apply these techniques to your garment.
With practice, you’ll master this essential skill that adds polish to every handmade piece.
Frequently Asked Questions (FAQs)
How to sew a top step by step?
Like threading a needle with purpose, you’ll cut fabric pieces, pin pattern layouts.
Sew shoulder seams first, then side seams.
Finish necklines with bias tape, and hem edges for your completed top, which is like threading a needle with purpose.
How to sew on top of fabric?
Place your fabric right sides together, aligning edges perfectly.
Pin pieces to prevent shifting. Use straight stitches with appropriate seam allowances.
Backstitch at start and end for strength. Press seams open for professional results.
How hard is it to sew a top?
Sewing a basic top isn’t rocket science.
You’ll need patience and practice, but it’s totally doable for beginners.
Start with cotton fabric and simple patterns.
Expect some hiccups, but you’ll master it quickly.
How to do top stitching?
To topstitch, sew a straight line close to the edge using a slightly longer stitch length.
Keep fabric smooth and guide it evenly.
It adds strength and a polished look, like icing on a cake!
What type of thread should I use when sewing knit tops?
Thread choice is your knit top’s best friend.
You’ll want polyester or cotton-poly blend thread that stretches with your fabric.
Avoid regular cotton thread—it’ll snap when your knit stretches, leaving you with broken seams.
How can I alter the pattern to create a higher or lower neckline?
Adjust your neckline by drawing a new curve on the pattern.
For lower necklines, cut deeper into the original line. For higher ones, add paper to extend upward, then redraw smoothly, to achieve the desired neckline.
What are some good tricks for sewing curved seams smoothly?
Curved seams can feel like wrestling a snake, but they’re surprisingly tame.
Use sharp scissors to clip notches every half-inch, press seams open with steam, and sew slowly while gently guiding fabric—never forcing it.
How do I attach sleeves to an armhole?
Pin the sleeve to the armhole with right sides together, matching notches and shoulder seam.
Ease any fullness by gently stretching the armhole.
Sew slowly with a ⅝-inch seam allowance, then press toward the sleeve.
How to choose the right fabric weight?
Consider your project’s purpose and fabric behavior.
Lightweight fabrics like cotton voile work for flowy tops, while medium-weight cotton poplin provides structure.
Heavy fabrics create bulk at seams.
Match weight to your pattern’s recommendations and desired drape.
What needle type works best for tops?
Sarah struggled with puckered seams until switching needles.
You’ll want universal needles (size 80/12) for cotton tops, ballpoint needles for knits, and sharp microtex needles for delicate fabrics like silk or chiffon.
Conclusion
Rome wasn’t built in a day, and neither is your sewing expertise.
Learning how to sewing top takes patience and practice, but you’ve now got the roadmap.
Start with simple cotton fabrics and basic patterns. Don’t worry if your first attempt isn’t Instagram-worthy – every professional seamstress began exactly where you’re now.
Focus on clean seams, proper pressing, and accurate measurements. Soon you’ll be creating tops that fit perfectly and reflect your personal style.
Keep stitching forward!

