This site is supported by our readers. We may earn a commission, at no cost to you, if you purchase through links.
That drawer stuffed with old band tees and marathon shirts isn’t clutter. It’s a quilt waiting to happen. Grab nine to twelve shirts, and you’ve got a lap quilt. Grab thirty, and you’re looking at a king-size blanket that tells your whole story.
Here’s the good news: you don’t own a sewing machine, and you don’t need one. A tshirt quilt no sewing pattern relies on iron-on tape, fusible interfacing, and a little elbow grease instead of thread.
Cut your squares, arrange your graphics, and bond it all together. No needles, no bobbins, just a blanket that actually means something.
Table Of Contents
Key Takeaways
- You can build a no-sew t-shirt quilt using iron-on tape, fusible interfacing, and heat instead of a sewing machine, with shirt count (9-30) determining whether you get a lap, twin, or king-size blanket.
- Cutting uniform 12-inch squares with a template, adding a 1/4 inch seam allowance, and fusing knit interfacing on the back keeps every panel stable and consistent before assembly.
- Joining panels relies on iron-on tape for bonding, tie-knot fringing for a decorative no-heat edge, or a hybrid of both for extra strength and structure.
- Thoughtful planning around backing fabric (cotton, microfleece, or poly-blend), layout grid, and color balance turns a pile of old shirts into a cohesive, meaningful keepsake.
Choose Your No-Sew Quilt Size

Before you cut a single shirt, figure out how big you want this quilt to be. Size decides everything else, from shirt count to backing fabric to how you’ll lay out the grid. Let’s break down what you need to know to plan it right.
If you’re aiming for something cozy rather than bed-sized, check out how big lap quilts typically run before settling on your dimensions.
Shirt Count by Size
Nine to thirty shirts—that’s your range, depending on the size you’re after. Collect your shirts first, then count: lap quilts need 9-12, twin size runs 12-16, and king size uses about 15 hefty panels.
Repurposing old shirts? Grab a few extras. Odd colors or stretched-out graphics happen, and having backups reduces waste before you even start cutting.
12. inch Square Template
Once you’ve counted shirts, grab a 12-inch square template to keep every panel identical. Cardboard works, but acrylic resists warping and gives you clean grid alignment for precise cuts.
Trace, cut, repeat—that rhythm turns scattered tees into real memory keepsakes. Wipe it clean after each session and store it flat; that edge accuracy pays off across your whole DIY t-shirt quilt, no sewing required.
Backing Fabric Options
Your template pile is squared away—now flip the quilt over and think about what your hands (and feet) will actually feel.
100 cotton fabric breathes best for sleep. Polyester durability wins for daily grabs. Blended fabric benefits split the difference.
Want cozy? Microfleece backing or fleece batting adds serious warmth, though upholstery stability matters if this blanket lives on a couch, not a bed.
Choosing the right backing fabric choice can increase your quilt’s durability by 30%.
Layout Grid Planning
Grab your backing fabric and lay it flat—now it’s time to map out where every square goes. Think of your grid like a chessboard: rows and columns keeping everything balanced. A 45"x45" lap quilt fits neatly in a 3×3 grid using 15 inch squares.
Arrange for symmetry, alternating bold graphics with quieter ones so nothing overwhelms one corner. Visualize placement before you commit.
Color and Theme Grouping
Sorting shirts by color isn’t just tidy—it’s storytelling. Group hues by shared mood, keeping 2-3 colors per section for Color Palette Balance. Pair warm tones with cool ones for pop, but watch your Saturation Level Balancing so nothing clashes.
- Anchor each group with a dominant color
- Repeat it in two more shirts
- Add a pastel for visual rest
- Guide eyes left to right with Narrative Layout Flow
Gather Materials and Tools

Before you start cutting up your favorite tees, let’s round up everything you’ll need. A little prep now saves you a headache later. Here’s your full shopping list, gathered in one spot.
T-shirts and Backing Fabric
Every old tee tells a story, and your t-shirt quilt turns those stories into something you’ll actually use. Pick 15 to 30 shirts, then choose backing: microfleece for cozy warmth, cotton for breathable comfort, or poly-blends to fight shrinkage.
Before cutting into your shirts, browsing these hand-sewn patchwork quilt patterns can help you plan a layout that highlights each shirt’s design.
Every old tee tells a story, and a t-shirt quilt turns those stories into something you’ll actually use
Prewash everything first. Match backing color to your shirts for a unified look, and heavier fabric adds durability but more bulk to handle.
Rotary Cutter and Ruler
Cut like you mean it, and your seams stay clean. A rotary cutter glides through fabric fast, but only with a self-healing mat underneath and an acrylic ruler—never metal—guiding your line.
Keep fingers clear and retract the blade after each pass.
- Choose a sharp, undulled blade
- Use fabric cutting scissors for tight corners
- Cut 15 inch squares confidently
Sharp tools mean smoother fabric manipulation, every time.
Cardboard Square Template
Think of your template as the boss of every square you cut. Trace a 12-inch square onto sturdy cardboard, then cut it out for repeated use.
This tool guarantees fabric dimensions stay consistent across all panels—no eyeballing, no wonky corners. For precision tracing, a permanent marker works best. Laminate it for template durability, and you’ve got a reusable guide for your entire DIY t-shirt quilt project.
Iron-on Adhesive Supplies
Your quilt’s bond strength comes down to one thing: picking the right adhesive.
- Iron-on tape, cut into 6–10 inch strips
- Fusible interfacing squares for stabilizing knit fabric
- Heat-activated films for flexible edges
- A basic household iron set to the right temperature
Fusible web stabilizers and iron-on tape both create lasting fabric adhesion when heat and pressure meet correctly, so grab both before you start cutting.
Pins and Pressing Cloth
Pins and a pressing cloth might seem like small players, but they keep your whole project from sliding apart.
Grab glass head pins for light shirts (they resist melting under heat) and metal pins for thicker layers. Pin every 2 to 4 inches, perpendicular to edges.
| Tool | Purpose |
|---|---|
| Glass head pins | Heat-safe hold on light fabric |
| Cotton pressing cloth | Prevents scorch marks |
| Magnetic pin holder | Quick pin storage |
| Fork pins | Slippery fabric control |
Cut and Stabilize Shirt Panels
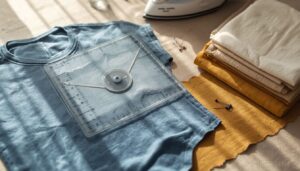
Now it’s time to turn those t-shirts into real quilt panels. This step is all about cutting clean squares and making sure your knit fabric stays put instead of stretching out on you. Here’s exactly how to get each panel ready.
Remove Seams and Sleeves
Grab a seam ripper before you touch the scissors—it’s your best friend for clean sleeve removal. Gently pop stitches around each armhole, then trim excess fabric.
- Snip loose threads to manage fraying
- Remove any lining near the armhole
- Clip curves to release tension
- Check for missed stitches
- Preserve the shirt’s original silhouette
This upcycling step turns tired shirts into sturdy quilt panels, ready for stabilization.
Center Each Shirt Graphic
Now find the sweet spot on each design before you cut. Measure 3 to 4 inches below the collar, lining up with the collarbone for true graphic symmetry.
| Tool | Purpose |
|---|---|
| Ruler | Measure center point |
| Fabric chalk | Mark placement |
| Spirit level app | Check vertical alignment |
| Masking tape | Hold shirt flat |
Stay within safe print margins to avoid print distortion on your memory quilt panels.
Cut Uniform Quilt Squares
With your center point marked, lay the shirt flat on the mat and press your 12-inch square template right over it. Cut slow and steady with the rotary cutter—template accuracy here keeps every block matching later.
Add a 1/4 inch seam allowance around each edge. This step guards against fabric distortion while piecing the t-shirt blocks for your memory quilt.
Fuse Interfacing if Needed
Knit fabric stretches, and that’s where fusible interfacing earns its keep. Cut a 15×15 square, place it shiny-side down for proper fabric stabilization, and press firmly:
- Choose 12-24 g/m2 weight
- Set iron to 275-350°F
- Skip steam
- Press 8-12 seconds
- Cool completely before moving
Too much heat causes adhesive residue—always test scraps first.
Protect Printed Designs
Those graphics are the heart of your quilt, so treat them gently once fabric stabilization is done. Skip harsh heat and always iron face-down with a pressing cloth between iron and design.
If you’re printing your own shirts for a shop or gift line, protect your work too: watermark placement on proofs, digital watermark tech on files, and even design registration for original art guard against theft.
Arrange The Quilt Pattern
Now comes the fun part, so grab your cut panels and clear off a big table or floor space. This is where your quilt starts to feel real, before any tape or knots come into play. Here’s what to do to get your layout ready.
Lay Panels on Backing
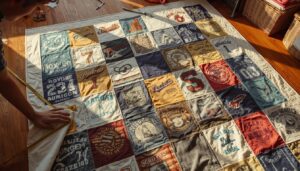
This is your dress rehearsal before anything gets permanent. Lay every panel onto your backing exactly where you want it to live.
- Keep edges flush to prevent gaps
- Check spacing corner to corner
- Step back and eyeball the full layout
- Adjust panels for stability
- Confirm nothing shifts before pinning
Basting comes next, but first, your quilt top needs a solid home.
Balance Colors and Graphics
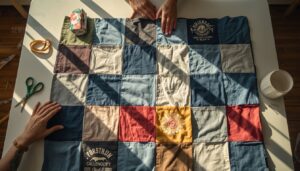
Ever notice how one bold shirt can steal the whole show? Aim for Color Balance Ratios: 60% dominant, 30% support, 10% accent. Spread saturated pieces apart—their Visual Weight Distribution pulls eyes fast.
Keep graphic alignment consistent across rows, and let your theme narrative flow shine through. This is upcycling clothing turned art, so trust your quilt top’s rhythm.
Pin Panels Before Bonding
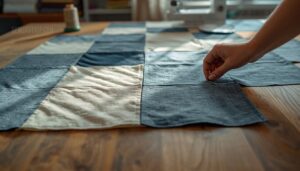
Pin every panel before you commit to bonding — it’s your safety net against a crooked quilt.
- Corners and center points
- Every 2 to 3 inches along edges
- Skip seam allowances
- Use fine, snag-free pins
- Check graphic orientation as you go
Pinning prevents shifting and keeps your t-shirt quilt panels stabilized while you finalize placement, protecting delicate prints before the iron-on tape or fusible interfacing goes to work.
Check Row Alignment
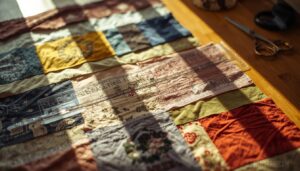
Straight rows make or break your quilt’s look, so take a beat before you bond anything.
Grab your straightedge and check that every panel top sits level across the row — no staggered seams allowed. Measure row height as you go, keeping consistent row spacing and vertical edges lined up. Even without sewing your rows, good seam construction habits pay off. Catch overlaps now, not after ironing.
Join Panels Without Sewing

Now comes the fun part: turning all those panels into one solid quilt. No needle required, just a few simple tricks that hold everything together. Here’s how to pick the method that fits your style best.
Iron-on Tape Method
Iron-on tape turns your DIY t-shirt quilt into a no-sew project anyone can finish.
- Choose tape width based on panel thickness
- Prewash fabric to boost adhesion
- Use high heat with firm pressure
- Protect graphics with a pressing cloth
- Let seams cure a full 24 hours
Cut strips 6-10 inches, press firmly, then flip and repeat for solid textile stabilization before moving on.
Tie-knot Fringe Method
Tape isn’t your only option — tying knots gives your quilt a decorative fringed edge with zero heat involved.
Cut short slits along matching panel edges, then knot the strips together. Choose t-shirt knit since it frays predictably, keeping fringe length even. Adjust fringe density for a bolder or subtler look. Check knots occasionally; loose ones just need retying to keep your handmade quilt looking sharp.
Bond Panels to Backing
Bonding means fusing every panel down for good, so give your backing a quick wipe first—surface degreasing helps adhesive grip better. Apply iron-on tape in even strips, or fuse interfacing fabric for extra body. Press firmly to avoid air pockets.
Let it cool fully (cure time matters) before testing bond strength with a gentle tug.
Secure Edges and Corners
Once your bond cures, give every corner extra love. Add heat bond webbing along raw edges to stop fraying, and slip in corner guard foam where panels meet for cushioning.
This step prevents corner puckering and protects graphics from heat damage. Skip traditional sewing techniques entirely—no seam allowance needed. Just press gently, keep edges flat, and let stabilized fabric hold its shape.
Finish and Inspect Blanket
Give your quilt top one last once-over before calling it done. Run your hands across the surface—consistent texture matters as much as looks. Check every corner stays flat, edges hold tight, and no adhesive peeks through.
Measure length and width against your plan. This isn’t sewing, but quality control still counts. Once it lies flat and true, your handmade blanket’s ready for real life.
Frequently Asked Questions (FAQs)
How many shirts do you need for a t-shirt quilt?
Think of your closet as a memory bank: every shirt is a chapter. For a DIY tshirt quilt tutorial, lap sizes need 12-20 shirts, twin 20-30, queen 40-50 — always add extras for wastage and miscuts.
How to make a tshirt quilt without sewing?
Cut shirts into 12-inch squares, stabilize with fusible interfacing to protect knits, then join panels using iron-on tape or a tie-knot method. No stitching required—just cutting, layering, and pressing your DIY memory quilt into place.
How to make a simple t-shirt quilt?
Simple, sentimental, and satisfying: pick your favorite tees, trim them into 12-inch squares, fuse interfacing on back, arrange on backing fabric, then bond with iron-on tape. No sewing, no stress—just a cozy DIY t-shirt quilt.
What is the best backing for a tee shirt quilt?
Cotton or microfleece wins for most builds—cotton breathes and washes well, microfleece adds cozy warmth. Weigh durability versus drape: denim’s tough but stiff. Colorfast, tightly woven fabric keeps your quilt’s stabilization solid wash after wash.
How long does a no-sew t-shirt quilt last?
A well-loved denim jacket softens with age but rarely falls apart — that’s your goal here. Fabric quality and adhesive degradation decide the timeline. Gentle laundering, sturdy backing, and careful heat use keep your memory quilt holding strong for years.
Can old, stretched-out t-shirts still be used?
Stretched shirts still work great as fabric filler or backing strips. Just fuse knit interfacing to stabilize the material, correcting any distortion, so panels hold their shape without adding bulk or extra seams.
Whats the best way to wash a t-shirt quilt?
Wash on gentle cycle with cold water, mild detergent, no bleach. Skip the agitator machines—jersey knits and prints hate friction. Air drying beats heat every time, keeping graphics vibrant and your upcycled quilt sturdy for years.
Can you combine iron-on tape and tie-knot methods?
Team up both methods for the best of both worlds. Use iron-on tape first to stabilize edges, then tie your knots for extra strength. This hybrid assembly gives your quilt serious structural stability—rebellious durability meets creative flair.
How do you store shirts before starting the project?
Think of your shirt stash like a treasure chest waiting to be cracked open. Store shirts in breathable, labeled bins at 60-70°F, inspect for stains, and keep a quick inventory to prevent color transfer and mildew before your DIY quilt begins.
Conclusion
Like patchwork stitched together by memory instead of thread, your finished blanket proves you never needed a sewing machine to build something real. You cut, you bonded, you turned old shirts into a story you can wrap around your shoulders.
That’s the beauty of a tshirt quilt no sewing pattern: it rewards guts over gear. Fold it, hang it, gift it. Whatever you choose, you’ve made something no store could ever sell you.