This site is supported by our readers. We may earn a commission, at no cost to you, if you purchase through links.
 Embarking on the journey of hand stitching is akin to holding a paintbrush for the first time; each stitch you make is a stroke of your creativity on the canvas of fabric.
This guide to types of hand stitches is your palette, offering you the colors and textures needed to bring your sewing projects to life. Whether you’re stitching a delicate seam or adorning a piece with intricate details, mastering these stitches will equip you with the skills to transform the ordinary into the extraordinary.
Let’s dive into the world of hand stitching, where your hands become the tools of your imagination, crafting beauty stitch by stitch.
Table Of Contents
Key Takeaways
- Needle selection is crucial for the success of hand stitches, with different needles recommended for various fabric types and thread thicknesses to ensure smooth penetration and prevent fabric damage.
- Thread choice plays a significant role in the durability and appearance of hand stitches, with options like polyester and nylon offering strength and a wide range of colors and finishes to match project requirements.
- The method of threading the needle, whether single or double-threaded, affects the strength and visibility of stitches, highlighting the importance of choosing the right threading technique for the desired stitch outcome.
- Starting and ending stitches properly, including securing threads with sturdy knots and maintaining even tension, is essential for the longevity and neatness of hand-sewn projects.
Hand Stitching Basics
In the realm of hand stitching, selecting the right tools and techniques is crucial for achieving the desired outcome in your sewing projects. You’ll need to choose the best needles and threads tailored to your specific needs, as these foundational choices can significantly impact the quality and durability of your stitches.
Whether you opt for single or double-threaded needles depends on the fabric and the strength required for the stitch, while starting and ending your stitching properly ensures a neat and secure finish.
This brief overview sets the stage for a deeper exploration into the art of hand stitching, guiding you through essential decisions that will enhance your sewing endeavors.
Best Needles for Stitching
Choosing the right needle for your hand stitching project is crucial for both the ease of your work and the quality of the final product. Needle sizes and materials vary, and each type is designed for specific thread types and fabric weights.
For instance, a sharp, fine needle is ideal for delicate fabrics, while a thicker needle with a larger eye may be better for heavier materials.
When selecting a needle, consider needle sharpness for penetrating the fabric without damage. Needle storage is also important; keeping needles organized and safe ensures they stay sharp and ready for use.
For hand stitches like the back stitch, which requires strength and precision, a sturdy needle that can handle the tension without bending is essential.
For an invisible seam, a needle that allows for fine, discreet stitches, such as a milliner’s or straw needle, might be the best choice. Remember, the right needle can make your hand sewing experience more enjoyable and your stitches more professional.
Best Threads for Hand Stitching
Choosing the right thread for hand stitching is crucial for the durability and appearance of your project.
- Thread Types: Polyester and nylon threads are popular for their strength and versatility in both hand and machine sewing.
- Thread Strengths: Look for high tensile strength for durability, like the 15 lb tensile strength of a 3-ply uncoated polyester thread.
- Thread Colors and Finishes: A wide range of colors and finishes, such as wax-coated or gassed for reduced lint, are available to match your project needs.
Single Vs Double Threaded Needles
When it comes to hand stitching, choosing between a single or double threaded needle can make all the difference in your project’s outcome.
Single thread basting is perfect for temporary holds and easy removal, while double thread embroidery offers extra strength and durability for tasks like securing buttons or decorative stitch work.
A needle threader can be a handy ally, especially when dealing with finicky threads. Whether you’re working on standard stitching or intricate embroidery stitches, understanding when to use single or double threading will elevate your sewing game.
Starting and Ending Hand Stitching
Starting and ending your stitching with finesse is crucial. Secure your thread with a sturdy knot, ensuring it’s snug but not straining the fabric.
Align your stitches like soldiers in formation, maintaining even tension. Whether you’re running with a running stitch or backtracking with a backstitch, choose your thread wisely.
Basting Stitch
The basting stitch is a fundamental technique in hand sewing, serving as a temporary stabilizer that holds layers of fabric together during the sewing process.
You’ll find it invaluable when working with slippery or stretchy materials, or when precise alignment is crucial, such as with pleats or zippers.
Its versatility extends to fitting, quilting, and even decorative applications, making it a skill worth mastering for both beginners and seasoned sewists alike.
Uses and Applications
Uses and Applications
The basting stitch, also known as tacking, is a fundamental sewing technique used for temporarily holding layers of fabric together. It’s a versatile stitch that serves various purposes in both hand and machine sewing.
-
Temporary Holding: Basting stitches are used to temporarily join fabric layers, making them easier to manage during the final sewing process. This is particularly useful for complex garments or quilting projects where precision is crucial.
-
Pattern Marking Transfer: When tailoring garments, basting stitches can transfer pattern markings onto the fabric, ensuring accurate construction.
-
Fitting: Basting allows for temporary fitting of garments. It’s especially helpful for tailors when adjusting the fit of a garment on a model before final sewing.
-
Alignment: It ensures the accurate alignment of fabric layers before the final stitch is applied. This is essential for zippers, necklines, armhole facings, and when matching patterns or prints.
Basting stitches are meant to be removed after the permanent stitching is completed, making them a critical yet unobtrusive part of the sewing process. They can be applied using various techniques, such as even, uneven, diagonal, or slip basting, each serving a specific purpose and offering different levels of control and stability.
Whether you’re a beginner or an experienced sewer, mastering the basting stitch can significantly improve the quality and ease of your sewing projects.
Technique
To master the art of hand stitching, you’ll need to understand the technique behind each stitch type. Let’s dive into the basting stitch, a fundamental skill in your sewing repertoire.
Imagine you’re prepping a delicate fabric, one that slides away like a fish in water. You’ll want to tame it, right? That’s where basting comes in, acting as your temporary reins.
Choose your needle size wisely; a size 7 or 8 is a good starting point for beginners. Thread tension should be just right—not too tight, not too loose—like a friendly handshake.
Fabric choice matters too; it’s the canvas to your masterpiece. Now, for the stitch length and spacing, think of a leisurely stroll rather than a sprint—about 3-8 inches apart for those basting stitches.
If you’re feeling adventurous, throw in a zigzag or blind hem stitch for a bit of flair. But remember, the goal is to secure the fabric, not to leave a permanent mark. So, keep it even, keep it light, and once you’re done, those basting stitches should come out as easily as a magician’s trick, leaving behind nothing but your perfect seam.
Running Stitch
Transitioning from the basting stitch, let’s dive into the world of the running stitch, a cornerstone in the realm of hand sewing. This stitch, while seemingly simple, opens up a universe of creativity and practicality.
Whether you’re joining fabrics or delving into embroidery, mastering the running stitch is akin to holding a key to an expansive garden of textile arts.
- Variety is the Spice: Running stitch variations, such as the whipped or double running stitch, can transform a basic seam into a decorative masterpiece. Imagine the possibilities when you mix and match these variations on different projects!
- Choose Wisely: Running stitch fabric choice and thread selection go hand in hand. A delicate silk fabric paired with a fine thread can create elegant, subtle details, while a sturdy canvas with a bold thread can add strength and character to your work.
- Practice Makes Perfect: Dedicate time to running stitch practice on a sampler. Experiment with stitch length, tension, and spacing. This hands-on exploration isn’t just about mastering the stitch but also about discovering your unique stitching rhythm.
- Application Galore: From creating a simple vertical hem to embellishing with intricate embroidery, the applications of the running stitch are as broad as your imagination. It’s the backbone of many sewing projects, including buttonholes and chain stitch embroidery.
Backstitch
When it comes to hand stitching, the backstitch is your trusty sidekick for strength and durability. Think of it as the superhero of stitches, swooping in to save the day when you need a seam that can take a bit of a beating.
Whether you’re mending a tear in your favorite jeans or crafting a DIY masterpiece, the backstitch is your go-to for keeping everything tightly in place.
Now, let’s get down to the nitty-gritty. To start your backstitch adventure, you’ll need a single thread with a knot at the end—no double trouble here. Dive in by pushing your needle through the fabric from the wrong side to the right, just like you’re peeking into a secret garden.
Then, take a tiny step back and plunge the needle down into the fabric, right behind your first stitch. It’s like taking one step forward and one step back, but trust me, you’re making progress.
Next, leapfrog over that first stitch and come up a stitch-length ahead. It’s a bit like hopscotch, but with a needle and thread. Keep this rhythm going—back a bit, forward a bit more—and watch as a strong, secure line forms, ready to take on the world (or at least the stress of daily wear and tear).
Whip Stitch
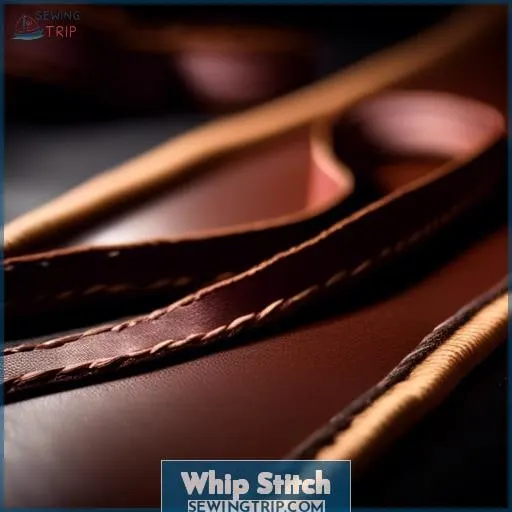
Whip stitching is a versatile hand sewing technique that’s perfect for hemming and fabric joining. It’s a go-to for rolled hems and creating decorative edges, making it a staple in your sewing repertoire.
When you’re whip stitching, you’re essentially wrapping the thread over the fabric’s edge, starting from the back to keep things neat. This stitch is all about enclosing the raw edge, ensuring your fabric doesn’t fray and unravel at the seams.
To achieve a professional look, maintain even spacing and consistent stitch length. It’s not just about utility; whip stitching can add a decorative flair to your projects. Think of it as the cherry on top of your sewing sundae – it’s functional, but it also looks good.
Whether you’re hemming a delicate voile or joining two pieces of felt, whip stitching has got you covered.
Overcast Stitch
The overcast stitch is a hand sewing technique used to prevent the unraveling of fabric edges by wrapping the thread over the edge in evenly spaced stitches. It’s particularly useful for finishing seams or edges that are prone to fraying and can be an alternative to machine-sewn zigzag or serging stitches.
This stitch is versatile and can be applied to a variety of fabrics, including those that are too bulky or delicate for a sewing machine.
Overcast stitches are commonly used for finishing fabric edges, sewing seams, and as a decorative element in appliqué. They’re also employed in embroidery to create raised line stitches on even-weave fabrics.
To hand sew an overcast stitch, you start with a knot and bring the needle up through the fabric from the back to the front. The thread is then wrapped around the edge, and the needle is brought through the fabric in the same direction for each stitch, maintaining even tension and spacing.
One of the main advantages of the overcast stitch is its simplicity and the control it offers, making it suitable for a range of projects from garment construction to decorative crafts. It’s also a valuable technique when a serger or sewing machine isn’t available or when working with fabrics that require a gentler touch.
There are variations of the overcast stitch, such as the blanket stitch, which is similar but leaves a row of straight stitching along the fabric’s edge, often serving a decorative purpose. Double overcasting, where you work a line of overcast stitches in one direction and then go back in the opposite direction, creates a finish similar to a zigzag stitch on a sewing machine.
To master the overcast stitch, practice is key. Start with wide stitches on a sampler and experiment with different stitch lengths and densities to find the best finish for your fabric. Remember to secure your thread at the end with a knot or back stitches to prevent unraveling.
Catch Stitch
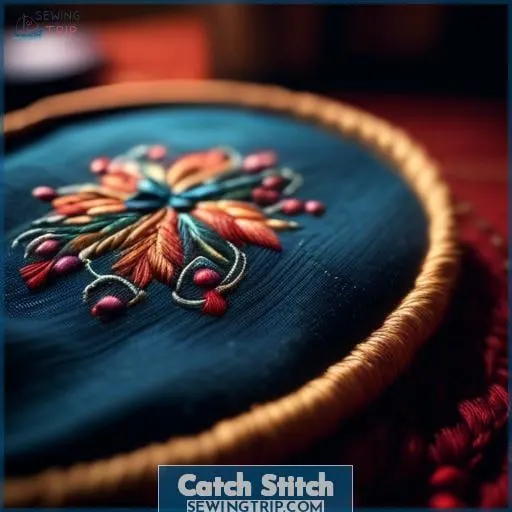
The catch stitch is a versatile hand stitch known for its flexibility and strength, making it a go-to for invisible hemming and securing knits. Its crisscross pattern allows for movement, which is particularly beneficial when working with thicker fabrics or knits.
This stitch isn’t only functional but can also be decorative, offering variations to suit different needs and aesthetics.
Catch stitch uses range from hemming to tacking two pieces together, and its zig-zag pattern is designed to accommodate fabric stretch while remaining strong. When executed with a thread color that matches the garment, the catch stitch becomes virtually invisible from the outside, providing a clean finish.
To perform a catch stitch, start with a single thread and a knot, working from the wrong side of the fabric. The needle moves in a diagonal motion, grabbing only a few threads of the fabric to maintain invisibility on the right side.
It’s important to ensure even spacing and stitch length for a professional look.
Comparing the catch stitch to a blind stitch reveals that both aim for invisibility but may differ in technique and the type of hem finish they provide. The catch stitch is particularly praised for its ability to stretch, making it superior for knit fabrics.
In summary, the catch stitch is a strong, flexible stitch ideal for invisible hemming and working with stretchy materials. Its ability to be both functional and decorative adds to its popularity in hand stitching projects.
Hand Stitching for Buttons
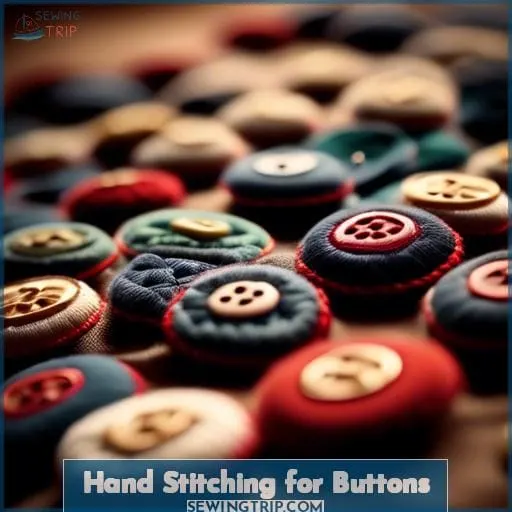
When it comes to hand stitching for buttons, mastering the techniques for attaching shank, 4-hole, and 2-hole buttons is essential for any sewing project.
Each type of button requires a specific approach to ensure it’s securely fastened and functional. Whether you’re working on a garment that needs a durable shank button, a piece that calls for the decorative appeal of a 4-hole button, or a simple repair involving a 2-hole button, understanding these methods will elevate your sewing skills and expand your creative possibilities.
Shank Buttons
After mastering the catch stitch, you’re ready to tackle shank buttons, a small but mighty component in your sewing arsenal.
Shank buttons, unlike their flat counterparts, boast a loop on the back, making them ideal for thicker fabrics where a bit of space between the button and fabric is necessary. Think of them as the high heels of the button world; they elevate the fabric, allowing it to drape gracefully without bunching.
When sewing them on, it’s crucial to consider shank placement, ensuring it aligns perfectly with your buttonhole for a seamless closure. Thread tension is another key player. Too tight, and you risk pulling the fabric; too loose, and the button dangles awkwardly.
4. Hole Buttons
To sew a four-hole button by hand, you’ll need to master a few key steps to ensure the button is secure and the finish is neat.
-
Prepare Your Materials: Gather a needle, thread, scissors, and your button. Cut a length of thread (about 24 inches should suffice) and thread your needle, tying a knot at the end of the thread.
-
Button Placement: Position the button where you want it on the fabric. If you’re replacing a button, align it with the corresponding buttonhole.
-
Starting the Stitch: From the back of the fabric, bring the needle up through one hole of the button and down the diagonally opposite hole, pulling the thread tight until the knot catches.
-
Crisscross Pattern: Continue by bringing the needle up through a second hole and down the opposite one, creating an ‘X’ shape with the thread across the button holes. Repeat this process several times to ensure the button is securely attached.
-
Creating a Shank: If you need a shank (a thread stem to give the button room to sit above the fabric), wrap the thread around the stitches under the button several times before finishing.
-
Securing the Thread: To finish, bring the needle to the back of the fabric and tie off the thread with a knot to secure the button in place. Trim any excess thread.
2. Hole Buttons
After mastering the 4-hole button, you’re ready to tackle the 2-hole variety with equal finesse.
- Button placement is key; align it with the buttonhole for a neat finish.
- Choose your Thread choice wisely; it should be strong and match your fabric.
- A secure Knotting technique at the thread’s end prevents unraveling.
- Maintain consistent Stitch length for durability and a clean look.
- Buttonhole reinforcement with extra stitches can prevent future mishaps.
Hand Stitching for Sequins
After mastering the art of attaching buttons, let’s dive into the glitzy world of sequin embellishments. Whether you’re jazzing up a jazz costume or adding pizzazz to a purse, sequins can transform the mundane into the magnificent.
But it’s not just about tossing on a handful of sparkle and hoping for the best. Oh no, sequin placement is an art form, and getting it right can mean the difference between a masterpiece and a mess.
When it comes to sequin density, think of it as the spice of your sewing project – a little can go a long way, or you can go full-on Mardi Gras. It’s all about the effect you’re after. And don’t even get me started on sequin shapes and colors.
From classic circles to funky flowers, and in every hue under the sun, your choices are as endless as a magician’s handkerchief trick.
Now, let’s talk technique. You’ll want to start from the back, bringing your needle up through the fabric and the center of the sequin. A small stitch on the side secures it, and then it’s on to the next. Overlap them for a fish-scale effect that’ll make mermaids envious.
And remember, even spacing and stitch length are your best friends for a professional finish.
But here’s a pro tip: if you’re planning a sequin marathon, arm yourself with a thimble. It’s the knight’s armor in the battle against finger pricks. And for those scattered sequin effects, consider using tiny seed beads as anchors – they’re like the fairy dust that holds the magic together.
In conclusion, sequin embellishments aren’t just about adding bling. They require a thoughtful approach to placement, density, and color to truly shine.
Hand Stitching Projects
Ready to dive into the world of hand stitching projects? Let’s roll up our sleeves and get crafty with some fabric embellishments that’ll make your creations pop!
-
Fabric Flowers: These aren’t just any old flowers; they’re your ticket to customizing just about anything. From jazzing up a plain tote bag to adding a touch of whimsy to a summer dress, fabric flowers are as versatile as they’re charming. And the best part? You can whip them up with just a few snips and stitches. Imagine turning a scrap of fabric into a blooming masterpiece!
-
Bows and Scrunchies: Talk about a dynamic duo! Bows add a dash of elegance to hair accessories, while scrunchies are the comeback kids of fashion. Whether you’re aiming for a classic look with a satin bow or going for a retro vibe with a velvet scrunchie, these projects are a fun way to practice your needle threading techniques and stitch patterns.
-
Small Purses: Who says practical can’t be pretty? Small hand-stitched purses aren’t only a testament to your creative expertise but also a showcase of your comprehensive knowledge of hand stitching tools. They’re perfect for storing your treasures or gifting to someone special.
Frequently Asked Questions (FAQs)
How can I prevent my hand stitches from puckering the fabric?
To dodge puckering, think of your fabric as a delicate dance partner. Don’t lead too aggressively.
Like finding the perfect dance rhythm, adjust your tension and stitch length to match the fabric’s weight and character. Imagine your needle and thread waltzing smoothly, without stepping on each other’s toes.
If puckers still crash your party, consider a lighter thread or a needle change. Remember, it’s all about harmony between your materials and technique.
What is the best way to ensure even spacing between hand stitches?
Imagine stitching with the precision of a Swiss watchmaker, where every stitch is a tick in perfect harmony.
To achieve this, mark even lines on your thumb as a guide. It’s like having a tiny ruler at your fingertips, ensuring your stitches march in lockstep across the fabric.
How do I choose the right type of thread for different hand stitching techniques?
Choose your thread based on fabric type and project needs.
Cotton thread pairs well with natural fibers, while polyester is durable for most fabrics.
Silk thread is ideal for fine fabrics.
Match thread weight to fabric weight for best results.
Can hand stitching be used effectively for stretchy or knit fabrics, and if so, how?
Yes, hand stitching can be effectively used on stretchy or knit fabrics by choosing the right stitches and techniques.
Imagine you’re turning a beloved but worn-out t-shirt into a cozy pillow cover. For such stretchy materials, a spaced backstitch is ideal because it allows the seam to stretch without breaking, ensuring durability and flexibility.
This stitch creates tiny, evenly spaced dots that look neat and provide the necessary give for the fabric’s stretchiness.
To achieve this, you’ll thread your needle with a polyester thread, which has its own elasticity, and work the stitch by going back a bit before moving forward underneath the fabric, creating a small space between stitches.
This method not only secures your project but also adds a touch of handcrafted charm, proving that with the right approach, hand stitching can beautifully complement even the stretchiest of fabrics.
What are some tips for maintaining consistent stitch length during hand sewing?
To keep your stitches even, mark your finger instead of the fabric; it’s quicker and adapts to how you hold your work.
Also, practice regularly to find your rhythm and avoid rushing, which can lead to uneven tension and stitch lengths.
Conclusion
Imagine you’ve just completed a delicate embroidery piece, a labor of love that’s taken weeks of careful, repetitive stitching. Each thread woven into the fabric not only adds to the beauty of the design but also intertwines with your emotions, capturing moments of tranquility and bursts of creativity.
As you’ve explored the various types of hand stitches, you’ve not only enhanced your technical skills but also embraced a form of creative expression that’s deeply personal and rewarding. The stitches you’ve mastered are more than just techniques; they’re a language of their own, allowing you to communicate through the art of sewing by hand.
With every stitch, you’re not just making a garment or a decoration; you’re crafting a story, a piece of art that speaks to the heart. Embrace this journey, and let the types of hand stitches you’ve learned be the vocabulary with which you write your next chapter in the world of textile art.

