This site is supported by our readers. We may earn a commission, at no cost to you, if you purchase through links.
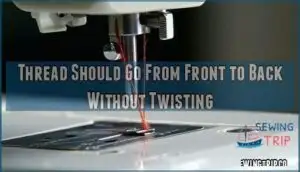
Cut your thread at an angle for a sharp point, then approach from the front of the needle.
Pull the thread straight back through the eye without twisting – think of it like threading a really important tunnel that your project depends on.
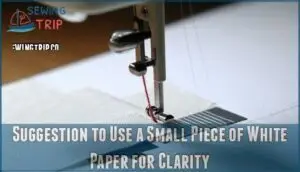
If you’re struggling to see clearly, place white paper behind the needle for contrast.
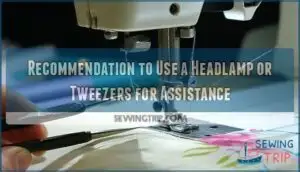
Some sewers swear by headlamps or tweezers for tricky moments.
Whether you’re using manual threaders, built-in systems, or going freestyle, the right technique makes all the difference in your stitching success.
Table Of Contents
- Key Takeaways
- Ensure Proper Lighting in Your Sewing Area
- Thread Should Go From Front to Back Without Twisting
- Raise The Needle to Its Highest Position
- Suggestion to Use a Small Piece of White Paper for Clarity
- Recommendation to Use a Headlamp or Tweezers for Assistance
- Needle Threaders
- Built-in Needle Threaders
- Automatic Needle Threaders
- Frequently Asked Questions (FAQs)
- Conclusion
Key Takeaways
- Set up proper lighting first – Position your machine near natural light and add LED task lighting at a 45-degree angle to eliminate shadows that make threading nearly impossible.
- Always raise the needle to its highest position – Turn the handwheel counter-clockwise or use the needle-up button before threading to protect your machine’s timing and create proper alignment.
- Thread from front to back without twisting – Cut your thread at a 45-degree angle and guide it straight through the needle’s eye from front to back to prevent tangles and ensure smooth stitching.
- Use tools when you’re struggling – Try a small piece of white paper behind the needle for contrast, needle threaders for precision, or a lightweight headlamp for hands-free illumination.
Ensure Proper Lighting in Your Sewing Area
Position your sewing machine near a window for natural light, but don’t rely on sunlight alone.
Essential placement of task lighting eliminates shadows that make threading nearly impossible.
Choose LED bulbs with proper wattage—around 100 watts equivalent works perfectly for detailed work.
Light temperature matters too, with cool white bulbs (4000-5000K) providing crisp sewing machine illumination without eye strain.
Warm yellow light can make threading feel like finding a needle in a haystack.
Reducing glare is vital for your sewing machine workspace, and can be achieved by angling your auxiliary light source to avoid reflections off the needle.
Many sewers swear by adjustable desk lamps or clip-on sewing machine lights positioned at 45-degree angles.
For enhanced visibility, consider using a LED light strip to brighten the workspace.
Consider wearing a lightweight headlamp for precision work—it sounds quirky, but you’ll thread needles like a pro.
Your eyes will thank you later, as proper lighting makes a significant difference in the sewing experience.
Thread Should Go From Front to Back Without Twisting
Getting your thread direction right is like following a one-way street—there’s only one correct path. The front-back method guarantees your sewing machine threading works smoothly every time, preventing those annoying tangles that can derail your project.
Thread like your sewing machine depends on it—because it does.
Proper thread direction means guiding the thread through the needle’s eye from the front side to the back side. This consistent threading approach prevents twist issues that cause knots and uneven stitches. When you maintain smooth passage through the needle, your machine runs like a dream.
Here’s your needle threading guide for perfect results:
- Cut thread at a clean 45-degree angle for easier insertion
- Keep the thread taut but not overly tight during threading
- Position your spool so thread unwinds counter-clockwise naturally
- Use twist prevention by holding the thread steady near the eye
- Check that thread lies flat against the needle’s surface
- Pull thread straight through without letting it curl or bend
Master this fundamental technique, and you’ll thread a needle confidently every time. Guarantee you understand the tension discs function for ideal results.
Raise The Needle to Its Highest Position
Precision marks the difference between smooth threading and frustrating tangles. You’ll want to turn your handwheel toward you (counter-clockwise) until the needle reaches its highest point.
This needle up position isn’t just about convenience—it’s about protecting your machine’s delicate timing mechanisms. When you raise the needle properly, you’ll also bring the take-up lever to its peak position.
This threading alignment creates the perfect setup for feeding thread through each guide without resistance. Skipping this step often leads to bent needles or damaged internal components. The motorized system explained controls the needle’s precise positioning.
| Method | Direction | Why It Matters |
|---|---|---|
| Handwheel | Turn toward you | Raises needle safely |
| Needle Up Button | Press once | Quick positioning |
| Hand Crank | Counter-clockwise | Manual control |
| Foot Pedal | Gentle tap | Electronic precision |
Most modern machines have a needle up position button that eliminates guesswork. However, the traditional handwheel direction method works universally across all sewing machine models. Taking this threading step seriously prevents costly repairs and makes certain your sewing machine needle threading process goes smoothly every time.
Suggestion to Use a Small Piece of White Paper for Clarity
Once your needle’s in position, here’s a threading tutorial game-changer: grab a small piece of white paper.
This simple paper threading method creates incredible contrast and visibility against the dark needle eye, making sewing machine threading much easier.
White Paper Benefits for threading steps:
- Paper Size Matters – Tear a 1-2 inch piece of plain white paper (avoid patterns or dark colors)
- Contrast and Visibility – Hold the paper directly behind the needle eye while threading
- Lighting and Paper – The white backdrop eliminates shadows, making the tiny opening crystal clear
This sewing machine threading tutorial trick works because Alternative Backdrops create visual definition.
You’ll thread faster and with less eye strain using this method.
Recommendation to Use a Headlamp or Tweezers for Assistance
Two essential tools can transform your sewing machine threading experience from frustrating to effortless. A headlamp provides Headlamp Benefits like hands-free illumination, letting you position the perfect Lighting Angles directly onto the needle’s eye. This threading tutorial approach eliminates shadows that plague traditional overhead lighting.
Good lighting transforms threading from a struggle into smooth sailing—your eyes will thank you.
For Dexterity Challenges, needle-nose tweezers offer precision control. The Tweezers Technique involves grasping the thread end firmly and guiding it steadily through the needle’s eye. These sewing aids for poor vision provide the steady grip your fingers might lack.
Many sewers find a sewing headlamp helpful for detailed work.
Headlamp Benefits:
- Adjustable beam focus for targeted illumination
- Lightweight comfort during extended sewing sessions
- Battery-powered portability for any workspace
- Eliminates hand shadows that block your view
Tweezers Usage:
- Non-slip grip prevents thread slipping
- Precision control for exact placement
- Steady handling reduces hand tremors
- Perfect for delicate threading techniques
These Magnification Options and needle threader tool alternatives make sewing machine threading accessible for everyone, regardless of vision or dexterity limitations.
Needle Threaders
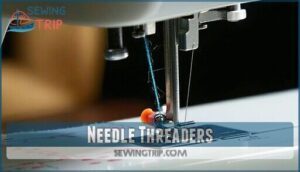
If you’re struggling to get thread through that tiny needle eye, a needle threader can be your best friend.
These simple tools make the job much easier, though they can be a bit fragile and might break if you’re not gentle with them.
Step-by-step Guide on Using a Needle Threader
Using a needle threader tool transforms sewing machine threading from frustrating to effortless.
Insert the wire loop through your needle’s eye from front to back. Thread your cotton or polyester through the threader’s loop, then gently pull the wire loop back through the needle, bringing your thread with it.
Many sewers find it useful to buy threader tools for various sewing projects.
Popular threader types include the reliable Dritz threader and basic wire loop models.
Self-threading needles offer another option, though regular threading techniques work with standard needles too, making the process effortless and allowing for various sewing projects.
Note About Potential Issues With Needle Threaders Breaking
Even quality needle threading tools face their limits. Threader hook bending happens when you apply too much pressure or work with thick threads.
When your needle threader snaps, don’t panic—threading a sewing needle by hand remains perfectly doable. Gentle threader handling extends their lifespan substantially.
Consider automatic needle threader options or sewing machine threading issues as signs you need sturdier tools. Many users choose an automatic threading device for convenience.
Threader replacement costs stay minimal, but investing in durable needle threading tools prevents constant breakage. Keep tweezers handy as threader alternative methods for tricky situations.
Built-in Needle Threaders
Many modern computerized sewing machines come with built-in needle threaders that make threading much easier than doing it by hand.
These helpful features use a small hook or lever mechanism to guide the thread through the needle’s eye automatically, saving you time and reducing eye strain, which is a significant advantage of using such modern machines.
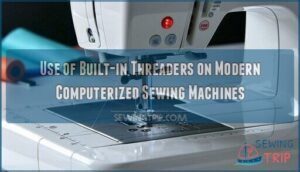
Use of Built-in Threaders on Modern Computerized Sewing Machines
Modern computerized machines feature built-in threaders that revolutionize sewing machine threading. These automatic needle threader systems eliminate squinting and guesswork, making threading effortless for sewers of all skill levels.
Built-in threaders offer three major advantages:
- Instant Relief – No more eye strain or frustration when your thread won’t cooperate
- Time Freedom – Thread your needle in seconds instead of minutes of fumbling
- Confidence Boost – Start every project knowing your machine’s got your back
These sewing machine features represent a significant upgrade in threading instructions. A vital element is the threader hook design, which gently pulls the thread through the needle eye.
However, threader maintenance matters—handle gently to guarantee threader longevity. Consider threader limitations with thick threads or tiny needles, where threader alternatives might work better. Thread compatibility varies by machine, so check your manual for superior threader performance.
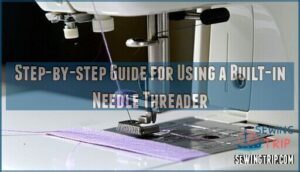
Step-by-step Guide for Using a Built-in Needle Threader
Now that you understand how built-in threaders work on modern sewing machines, let’s walk through the actual threading process step by step.
First, verify your needle positioning is correct by raising it to its highest point using your sewing machine’s handwheel or needle up button. Pull down the threader lever gently until the small hook passes through the needle’s eye from back to front. Place your thread under the guide hook, keeping slight thread tension as you hold it parallel to your work surface.
Here’s your threading checklist:
- Check threader compatibility with your needle size before starting
- Maintain steady hands during hook adjustment and lever movement
- Apply gentle downward pressure only – never force sideways movement
- Keep threader maintenance in mind by moving slowly and deliberately
Release the lever carefully, allowing it to pull a thread loop through the needle’s eye. Complete your automatic needle threader process by pulling the remaining thread through. This sewing machine threading guide becomes second nature with practice.
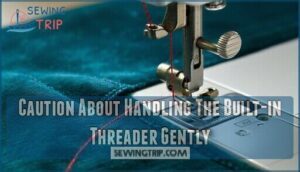
Caution About Handling The Built-in Threader Gently
Handle your built-in needle threader like fine china—these delicate threader parts break easily with rough handling.
Avoid forcing threader mechanisms when you feel resistance, as threader hook bending happens quickly.
Apply gentle downward pressure only, never sideways force, to prevent expensive threader repair costs that could’ve been prevented.
Your sewing machine’s threading tools need tender loving care to keep working smoothly for years.
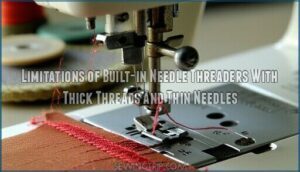
Limitations of Built-in Needle Threaders With Thick Threads and Thin Needles
Built-in needle threaders aren’t perfect for every sewing machine threading situation.
Thread thickness and needle size matter more than you’d think. Here’s when these threading tools struggle:
- Heavy threads (size 30 and thicker) – The threader’s delicate wire can’t handle bulky thread
- Tiny needles (size 65/9 and smaller) – Not enough room for the threader mechanism
- Specialty needles – Twin needles often cause threader fragility issues
- Frequent repairs needed – These mechanisms break easily with wrong thread combinations
When your built-in threader fails, try alternative tools or manual threading for better results.
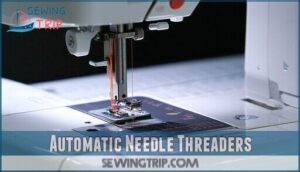
Automatic Needle Threaders
Automatic needle threaders take the hassle out of threading by doing the work for you with just the push of a button.
You’ll find these handy features on many modern computerized sewing machines, making threading quick and effortless even with shaky hands, using an automatic needle threader.
Steps to Use The Automatic Needle Threader
You’ll find automatic threader instructions in your sewing machine threading guide, but here’s the easy threading method: raise your needle completely, guide thread through designated hooks, then press the automatic threader button.
The threader hook creates a loop—gently pull it through. Remember threader alignment issues cause most failures, so check your threader compatibility guide.
Regular threader maintenance tips include cleaning lint buildup. For those with dexterity challenges, a needle inserter can greatly simplify the process.
If problems persist, consider alternative threading methods for reliable results.
Challenges With Twin Needles and Sergers
Automatic needle threaders hit roadblocks when you’re dealing with twin needle tension and serger threading order complications.
These specialty tools don’t play nice with standard threading methods, leaving many sewers scratching their heads. Don’t worry—there’s light at the end of the tunnel.
Here’s your game plan for tackling these tricky situations:
- Twin needles: Thread each needle separately, checking twin needle tension settings between passes
- Serger looper threading issues: Follow your machine’s color-coded threading order precisely—skipping steps causes chaos
- Differential feed problems: Adjust feed settings before threading to prevent fabric bunching
- Skipped stitches: Verify proper needle insertion and thread path alignment
Most automatic threaders simply can’t handle these complex setups. You’ll need to master the easy threading method manually for sergers and twin needle work, but once you’ve got it down, these sewing machine threading problems become manageable challenges rather than project-stoppers.
Frequently Asked Questions (FAQs)
What sewing machine needle threader do you use?
Like threading a needle with your eyes closed, you’ll find several helpful options. Try handheld needle threaders, built-in automatic threaders, or the Dritz Needle Inserter for easier threading every time.
How do you thread a sewing machine?
Start by turning off your machine and raising the needle to its highest position.
Place thread on the spool pin, then follow your machine’s threading path through guides and tension discs.
Thread the needle from front to back, pulling several inches through underneath, to ensure proper threading and to start sewing effectively.
What are the best needle threaders?
You’ll love the Dritz Needle Inserter and Threader for its V-shaped channel design that slides down needles effortlessly.
Silver wire loop tools work great too, inserting from back to front for smooth threading.
What thread weight works best for machine needles?
You’ll get the best results using thread weights between 40 and 50 for most machine needles.
Too thick, and you’ll jam things up; too thin, and the stitches might look wimpy.
Goldilocks would approve!
How often should I replace my sewing needle?
Replace your sewing needle every 8-16 hours of stitching or after completing 2-3 projects.
Dull needles create skipped stitches, thread breaks, and fabric snags that’ll frustrate you faster than tangled thread.
Why does my thread keep breaking while sewing?
Your thread’s breaking because you’re using the wrong needle size, threading incorrectly, or your tension’s too tight.
Check that your needle matches your fabric weight and thread type, then adjust your machine’s tension settings.
Can I use hand sewing needles in machines?
While hand needles might seem similar, they’re completely different beasts.
You can’t use hand sewing needles in machines – they’ll snap instantly.
Machine needles have flat backs and precise construction for mechanical operation.
What causes needle to bend or break frequently?
Frequent needle bending or breaking happens when you’re using the wrong needle size for your fabric, pulling material while stitching, or hitting pins.
You’ll also snap needles with blunt or damaged points, improper threading tension, or forcing thick fabrics through without adjusting settings, which can be prevented by using the correct technique and proper equipment maintenance.
Conclusion
Threading your sewing machine needle correctly can make or break your project – and coincidentally, it’s often the step that breaks many sewers’ patience too.
You’ve learned how to thread sewing machine needle using proper lighting, positioning, and various threading tools.
Whether you’re using manual threaders, built-in systems, or going freestyle, remember that practice makes perfect. The key is patience, good lighting, and the right technique for your specific machine.
Don’t get discouraged if it takes a few tries – even experienced sewers sometimes struggle with tricky threads or tiny needle eyes, and it’s all about finding the right technique and having good lighting.
- https://janomelife.wordpress.com/2022/03/07/built-in-needle-threader/
- https://www.youtube.com/watch?v=eG1HOrE400w
- https://www.ageberry.com/how-to-thread-needle-sewing-machine/
- https://www.reddit.com/r/sewing/comments/1d7igu7/psa_for_those_of_you_who_sew_with_a_machine_with/
- https://www.goldstartool.com/blog/the-proper-use-of-needle-threaders-pros-and-cons.htm

