This site is supported by our readers. We may earn a commission, at no cost to you, if you purchase through links.
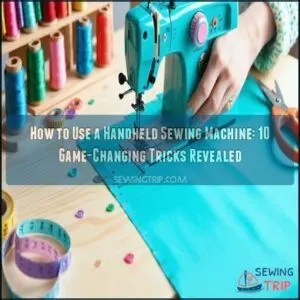 Using a handheld sewing machine is easier than it seems.
Start by loading the batteries or plugging it in, then thread the needle following the machine’s guide—this step’s essential for clean stitches.
Place your fabric under the presser foot and align the seam area with the needle. Hold the fabric steady and press the machine’s switch to start stitching.
Move at a steady pace to avoid uneven lines or skipped stitches. Handheld machines work best on lightweight fabrics, so don’t expect miracles on denim.
Practice makes perfect, and once mastered, these tools are lifesavers for quick fixes and creative projects!
Table Of Contents
- Key Takeaways
- Getting Started With Handheld Sewing
- How to Use a Handheld Sewing Machine Effectively
- Setting Up Your Handheld Sewing Machine
- Mastering Basic Handheld Sewing Techniques
- Working With Different Fabrics and Threads
- Maintaining Proper Tension for Quality Stitches
- Troubleshooting Common Handheld Sewing Issues
- Making Repairs and Alterations With Your Machine
- Using Your Handheld Sewing Machine for Crafts
- Advanced Handheld Sewing Machine Techniques
- Frequently Asked Questions (FAQs)
- Conclusion
Key Takeaways
- Load 4 AA batteries, thread the needle carefully, and adjust tension for smooth operation.
- Stick to lightweight fabrics like cotton or polyester for better results and avoid thick materials like denim.
- Practice on scrap fabric to master guiding the fabric steadily and making clean stitches.
- Use the machine for quick fixes, hems, or simple repairs, but don’t expect it to handle heavy-duty tasks.
Getting Started With Handheld Sewing
You’ll need to load four AA batteries and follow the instruction manual carefully before using your handheld sewing machine.
Once powered up, test the needle movement by pressing the power button and verify proper threading through the tension disks for superior stitching results.
Choosing The Right Machine
Finding the right handheld sewing machine starts with matching it to your specific needs. For beginners, the Singer Stitch Sew Quick offers versatility at an affordable price point, handling everything from silk to leather.
If you’re looking for more features, consider the Singer Quantum Stylist 9960 with its larger sewing area and better accessory storage.
When comparing options, evaluate these key factors:
- Machine weight (lighter models improve portability)
- Stitch options (basic vs. decorative capabilities)
- Fabric compatibility (thicker fabrics require more powerful machines)
- Power source (battery-operated vs. corded)
- Intended use (quick repairs vs. detailed projects)
Most portable sewing machines start around $100, though feature-rich models like the Husqvarna Viking Onyx 25 offer better educational resources for beginners. Many users find it convenient to shop for options online.
The Brother CS7000X provides exceptional smoothness when working with various fabrics.
Essential Components to Know
Now that you’ve picked your perfect pocket-sized sewing companion, let’s get familiar with its key parts.
Your handheld sewing machine features several critical components: the bobbins and spindle for thread storage, various needle types for different fabrics, tension disks that control stitch tightness, a fixing plate to hold material in place, and a power source compartment.
Understanding these elements will transform frustrating first attempts into smooth, successful stitching, and this knowledge is crucial for mastering your sewing machine, making it an essential part of the learning process to achieve perfect results.
Loading Batteries and Setting Up
Setting up your handheld sewing machine begins with proper battery installation—the foundation of reliable operation.
For successful initial setup:
- Load four AA batteries into the bottom compartment, carefully aligning positive and negative terminals according to the markings. Incorrect placement is a common source of power issues.
- Place your machine on a stable tabletop surface before proceeding with threading or tension adjustments. This prevents wobbling during operation.
- Lift the fastening plate to prepare for fabric insertion, then release the machine and press the power button to test functionality.
Once powered, check that the needle arm moves smoothly before attempting to thread the bobbin, ensuring smooth operation and preventing potential threading issues.
How to Use a Handheld Sewing Machine Effectively
Using a handheld sewing machine effectively requires both practice and proper technique.
Master these fundamentals for best results:
- Maintain steady control by holding the machine firmly with your dominant hand while guiding fabric with the other
- Position fabric flat and taut under the needle to guarantee even stitching
- Use slow, deliberate movements when starting until you develop confidence
Choose lightweight fabrics for your first projects.
Always test on scrap material before tackling your main project.
Regular maintenance keeps your portable sewing machine running smoothly.
Setting Up Your Handheld Sewing Machine
You’ll need to load four AA batteries into the bottom compartment and properly thread your machine before starting any sewing project.
Proper setup guarantees your handheld sewing machine will produce tight, secure stitches without jamming or skipping, which is crucial for a successful sewing experience with proper setup.
Loading The Bobbin Correctly
Now that you’ve grasped the basics of your handheld sewing machine, let’s tackle the bobbin – a small but mighty component that can make or break your sewing experience.
The bobbin may be small, but it holds the key to smooth, flawless stitching with your handheld sewing machine.
Bobbin threading doesn’t have to be complicated. Start by placing your thread spool on the designated pin, ensuring it rotates freely. For handheld machines, the bobbin usually sits in a side compartment rather than underneath like standard machines.
Insert your bobbin with the thread unwinding counterclockwise, then pull it through the tension control disks.
Bobbin Type Placement Thread Direction Key Tip
Smooth stitches need balanced thread tension! Avoid winding issues by matching your bobbin size to your machine’s specifications.
Threading The Needle Properly
Now that your bobbin is set up, threading the needle is your next step. With handheld sewing machines, proper threading makes all the difference between smooth stitching and frustrating tangles.
Follow these precise steps for successful threading:
- Load the thread spool counterclockwise onto the pin, ensuring it rotates freely.
- Guide the thread through the notch above the spool pin, then between both tension disks for proper stitch tightness.
- Loop the thread through the hook on the needle arm—often the trickiest part.
- Thread the needle eye from back to front, leaving a 2-inch tail.
Double-check your thread path before starting. When correctly threaded, your handheld sewing machine will produce clean, consistent stitches right away.
Mastering Basic Handheld Sewing Techniques
You’ll achieve professional results with your handheld sewing machine once you master the basic techniques of stitch selection, seam width adjustment, and speed control.
These foundational skills form the backbone of successful portable sewing and will transform your quick repairs into polished finished products.
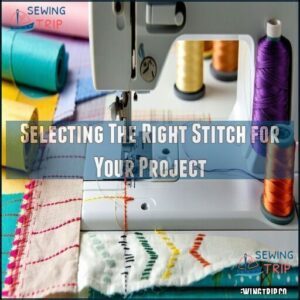
Selecting The Right Stitch for Your Project
Every successful sewing project begins with choosing the perfect stitch.
Match your selection to fabric type and project complexity for professional results.
- Straight Stitch: The workhorse for basic seams and everyday projects—ideal for cotton and stable fabrics where durability matters.
- Zigzag Stitch: Perfect for stretchy materials or when you need flexible, strong seams that won’t break.
- Chain Stitch: Creates decorative, easily removable stitches—great for temporary basting or when testing placement.
- Backstitch: Provides reinforcement at stress points and prevents seams from unraveling.
Your stitch choice affects both function and aesthetic appeal.
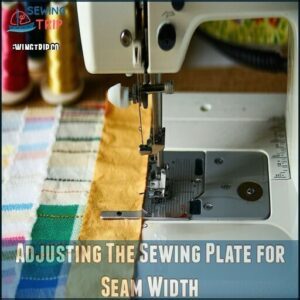
Adjusting The Sewing Plate for Seam Width
The sewing plate on your handheld sewing machine works like a compass for your fabric, guiding stitch placement and determining seam width.
Adjusting this plate lets you control how far your stitches sit from the fabric edge. For perfect stitch consistency, align your fabric with the plate’s guide marks.
The feed dogs grip fabric, which is key to consistent stitch length.
| Plate Position | Seam Width | Ideal Applications |
|---|---|---|
| Narrow (1-2mm) | Very slim | Delicate hems, lingerie |
| Medium (3-5mm) | Standard | Everyday repairs, thin fabrics |
| Wide (6-8mm) | Generous | Thick materials, reinforced seams |
| Extra-Wide (9mm+) | Maximum | Heavy fabrics, canvas work |
Don’t rush plate adjustment—it’s the secret to professional-looking repairs!
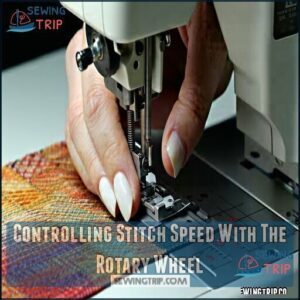
Controlling Stitch Speed With The Rotary Wheel
After adjusting your seam width, mastering the rotary wheel is your next step toward flawless stitching.
The rotary wheel on your handheld sewing machine gives you precise control over speed and accuracy:
- Slow rotation creates tighter, more accurate stitches in detailed areas
- Smooth hand coordination prevents thread bunching and tension issues
- Consistent turning rhythm produces even stitch lengths
- Practiced control lets you navigate fabric curves without stopping
Turn clockwise at a steady pace for best results—your stitch quality depends on it!
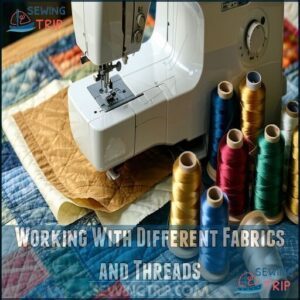
Working With Different Fabrics and Threads
You’ll need to match your needle and thread to your fabric type for the best results with your handheld sewing machine.
Different materials require specific settings, so adjust your tension properly to guarantee smooth, even stitches across lightweight cottons to medium-weight polyesters, ensuring smooth results.
Choosing The Right Needle for Fabric Thickness
The success of your handheld sewing machine project hinges on selecting the right needle for your fabric thickness.
Matching needle size to fabric type prevents damage and guarantees quality stitches.
Use smaller needles (70/10) for lightweight fabrics like silk, and larger needles (90/14-100/16) for denim or canvas.
Universal needles work well for most everyday projects, while specialty needles offer better results for specific materials.
Understanding specific needle dimensions is vital for superior sewing.
The choice of needle depends on the type of fabric you are working with, and using the correct needle can make a significant difference in the outcome of your project.
This table provides a quick reference guide to help you choose the correct needle for your project, ensuring that you achieve the best possible results with your handheld sewing machine.
By following these guidelines and selecting the appropriate needle, you can ensure a successful and enjoyable sewing experience.
Adjusting Tension for Smooth Stitches
After selecting the right needle, your focus should shift to tension adjustment – the magic behind professional-looking stitches.
Proper tension control prevents puckering, loose threads, and broken needles when using your handheld machine.
To achieve stitch consistency with different fabrics:
- Turn tension disks clockwise for thicker materials, counterclockwise for delicate fabrics
- Test settings on scrap fabric before committing to your project
- Look for balanced stitches where threads meet in the middle of the fabric
- Adjust gradually in small increments for precise control
Think of tension as a handshake between your thread and fabric – not too tight, not too loose, just right for proper fabric compatibility.
Using The Right Thread for Your Project
When selecting thread for your handheld sewing machine project, choosing the right type guarantees professional results and prevents frustration.
- Match thread weight to fabric thickness – lightweight thread (50-60 wt) for delicate fabrics, heavier thread (30-40 wt) for denim or canvas
- Consider thread material – polyester for stretch, cotton for natural fabrics
- Confirm thread-needle compatibility – thinner thread requires smaller needle sizes
These pairings create ideal tension and stitch appearance every time. Using high-quality thread brands will also guarantee smoother sewing and prevent mistakes, ensuring a successful project with high-quality thread and proper thread-needle compatibility.
Maintaining Proper Tension for Quality Stitches
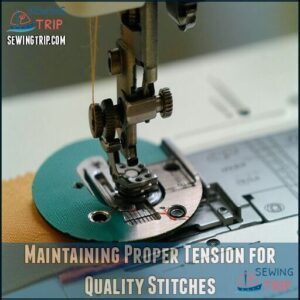
You’ll need to guide thread through both tension disks to achieve tight, professional-looking stitches with your handheld sewing machine.
Thread tension determines stitch quality, so adjust these disks carefully when working with different fabric types.
Adjusting Tension Disks for Thread Tightness
The perfect stitch depends entirely on your thread tension disk settings.
When you’re working with fabric of any thickness, you’ll need to adjust the tension disks for proper thread tightness control.
Turn the dial clockwise for tighter stitches or counterclockwise for looser ones.
Always test on scrap fabric first to achieve thread tension balance.
Small adjustments make significant differences in how your handheld sewing machine performs—like fine-tuning an instrument, which requires careful handling to achieve the perfect stitch.
Using The Correct Thread Type
With your tension disks properly set, your thread choice now takes center stage.
The right thread type directly impacts your stitch quality on handheld machines.
- Thread Material: Polyester offers strength for everyday projects; cotton provides a softer finish
- Thread Weight: Thinner (higher number) for delicate fabrics; thicker (lower number) for heavy materials
- Fabric Compatibility: Light threads for silk and chiffon; sturdy threads for denim and canvas
- Needle Size: Match thread thickness to your needle—thicker threads need larger needle eyes
- Stitch Appearance: Smooth thread creates cleaner stitches on your portable machine
For robust stitching, consider using polyester sewing thread.
Troubleshooting Common Handheld Sewing Issues
You’ll encounter occasional hiccups when using your handheld sewing machine, from thread jams to battery issues.
These common problems can be quickly fixed with proper threading, tension adjustments, and battery checks.
Needle Not Stitching or Breaking
Is your needle not stitching properly?
After careful tension adjustments, check for bent needles or incorrect needle alignment.
Match needle type to fabric thickness—universal for lightweight materials, denim needles for thick fabrics.
Inspect for dull tips that cause skipped stitches.
Problems often stem from improper threading or bobbin issues.
Keep your machine clean and maintain proper needle position to prevent frustrating stitching problems during your projects.
Thread Tension Problems and Solutions
Struggling with your handheld sewing machine’s thread tension? You’re not alone. Proper tension control is essential for clean stitches.
Here’s how to troubleshoot:
- Check the tension disks for dust or thread fragments that block proper adjustment
- Match thread type to your fabric thickness—heavier fabrics need stronger thread
- Confirm the bobbin case tension is correctly set using the small screw
- Adjust tension gradually while testing on scrap fabric before tackling your project
Incorrect thread can lead to tension imbalance issues, which affects the overall sewing machine’s performance and can cause tension imbalance. Clean stitches are a result of proper thread tension control.
Machine Not Turning on or Functioning
Now that we’ve fixed your thread tension issues, let’s address another common challenge: when your handheld sewing machine won’t cooperate at all.
If your machine refuses to turn on or function properly, check these common culprits:
- Battery Polarity: Verify that batteries are inserted correctly with proper +/- alignment
- Power Switch Problems: Verify the switch moves freely and makes proper contact
- Internal Wiring Issues: Look for loose connections or damaged wires
Remember to consult your machine’s manual for specific troubleshooting steps.
Making Repairs and Alterations With Your Machine
You’ll find that your handheld sewing machine can handle most common clothing repairs from hemming pants to fixing tears.
With proper tension settings and the right needle for your fabric, you can easily extend the life of your favorite garments, which is a key aspect of maintaining your clothing, and by doing so, you can easily keep them in good condition.
Hemming Pants and Fixing Tears
Why struggle with droopy pants when your handheld sewing machine can fix them in minutes?
For hemming, simply fold the fabric to desired length, pin in place, and stitch a straight line.
When tackling tears, secure fabric patches behind the damage for reinforcement before stitching.
Keep seams tight by maintaining proper tension while mending clothes, your repairs will look professional with practice—no tailor required, and it’s a skill that will make your repairs look professional.
Sewing Buttons and Creating a Blind Hem
Tackling button attachment and blind hems becomes straightforward with your handheld sewing machine.
- Scotch tape secures button placement while a needle between holes maintains proper spacing
- Post-it notes create perfect button gaps from fabric for easier fastening
- For blind hemming, position fabric with folded edge facing the foot and pins pointing away
- Select your machine’s blind hem stitch for nearly invisible results
Use these techniques for professional-looking repairs without traditional sewing machine bulk.
Shortening or Lengthening Garments
While altering garments with your handheld sewing machine, measuring accurately is essential for professional results. You’ll need to mark fabric precisely before making any cuts.
For hemming techniques, fold fabric twice to create a clean edge that won’t fray when stitched.
| Alteration Type | Fabric Considerations | Finishing Touches |
|---|---|---|
| Hem Pants | Pin evenly around leg | Press before sewing |
| Lengthen Skirt | Check for extra fabric | Add compatible trim |
| Shorten Sleeves | Mark both sides equally | Double fold for durability |
| Expand Waistband | Use stretchy material | Secure with backstitch |
| Minor Repairs | Match thread color | Test on scrap first |
While altering garments with your handheld sewing machine, measuring accurately is essential for professional results. You’ll need to mark fabric precisely before making any cuts.
| Alteration Type | Fabric Considerations | Finishing Touches |
|---|---|---|
| Hem Pants | Pin evenly around leg | Press before sewing |
| Lengthen Skirt | Check for extra fabric | Add compatible trim |
| Shorten Sleeves | Mark both sides equally | Double fold for durability |
| Expand Waistband | Use stretchy material | Secure with backstitch |
| Minor Repairs | Match thread color | Test on scrap first |
For hemming techniques, fold fabric twice to create a clean edge that won’t fray when stitched.
Using Your Handheld Sewing Machine for Crafts
Your handheld sewing machine can transform simple materials into creative craft projects with minimal setup.
You’ll find it particularly useful for lightweight fabrics like cotton and silk, making it perfect for decorative elements on bags, iron-on patch applications, and lining for crochet projects, which involves working with creative craft.
Choosing The Right Materials and Fabrics
Your handheld sewing machine’s success depends entirely on choosing compatible materials. Lightweight fabrics like cotton and polyester yield the best results, while heavyweight denim can strain your portable device.
Lightweight fabrics like cotton and polyester ensure smooth stitching and effortless results, while denim may challenge your handheld sewing machine.
Fabric properties matter when selecting materials for your project. This is crucial because the right fabric can make a significant difference in the quality of your work.
To ensure the best results, follow these guidelines:
- Match your needle size to fabric weight (70/10 for thin materials, 80/12 for medium)
- Select thread type that complements your fabric thickness for superior stitch quality
- Test material compatibility on scraps before starting your project
- Prepare fabric edges to prevent jamming in your machine
Remember that smooth, tightly woven fabrics are easier to manage than stretchy or bulky materials when using handheld sewing machines. This consideration is key to achieving professional-looking results and preventing machine strain. By choosing the right fabric and following these tips, you can ensure a successful sewing experience with your handheld machine, resulting in high-quality stitches and a professional finish.
Simple Crafts and Projects for Beginners
Beginners can discover creativity with these accessible projects for your handheld sewing machine.
Start small and build confidence with each stitch.
| Project | Materials | Difficulty | Time | Perfect For |
|---|---|---|---|---|
| Fabric Coasters | Cotton squares, thread | ★☆☆ | 20 min | Quick gifts |
| Bookmarks | Ribbon, felt scraps | ★☆☆ | 15 min | Scrap fabric use |
| Phone Pouch | Denim/canvas, elastic | ★★☆ | 35 min | Practical items |
| Simple Tote | Cotton fabric, thread | ★★☆ | 45 min | Grocery shopping |
| Decorative Pillow Cover | Home decor fabric | ★★★ | 60 min | Simple home decor |
Tips for Success and Creativity
Success with your handheld sewing machine blooms from thoughtful preparation and creativity.
Smart fabric choices lay the foundation for impressive projects, while proper machine customization guarantees peak performance for your specific needs.
Experiment with creative embellishments to transform simple repairs into personalized statements.
Develop your skills gradually with these approaches:
- Keep a sewing journal documenting techniques that work best with your machine
- Test stitch settings on scrap fabric before starting new projects
- Join online communities for fresh DIY sewing project ideas and troubleshooting to ensure you can overcome any obstacles and achieve peak performance.
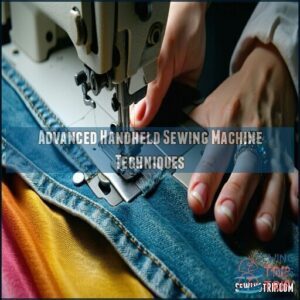
Advanced Handheld Sewing Machine Techniques
You’ll discover more creative potential with your handheld sewing machine once you master these advanced techniques.
Now you can confidently work with challenging fabrics, create custom embellishments, and tackle ambitious DIY projects that showcase your growing skills, utilizing your newfound ability to work with a variety of materials and custom embellishments.
Sewing on Different Types of Fabric
While mastering fabric sewing with a handheld sewing machine requires practice, matching materials correctly guarantees professional results.
Your fabric weight determines everything from needle choice to tension adjustment.
For best results with different fabrics:
- Select appropriate needles: Use size 70/10 for silk, 80/12 for cotton, and 90/14 for denim
- Adjust stitch length: Shorter for lightweight fabrics, longer for heavier materials
- Maintain proper tension: Looser for delicate fabrics, tighter for sturdy materials
Creating Custom Designs and Embellishments
With your handheld sewing machine, transform ordinary fabrics into custom masterpieces.
Apply fabric appliqués and create unique stitch patterns that showcase your creativity.
| Embellishment | Technique | Difficulty |
|---|---|---|
| Custom Patches | Chain stitch | Easy |
| Beaded Accents | Single thread | Medium |
| Embroidery Options | Free-motion | Advanced |
For best results, practice on scrap fabric before adding embellishments to sewing projects. Your portable machine is perfect for these detailed crafting projects, allowing you to create custom masterpieces with unique stitch patterns.
Using Your Handheld Sewing Machine for DIY Projects
Now that you’ve mastered custom designs, let’s transform your handheld sewing machine into a DIY powerhouse. Your portable device excels at quick projects that showcase your creativity.
- Create patch applications for personalized clothing
- Stitch linings for crochet projects
- Repair small tears in bags and backpacks
- Craft simple home decor items
- Make quick fabric gift pouches
- Assemble lightweight fabric accessories, which can help you create and personalize your items.
Frequently Asked Questions (FAQs)
How hard is it to use a handheld sewing machine?
It’s surprisingly simple, but don’t expect perfection right away.
Threading can be tricky, and tension adjustments might feel like a mystery.
With patience and practice, though, you’ll sew quick fixes or small projects with ease.
Are the hand held sewing machines any good?
Handheld sewing machines can be handy for quick fixes, lightweight fabrics, and small projects.
They’re portable and simple to use, but don’t expect heavy-duty performance or flawless stitches—perfect for beginners or on-the-go repairs, making them ideal for quick fixes.
How do I use a handheld sewing machine?
Getting started is a breeze! Load 4 AA batteries, thread the needle from back to front, and verify proper tension.
Place fabric under the plate, press the power button, and sew away smoothly!
How to use the handheld sewing machine power adapter?
Plug the power adapter securely into the machine and an outlet, ensuring proper voltage compatibility.
Switch on the machine, and the needle arm should move.
Always follow the manual’s guidelines for safe and efficient use.
Can a beginner use a handheld sewing machine?
Learning the ropes isn’t hard with a handheld sewing machine.
It’s beginner-friendly, lightweight, and perfect for simple tasks like repairs or hems.
Just follow the manual, practice on scrap fabric, and adjust tension carefully.
How to use a mini handheld sewing machine?
Place fabric under the fastening plate, thread the needle from back to front, and verify proper tension.
Turn it on, guide fabric gently, and complete stitches.
Practice on scraps to build confidence.
What can you use a handheld sewing machine for?
Fix, stitch, repair, and customize—handheld sewing machines are perfect for quick clothing repairs, hemming pants, sewing linings, fixing curtains, or adding patches.
They’re handy for lightweight fabrics, small projects, and on-the-go needs, making them ideal for quick repairs.
How to use a sewing machine step by step for beginners?
Start with threading the needle and adjusting tension.
Insert fabric under the fastening plate, then turn the machine on.
Guide the fabric gently as it stitches. Practice on scrap fabric to perfect your technique!
Are hand held sewing machines any good?
Handheld sewing machines are great for quick fixes and small projects.
They’re portable, beginner-friendly, and ideal for lightweight fabrics, but they’re not powerful enough for thick materials or heavy-duty tasks.
Perfect for on-the-go repairs!
How to use a hand sewing machine?
Slow and steady wins the race" applies here—start by threading the needle carefully, checking tension, and loading fabric under the fastening plate.
Power it on, guide your stitch, and don’t rush for clean results.
Conclusion
Mastering how to use a handheld sewing machine might feel like learning a superpower, but it’s simpler than you think.
Once you’ve set it up, practiced steady stitching, and matched the right fabrics, you’ll quickly see its value.
Focus on threading properly, adjusting tension, and troubleshooting small issues to keep things smooth.
Perfect for quick repairs and creative projects, this compact tool is a game-changer for sewing enthusiasts and beginners alike.
Practice, and you’ll stitch like a pro!

