This site is supported by our readers. We may earn a commission, at no cost to you, if you purchase through links.
First, identify your machine’s model to make sure it’s compatible. Then, match the attachment to your project – zipper foot for sleek closures, hemmer for polished edges, or darning foot for mending miracles.
Installing is a breeze: snap it on, adjust settings, and test with scrap fabric. Remember, practice makes perfect!
Experiment with different attachments to add flair to your creations. From buttonholes to quilting, these nifty gadgets will have you stitching like a pro in no time.
Just imagine the possibilities – decorative stitches, perfect pleats, and flawless finishes await. Your sewing adventures are about to get a whole lot more exciting!
Table Of Contents
Key Takeaways
- You’ll become a sewing superhero when you match attachments to your projects – think zipper foot for sleek closures and darning foot for mending miracles. It’s like picking the perfect dance partner for each fabric tango!
- Don’t let tension troubles tie you in knots! Adjusting your machine’s settings is your secret weapon for perfect stitches. Remember, it’s all about balance – like a tightrope walker between your fabric layers.
- Cleaning your attachments isn’t just a chore – it’s a love letter to your sewing machine. A quick brush after every 2-3 bobbins keeps your tools purring like a well-fed cat, ready for your next creative adventure.
- You’re not just sewing, you’re conducting an orchestra of attachments! Combine tools like a pro to create intricate masterpieces. Mix and match to save time and expand your creativity – it’s like being the MacGyver of the sewing world.
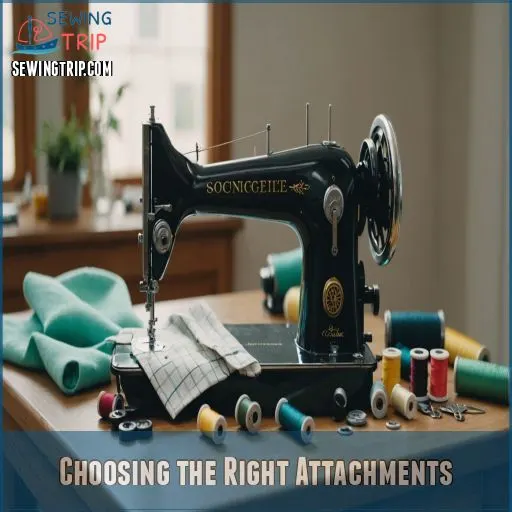
Choosing the Right Attachments
Choosing the right sewing machine attachments can feel like tackling a sewing project while wearing mittens, but it’s easier than you’d think!
By matching attachments to your machine and project needs, you’ll transform your sewing experience and add a professional touch to every stitch.
Identifying Your Sewing Machine Model
To begin, consider the various tools you’ll need, such as the right presser feet, like the zipper foot usage, before diving into attachments, identifying your sewing machine model is essential. Check your sewing machine manual and locate the serial number, usually near switches or panels.
- Unearth hidden treasures.
- Avoid mismatched accessories.
- Discover your machine’s unique history.
- Join a community of enthusiasts.
- Embrace your machine’s true potential.
Armed with this knowledge, you’re ready for anything!
Types of Sewing Machine Attachments
Understanding your machine is just the beginning.
Now, let’s explore attachments like the zipper foot, hemmer foot, and darning foot—each offering unique possibilities.
Choose wisely by considering attachment compatibility, foot types, and attachment care. For some DIY flair, experiment with common brands’ options!
Check out this handy table below for guidance:
| Attachment | Purpose | Example Use |
|---|---|---|
| Zipper Foot | Install zippers | Dressmaking |
| Hemmer Foot | Create hems | Skirts, dresses |
| Darning Foot | Repair fabrics | Patching jeans |
Compatibility and Brand Considerations
If you’re diving into sewing machine attachments, compatibility is key. Check compatibility charts to make sure universal attachments work with your machine.
Don’t let brand-specific features fool you—quality matters! Think beyond old sewing machine parts and explore new options.
A good warranty and support can save future headaches, making your projects smoother and more creative, with a focus on making your projects smoother.
Project Requirements and Attachment Selection
Choosing the right sewing machine attachments is like picking the right tool for a DIY project—it’s essential!
Consider your:
- Project types: Crafting a quilt? Grab a quilting foot.
- Sewing goals: Perfect buttonholes need a button sewing foot.
- Fabric types: Thick materials require a walking foot.
Consider your:
- Skill level & budget: Match attachments to both your experience and wallet.
Quality and Durability of Attachments
After selecting attachments based on project needs, let’s talk quality and durability.
A solid brand reputation guarantees long-lasting attachments that endure wear and tear.
To avoid issues like a sewing machine needle keeps breaking, proper maintenance also involves choosing the right sewing machine needles and ensuring smooth operation with reliable parts.
Materials matter—sturdy metals impact lifespan expectations positively.
Compare costs against potential repair options to find value.
Make sure your throat plate is clean and free of debris, and that your parts of sewing machine are well-maintained to prevent damage and ensure smooth stitching, and that your stitch settings, sewing machine needles, and width-selector operate smoothly with reliable parts, keeping projects flawless and frustration-free.
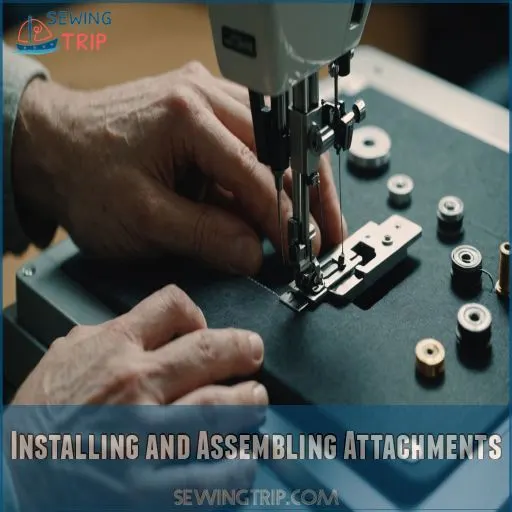
Installing and Assembling Attachments
Attaching and securing sewing machine attachments is a breeze once you get the hang of it.
Just follow the manufacturer’s instructions, adjust the settings, and you’ll be sewing like a pro in no time!
Attaching and Securing the Attachment
Imagine this: you’re about to attach a new sewing machine attachment.
First, verify attachment compatibility with your machine’s foot and needle. Then, follow the secure attachment tips: align the attachment with the thread guide, and test for a secure fit.
Don’t forget—it should easily pop off after use, making attachment removal a breeze.
Voilà, creativity in action!
Adjusting Settings and Tension
You’ve securely attached your sewing gadget, so now’s the perfect moment to adjust settings and tension for smooth sailing.
Keep an eye on thread tension and needle size, ensuring they’re suited for your fabric type.
Play with the tension regulator and tension discs—tighten or loosen them a smidge. Tweak the stitch length, powering up your creativity like a sewing superstar.
Threading and Testing the Attachment
Now that you’ve got your settings just right, let’s thread that shiny new attachment! Follow the thread path like you’re unraveling a mystery – through guides, around the take-up lever, and into the needle’s eye. Don’t forget to fish out that bobbin thread.
Ready to test? Start with a scrap fabric and let your creativity flow!
- The thrill of the first perfect stitch
- The satisfaction of conquering a tricky thread path
- The pride in mastering a new technique
- The excitement of endless creative possibilities
Common Installation Mistakes to Avoid
Several missteps can turn your sewing project into a frustrating ordeal. Don’t let these common blunders derail your creativity!
From incorrect attachments to tension troubles, here’s a quick guide to keep your sewing smooth:
| Mistake | Solution |
|---|---|
| Loose screws | Tighten with care |
| Improper threading | Follow machine’s path |
| Tension issues | Adjust and test |
| Alignment problems | Check needle bar |
| Wrong foot for fabric | Match foot to material |
Remember, a little patience goes a long way. You’ve got this!
Mastering Common Attachments
To get the most out of your machine, start by understanding its basic parts and functions, such as the foot control pedal for speed regulation. You’re about to master the full potential of your sewing machine with these common attachments.
From buttonholes to zippers, you’ll learn how to tackle tricky tasks with ease and add professional flair to your projects.
Using Buttonhole Attachments
Let’s button up your sewing skills! With your attachments installed, it’s time to tackle buttonholes. These tiny openings can make or break a project, but don’t sweat it.
Your buttonhole attachment is about to become your new best friend. It’s like having a mini-tailor right at your fingertips, ready to create perfect openings every time.
- Choose from straight or keyhole styles for different button types
- Adjust buttonhole sizes from 3/8" to 15/16" using various templates
- Practice on scrap fabric to avoid buttonhole blues
- Use the stitch-length selector for the best results
Working With Zipper and Blind Hem Attachments
Zippers and hems, those pesky sewing challenges, become a breeze with the right attachments.
You’ll zip through projects using a narrow zipper foot, which lets you stitch closer to the teeth. For blind hems, the adjustable guide makes sure invisible stitches.
Here’s a quick comparison:
| Attachment | Best For | Pro Tip |
|---|---|---|
| Zipper Foot | Zippers, Trims | Use edge as guide |
| Narrow Zipper | Tight spaces | Great for offset stitches |
| Blind Hem | Invisible hems | Adjust guide for fabric |
| Zipper w/ Guide | Zippers, Cording | Versatile for trims |
| Regular Zipper | Basic zippers | Use seam gauge to check |
Gathering and Shirring Attachments
Your sewing machine’s gathering and shirring attachments are game-changers for creating beautiful textures and volume.
These nifty tools, like the gathering foot or ruffler foot, can transform light to medium-weight fabrics into smock-like gathers or elegant shirring.
By adjusting stitch length, you’ll control the fullness of your gathers.
Pro tip: Try using contrasting thread in the bobbin for a pop of color in your shirred designs. Ready to ruffle some feathers?
Quilting and Appliqué Attachments
With quilting and appliqué attachments, you’ll transform ordinary fabric into stunning works of art.
The circular attachment lets you create perfect curves and hearts, while an open toe embroidery foot gives you clear visibility for intricate stitching.
Experiment with different appliqué stitch styles to add texture and dimension.
Don’t forget the trusty quilting foot for those precise, even stitches.
Ready to quilt like a pro?
Overlock and Edge Finishing Attachments
Now that you’ve mastered quilting, let’s tackle those pesky fraying edges! Overlock and edge finishing attachments are your secret weapons against unraveling fabric. These nifty tools create professional-looking seams without a serger.
Here’s why you’ll love them:
- They’ll make you feel like a sewing superhero
- You’ll kiss frayed edges goodbye
- Your projects will look store-bought (in a good way!)
- You’ll save time and frustration
Try the overcast stitch foot for a clean finish on various fabrics.
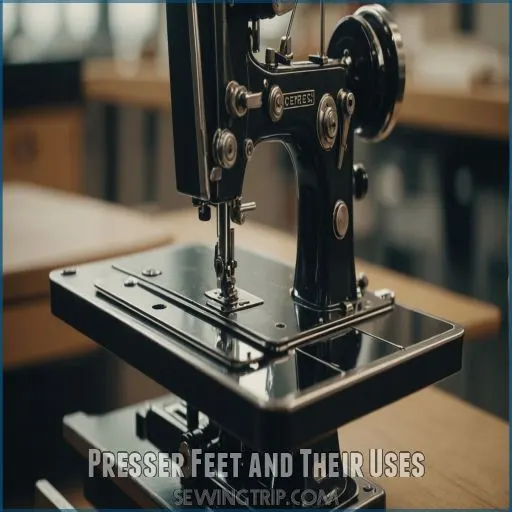
Presser Feet and Their Uses
You’ve got a drawer full of mysterious presser feet, but don’t worry – they’re not there to trip you up!
These handy attachments are your secret weapons for tackling everything from basic seams to fancy finishes.
So let’s get you acquainted with your new sewing sidekicks.
Basic and Essential Presser Feet
Let’s talk about the unsung heroes of your sewing machine: basic presser feet. These little workhorses are the foundation of your sewing success. From the all-purpose zigzag foot to the trusty zipper foot, each one has a special job.
The standard presser foot, in particular, is suitable for basic stitching and can accommodate zigzag stitches, making it a great choice for simple hems, seam finishes, buttonholes, and lightweight zippers – learn more in this sewing machine presser feet guide.
Think of them as your sewing sidekicks, ready to tackle straight stitches, buttonholes, and everything in between. Choosing the right foot for each task is like picking the perfect dance partner – it’ll make your sewing smooth and effortless.
Specialty and Decorative Presser Feet
Specialty and decorative presser feet are your ticket to sewing stardom.
You’ll dazzle with appliqué techniques using an open toe foot for perfect visibility.
Explore your creativity with embroidery foot types like the candlewicking foot for textured designs.
Want to add some bling? The pearls and sequins foot lets you effortlessly attach shimmering embellishments.
With these feet, you’ll transform ordinary projects into extraordinary works of art.
Presser Feet for Quilting and Home Decor
Your quilting and home decor projects are about to get a whole lot easier!
With the right presser feet, you’ll breeze through free-motion quilting and create stunning decorative stitches.
Try the open toe quilting foot for better visibility, or the walking foot for even fabric feed.
Don’t forget the 1/4 inch piecing foot for precise quilt seams.
These feet will have you stitching like a pro in no time!
Presser Feet for Garment Construction
A garment-maker’s arsenal isn’t complete without the right presser feet.
With a zippy zipper foot, you’ll breeze through closures like a pro.
For those pesky hems, the blind stitch foot is your secret weapon.
Want perfect buttonholes? The buttonhole foot‘s got your back.
And don’t forget the overlock foot for professional seam finishing.
Master these tools, and you’ll be stitching up a storm in no time!
Adapting Presser Feet for Specific Fabrics
Different fabrics demand different presser feet.
For slippery chiffon, ditch the standard foot and grab a straight stitch foot. It’ll keep that tricky fabric from diving under the needle plate.
Tackling vinyl or leather? Roll with a roller foot to glide over sticky situations.
Remember, the right foot can turn a fabric nightmare into a sewing dream. So, mix and match those feet like a fashion-forward centipede!
Troubleshooting Attachment Issues
You’ve got your shiny new attachment, but it’s acting up like a temperamental toddler.
Don’t fret!
We’ll tackle common hiccups and get your sewing machine purring again, turning those frustrating moments into stitching triumphs.
Common Problems and Solutions
Even the most skilled sewists hit snags with attachments. Let’s tackle those pesky problems head-on! When skipped stitches or jammed needles strike, don’t throw in the towel.
Here’s your troubleshooting cheat sheet:
- Check for bent or dull needles
- Make sure you have the correct threading and bobbin placement
- Clean out lint and dust buildup
- Use the right needle size for your fabric
Remember, a stitch in time saves nine – regular maintenance keeps your sewing smooth sailing!
Adjusting Tension and Thread Settings
While thread tension might seem like a tricky thing to master, it’s actually your secret weapon for perfect stitches. Let’s tame this sewing monster together!
Adjusting tension is all about balance, like a tightrope walker between your fabric layers.
Check out this quick guide to common tension troubles:
| Problem | Solution |
|---|---|
| Loopy underside | Increase upper tension |
| Loopy topside | Decrease upper tension |
| Puckered seams | Loosen both tensions |
| Gaping seams | Tighten both tensions |
Remember, tension’s a team sport – your upper and lower threads need to play nice.
Cleaning and Maintaining Attachments
Three simple steps will keep your attachments in tip-top shape.
First, embrace a regular cleaning schedule – after every 2-3 bobbins is ideal. Grab a small brush and gently sweep away lint and debris.
Next, store your attachments in an airtight container to prevent dust buildup.
Replacing Needles and Parts
Now that you’ve got your attachments sparkling clean, let’s tackle the heart of your sewing machine: needles and parts.
Don’t let worn-out needles spoil your sewing mojo!
Selecting the right needle for your fabric is like finding the perfect dance partner.
Keep a maintenance schedule to stay on top of replacements.
With a bit of DIY spirit, you can often swap out parts yourself, saving on replacement costs.
Remember, a happy needle means happy stitches!
Seeking Professional Help and Support
Sometimes, even the handiest sewers hit a snag.
When you’ve exhausted your DIY tricks, it’s time to call in the cavalry. Local sewing shops can be treasure troves of expert advice.
Don’t be shy – reach out to online sewing communities for a virtual helping hand. Remember, pros have seen it all, so your "unsolvable" problem might be their Tuesday morning warm-up.
You’ve got this, stitch whisperer!
Creative Applications of Attachments
You’ll be amazed at how sewing machine attachments can transform your projects from ordinary to extraordinary.
With these nifty tools, you can create intricate embroidery, perfect quilts, and even upcycle old clothes into stylish new pieces.
The possibilities are as endless as your imagination!
Embroidery and Appliqué Techniques
Let’s jazz up your sewing with embroidery and appliqué! You’ll feel like a fabric artist in no time.
Grab your embroidery floss and hoop, and let’s get creative.
For appliqué designs, use Heat N Bond Lite to prevent fabric bunching.
Free-motion embroidery? It’s like drawing with thread!
Don’t forget stabilizer types – they’re your secret weapon.
With the right embroidery hoop sizes, you’ll be stitching masterpieces faster than you can say "needle threader.
Quilting and Home Decor Projects
Your sewing machine’s hidden talents shine in quilting and home decor, and investing in quality attachments can transform the way you sew.
With the right sewing attachment accessories, you’ll breeze through intricate quilting patterns and decorative stitches.
Drop those feed dogs for free-motion quilting magic . Mix up fabric choices to create stunning cushions, table runners, and wall hangings.
Don’t forget a walking foot for smooth sailing through layers. Ready to transform your space? Your creativity’s the limit!
Garment Construction and Alterations
Transform your wardrobe with sewing machine attachments that make garment construction a breeze.
These handy tools can help you:
- Create perfect hems on pants and dresses
- Add professional-looking darts for a fitted fit
- Insert zippers smoothly, even in tricky fabrics
- Craft sleek pockets and adjust sleeve lengths with ease
Don’t let alterations intimidate you. With the right attachments, you’ll be tweaking and customizing clothes like a pro in no time.
Accessory and Bag Making
Ready to take your sewing skills up a notch? Accessory and bag making is where the magic happens!
With the right attachments, you’ll be whipping up professional-looking totes and purses in no time.
A cut & hem foot can create neat, narrow hems for linings.
For thick materials like leather, consider a specialized machine like the Adler 205 for binding tough fabrics.
Don’t forget to organize your attachments in a handy tote for easy access!
Upcycling and Repurposing With Attachments
One person’s trash is another’s treasure, especially when you’ve got the right sewing machine attachments!
Let’s breathe new life into those forgotten fabrics and turn them into something spectacular. With a bit of creativity and the right tools, you’ll be upcycling like a pro in no time.
- Transform old sweaters into cozy throw pillows
- Create a festive wreath from unworn neckties
- Turn damaged jeans into a unique throw rug
Advanced Attachment Techniques
You’re ready to take your sewing skills to the next level with advanced attachment techniques.
By combining attachments, experimenting with new methods, and adapting tools for different materials, you’ll open up a world of creative possibilities.
You’ll tackle complex projects with confidence.
Combining Attachments for Complex Projects
Combining attachments for complex projects is like conducting an orchestra of sewing tools. You’ll orchestrate multiple attachments in harmony, creating intricate masterpieces.
Let’s explore some powerful combinations:
| Attachment Combo | Project Type | Time-Saving Tip |
|---|---|---|
| Zipper + Bias Binder | Lined Bags | Pre-bind edges before zipping |
| Ruffler + Hemmer | Tiered Skirts | Ruffle and hem in one pass |
| Quilting Guide + Walking Foot | Quilted Jackets | Stitch perfect parallel lines |
| Embroidery Foot + Binding Attachment | Embellished Pillows | Embroider then bind edges seamlessly |
With these advanced techniques, you’ll tackle multi-step projects like a pro, saving time and expanding your creativity.
Using Attachments for Precision and Accuracy
Now that you’ve mastered combining attachments, let’s focus on precision and accuracy. Your sewing machine comes with various presser feet, including the straight stitch foot, types of presser feet like the zigzag foot and zipper foot, that can help you achieve perfect stitches. Your sewing machine attachments are like secret weapons for achieving perfect stitches.
Here are three game-changing techniques to elevate your sewing game:
- Use a magnetic seam guide for laser-straight lines
- Employ compensating presser feet for even stitching on thick fabrics
- Utilize a double-fold binder for professional-looking edges
With these attachment techniques, you’ll be sewing like a pro in no time!
Experimenting With New Attachment Techniques
Ready to take your sewing game up a notch? Let’s explore some wild and wonderful attachment combinations!
Try pairing your ruffler foot with a binding attachment for instant pleated trim.
Or, use your embroidery foot to create custom appliqués, then finish them with decorative stitches.
You can even repurpose a zipper foot for piping or cording. The sky’s the limit when you mix and match attachments creatively!
Adapting Attachments for Different Fabrics and Materials
You’ve mastered new techniques, and now it’s time to conquer different fabrics!
Your trusty attachments aren’t one-size-fits-all. For slippery silks, dial down the tension and use a fine needle (Source). Tackling leather? Switch to a walking foot and adjust your stitch length.
Remember, swatching is your secret weapon – test those decorative stitches before diving in (Source). With a bit of tweaking, you’ll be sewing like a pro on any material!
Creating Custom Attachments and Accessories
Once you’ve mastered standard attachments, it’s time to let your creativity shine!
Creating custom sewing machine accessories can take your projects to the next level.
Let’s explore some DIY attachment hacks that’ll make your sewing buddies green with envy:
- 3D-printed attachments for unique fabric manipulations
- Repurposed materials for one-of-a-kind presser foot designs
- Sewing machine mods using everyday items for specialized tasks
With these tricks up your sleeve, you’ll be the MacGyver of the sewing world!
Frequently Asked Questions (FAQs)
What are the 6 common sewing machine attachments?
Like a Swiss Army knife for your sewing machine, these six attachments are game-changers.
They’ll transform your sewing projects from basic to pro-level in no time!
These six attachments include zipper foot, blind stitch foot, buttonhole foot, walking foot, overcast foot, and quilting foot.
How do you use a sewing machine?
Grab that sewing machine and let’s get started!
Thread the needle, wind the bobbin, and adjust your stitch settings.
Place fabric under the presser foot, lower it, and gently press the pedal.
You’re off to the races!
How do you attach a needle to a sewing machine?
Ready to thread that needle?
Turn off your machine and raise the needle to its highest point.
Loosen the clamp, insert the new needle flat-side back, and tighten.
It’s like giving your machine a tiny makeover!
How do you attach a bobbin to a sewing machine?
Thread your bobbin, then drop it into the machine’s bobbin case.
Make sure it spins counterclockwise (Source).
Hook the thread through the notch and under the tension plate.
You’ll feel like a sewing ninja in no time!
What are different presser feet for?
Ever wonder if there’s a secret weapon for every sewing task?
Different presser feet are your sewing superpowers.
From zippers to buttonholes, each foot’s unique design tackles specific challenges.
You’ll breeze through tricky fabrics and fancy stitches like a pro.
What are the various attachments of a sewing machine?
Your sewing machine’s arsenal includes various specialized feet, such as what are sewing feet, presser feet, hemmers, binders, and rufflers.
These attachments are like superheroes for your fabric, each with a unique power.
From creating perfect hems to attaching zippers, they’ll transform your sewing game faster than you can say "stitch!
How to use presser foot for normal sewing machine?
While some fear presser feet, you’ll love their magic!
Snap it on, lower it, and watch fabric glide smoothly. Adjust pressure for different fabrics.
Sewing superstar, remember, the right foot can turn tricky tasks into a breeze. You’ve got this!
How do you use a seam guide attachment on a sewing machine?
Before attaching any accessories, ensure the presser foot is securely in place as it holds fabric in place while sewing. Attach the seam guide to your machine’s presser foot screw.
Slide it to your desired seam width.
As you sew, keep fabric aligned with the guide for precise, evenly spaced stitches.
It’s like having a built-in GPS for your fabric!
How often should I clean my sewing machine attachments?
Ironically, the cleanest sewing machine attachments might be the least used!
Clean yours after every 3-4 projects or when they’re visibly dirty.
A quick wipe with sewing machine oil and a lint-free cloth keeps ’em humming along smoothly.
Can I use attachments from different sewing machine brands?
You can often use attachments from different brands, but it’s not guaranteed.
Modern machines are more compatible .
Check the shank type (high, low, slant) and needle position.
When in doubt, give it a try!
Whats the best way to store sewing attachments?
Prepare for a storage revolution!
Organize your sewing attachments in clear plastic containers, labeled drawers, or magnetic boards.
Use a rolling cart for easy access.
Repurpose tins or jars for smaller items like clips and pins.
Are there universal attachments that fit all machines?
While universal attachments exist, they’re not one-size-fits-all magic wands.
Many fit common brands, but you’ll need to check compatibility.
It’s like finding the right dance partner – some moves work with everyone, others need a perfect match!
How do I know if an attachment is worn out?
Wear and tear tells tales.
Look for loose or grinding gears, skipped stitches, or stalling . Check if plastic parts are ground down.
Listen for unusual noises.
If it’s not performing like it used to, it’s likely worn out.
Conclusion
Did you know that 97% of sewers report increased project satisfaction when using the right attachments?
Mastering how to use sewing machine attachments opens up a world of creative possibilities. From perfect buttonholes to flawless zippers, these tools elevate your sewing game.
Remember, practice makes perfect – don’t be afraid to experiment!
With your newfound attachment know-how, you’re ready to tackle any project with confidence. So go ahead, snap on that presser foot and let your imagination run wild.
Happy sewing!

