This site is supported by our readers. We may earn a commission, at no cost to you, if you purchase through links.
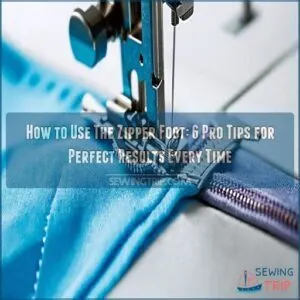 To use the zipper foot, start by attaching it to your sewing machine.
Adjust the needle position and thread tension for your fabric.
Position your zipper face-down on the fabric, lining up the teeth with the center of the opening.
Stitch close to the teeth, using the foot’s narrow design for precision.
For invisible zippers, press the teeth flat and guide them through the foot’s groove.
Remember, practice makes perfect!
Experiment with different techniques like lapped or fly-front applications.
Don’t fret if you encounter issues; uneven stitching or puckering can be fixed by tweaking settings.
Beyond zippers, this versatile foot opens up a world of creative possibilities.
Table Of Contents
Key Takeaways
- You’ll master zipper installation by first choosing the right zipper type for your project, such as a nylon zipper for lightweight projects, and then adjusting your machine’s settings, including needle position and thread tension, for each fabric type.
- You can tackle various zipper techniques like straight stitch, lapped, invisible, and fly front closures using your zipper foot.
- Your zipper foot isn’t just for zippers—it’s versatile for piping, decorative trims, close-to-edge topstitching, and even button placement.
- You’ll troubleshoot common issues like uneven stitching, broken needles, and fabric puckering by fine-tuning your machine and sewing techniques.
Types of Zipper Feet for Different Projects
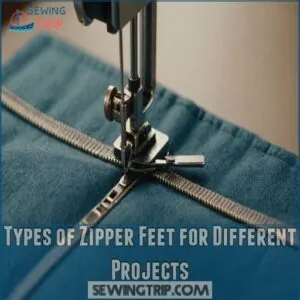
Each type has unique features that make it suited for specific tasks.
From basic zipper installation to working with specialty trims and decorative elements.
Standard Zipper Foot Features
Your standard zipper foot is a real game-changer with its sleek, narrow toe design.
You’ll love how it lets you stitch incredibly close to zipper teeth while maintaining perfect needle clearance.
If you don’t have a zipper foot, you can try using a narrow foot for a similar result, but you’ll need to use a wider seam allowance link to knowledge base.
The foot’s unique cutouts give you a clear view of your work, making zipper installation a breeze.
Whether you’re working on delicate fabrics or heavy-duty projects, this versatile attachment helps you achieve professional-looking results every time.
Adjustable Zipper Foot Benefits
Every skilled sewist knows the adjustable zipper foot is a game-changer for precision stitching.
With its versatile design, you’ll gain total control over multiple fabric layers.
The benefits are crystal clear:
- Snug fit against zipper teeth for professional-looking seams
- Easy to clip on and adjust for different project needs
- Works beautifully with both plastic and metal zippers
- Allows for wider seam allowances, making the process simpler for beginners
Don’t let zipper installation intimidate you – this foot turns tricky tasks into a breeze!
Invisible Zipper Foot Design
While standard zipper feet serve many needs, invisible zipper feet bring a special magic to your sewing arsenal.
The unique grooves underneath this specialized foot fit perfectly over zipper coils, letting you stitch incredibly close to the teeth.
It’s like having a GPS for your needle – those built-in channels guide each stitch exactly where it needs to go, helping you achieve that truly invisible finish that’ll make everyone wonder, "Where’s the zipper?
Regular Zipper Foot Applications
Regular zipper feet transform tricky zipper installations into a breeze with their versatile design.
The notched sides let you sew close to zipper teeth on both sides, making them perfect for all-purpose plastic zippers and DIY projects like cushion covers.
For precise zipper placement, switch between left and right needle positions to maintain ideal seam allowance.
You’ll get the best results by adjusting foot pressure and stitch length based on fabric type.
Setting Up Your Sewing Machine
You’ll need to prepare your sewing machine by removing the current foot and attaching the singer vertical needle zipper foot with the needle in the highest position and the presser foot raised, as shown in the proper installation steps. You’ll need to prepare your sewing machine with the right zipper foot attachment and settings before starting your project.
Zipper foot selection is the first step.
Once you’ve selected the appropriate zipper foot for your machine, you can adjust the needle position, thread tension, and stitch length to achieve professional-looking results.
Attaching The Zipper Foot
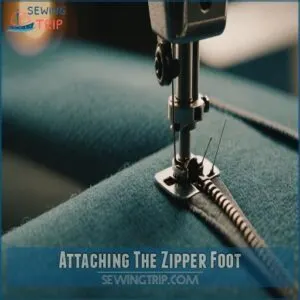
Start by raising the needle to its highest position by turning the handwheel counterclockwise.
You’ll find a black release button at the back of the presser foot holder – press it to remove the current foot.
Simply align your zipper foot’s pin with the holder’s shank, then lower the presser foot lever until it clicks securely into place.
Adjusting Needle Position
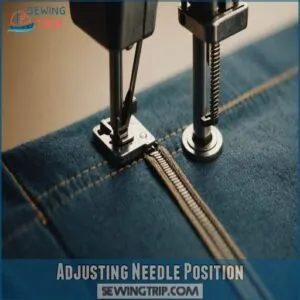
On newer machines, you’ll find a button that moves the needle left or right of the notches.
If your machine doesn’t have adjustable positions, don’t worry!
Look for a zipper foot with a slider on the back – just loosen the screw, adjust the foot’s position, and tighten it back up.
Thread Tension Settings
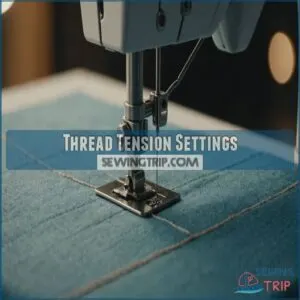
- Double-check your machine’s threading path, especially the take-up lever, to prevent pesky bunching
- Start with a tension setting of 4 for cotton and standard fabrics
- Increase tension for thick fabrics like denim or upholstery materials
- Clean your tension discs occasionally by blowing out dust and thread residue
- Adjust pressure foot settings to complement your tension for smoother stitching
Testing Stitch Length
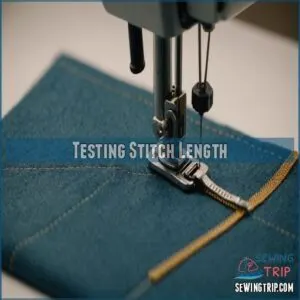
Test your stitch length by creating sample runs on scrap fabric that matches your project’s thickness (Source).
You’ll want to adjust the dial until your stitches flow smoothly like a well-oiled machine.
Start with medium-length stitches, then fine-tune based on your fabric weight and zipper type.
Remember, thicker fabrics usually need longer stitches for balanced results.
Basic Zipper Foot Techniques
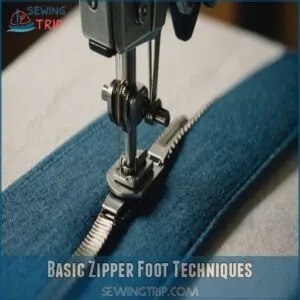
Using your zipper foot, you’ll learn how to install a basic straight stitch zipper.
You’ll learn how to create a clean lapped application.
You’ll learn how to work with invisible zippers.
You’ll learn how to tackle the classic fly front closure.
Straight Stitch Zipper Installation
You’ll love how straightforward standard zipper installation can be.
With your machine properly set up, lay your zipper face-down on the right side of your fabric .
Line up the zipper teeth precisely in the center of your opening and pin in place.
Move your needle position to the left, allowing you to stitch close to those teeth without any fuss (Source).
Take it slow – you’ve got this!
Lapped Zipper Application
Lapped zippers offer a polished look with only one visible stitching line.
Lapped zippers create a clean finish, perfectly concealing the zipper teeth for a professional appearance.
To start, mark a 1" seamline at the zipper opening.
Position the closed zipper under the zipper underlay, right sides up.
Stitch next to the fold from bottom to top.
Lap the left side over the right, matching markings.
Invisible Zipper Method
Invisible zippers offer a sleek, hidden closure for your projects.
To master this technique, start by pressing the zipper teeth flat with a medium-hot iron.
Position the coils in your zipper foot’s groove, stitching close to the teeth without catching them.
Here’s why sewists love invisible zippers:
- Create a smooth, professional finish
- Achieve a seamless look in fitted garments
- Boost your confidence with a polished result
- Enjoy the satisfaction of a perfectly concealed closure
Fly Front Zipper Technique
The fly front zipper technique adds a professional touch to trousers and skirts.
Unlike invisible zippers, this method showcases the zipper as a design element.
Start by preparing your fly facing and shield.
To make sure a smooth zipper installation, use a sewing machine with a zipper foot, as it allows for sewing a zipper with precision and control.
Align the zipper with the fly facing, making sure proper placement.
Here’s a quick guide to mastering this technique:
| Step | Description | Key Point |
|---|---|---|
| 1 | Prepare pieces | Fuse interfacing |
| 2 | Attach zipper | Baste to fly facing |
| 3 | Topstitch | Create J-shaped curve |
| 4 | Add fly shield | Align with topstitching |
| 5 | Finish | Bar tack for strength |
Common Mistakes and Troubleshooting Tips
Uneven Stitching Solutions
Dealing with uneven stitches can be a real head-scratcher.
First, check your needle tension and adjust it if needed.
Next, consider your fabric thickness and thread type – thinner thread for delicate fabrics.
Don’t overlook foot pressure; it should hold fabric firmly without restricting movement.
Experiment with stitch length for smoother results.
Remember, even pros face hiccups – keep at it, and you’ll master those pesky stitches in no time.
Broken Needle Prevention
Broken needles can be a real pain, but they’re easy to prevent with a few simple steps. To keep your zipper foot zipping along smoothly, follow these tips: first, pay attention to the average 8-10 hour needle lifespan guide to make sure timely replacements happen.
- Use the right needle size for your fabric thickness 2. Check thread type compatibility with your needle 3. Make sure your needle is sharp and not bent 4. Adjust foot pressure appropriately for your material By paying attention to these details, you’ll avoid the frustration of needle breakage and keep your sewing projects on track.
Fabric Puckering Fixes
Fabric puckering can make your zipper installation look less than professional.
To fix this, adjust your fabric tension and use the right needle size for your material.
Experiment with stitch length, paying attention to seam allowance.
Don’t forget pressing techniques – a well-pressed seam can work wonders.
If puckering persists, try the slash and spread method.
With these tricks up your sleeve, you’ll be zipping through projects in no time!
Zipper Alignment Issues
Precision is key when tackling zipper alignment issues.
You’ll want to make sure your zipper teeth spacing is even and your needle alignment is spot-on.
Here are three tips to keep your zippers on track:
- Check zipper tape tension before sewing
- Position your zipper foot correctly for fabric thickness
- Use pliers to straighten any crooked teeth
Remember, a well-aligned zipper is like a happy smile – it opens and closes smoothly, making your project look polished and professional.
Creative Uses Beyond Zippers
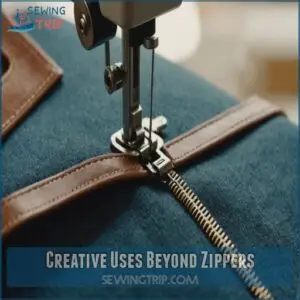
Piping and Cording Projects
Beyond zippers, your trusty zipper foot opens up a world of creative piping and cording projects.
You’ll master these techniques in no time, adding professional flair to your sewing.
Let’s explore some key aspects:
| Aspect | Technique | Tips |
|---|---|---|
| Piping placement | Align with foot edge | Keep consistent distance |
| Cord thickness | Choose based on project | Thicker for bold look |
| Fabric selection | Consider weight and drape | Match to piping style |
| Corner turning | Clip seam allowance | Pivot carefully |
Decorative Trim Application
Your zipper foot isn’t just for zippers.
It’s a secret weapon for adding flair to your projects with decorative trims.
Want to jazz up a plain shirt with pom pom trim? Or give your pillowcase a ribbon trim makeover?
Your zipper foot‘s got your back.
It’ll help you attach bias tape, lace trim, and even create decorative stitching with precision.
Let’s turn those ordinary projects into eye-catching masterpieces!
Close-to-Edge Topstitching
The zipper foot isn’t just for zippers – it’s a secret weapon for close-to-edge topstitching.
This versatile tool lets you create professional-looking finishes on various projects.
Here’s how to master this technique:
- Adjust needle position for precise stitching
- Use the foot’s guide to maintain consistent distance from edge
- Decrease presser foot pressure for smooth fabric transport
- Try different distances for varied effects, from dainty to dramatic
Button Placement Guide
Zipper feet aren’t just for zippers! They’re perfect for precise button placement too.
Use this handy guide to nail your button positioning every time:
| Garment Type | Button Placement | Spacing |
|---|---|---|
| Shirt | Center front | 3-4 inches |
| Jacket | 1 inch from edge | 4-5 inches |
| Pants | Waistband center | Single button |
Remember, button placement can make or break your project. Stick to these basics, and you’ll be buttoning up like a pro in no time!
Advanced Projects Using Zipper Foot
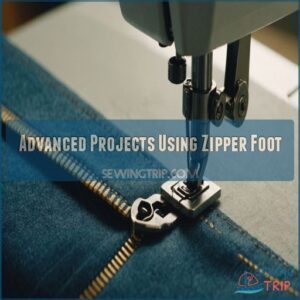
You’ll learn how to apply your zipper foot techniques to create professional-looking results when troubleshooting zipper problems and how to use them in complex sewing projects and home decor applications.
Designer Bag Creation
Stepping up to designer bag creation? Your zipper foot’s about to become your new best friend. Master precise zipper placement for professional-looking closures.
When attaching bag linings, use the foot to stitch close to hardware details without a hitch.
For strap construction, it’ll help you achieve clean, tight seams.
Experiment with various closure techniques, from invisible zippers to decorative exposed ones, to elevate your bag’s style and functionality.
Fitted Dress Construction
Now, let’s put your zipper foot to work on a fitted dress.
You’ll be tackling fitted dress seams, bust darts, and a back zipper with finesse.
Start by basting one side of the zipper tape.
For waist shaping and skirt panels, make sure all seams align perfectly.
Remember, sew in the same direction for every stitch to keep fabric tension consistent.
With practice, you’ll be zipping up your custom creation in no time.
Home Decor Applications
Your home’s a canvas for zipper foot creativity.
Craft zippered pillows that pop or add flair to curtain hems.
Breathe new life into worn upholstery with clever repairs.
Transform throw blankets with sleek closures.
For a pro touch, tackle cushion covers.
Your zipper foot’s the key to opening up these projects.
With each stitch, you’re not just decorating—you’re mastering your space, one zip at a time.
Specialty Garment Techniques
Zipper placement in specialty garments can be tricky.
For fitted tops, consider moving the zipper to the side seam for easier wear.
When working with delicate fabrics, try these techniques:
- Use an invisible zipper foot for a seamless look
- Adjust stitch length for different fabric weights
- Press carefully to avoid fabric damage
Remember, proper zipper placement makes for a comfortable fit and smooth fabric manipulation. Don’t be afraid to experiment with different positions to achieve the perfect result for your unique design.
Frequently Asked Questions (FAQs)
How to properly use a zipper foot?
Threading the needle of zipper mastery isn’t hard.
Attach the foot to your machine, positioning the needle on either side.
Align it with the zipper teeth, sew close to the edge, and adjust as needed for different projects.
What is the point of a zipper foot?
A specialized sewing tool, the zipper foot lets you stitch close to raised edges.
It’s your secret weapon for installing zippers, adding piping, and working with trims.
You’ll gain precision control and achieve professional-looking results with ease.
How do you use a zipper piping foot?
Who knew sewing could be so zippy?
Attach the foot, placing the piping’s bump in its groove.
Align the needle with existing stitching.
Guide the fabric, letting the foot’s shape do the work.
You’ll be piping like a pro in no time!
What stitch to use with a zipper foot?
For your zipper foot, you’ll want to use a straight stitch (center) .
This classic choice gives you precision and control.
Remember, it’s all about getting up close and personal with those zipper teeth – no fancy stitches needed!
How do I clean and maintain my zipper foot?
Like a well-oiled machine, your zipper foot needs care.
Keep it clean by brushing off lint and debris after each use.
Wipe it down with a soft cloth, and occasionally oil moving parts.
Store it safely to prevent damage.
Can I use a zipper foot on thick fabrics?
You can use a zipper foot on thick fabrics, but it might be tricky.
Adjust your machine’s tension and stitch length for better results.
For super-thick materials, consider a roller foot or Teflon foot instead.
Whats the difference between metal and plastic zipper feet?
Metal zipper feet offer durability and precision, while plastic ones are lightweight and budget-friendly.
Metal feet excel on thick fabrics, providing better control.
Plastic feet work well for delicate materials but may struggle with heavy-duty tasks.
Choose based on your sewing needs.
Are there universal zipper feet for different sewing machines?
Universal zipper feet aren’t truly universal.
While many machines use similar feet, some require specialty types.
Your machine’s shank height matters.
For Japanese brands like Janome or Brother, you’ll find compatible universal feet easily.
Always check your model’s specifications before purchasing.
How do I adjust stitch length when using a zipper foot?
Ready to tame that zipper foot?
Locate your machine’s stitch length dial and turn it to about 5 (Source).
For basting, crank it up to 6 or your max setting.
Adjust as needed for different fabrics.
Conclusion
Mastering how to use the zipper foot is like opening a treasure chest of sewing possibilities.
With practice, you’ll zip through projects with ease.
Remember to adjust settings for each fabric, experiment with different techniques, and troubleshoot issues patiently.
The zipper foot’s versatility extends beyond closures, opening doors to creative trim and topstitching applications.
By following these pro tips and exploring advanced projects, you’ll elevate your sewing skills.
So grab your machine, attach that zipper foot, and start stitching your way to perfect results every time.

