This site is supported by our readers. We may earn a commission, at no cost to you, if you purchase through links.
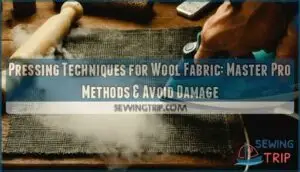
Always use a lifting motion rather than dragging the iron across the surface. Steam is your friend, but don’t overdo it – too much moisture can cause shrinkage.
Press seams open using a tailor’s ham for curved areas, and work slowly to avoid scorching. Different wool types require different approaches: delicate merino needs gentler handling than sturdy tweed.
The key is controlling heat, steam, and pressure to shape your garment without damaging the fibers. Professional results depend on technique timing and specialized tools.
Table Of Contents
Key Takeaways
- Set your iron to wool temperature (275-300°F) and always use a pressing cloth – This prevents shine and scorching while protecting delicate wool fibers from direct heat damage.
- Use lifting motions instead of dragging your iron – Press down and lift up rather than sliding across the fabric to avoid stretching and distorting wool’s natural texture.
- Control steam application carefully – Apply steam in short bursts and allow complete drying between applications, as too much moisture can cause shrinkage and fiber damage.
- Invest in specialized pressing tools like a tailor’s ham and sleeve roll – These tools help you shape curved seams and sleeves properly while maintaining the fabric’s natural drape and achieving professional results.
Pressing Wool Fabric
Pressing wool fabric requires specific temperature settings, controlled steam application, and proper tools to maintain the fabric’s natural texture and prevent damage.
You’ll need to use low to medium heat settings around 148°C, apply steam carefully through a pressing cloth, and work with tools like a tailor’s ham to shape curved areas effectively, ensuring the fabric’s quality is preserved by using the right temperature settings.
Temperature Settings
Getting wool temperatures right prevents fabric damage and guarantees professional results.
Set your iron between 300-350°F for most wool pressing techniques.
Synthetic blends require lower heat than pure wool fabric.
Always start temperature testing on fabric scraps before pressing your garment.
Check iron calibration regularly since inconsistent heat ruins expensive materials.
Medium settings work best for pressing temperature wool applications, ensuring the right temperatures are used to prevent damage and achieve professional quality, with a focus on getting the temperatures right.
Steam Application
Steam application transforms wool’s moldable nature through controlled moisture and heat. You’ll achieve professional results by managing steam temperature and moisture levels carefully.
Master wool’s transformation with controlled steam – where moisture meets heat for professional pressing results.
Essential pressing tools are key to achieving the best results.
- Steam Temperature: Keep iron at 148°C for ideal fabric shaping without damage
- Moisture Levels: Apply gentle steam bursts, allowing complete drying time between applications
- Steam Tools: Use spray bottles for targeted moisture control
- Fabric Shaping: Steam makes wool fibers pliable for pressing curved seams and darts
Pressing Tools
Beyond your standard iron, wool pressing demands specialized equipment for professional results.
A tailor’s ham shapes curved seams perfectly, while sleeve boards handle narrow areas.
Pressing cloths protect delicate fibers from direct heat damage.
Seam rollers work magic on long edges, and sleeve rolls prevent unwanted creases.
These pressing equipment essentials transform amateur attempts into expert-level finishes.
Proper shaping relies on using a tailor’s ham, which is crucial for achieving professional results.
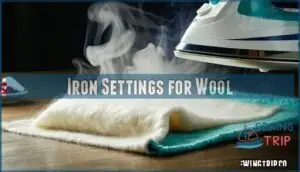
Iron Settings for Wool
You’ll need to set your iron to the wool setting, which typically runs at 148°C (300°F), to avoid damaging the delicate fibers.
Always use steam sparingly and make certain your iron’s soleplate is clean, as wool requires gentle heat distribution to prevent scorching or flattening the fabric’s natural texture.
Heat Levels
Now that you understand wool’s unique characteristics, proper heat application becomes your foundation for success.
Medium iron temperature between 110-150 degrees provides the ideal temperature for most wool pressing tasks.
Here’s your essential temperature guide for wool fabric:
- Test heat levels on fabric scraps first – preventing costly mistakes on your main project
- Use wool-specific iron settings – protecting delicate fibers from irreversible damage
- Adjust temperature based on fabric weight – ensuring consistent results across different wool types
This controlled heat application prevents scorching prevention while avoiding fiber damage during wool pressing.
Steam Usage
When pressing wool clothes, you’ll need controlled steam to reshape fibers without damage.
Set your iron’s steam temperature to medium, allowing moisture levels to penetrate gently. Apply steam in short bursts while moving the iron slowly across fabric.
This steam shaping technique makes wool fibers malleable, helping achieve professional results. Always verify complete fabric drying before handling your pressed wool garments.
Iron Soleplate
Your iron’s soleplate material directly impacts how well you’ll iron wool fabric.
Ceramic and stainless steel soleplates offer superior temperature control and steam distribution compared to aluminum options.
These materials glide smoothly across delicate wool fibers without snagging or creating hot spots that damage your fabric.
- Ceramic soleplates provide even heat distribution and resist scratching
- Stainless steel surfaces offer excellent glide performance and durability
- Non-stick coatings require gentle cleaning methods to maintain effectiveness
Pressing Techniques
You’ll master wool pressing by following three essential techniques that protect your fabric while achieving professional results.
These methods include proper step-by-step procedures, correct pressing cloth usage, and techniques to prevent scorch marks that can permanently damage wool fibers.
Step-by-Step Instructions
Start by positioning your wool fabric wrong side up on the ironing board. Press newly sewn seams flat to achieve proper seam setting before opening allowances.
For curved seams, snip the allowance handling carefully, then press slowly using a tailor’s ham. When dart shaping, fold precisely and steam gently.
Complete sleeve detailing by draping over appropriate tools for professional results.
Using Pressing Cloth
Place a pressing cloth wool between your iron and fabric to protect delicate fibers from direct heat.
Silk organza works best for preventing shine, while muslin and cotton provide excellent heat distribution.
The cloth creates steam diffusion that penetrates wool fabric evenly.
You’ll press faster since heat reaches both sides simultaneously, achieving professional results without damaging your garment.
Using specific wool cloths guarantees the best results.
Avoiding Scorch Marks
Heat control remains your strongest defense against fabric burning and pressing marks on delicate wool fibers.
Always test temperature settings on fabric scraps before committing to your garment. Keep pressing cloths between iron and wool to prevent shine wool disasters.
Monitor moisture levels carefully—too much steam creates scorching. Clean your iron’s soleplate regularly, as buildup transfers unsightly marks onto precious wool pieces, and this is crucial for maintaining heat control and preventing damage from delicate wool fibers.
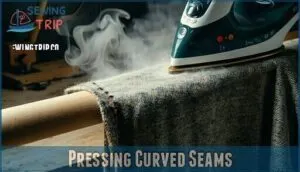
Pressing Curved Seams
Curved seams in wool require specific techniques to prevent puckers and maintain the fabric’s natural drape.
You’ll need to snip the seam allowance at regular intervals and use a tailor’s ham to support the curved shape.
While pressing slowly with controlled steam is crucial, it must be done carefully to achieve the desired result, making controlled steam essential for a professional finish.
Using Tailor’s Ham
Your tailor’s ham transforms curved seam pressing from frustrating to flawless. This stuffed pressing tool mimics body contours, supporting wool fabric’s natural shape during steam pressing wool applications.
A tailor’s ham is one of the essential pressing tools for achieving professional results.
- Ham Size: Choose 12-14 inch length for most garments
- Ham Shape: Curved design supports armholes and princess seams
- Fabric Support: Prevents distortion during pressing techniques
- Seam Contouring: Matches body curves for professional results
- DIY Ham: Stuff canvas with sawdust for budget-friendly option
Snipping Seam Allowance
Curved seams in wool fabric require strategic snipping to achieve proper curve conformity.
Make small clips perpendicular to the seam line, spacing them every half-inch along curves.
This tension release prevents puckering and allows the fabric to lie flat.
Focus on clipping angles where curves are tightest.
Proper notch placement guarantees bulk reduction while maintaining seam integrity during pressing techniques, ensuring seam integrity and promoting a smooth finish with proper curve conformity.
Pressing Slowly
When dealing with wool fabric’s natural resistance, you’ll need gentle pressure and controlled heat to achieve gradual shaping without fiber distortion.
Move your iron methodically across curved seams, allowing time for fiber relaxation between passes.
This wool pressing guide emphasizes patience – rushing leads to puckering and permanent damage.
Proper fabric pressing requires deliberate movements that respect wool’s delicate structure and natural properties.
Pressing Darts and Sleeves
When you’re working with wool garments, pressing darts and sleeves requires specific techniques to maintain the fabric’s natural texture and shape.
You’ll need to use a tailor’s ham for darts and a sleeve roll for sleeves, applying controlled steam through a pressing cloth to achieve professional results without damaging the delicate wool fibers.
Pressing Dart Crease
Pressing darts properly shapes your wool garments with professional results.
Position your dart over the tailor’s ham with calico protection between iron and fabric.
Steam application softens wool fibers while you press the crease definition into place.
Ham positioning supports the fabric’s natural curve during pressing.
For best results, consider using specialized pressing tools designed for curved surfaces.
Follow these dart direction techniques:
- Fold dart along marked lines – Align edges precisely before pressing wool fabric
- Apply gentle steam pressure – Hold iron steady for 3-5 seconds per section
- Cool completely on ham – Let pressed darts set before moving your garment
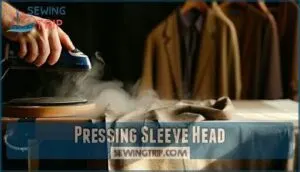
Pressing Sleeve Head
Position your wool fabric over a tailor’s ham to master shaping sleeve head techniques.
Apply water to the seam’s right side, then press with steady weight while steaming. Let the fabric cool completely before moving to prevent distortion.
This professional approach guarantees proper fabric drape and eliminates puckering. Use pressing cloth for delicate wool suits and coats to achieve flawless results.
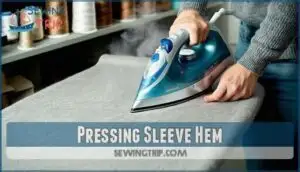
Pressing Sleeve Hem
When hemming wool sleeves, slide the fabric over your sleeve board or sleeve roll to create a stable pressing surface.
This specialized tool prevents unwanted creases while you work.
Press the hem carefully, rotating the sleeve to access the entire circumference.
The sleeve board’s narrow design allows precise control, ensuring your wool fabric maintains its natural texture while achieving that coveted professional finish, with the tool helping to prevent unwanted creases, thus ensuring a stable pressing surface.
Avoiding Common Mistakes
You’ll damage your wool fabric if you use excessive heat, apply too much steam, or ignore proper iron settings.
These three mistakes account for most pressing problems, from scorched fibers to shiny spots that can’t be reversed, including issues like shiny spots.
Overheating Fabric
Heat transforms wool from luxurious fabric into a crispy disaster when you’re not careful.
Heat is wool’s enemy—one moment of carelessness turns luxury into disaster.
Temperature control prevents fiber damage and fabric weakening that ruins your project. Set your iron to wool’s recommended 148°C setting and watch for scorch marks that signal overheating.
- Heartbreak: Watching your expensive wool fabric turn brown and brittle from excessive heat
- Frustration: Discovering shiny, flattened areas where your iron lingered too long
- Devastation: Realizing fabric burning prevention could have saved your entire garment
Using Excessive Steam
Steam can turn your wool pressing session into a soggy nightmare if you’re not careful.
Excessive moisture causes fabric distortion, water stains, and unwanted texture change in delicate wool fibers.
Too much steam weakens fibers and creates perfect conditions for mold growth.
Apply steam sparingly during wool fabric care, allowing complete drying between applications to prevent these pressing techniques disasters, and avoid excessive moisture and fabric distortion.
Ignoring Iron Settings
Wrong iron settings spell disaster for your wool fabric care routine.
Setting your iron too high creates scorching risks and fiber weakening that’s impossible to reverse.
Heat damage from incorrect temperatures can melt synthetics blended with wool, leaving permanent marks.
Always check your setting guide before pressing wool – your fabric’s survival depends on matching temperature to fiber type correctly, to avoid scorching risks and ensure proper fabric care.
Pressing Tools for Wool
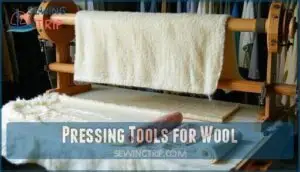
You’ll need specialized pressing tools to handle wool fabric properly without causing damage or creating unwanted shine.
The right equipment, including a tailor’s ham for curved areas, sleeve roll for tubular sections, and appropriate pressing cloth materials like silk organza or cotton voile, guarantees professional results while protecting wool’s delicate fibers.
Tailor’s Ham
Every tailors ham features dual-sided Ham Construction with wool and cotton surfaces for different temperature needs.
You’ll use the wool side for pressing wool seams and delicate areas, while the cotton side handles higher heat requirements.
This essential tool assists in Shaping Wool around curved seams, creating professional results through proper pressing techniques with your pressing cloth.
Many tailors find these pressing tools invaluable.
Sleeve Roll
Your sleeve roll becomes your secret weapon for pressing wool’s tubular areas without leaving unwanted seam creases.
This cylindrical pressing equipment wool tool prevents fabric impressions while handling sleeves and trouser legs.
Choose sleeve roll sizes that match your project needs, or create a DIY sleeve roll using towels.
Professional pressing wool demands this specialized tool for inseam pressing and maintaining fabric compatibility across different wool weights, which is crucial for fabric compatibility.
Pressing Cloth Materials
Choose your pressing cloth material based on wool type and desired results.
Wool pressing cloths offer superior heat resistance and steam permeability for worsted fabrics, preventing shine while maintaining durability.
Cotton flannel protects textured wools like bouclé from flattening.
Silk organza provides transparency for precise pressing wool without texture impact.
Each material offers distinct fabric protection benefits for professional wool fabric finishing, including superior heat resistance, steam permeability, and transparency for precise pressing.
Fabric Preparation
Before you press wool fabric, you’ll need to prepare it properly to achieve professional results.
Start by gently cleaning the wool with appropriate detergent, ensuring it’s completely dry.
Then set up your pressing area with the right tools and temperature settings.
Cleaning Wool Fabric
Clean wool fabric requires special attention to prevent damage and maintain its natural properties. You’ll need gentle detergent types and proper wool handling techniques to preserve fiber integrity.
Follow these essential wool care steps:
- Use wool-specific detergents or mild liquid soap for fabric care
- Check garment labels before selecting appropriate washing machines cycles
- Pre-treat stains immediately with gentle stain removal methods
- Test cleaning solutions on hidden fabric areas first
- Handle wet wool carefully to prevent stretching during wool maintenance
Drying Wool Fabric
After washing your wool garments, proper drying becomes your next priority.
Air drying works best for wool care, preserving delicate wool fibers from heat damage.
Lay pieces flat on clean towels for effective flat drying.
Skip tumble drying unless your dryer offers wool-specific settings.
Blocking wool maintains shape during the drying process.
Avoid direct sunlight to protect fabric texture, ensuring the delicate wool fibers are preserved and the garment retains its original shape and texture.
Setting Up Pressing Area
Your ironing board becomes mission control for wool pressing success.
Position it near good lighting and make certain stable footing for safety measures.
Arrange your pressing cloth, sleeve roll, sleeve board, and water spray bottle within arm’s reach for efficient tool placement.
This ergonomic setup prevents strain during extended sessions.
Surface selection matters—choose a well-padded board cover for superior results.
Pressing for Specific Results
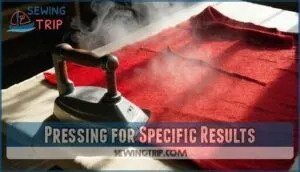
You’ll need targeted pressing techniques to achieve specific results when working with wool fabric, from shaping crisp collars to preserving the fabric’s natural texture.
These methods focus on controlling heat, steam, and pressure to prevent shrinkage while creating professional-looking seams and details.
Shaping Collars and Cuffs
Professional tailors know that collar interfacing and cuff finishes make or break wool garments.
You’ll need your sleeve roll and sleeve board for pressing wool suits and wool coats effectively.
Master tailor pressing techniques by steaming curved collars over your ham, then pressing pointed collars flat with steady pressure.
Crisp cuffs require careful positioning on the sleeve board for sharp, professional edges to achieve a high-quality finish with wool garments.
Preserving Wool Texture
Beyond collar and cuff shaping, maintaining wool’s natural bounce requires gentle handling.
Excessive heat flattens wool fibers permanently, destroying their insulating properties. You’ll preserve fabric softness by using controlled steam and proper pressing techniques.
Here’s your wool fiber care checklist:
- Use pressing cloth – Silk organza protects from direct heat contact
- Apply light pressure – Heavy pressing flattens wool’s natural texture
- Steam sparingly – Overuse removes wool’s inherent softness and spring
- Press briefly – Quick motions prevent heat damage to delicate fibers
- Cool completely – Let wool rest before handling to set natural texture
Reducing Shrinkage
Nobody wants their favorite wool sweater turning into doll clothes after pressing.
Fiber relaxation through gentle steam prevents unwanted shrinkage while maintaining weave impact.
Pre-treating wool with blocking techniques and gentle detergents before pressing wool fabric guarantees dimensional stability.
These wool pressing techniques deliver pressing benefits by controlling moisture and heat, making fabric shrinking a thing of the past, ensuring dimensional stability and preventing unwanted shrinkage.
Advanced Pressing Techniques
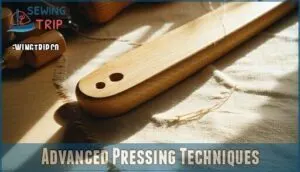
Once you’ve mastered basic wool pressing, specialized tools like loop pressing bars, pressing templates, and hem gauges will elevate your results to professional standards.
These techniques help you achieve precise measurements, consistent shapes, and flawless finishes that distinguish expert-level work from amateur attempts, allowing for professional standards and flawless finishes.
Using Loop Pressing Bars
Loop pressing bars transform how you handle bias tubes in wool garments. These specialized pressing tools guarantee width consistency and tube precision when creating Celtic applique or dimensional details.
Insert the bar into your sewn fabric tube, center the seam, then press smooth for professional results.
- Seam Centering: Manipulate fabric around the bar to position seams perfectly down the center
- Fabric Insertion: Slide bars into completed tubes before trimming excess seam allowance
- Bar Materials: Choose from five standard sizes (6mm to 18mm) for different tube widths
- Width Consistency: Cut bias strips twice the bar width plus two quarter-inch seam allowances
- Tube Precision: Press while bars remain inserted to maintain shape and eliminate puckering
Pressing Templates
Pressing templates guarantee consistent results when working with wool fabric details like pocket placement.
You can create DIY templates using folded pattern pieces or cardboard cutouts.
These template materials help achieve pattern matching and uniform pressing across multiple pieces.
Simply position your pressing cloth over the template, then press through both layers.
This wool pressing method guarantees professional-looking results every time.
Hem Gauge Usage
Your hem gauge becomes your measuring ally when pressing wool fabric, delivering gauge accuracy that transforms uneven hems into uniform masterpieces.
This metal tool’s marked measurements guarantee hem uniformity across your entire project. Speed pressing improves dramatically as you skip constant measuring.
Quality gauge materials like stainless steel withstand wool’s higher temperatures, though alternative tools like rulers work when needed.
A sewing gauge can also help with precise seam allowances, making it an invaluable tool for achieving uniform masterpieces.
Frequently Asked Questions (FAQs)
Which type of pressing is used for woolen fabrics?
You’ll use steam pressing for wool fabrics.
Set your iron to wool temperature (148°C), apply steam through a pressing cloth like silk organza, and let the fabric cool completely before moving it.
What is the best stitch for wool fabric?
Like threading a needle through silk, choosing the right stitch for wool makes all the difference.
You’ll want a straight stitch with 5-3mm length, using a ballpoint needle to prevent snags and maintain wool’s natural drape.
What is the best iron setting for wool?
Set your iron to the wool setting, which runs around 148°C (300°F).
You’ll want medium heat with steam capability.
Always use a pressing cloth to protect the fibers from direct heat damage.
Can 100% wool be ironed?
Yes, you can iron 100% wool, but you’ll need the right approach.
Always use low to medium heat, apply a pressing cloth, and work with steam or light moisture to prevent scorching and maintain wool’s natural texture.
Can wool be pressed without a pressing cloth?
Playing with fire, you shouldn’t press wool without a pressing cloth.
Direct heat creates shiny spots and can scorch delicate fibers.
You’ll need silk organza, cotton voile, or wool gauze to protect your fabric.
How to remove shine from over-pressed wool?
Steam the shiny area lightly using a pressing cloth, then brush the fabric with a soft-bristled brush while it’s still damp.
This lifts flattened fibers and restores wool’s natural texture without further damage.
Should wool garments be pressed while still damp?
Why risk water stains and uneven results?
Don’t press wool while damp.
Let it dry completely first, then use steam from your iron instead.
This prevents distortion and gives you better control over the pressing process.
Whats the difference between pressing and ironing wool?
Pressing involves lifting and placing your iron down with controlled pressure, while ironing uses sliding motions across fabric.
You’ll press wool to avoid stretching fibers and damaging the delicate texture that sliding creates.
How long should you wait between pressing sessions?
Allow wool fabric to cool completely between pressing sessions, typically 2-3 minutes.
This prevents heat damage and lets fibers settle naturally.
Rushing between sessions can cause scorching, shrinkage, or unwanted shine on your precious wool garments, which can lead to permanent damage and affect the overall appearance of the fabric.
Conclusion
Mastering pressing techniques for wool fabric works like learning to play a musical instrument—practice creates perfect results.
You’ve now gained essential knowledge about temperature control, steam application, and specialized tools.
Remember to use pressing cloths, work with gentle lifting motions, and respect each wool type’s unique characteristics.
These proven methods will help you achieve professional-quality garments while preserving your fabric’s integrity.
Start with simple projects to build confidence before tackling complex wool pieces.
- https://www.joejuneandmae.com/xyz/whats-a-tailors-clapper-5-facts-about-one-of-my-favorite-tools
- https://www.threadsmagazine.com/2014/05/23/video-make-your-own-tailors-pressing-tool
- https://blog.deer-and-doe.com/16104-pressing-alternatives-in-the-summer/
- https://pinterest.com/pin/create/button/?url=https://www.allfreesewing.com/Sewing-Tips-and-Tricks/Sewing-for-Beginners-How-to-Press-Fabric
- https://www.facebook.com/sharer/sharer.php?u=https://www.allfreesewing.com/Sewing-Tips-and-Tricks/Sewing-for-Beginners-How-to-Press-Fabric

