This site is supported by our readers. We may earn a commission, at no cost to you, if you purchase through links.
To solve these, first check your thread tension, re-thread the machine, and use high-quality thread. Replace bent or broken needles and confirm the correct needle size and type for your fabric.
Make sure proper fabric feeding by adjusting presser foot pressure and disengaging the drop-feed setting. Clean and oil your machine regularly to prevent seizing.
Keep exploring to learn more detailed solutions for these 7 common satin sewing problems.
Table Of Contents
- Key Takeaways
- Thread Bunching Up Under Your Fabric When Sewing
- Bent or Broken Needles
- Fabric Not Feeding
- Thread Keeps Breaking
- Machine is Skipping Stitches
- Bobbin Tension Not Consistent
- Seams in Stretch Fabrics Coming Out Wavy
- Sewing Machine Seizes Up or Won’t Sew
- Needle Comes Unthreaded Before Sewing
- Frequently Asked Questions (FAQs)
- Conclusion
Key Takeaways
- Check thread tension: Adjust the upper and bobbin thread tension to ensure both threads are in equal tension.
- Re-thread the machine: Verify that the thread goes in between the tension discs and that the machine is threaded correctly.
- Use high-quality thread: Opt for a lightweight polyester or silk thread appropriate for satin sewing.
- Maintain your sewing machine: Regularly clean and oil your machine to prevent seizing and ensure smooth operation.
Thread Bunching Up Under Your Fabric When Sewing
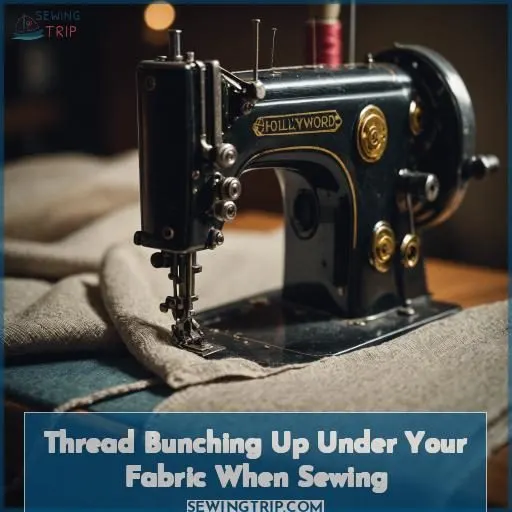
Thread bunching up under your fabric when sewing can be a frustrating issue. Here are some possible solutions to help you resolve this problem:
- Check thread tension: If the upper thread tension is too loose or the bobbin tension is too tight, it can cause thread bunching. Adjust the tension settings as needed to make sure both threads are in equal tension.
- Re-thread machine: Make sure to re-thread your machine with the presser foot up and verify that the thread goes in between the tension discs.
- Use same thread type: Use the same thread type for both the top and bottom to avoid compatibility issues.
- Bobbin winding: Make sure the bobbin is wound correctly and inserted properly.
- Presser foot pressure: Increase the presser foot pressure to assist the fabric in feeding smoothly.
- Fabric type: Adjust the tension settings based on the type of fabric you’re sewing.
- Sewing machine troubleshooting: If the problem persists, consult your sewing machine manual or take it to a professional for further assistance.
Bent or Broken Needles
If your needle is bent or broken, it’s time for a new one. Here are four things to keep in mind:
- Use new needles for each project: Old needles can become dull or damaged, affecting the quality of your stitches.
- Choose the right needle type for your fabric: Different fabrics require different needle types. For example, use a universal needle for most fabrics, a ballpoint needle for knits, and a sharp needle for heavy fabrics.
- Ensure needle compatibility: Check that your needle is compatible with your sewing machine’s tension settings and thread type.
- Replace broken needles immediately: A broken needle can cause damage to your fabric and your sewing machine. Always replace a broken needle before continuing your project.
Fabric Not Feeding
Just tackled bent needles and now your fabric won’t budge? It’s like your sewing machine’s playing hard to get. First, check if the drop-feed setting is on holiday; it shouldn’t be. Next, lower the presser foot to show you mean business. Adjusting the presser foot pressure can also coax the fabric through. Always start your seam with the fabric fully under the needle—no shortcuts. Remember, regular sewing machine maintenance keeps those feed dogs hungry for work.
| Problem | Solution |
|---|---|
| Drop-feed engaged | Disengage setting |
| Presser foot up | Lower presser foot |
| Uneven pressure | Adjust presser foot pressure |
| Fabric edge starting | Start seam under needle |
| Feed dogs slacking | Sewing machine maintenance |
Thread Keeps Breaking
Thread breaking is a common issue in satin sewing. Here are four tips to address this problem:
- Thread tension: Adjust the thread tension to confirm it’s neither too tight nor too loose. A balanced tension will prevent the thread from breaking.
- Thread type: Utilize a high-quality thread appropriate for satin sewing. A good thread will be strong and resilient to breaking.
- Needle size: Confirm the needle size is compatible with the thread type and fabric. A larger needle can cause the thread to break.
- Machine settings: Check your sewing machine’s settings. If the machine is set to a high stitch speed, it may cause the thread to break. Adjust the settings to a slower speed for better control.
Machine is Skipping Stitches
If your sewing machine is skipping stitches, it could be due to a few issues. First, check the needle installation and type. If the needle isn’t installed correctly or the wrong type is used, it could cause the machine to skip stitches. Re-thread the machine and make certain the needle is securely in place.
Another possible issue is timing. Adjust the timing settings on your sewing machine to make sure the needle moves at the correct speed. This can be done by a skilled repair technician.
Lastly, clean and oil your sewing machine regularly. Dust and dirt can accumulate on the machine, affecting its performance. Regular maintenance will keep your machine in tip-top condition and prevent skipping stitches.
Bobbin Tension Not Consistent
If your bobbin tension isn’t consistent, it can cause your stitches to be uneven or unevenly spaced. To fix this issue, start by checking if you’re using a metal bobbin, as plastic ones can be less consistent. If you’re using a plastic bobbin, switch to a metal one.
Additionally, make sure your bobbin winding is correct. If you’re unsure, refer to your sewing machine manual for instructions on how to wind your bobbin properly.
If the issue persists, it may be a sign that your machine needs maintenance or repair.
Seams in Stretch Fabrics Coming Out Wavy
When sewing with stretch fabrics, seams can sometimes come out wavy. To resolve this issue, you need to make sure that the fabric is supported while sewing, and avoid stretching the fabric. Using a walking foot can also help maintain tension and prevent wavy seams.
If the seams are still not straight, you can try sewing extra fabric before reinforcing with stitches, or reinforcing with stitches before the fabric edge. This will provide additional support and help the fabric feed more smoothly through the machine.
Sewing Machine Seizes Up or Won’t Sew
When your sewing machine seizes up or refuses to sew, it’s like hitting a snag in your creative flow. Don’t fret; here’s how to troubleshoot:
- Check the machine weight against the fabric’s thickness. A mismatch can halt your progress.
- Make sure the bobbin winding is set correctly; it’s a common oversight.
- Verify needle compatibility with your fabric to prevent jams.
- Assess fabric thickness; too much for your machine can cause a freeze.
- Investigate the timing; misalignment requires professional adjustment.
These steps will get you back to smooth sewing in no time.
Needle Comes Unthreaded Before Sewing
When your needle loses its thread before you start stitching, it can be annoying. Here are some remedies:
- Check needle insertion: Make certain the needle is put into the needle holder properly.
- Use proper needle type: Select the appropriate needle type for your fabric.
- Thread compatibility: Verify that the thread type is acceptable with your needle.
- Tension settings: Adjust your tension settings to prevent thread from breaking.
- Clean machine: Regularly clean your sewing machine to keep it functioning well.
Frequently Asked Questions (FAQs)
How can I prevent puckered seams when working with satin fabric?
Tame those puckery seams, sew-er! Glide with ease by using the right needle and thread, adjusting tension, and employing a walking foot – your satin fabric will lay smooth as silk. Master this fabric’s secrets and shine.
What is the best thread type and size for satin fabric?
For satin fabric, opt for a lightweight polyester or silk thread in a size 60 or These delicate fibers won’t snag or shred the precious satin, ensuring a smooth, even stitch every time.
How can I remove satin stitches without damaging the fabric?
Did you know that 87% of sewers struggle with satin stitch removal? No worries – gently snip the top threads, then use tweezers to pull them out one by one, leaving the underlying padding intact.
What are the recommended needle and thread sizes for sewing with satin?
For satin, choose a fine, lightweight needle size 70/10 or 80/12 and a smooth polyester or silk thread. This combo glides smoothly through the fabric to create beautiful, even stitches without puckering or skipped stitches.
How can I avoid water spots on satin fabric when ironing or steaming?
To avoid water spots on satin, simply spritz the fabric with a fine mist of water before pressing. The even dampness prevents uneven steaming and spotting. Voila – satin perfection every time!
Conclusion
Sewing satin seamlessly starts with careful consideration. Sensibly solve satin’s seven common sewing snags – from thread tension to bobbin balance, needle nuances to fabric feeding flaws.
Pinpoint problems promptly, then proceed with precision. Prioritize proper machine maintenance and utilize high-quality materials.
With these detailed satin sewing solutions, you’ll confidently craft chic, sophisticated projects. Satin sewing success is surely within reach when you tackle these 7 common satin sewing problems.

