This site is supported by our readers. We may earn a commission, at no cost to you, if you purchase through links.
Pick up a pair of sewing scissors, and something feels off right away, one handle sits higher than the other, almost like they got bent by accident. They didn’t. That crooked shape is engineering, not error, and once you know why, you’ll never look at a flat pair of craft scissors the same way again.
Fabric shifts, wrinkles, and puckers the moment your hand gets in the way of a flat cut. So sewing scissors solve this with a bent handle that lifts your palm above the table, letting the bottom blade glide flush against the cloth while you cut clean, straight lines.
That small offset does more than you’d think, protecting your wrist, sharpening your view of the blade tip, and turning ragged edges into pattern-perfect seams.
Table Of Contents
Key Takeaways
- The bent handle lifts your hand above the fabric so the bottom blade stays flat against the cloth, preventing shifting, wrinkling, and puckering as you cut.
- This offset design keeps your wrist in a neutral position, reducing strain on tendons and the median nerve and lowering your risk of repetitive strain injuries over time.
- Raising your hand off the table also clears your line of sight to the blade tip, cutting down on parallax errors and helping you follow pattern lines more accurately.
- Choosing the right shears (matching blade material and length to your fabric) and maintaining them through regular sharpening, cleaning, and fabric-only use keeps that precision and comfort working for you long-term.
Why Do Sewing Scissors Have a Bent Handle?
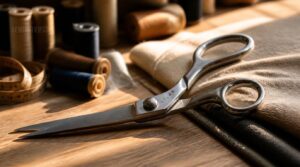
That bent handle isn’t just for looks, it’s doing real work every time you cut. The offset shape changes how the blade meets your fabric, and that makes a bigger difference than you’d think. Here’s what that little bend actually does for you.
Because the offset keeps your hand above the fabric instead of pressing into it, you get flatter, more consistent cuts, especially useful when comparing different types of fabric scissors for sewing for your next project.
Keeping Fabric Flat While Cutting
Cutting fabric on a wobbly surface is asking for trouble. Bent-handled shears keep your hand up while the blade stays flat, so fabric doesn’t shift or wrinkle mid-cut.
Pair that with a self-healing mat, fabric weights at the corners, and proper grainline alignment, and you get smooth, precision cutting without distortion — every single time.
Bottom Blade Stays Level
That flat surface only works because the angled lower blade holds still. A precision pivot mechanism controls blade tilt, so only the top blade angles while the bottom stays true.
Tight mounting hardware tolerances keep things locked in, and a smooth surface finish reduces micro-warping — meaning bent handled dressmaker shears cut cleanly without fabric distortion, cut after cut.
Preventing Slips on Slippery Fabric
Silk and chiffon love to wander mid-cut, but a level bottom blade holds its ground, so the fabric stays put instead of sliding away.
Pair your bent handled dressmaker shears with smart habits: try textured fabric selection, non-slip matting, fusible interlining, or corner weights. Add grip-enhancing accessories for extra control. Less shifting means smoother cutting action and real precision, without fabric distortion sneaking into your seams.
Enabling Clean, Precise Cuts
Once fabric stays flat, everything else falls into place. That level bottom blade keeps blade contact stability steady, so pressure spreads evenly across the whole edge instead of bunching up.
Even pressure means no jagged spots or wandering cuts. It’s how bent handled dressmaker shears deliver that smooth cutting action, reducing blade drift and edge distortion while maintaining a true cutting plane, cut after cut, for real precision.
Ergonomic Benefits of The Offset Design
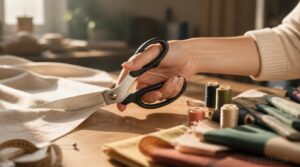
That bent handle isn’t just about the fabric, it’s about you too. Your wrists, elbows, and shoulders take on less strain every time you make a cut. Here’s what that offset design actually does for your body.
Neutral Wrist Positioning
Your wrist wants to sit in a straight line with your forearm, not bent up or down. That’s the neutral wrist position, and bent handle shears make it happen naturally.
This alignment keeps tendons gliding smoothly through the carpal tunnel, protects the median nerve, and cuts down on lateral wrist deviation. Less strain now means fewer repetitive strain injuries later, especially during marathon fabric cutting sessions. Maintaining a neutral wrist position is essential to prevent cumulative trauma to the arm.
Reducing Repetitive Strain Injuries
Repetitive strain injuries build slowly, one snip at a time, so prevention matters more than cure. Comfortable grips aren’t a cure-all, though—pair them with real habits.
Getting that screw tension right matters too, since how tight your scissors should actually be affects both cutting control and the strain on your hand.
Try task variation strategies: alternate cutting with pinning or marking. Schedule short breaks before fatigue hits. Practice early symptom recognition—tingling or aching means stop, adjust posture, or fix your workstation height.
Less Shoulder and Elbow Tension
Snip after snip, tension can creep from your wrist right up into your shoulder and elbow if your tools fight your posture.
Bent-handled shears keep forearm alignment neutral, so:
- Elbow moment arms shrink, easing shoulder pull
- Wrist deviation drops, protecting tendons
- A relaxed grip cuts muscle activity up to 25%
Pair that ergonomic design with a proper cutting stance, and your shoulders stay loose through the whole project.
Comfort During Long Cutting Sessions
Ever notice how a marathon isn’t won by speed alone, but by pacing? Cutting fabric for hours works the same way.
Ergonomic grips cut wrist torque and muscle fatigue, but comfort also means posture: keep your spine aligned, shoulders relaxed.
| Habit | Benefit | Frequency |
|---|---|---|
| Micro-breaks | Lowers fatigue | Every 20–30 min |
| Grip texture | Reduces grip force | Ongoing |
| Spine alignment | Prevents back strain | Constant |
How The Bend Improves Cutting Visibility
Comfort isn’t the only reason your hand sits up and away from the table. That small lift also changes what you can actually see while you cut. Here’s how that better view helps you every step of the way.
Raising Hands Off The Table
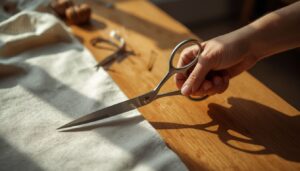
Good posture isn’t just polite, it’s practical. That bent handle naturally lifts your hand off the table, mirroring the classic etiquette cue of keeping wrists elevated during focused work.
This workspace accessibility boost means your fingers, palm, and forearm never block the fabric below. You stay engaged, alert, and ready to react, with ergonomic wrist relief built right into the design of bent-handled dressmaker shears.
Clear Sightline to The Blade
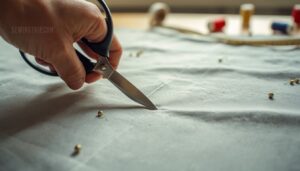
Can you cut what you can’t see? With bent-handled dressmaker shears, your hand sits above the fabric, so the blade tip stays in direct view the whole time.
With bent-handled shears, your hand stays clear of the fabric, keeping the blade tip in direct view at all times
This reduces visual obstruction and minimizes parallax errors, those tiny angle tricks your eyes play when hands block the line. Better edge control follows naturally.
For offset shears users, visual line tracking becomes second nature, sharpening overall cutting precision.
Following Pattern Lines Accurately
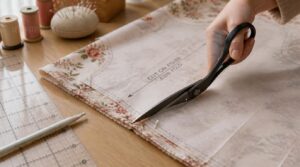
That clear sightline pays off most when tracing pattern lines. Your eyes track the marked path without your fingers blocking the view, so grain line alignment stays accurate from start to finish.
- Use stable tracing tools like a transparent ruler
- Choose the right marking tool for crisp lines
- Verify pattern transfer before cutting
- Control fabric tension to prevent shifting
- Trust your dressmaker shears for steady cutting precision
Trimming Seams and Appliqué Edges
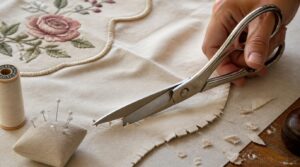
Once the pattern lines are cut, your Bent Handled Dressmaker Shears shine again during finishing work.
| Task | Trim Distance | Purpose |
|---|---|---|
| Straight seams | 3 mm | Reduce bulk |
| Curves | 2–3 mm clips | Ease turning |
| Appliqué edges | 1–2 mm | Clean satin stitch finish |
Grading seam bulk, clipping curved notches, and stabilizing delicate fabrics before trimming all rely on that same unobstructed sightline you’ve built cutting pattern lines.
Choosing The Right Bent-Handle Shears
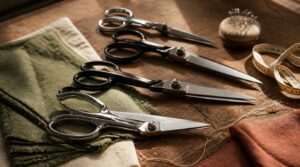
Now that you know why the bend matters, it’s time to find shears that fit your hands and your projects. Not all bent-handle scissors are built the same, and the right pick depends on what you’re cutting and how often you sew. Here’s what to look for before you buy.
Gingher Professional Dressmaker Scissors
Gingher Professional Dressmaker Scissors earn their spot in serious sewing kits through knife edge technology that stays sharp cut after cut. Forged steel construction resists chipping, while the chrome nickel finish fights corrosion.
A precision tension screw keeps blade alignment tight, so you get:
- Clean corners
- Accurate notches
- Smooth glides through satin or silk
These bent handled dressmaker shears deliver serious cutting power.
Kai 5210 8-Inch Dressmaking Shears
Kai 5210 8-Inch Dressmaking Shears bring hardened stainless steel blades built for denim, cotton, and everything between. The ambidextrous handle design fits right or left hands equally well, with a soft ergonomic grip that eases fatigue during marathon cutting sessions.
Blade alignment stays even across multiple layers, so your fabric cutting stays snag-free and steady, cut after cut.
Stainless Steel Vs Titanium-Coated Blades
Blade material makes a real difference in how your shears perform over time. Stainless steel shears offer excellent sharpness and hold an edge well, though they’re prone to corrosion without proper drying.
Titanium-coated shears add a harder outer layer, boosting edge durability, corrosion resistance, and shaving off weight for better maneuverability, but that coating wears down eventually, so gentle cleaning matters.
Matching Shears to Fabric Type
Ever wonder why one pair of shears glides through silk but chokes on denim? It comes down to matching blade to material.
- Weight compatibility: light chiffon needs fine edges; canvas needs reinforced steel.
- Fiber content: synthetics grip better with micro-serrated blades.
- Weave density: tight weaves want straight dressmaker shears.
- Specialty handling: leather demands rigid, heavy-duty cutting power.
- Edge maintenance keeps every fabric type cutting clean.
Caring for Your Bent-Handle Shears
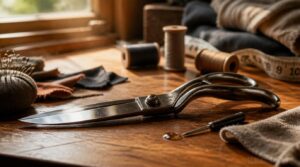
A great pair of bent-handle shears deserves a little upkeep to stay sharp and reliable for years. Good care habits protect both the blades and your wrists, so all that comfort you paid for doesn’t go to waste. Here’s what keeps your shears cutting like new.
Sharpening for Clean Cuts
Even the best fabric scissors lose their bite eventually. When you sharpen your shears, keep the edge angle precision between 10-15 degrees, and pick the right grit selection—1000 to 6000 works well.
Don’t skip deburring techniques or a quick stropping pass afterward. Check pivot tension too. That’s real blade maintenance, keeping sharpened steel delivering full cutting power.
Reserving Shears for Fabric Only
One rule saves your edge: fabric only, no exceptions. Grab paper, tape, or cardboard with those dressmaker shears, and you’re inviting dullness fast.
- Blade contamination risks from adhesives and plastics
- Paper vs fabric wear patterns differ completely
- Prevents residue transfer onto clean textile cutting
- Protects sharp edges on bent-handled shears
- Boosts overall tool longevity for sewing tools
Cleaning and Oiling The Mechanism
A quick wipe beats a rust spot every time. After each session, run a microfiber cloth over both blades to clear fibers. Add rubbing alcohol for glue residue.
| Task | Frequency | Product |
|---|---|---|
| Wipe-down | Every use | Microfiber cloth |
| Pivot oiling | As needed | Scissor oil |
| Deep clean | Monthly | Household oil |
Oil the pivot with 2-3 drops, then open and close the blades to spread it evenly.
Using The Full Blade Length
Short, choppy cuts create jagged edges and extra fabric distortion. Open your bent scissors wide and glide through fabric heel to tip in one smooth motion.
Full blade engagement means fewer cutting motions, less hand fatigue, and straighter lines along seam allowances. Keep fabric centered for control. This technique optimizes cutting efficiency while your bent-handled shears maintain that neutral wrist position you’ve worked hard to master.
Frequently Asked Questions (FAQs)
Are bent scissors better?
Bent-handled shears simply beat straight ones for serious sewing: layered fabric efficiency lets you slice 8 cotton layers cleanly, precision curve cutting boosts accuracy 10%, and silk handling stays smooth, gentle, and distortion-free every single time.
Why can’t left-handers use scissors?
Right-handed scissors force lefties into blade orientation mechanics and force transmission that push blades apart instead of together, causing visual obstruction, grip misalignment, and frayed cuts.
Left-handed shears or ambidextrous models actually work with your natural hand movement.
What is the advantage of bent-handled shears?
These ergonomic grips cut fabric distortion by up to 40%, ease wrist angle strain, and give you unobstructed cutting views.
That means better multi-layer power, stronger pattern integrity, and steadier control, exactly what garment construction and tailoring work demand from good equipment.
What are bent scissors used for sewing?
You’ll reach for these on multi-layer cutting, appliqué trimming, and intricate pattern work. Dressmaking and tailoring supplies rely on them for duckbill blade precision, clean seam edges, and confident fabric manipulation across everyday sewing and garment construction projects.
What length qualifies scissors as true dressmaking shears?
True dressmaking shears need 6-inch blades or longer, measured tip to pivot, not overall length. Professional ranges run 8 to 12 inches (20-30 cm), with 25 cm hitting the sweet spot for most fabric manipulation and pattern cutting tasks.
Whats the difference between rounded and elliptical handle bows?
That’s actually bow grip design, not shears—different tool entirely.
Quick answer: rounded grips offer even grip pressure distribution and lower weight; elliptical grips give more handle width variation, better fit for larger hands, and align nicely with mechanical release techniques.
Are pinking shears also available with bent handles?
Bent-handle pinking shears exist from brands like Fiskars, Fabany, and Kai, offering saw-tooth blades in stainless steel or titanium-coated options—giving you fray-resistant edges plus the same wrist-friendly comfort you’d expect from standard dressmaking shears.
How often should professional blade sharpening be scheduled?
Sharpening is a rhythm, not a random chore. Follow usage-based frequency: heavy denim or multi-layer cutting demands more frequent sharpening than lightweight fabrics. Watch for performance-based triggers like snagging, and pair seasonal upkeep with professional sharpening services for consistently clean, precise cuts.
Conclusion
Somewhere, a flat-handled pair of scissors is judging your fabric, wrinkling it just to watch you struggle. Rude, honestly.
Now you know why do sewing scissors have a bent handle: that offset isn’t quirky design, it’s your wrist’s best friend and your seam’s secret weapon. Straight lines, less strain, sharper eyes on the blade tip. Keep them sharp, keep them for fabric only, and that bend keeps paying you back, cut after cut, project after project.
- https://www.stitchclinic.com/best-types-of-scissors
- https://sewcutepatterns.com/blog/sharp-stylish-and-superbly-handy-bent-handled-dressmaker-shears-
- https://hollanders.com/products/wiss-bent-handle-shears
- https://artmaninstruments.com/products/bent-handle-curved-surgical-scissors-6-artman
- http://www.blogforbettersewing.com/2011/10/cultivating-scissor-arsenal.html