This site is supported by our readers. We may earn a commission, at no cost to you, if you purchase through links.
That drawer of old t-shirts you keep meaning to donate? It’s basically a yarn factory in disguise. One XL shirt can turn into 28 yards of soft, stretchy cord once you learn a few cutting tricks, and five shirts get you enough for a whole bathmat.
I’ve turned a stack of thrifted tees into rugs, baskets, and market bags without touching a knitting needle. The secret’s in how you cut and stretch the fabric, not fancy equipment. Grab your scissors (or a rotary cutter, if you’re feeling speedy) and let’s turn that old cotton into something you’ll actually use.
Table Of Contents
Key Takeaways
- One XL cotton jersey t-shirt yields about 28 yards of yarn once stretched, and five shirts produce roughly 150 yards, enough for a full bathmat.
- The key technique is cutting continuous strips with zigzag diagonal cuts and rounded corners, then stretching each strip firmly at least four times to create the yarn’s signature curl.
- Choosing medium-to-heavyweight, tubular cotton jersey shirts (avoiding rib knit) and prepping them by washing, ironing, and removing hems ensures smooth, even strips.
- T-shirt yarn works well for rugs, baskets, cushions, and bags, but its bulkiness requires a large 9-15mm crochet hook and patience with tension control.
What is T-Shirt Yarn?

Ever wonder what to do with that drawer full of old tees you can’t quite toss? Enter t-shirt yarn (also called jersey yarn or "tarn")—a chunky, DIY-friendly yarn made by cutting cotton jersey fabric into continuous strips.
Once you’ve mastered the basic cutting technique, you can braid or crochet the strips into cozy floor rugs using ideas from this guide to sewing projects using old clothes.
It’s basically upcycling magic: no spinning, no twisting, just fabric and scissors. That soft drape you love in a well-worn shirt? It carries right over, giving your yarn a bouncy, textured feel perfect for rugs, baskets, and other post-consumer-fabric creations. You can use a spiral cutting pattern to create long, continuous strands.
Essential Materials and Tools Needed
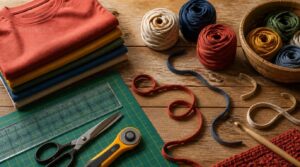
Before you start cutting, let’s talk about what you actually need on hand. Good news: you probably already own most of it, or can grab it cheap. Here’s your quick rundown of shirts, tools, and where to find them.
Choosing The Right Shirts
So, which shirts actually make good t-shirt yarn? Grab your old tees and check for cotton jersey knit — it curls naturally and won’t fray. Skip rib knit; it ruffles apart.
Medium-to-heavyweight shirts (5.0 oz or up) hold together best, and side-seam-free tubular ones let you cut continuous strips without interruption.
Basically, upcycle what’s already worn out — those fabric scraps have a second life waiting.
Cutting Tools Required
Now let’s talk tools. Your supply list doesn’t need to be fancy — just sharp.
- Fabric scissors for control
- Rotary cutter for speed
- Self-healing cutting mat
- Ruler for straight lines
- Locking blade for safety
Scissors vs rotary really comes down to feel: scissors grip better for detail cuts, rotary blades fly through when you cut the strips fast. Keep blades sharp (dull ones snag) and pick ergonomic grips — your hands will thank you.
Where to Source Shirts
Once your tools are sorted, the real hunt begins: finding shirts worth cutting up.
Thrift store hunting is your best bet — Goodwill and Salvation Army sell shirts for $3-$12. Check your own closet first (personal wardrobe upcycling is free!). Craft stores like Michaels and Hobby Lobby run clearance deals too. For bulk projects, wholesale fabric bolts keep colors consistent across the whole piece.
How to Prepare The Fabric
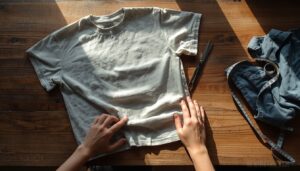
Now that you’ve got your shirt picked out, it’s time to get it ready for cutting. Prepping the fabric right sets you up for smooth, even strips later on. Here are the three quick steps you’ll want to follow first.
Start by washing and ironing your shirt to remove wrinkles, then check out this step-by-step infinity scarf sewing guide for tips on prepping fabric for clean, even cuts.
Ironing Out Wrinkles
A wrinkled shirt makes for crooked cuts, so grab your iron first. Use a medium heat setting and spray a little water on stubborn spots. Check the care label for max temperature. Steam works faster than dry ironing here.
Iron the collar and yoke first, then sleeves, then the back — this sequence keeps everything smooth for cutting continuous tshirt yarn strips later.
Removing The Hem
Grab your scissors (or a rotary cutter if you’ve got one) and slice straight across the bottom hem through both layers. A rotary cutter gives cleaner edges and cuts prep time nearly in half.
Got side seams? Trim those off too — they add annoying bulk. Steer clear of any logos, and press the raw edge for less fraying later.
Cutting The Body Piece
Now find the armpit seams and cut straight across, connecting one side to the other. This creates your main body piece — the foundation for continuous fabric strips.
- Keep armpit seam precision tight for even strips
- Lay seams horizontal, open edges vertical
- Smooth out layers before cutting
Good body piece orientation now saves headaches once you start to cut the strips later!
How to Cut Continuous Strips
Now that your fabric is prepped and flat, it’s time for the fun part: turning it into one long, continuous piece of yarn. This isn’t hard, but it does take a little technique to get that smooth, unbroken strip. Let’s walk through the three key steps that’ll get you there.
Choosing Your Yarn Width
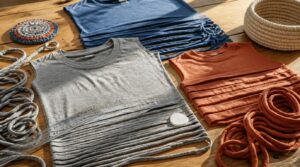
Width is where your t-shirt yarn really takes shape (literally). Measure the shirt’s height, then divide by 1 for standard yarn or 4 for chunky, bulky yarn. A 12-inch shirt gives you 12 strips at 1 inch, or 3 fat strips at 4 inches.
Standard width suits bags and coasters; bulky suits poufs and baskets needing structure.
Making The Diagonal Cuts
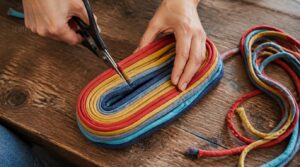
Here’s where your straight strips become one continuous length of yarn. Start your first diagonal cut at the outer edge (not the fold), slicing toward the next slit inward.
Alternate direction each time: right-to-left, then left-to-right, all the way across. This zigzag keeps you cutting with the fabric grain, connecting every strip while preventing ring separation.
Rounding The Corners
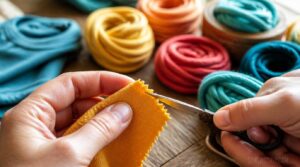
Those pointy corners left over from your zigzag cuts? They’re the enemy of smooth yarn. Snip each one into a soft curve, about 1/4 inch off the tip, so connections flow together instead of poking out.
This little trimming step is what prevents bulky knots later. Whether you’re using the Maze Method or crisscrossing back and forth, rounded corners mean your continuous length of yarn stretches evenly, no snags, no lumps.
How to Finish and Stretch Yarn
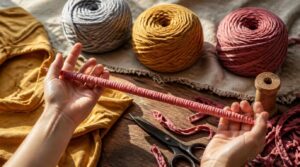
Now that your strips are cut, you’re almost to real yarn. This next part is where the magic happens (and where flat fabric finally becomes something you can actually knit or crochet with). Here’s what to do next.
Stretching for Curled Edges
Grab your strip and pull it firmly through your fingers, keeping your thumb on the stocking stitch side to stop twisting. Feed the fabric under your thumb, adjusting position if it flips.
Stretch it at least four times — each pull deepens the curl until that flat ribbon becomes true string-like t-shirt yarn. After the first pass, you can loosen your grip a bit.
Pull hard enough to feel resistance, but not so hard it snaps. Pure cotton needs more muscle; Lycra blends curl easier, thanks to built-in stretch memory.
Winding Into a Ball
Once your strip is stretched and curled, wind it using the center-pull technique so you can pull yarn from the middle later without a tangled mess.
- Wrap loosely around three fingers to build your base, forming an "X"
- Slide it off, thumb in center, keep wrapping diagonally
- Finish with a horizontal wrap to lock it, tucking the end
Keep tension loose — tight winding stretches your Tshirt Yarn permanently, ruining gauge. A crochet hook works great as a winding tool!
How to Join Multiple Strips

Now that you’ve got a pile of stretchy yarn, you’ll probably need more length for bigger projects. Good news: joining strips together is easy, and you’ve got a couple of solid options. Let’s look at both ways to connect your strips.
Tying a Double Knot
Once you cut the strips, you’ll need a rock-solid way to join small strips together, and that’s where the double knot shines. Overlap two ends by 2 inches, tie a square knot, then repeat directly beside it before you tighten the knot. This double loop structure gives you redundant holding power. Testing shows double knots hold roughly 15.3 pounds versus 14.92 for single knots.
| Knot Type | Breaking Strength |
|---|---|
| Single Knot | 14.92 lbs |
| Double Knot | 15.3 lbs |
Joining With Slits
Want a join with zero bulk? Skip the knot. Fold each strip’s end, then snip a tiny slit—not through the edge, just enough for a hole. Line up both slits, right sides facing, thread one tail through both openings, then pull the loose ends firmly. This creates tension that locks everything invisibly, no bumps. Roll the join between your fingers to smooth it flat. It’s oddly satisfying, and this method beats knots for preventing fraying edges in recycled yarn projects altogether.
How Much Yarn One Shirt Yields
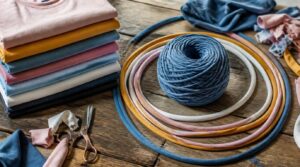
Now that your yarn is cut, joined, and ready to go, you’re probably wondering just how far one shirt will actually stretch. Good question! Let’s break down what you can expect, from a single tee to a whole stack of them.
Unstretched Vs Stretched Length
Here’s something that trips up a lot of first-timers: your yarn changes size the moment you stretch it. A men’s XL shirt gives you 22 yards unstretched, but pulling it firmly gets you closer to 28 yards.
That gain comes from:
- Cotton jersey stretching 20-30% naturally
- Fabric weight affecting how much it gives
- Edges curling inward as you pull
- Strip width narrowing slightly
- Fabric mix changing elasticity
Always calculate yardage after stretching your tshirt fabric strips, not before!
Yardage From Multiple Shirts
Five XL shirts get you roughly 150 yards of connected strips once stretched—about one commercial skein’s worth. That’s the magic number for planning bigger projects.
Here’s the formula: shirt width × 2 × number of strips ÷ 36 = yards. Handy when you’re eyeballing a bulk sourcing haul from the thrift store.
For a tshirt yarn rug, budget 6-8 large shirts. Cost-wise, homemade beats premium commercial yarn by roughly 20% per dollar—proof that learning how to make tshirt yarn genuinely pays off while you repurpose old cotton.
Homemade t-shirt yarn stretches your budget further, beating premium commercial yarn by roughly 20% per dollar
What to Make With T-Shirt Yarn

Now that you’ve got a ball of yarn ready to go, let’s talk about what to actually do with it. This stuff is tough, stretchy, and honestly perfect for all kinds of projects around the house. Here are a few of my favorite ways to put it to use.
Rugs and Bathmats
Here’s where t-shirt yarn really earns its keep: bathmats. Crochet 43 foundation chains, work in continuous rounds, and you get a smooth, non-slip mat thanks to its weight when wet.
The cotton’s naturally absorbent and wicking, drying feet fast. Four to five shirts, some looped rag-rug stitching for texture, and you’ve got sustainable, washable textile recycling in action.
Baskets and Cushions
Ready to level up? Grab a plastic base with punched holes for rock-solid stability, then slip stitch your t-shirt yarn through using tight, dense crochet for sturdy walls.
For cushions, crochet two matching panels, join three sides, then close the last one with chunky buttons—an easy, washable closure that repurposes old shirts beautifully into home decor you’ll actually use.
Bags and Accessories
Want a bag that actually holds groceries? Start with a single crochet base, then work up the sides using half double crochet for load-bearing strength.
- Sturdy upcycled tote bag
- Beaded jewelry from scrap sleeves
- Twisted plant hangers
For straps, whip stitch them on with locking markers. Add a magnetic snap closure, and you’ve got real DIY fiber arts.
Frequently Asked Questions (FAQs)
What are the pros and cons of t-shirt yarn?
Old shirts become new treasure. Sustainable crafting wins big: cheap, durable, beginner-friendly.
But bulkiness limits fine projects, colors depend on your stash, and blended fabrics tear easier — tradeoffs worth knowing before you upcycle that drawer full of tees.
Which yarn is best for a t-shirt?
Cotton jersey tees win here—soft, breathable, and stretchy enough for good curling. Look for 20-30 count weight, stitch-free tube-knit shirts to repurpose.
Blends work too, but pure cotton stretches best when fabric manipulation transforms flat strips into rounded yarn.
What can you make out of t-shirt yarn?
Like Rumpelstiltskin spinning straw into gold, you’re turning old shirts into treasure. Crochet sustainable home decor, absorbent kitchen textiles, sturdy pet toys, custom gift bags, and woven accessories — basically endless DIY possibilities limited only by your imagination.
Is t-shirt yarn hard to crochet with?
Honestly, yes—a little. You’ll need a large hook (9mm or bigger), expect hand fatigue, and fight tension control since stretched strips distort stitches permanently. Uneven strip widths add to the challenge too, but that’s part of the upcycle charm!
Can you machine wash items made from t-shirt yarn?
Machine wash on a gentle cycle with cool water. Use a mesh bag to protect edges from raveling, and toss in colors together to prevent bleeding. Expect minor shrinkage—totally normal for upcycled cotton.
How do you store t-shirt yarn between projects?
Roll each yarn ball and stash it in clear bins away from sunlight to prevent fading. Sort by color, zip pouches guard against moths, and vacuum bags save space alongside your other knitting supplies.
What crochet hook or needle size works best?
Picture a chunky, super-bulky yarn spool — that’s your t-shirt strip. Grab a 9mm to 15mm hook (L-11 to P/Q). Test with a quick swatch first, since fiber content and tension shift gauge more than labels ever do.
Can printed or patterned t-shirts still be used?
Absolutely — printed shirts add fun marled color effects.
Pre-wash to prevent ink bleeding, cut strategically around graphics, and stretch gently in short cycles, since printed areas curl a bit differently than solid fabric during textile repurposing.
How long does making a batch of yarn take?
Like knitting a scarf while binge-watching your favorite show, time flies once you’re in the groove. A batch of four shirts takes 45 to 50 minutes, while ten shirts runs 5 to 2 hours as your workflow speeds up.
Conclusion
That drawer full of old tees is a caterpillar waiting for its moment. Once you know the cutting and stretching tricks, that tangle of cotton spins into something with wings.
Learning tshirt yarn how to make isn’t just a craft skill; it’s proof that "waste" is just raw material wearing the wrong label.
Grab another shirt, keep cutting, and watch your pile of "junk" become rugs, baskets, and bags you’ll actually use for years.