This site is supported by our readers. We may earn a commission, at no cost to you, if you purchase through links.
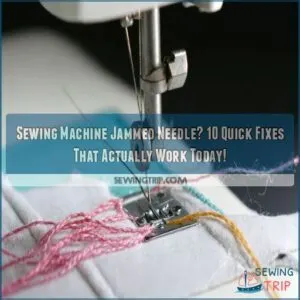
First, turn off your machine and lift the needle and presser foot so you can access the needle plate.
Gently clear out any debris, then try pulling the thread to free up the needle.
If it’s still stuck, take out the needle and check it for any nicks or bends – those can cause jams.
Make sure you’re using the right needle for your fabric too.
With a little troubleshooting, you’ll have your machine sewing smoothly again in no time.
Keep reading for more tips on preventing needle jams in the future!
Table Of Contents
- Key Takeaways
- Common Causes of a Jammed Sewing Machine Needle
- Why is My Sewing Machine Needle Jamming
- Signs of a Jammed Sewing Machine Needle
- Troubleshooting a Jammed Sewing Machine Needle
- How to Remove a Jammed Sewing Machine Needle
- How to Prevent a Jammed Sewing Machine Needle
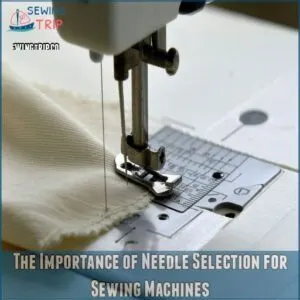
- The Importance of Needle Selection for Sewing Machines
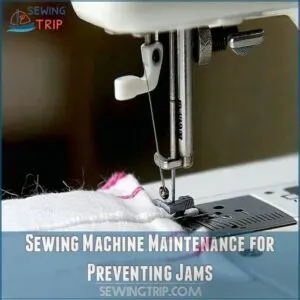
- Sewing Machine Maintenance for Preventing Jams
- Advanced Troubleshooting Techniques for Jammed Needles
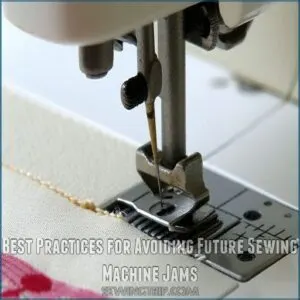
- Best Practices for Avoiding Future Sewing Machine Jams
- Frequently Asked Questions (FAQs)
- Conclusion
Key Takeaways
- Diagnose and fix a jammed sewing machine needle by checking the needle, threading, presser foot, and bobbin area.
- Prevent future needle jams by using the right needle, maintaining your machine, and following the user manual.
- Replace worn or damaged parts to keep your machine running smoothly and avoid frustrating issues.
- Troubleshoot advanced problems like thread tension and presser foot pressure to resolve persistent needle jams.
Common Causes of a Jammed Sewing Machine Needle
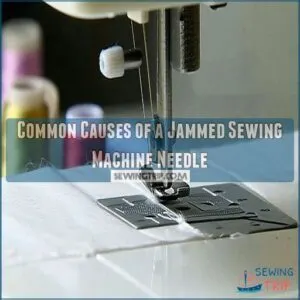
When your sewing machine needle jams, it’s often due to low feed dogs, the wrong needle, or improper threading. Knowing these common culprits helps keep your sewing smooth and frustration-free!
Low Feed Dogs
Ever felt like your sewing project just won’t move?
The feed dogs might be to blame.
If they’re too low, it’s like trying to ski without snow.
Check the feed dog height and alignment; give them a good cleaning, and adjust as needed.
Make sure they’re set for your fabric thickness to keep everything smooth and jam-free.
Wrong Needle
Using the wrong needle size is like trying to thread a camel through the eye of a needle – it just won’t work smoothly.
Your fabric and needle need to be perfectly matched to avoid jamming issues.
Here’s what you need to watch for:
- Universal needles aren’t always universal
- Heavy fabrics need stronger needles
- Delicate fabrics require finer needles
- Stretchy fabrics need special ballpoint tips
- Double-check your machine’s recommended needle types
Damaged or Bent Needle
A damaged or bent needle is one of the most common culprits behind a jammed sewing machine.
This can happen from hitting pins, over-stressing the needle, or simply using it for too long.
To fix this, unscrew the needle, inspect it closely, and replace it with a new one of the correct size and type.
Improper Upper Threading
If your sewing machine needle’s acting up, improper upper threading might be the culprit. To avoid this, ensure you’re threading the needle from front to back to prevent twisting, and use a needle threading technique. If your sewing machine needle’s acting up, improper upper threading might be the culprit. Check these for smooth operation:
- Misaligned thread guides causing headaches.
- Incorrect upper thread tension messing up stitches.
- Thread path issues driving you nuts.
- Spool cap loose, leading to frustration.
- Using the wrong thread type for your project.
Keep these in check for a seamless sewing experience!
Improper Bobbin Threading
Improper bobbin threading can also jam your needle.
Unwind the bobbin thread, then rethread the bobbin carefully.
Make sure the thread feeds through the tension slots and bobbin case correctly.
Pull the bobbin thread up above the faceplate to avoid jams.
Proper bobbin threading is essential for smooth, even stitching.
Why is My Sewing Machine Needle Jamming
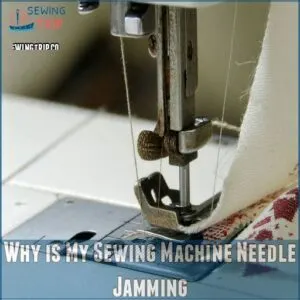
So, your sewing machine needle’s jammed. It’s frustrating, right? Let’s figure out why. Often, it boils down to a few common culprits.
First, are you using the correct needle size for your fabric type? Heavy denim needs a sturdier needle than delicate silk. Using the wrong needle is like trying to hammer a nail with a spoon—it just won’t work.
Next, check your thread. Low-quality thread breaks easily, causing jams. Think of it as a weak link in a chain; one break and the whole thing goes.
Also, make sure your machine tension is properly adjusted. Too loose, and the thread’s a floppy mess. Too tight, and it snaps. It’s a delicate balance, and sometimes even a well-threaded machine can still get stuck if you haven’t double-checked the thread path.
Bobbin issues are another frequent offender. A poorly threaded bobbin or incorrect bobbin tension can lead to a jammed needle. Imagine a tangled fishing line—it’s a nightmare to untangle.
Finally, make sure your feed dogs are properly raised. They should help feed the fabric smoothly. If they’re down, you’re fighting an uphill battle.
Addressing these issues should get your sewing machine purring again.
Signs of a Jammed Sewing Machine Needle
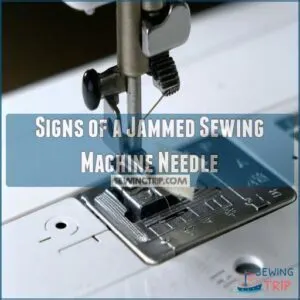
Experiencing a jammed sewing machine needle? Don’t worry – there are some clear signs that indicate a needle jam, like if your needle won’t move or your thread keeps breaking.
Pay close attention to how your fabric is feeding through the machine, too – uneven feeding or unusual noises are other telltale signs.
Needle Won’t Move
A jammed needle can feel like hitting a brick wall in your sewing project.
First, check if the feed dogs are stuck down.
Second, make sure the needle is properly inserted and not bent.
Finally, examine the bobbin area for tangled threads that might be causing the needle to lock up.
Handling these can often free the needle and get you back to sewing.
Thread Breakage
Thread breaking can be a real head-scratcher.
It often comes down to thread tension, needle size, or even the fabric type you’re working with.
Make sure your bobbin is wound correctly and check that your machine’s clean.
Each aspect plays a role in maintaining harmony between your fabric and machine; overlooking one might result in unexpected thread breakage.
Uneven Fabric Feed
Uneven fabric feeding could signal a feed dog issue.
Check if the feed dogs are raised above the faceplate and not obstructed by debris.
Additionally, consult sewing machine fabric feeding tips to make sure proper feed dog height and alignment are in place.
Fabric thickness and tension can also impact feed.
Make sure the needle is properly aligned, and consider adjusting the machine’s settings if the fabric still pulls unevenly.
Addressing these factors should help smooth out your stitching.
Sewing Machine Making Unusual Noises
If your sewing machine is making unusual noises, it could be a sign of a jammed needle.
Strange rattling, grinding, or thumping sounds often indicate loose parts, motor issues, or belt problems.
The machine may also be overheating, causing the fabric to jam.
Stop sewing and investigate the source of the noise right away.
| Symptom | Possible Cause |
|---|---|
| Rattling | Loose parts |
| Grinding | Motor issues |
| Thumping | Belt problems |
| Overheating | Fabric jamming |
Troubleshooting a Jammed Sewing Machine Needle
Has your sewing machine needle suddenly jammed or gotten stuck? Don’t worry – common issues like thread bunching or needle problems can often be resolved by checking the presser foot and thread tension settings, troubleshooting sewing machine problems. we’ve some quick and easy troubleshooting tips to get your machine running smoothly again in no time.
Checking The Feed Dogs
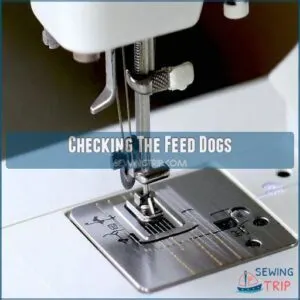
First, check if your feed dogs are raised above the faceplate.
If not, gently raise them using the adjustment screws.
Second, clean out any debris or lint buildup below the faceplate.
Third, see if your machine has adjustable feed dogs – try tweaking them to suit your fabric thickness.
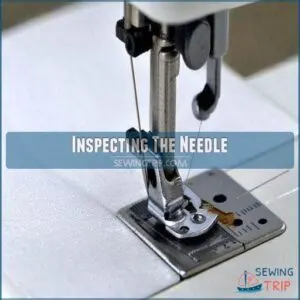
Inspecting The Needle
Take a close look at the needle – it might be bent, damaged, or simply the wrong type for your project.
Gently inspect it for any nicks, cracks, or imperfections.
If the needle looks worn, go ahead and replace it with a fresh one.
Choosing the right needle size and type for your fabric is key to preventing jams.
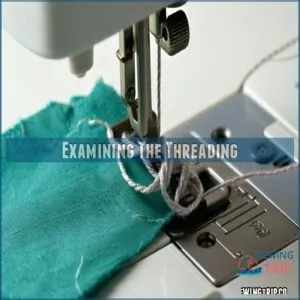
Examining The Threading
Next, thoroughly examine the threading of your sewing machine.
Rethread the upper thread, ensuring it passes through all the guides correctly.
Double-check the bobbin threading too, making sure the thread is feeding through the tension slots as intended.
Improper threading is a common culprit behind jammed needles, so pay close attention to this step.
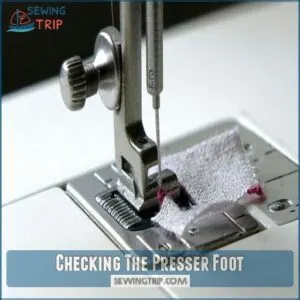
Checking The Presser Foot
The presser foot plays a key role in preventing needle jams.
Check that you’re using the right foot for your fabric – a walking foot for thick layers or a Teflon foot for slippery fabrics.
Make sure the foot is positioned properly, with the right pressure and alignment.
Mismatched feet can cause uneven feeding and needle problems.
- Use the right presser foot
- Adjust the foot pressure and alignment
- Make sure the foot is compatible with your fabric
How to Remove a Jammed Sewing Machine Needle
Having trouble with a jammed needle on your sewing machine?
Don’t worry, we’ve got you covered.
Read on for simple steps to quickly remove that pesky jammed needle and get your project back on track.
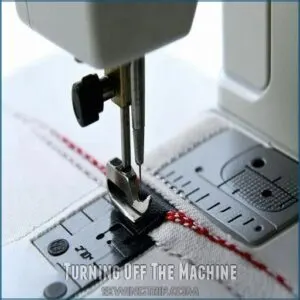
Turning Off The Machine
To safely remove a jammed needle, power off and unplug your sewing machine first.
This will prevent any accidental stitching or injuries while you work.
If you find that your needle is stuck frequently, consider investing in a specialized needle removal tool to make the process easier.
With the machine shut down, you can now focus on the problem at hand without putting yourself at risk.
Safety comes first when dealing with a stuck needle.
Cutting The Thread
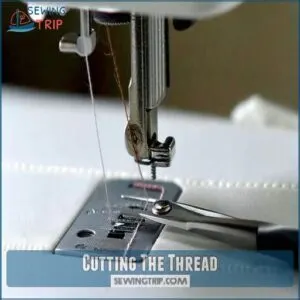
First, carefully cut the thread near the needle using small scissors or thread snips.
This will help release the tension and make it easier to remove the jammed needle.
Key steps to take here include:
- Locate the thread near the needle
- Gently and slowly cut the thread
- Avoid tugging or pulling on the thread
- Use small, sharp scissors for a clean cut
Removing The Needle
Removing the jammed needle can be tricky, but don’t worry – it’s a common issue.
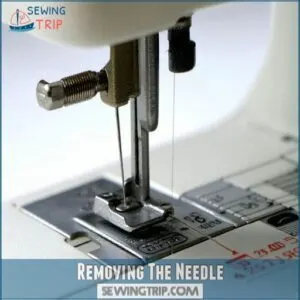
First, turn off your machine and locate the needle holder. Gently unscrew it and carefully pull out the stuck needle.
Inspect it for any bends or damage and replace it with a new one if needed.
With the needle removed, you’re one step closer to getting your sewing machine back in action.
Rethreading The Machine
Next, you’ll need to carefully rethread the machine.
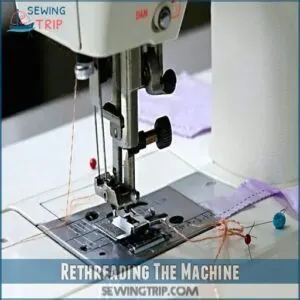
Start by rethreading the upper thread, ensuring it passes through all the guides correctly.
Then, rethread the bobbin, making sure the thread feeds through the tension slots properly.
Double-check that the spool cap is secure and the bobbin thread trails behind adequately.
With the machine properly rethreaded, you should be back in business.
How to Prevent a Jammed Sewing Machine Needle
Preventing a jammed sewing machine needle is all about proper maintenance and technique.
Keep your machine well-oiled and use the right needle for your fabric – it’ll save you a ton of headaches down the line.
Regular Machine Maintenance
Regularly selecting the right sewing machine needle based on needle size and type guidelines and maintaining its integrity can prevent issues. Keeping your sewing machine in tip-top shape is the key to preventing needle jams.
Establish a regular cleaning schedule to remove lint and debris, and be sure to lubricate the machine according to the manufacturer’s instructions.
Storing your machine properly in a clean, dry environment will also help ward off rust and corrosion.
Stay on top of maintenance, and those pesky jams will be a thing of the past.
Using High-Quality Thread
Using high-quality thread is key to preventing sewing machine needle jams.
Cheap or low-quality thread can break easily, causing all sorts of headaches.
Stick with premium thread brands designed specifically for sewing machines.
Check the thread tension too – too tight or too loose can lead to snapping.
Proper thread winding on the spool helps minimize issues as well.
Choosing The Right Needle
Choosing the right sewing machine needle is essential to prevent jams.
Different fabrics require specialized needles – delicate fabrics need finer needles, while heavy-duty materials call for sturdier ones.
| Fabric Type | Needle Type |
|---|---|
| Light | Sharp |
| Medium | Universal |
| Heavy | Denim |
Consult your machine’s manual or a reputable sewing resource to find the perfect match and sail through your project smoothly.
Proper Threading Techniques
Properly threading your sewing machine is key to preventing needle jams.
Take the time to carefully guide that thread through each tension disc and guide – it may seem fiddly, but it’ll save you a headache down the line.
And don’t forget the bobbin too – make sure it’s threaded just right for smooth, jam-free operation.
The Importance of Needle Selection for Sewing Machines
Your sewing machine’s needle is the key to smooth, even stitching.
Choosing the right needle for your fabric type and project makes sure it glides through seamlessly without jamming.
Carefully consider needle size, material, and style to get the best results.
Different Needle Types
There are three main types of needles for sewing machines: sharp, ball point, and stretch.
Sharp needles are ideal for woven fabrics, while ball point needles work best with knits.
Stretch needles have a special scarf that prevents skipped stitches when sewing stretchy materials.
Choose the right needle for your fabric to avoid frustrating snags and skipped stitches.
Needle Sizes
When sewing, choosing the right needle size is important.
Too small and the needle may bend or break; too large and it can create holes in delicate fabrics.
Use this handy table to select the perfect needle for your project:
| Fabric Weight | Needle Size |
|---|---|
| Light | 60/8 – 70/10 |
| Medium | 80/12 |
| Heavy | 90/14 – 100/16 |
Paired with the right thread thickness, the correct needle will guarantee smooth, professional-looking stitches every time.
Fabric Considerations
Choosing the right needle is essential for your fabric type.
Heavy fabrics like denim need a stronger needle, while delicate silks require a finer point.
Pay attention to your fabric’s thickness – using the wrong needle can lead to skipped stitches, thread breakage, or even a jammed machine.
Partner with the right needle for a smooth sewing experience.
Choosing The Right Needle for Your Project
Different fabrics require specific needle types and sizes for the best sewing, as understanding needle anatomy and systems can help you make the right choice learn more about sewing machine needle selection tips.
Too small a needle on heavy denim could break; too thick a needle on delicate silk may snag.
Consider the project, fabric, and thread when choosing a needle.
Don’t be afraid to experiment – it’s the only way to find the perfect match.
Sewing Machine Maintenance for Preventing Jams
Don’t let a jammed needle ruin your sewing session!
Keeping your machine well-maintained is key to preventing frustrating jams.
Regular cleaning, oiling, and replacing worn parts will help your sewing machine run smoothly.
Cleaning The Machine
Regular cleaning keeps your sewing machine humming along smoothly.
Grab a soft brush, specifically a sewing machine brush, and wipe down the surface – get in those nooks and crannies where lint loves to hide.
Don’t forget the bobbin area – a buildup of debris is a common culprit for jams.
With just a few minutes of TLC, you’ll ward off those pesky needle issues.
Oiling The Machine
Keeping your machine well-oiled is key to preventing jams.
Use the right type of sewing machine oil and apply it regularly as per the manufacturer’s recommendations.
A little goes a long way, so be careful not to overdo it.
Proper lubrication reduces friction and helps create smooth, consistent stitching.
Oil up, and watch those needle jams disappear.
Replacing Worn or Damaged Parts
On the flip side, even high-quality sewing machines have parts that wear out over time.
Replace worn-out or damaged components like the feed dogs, tension discs, and timing gears to keep your machine running smoothly.
Refer to your user manual for guidance on which parts need replacing and how to DIY the job.
Don’t skimp – quality replacements are worth the investment.
Storing The Machine Properly
When storing your sewing machine, you’ll want to make sure it’s kept in a clean, dry environment. Invest in a dust cover to protect it from dirt and debris.
Regularly cleaning the bobbin case area, as part of your daily sewing machine care, will also help prevent jams. Control humidity levels to prevent rust and corrosion.
Following these simple steps will help keep your machine in top shape for years to come.
- Use a dust cover
- Store in a dry, climate-controlled space
- Avoid high-humidity environments
- Properly maintain to extend machine life
Advanced Troubleshooting Techniques for Jammed Needles
Don’t let a jammed needle ruin your sewing project.
Get into advanced troubleshooting techniques by checking the bobbin area, inspecting the presser foot, and examining your machine’s tension – your user manual’s got your back.
Checking The Bobbin Area
If your needle keeps getting stuck, the problem could be down in the bobbin area.
Take a close look at the bobbin tension, thread path, and winding.
Carefully remove the bobbin and inspect the case for lint buildup or thread tangles.
Get that bobbin rethreaded and tension adjusted, and you’ll be back in business in no time.
Inspecting The Presser Foot
Your presser foot could be the culprit if your sewing machine needle keeps jamming.
Check for issues like incorrect presser foot type for the fabric, uneven or excessive foot pressure, which can be due to incorrect presser foot tension.
adjusting presser foot pressure is important for smooth stitching.
Misalignment of the foot, damage or wear on the foot, buildup of lint or debris under the foot.
Addressing these presser foot problems can often resolve needle jamming issues.
Examining The Machine’s Tension
Checking your machine’s thread tension is very important for preventing needle jams, and regularly cleaning the machine with a brush and sewing machine oil can help reduce bobbin thread issues that can lead to jams. Checking your machine’s thread tension is very important for preventing needle jams.
Too tight or loose tension can lead to skipped stitches, breakage, and jamming.
Gently adjust the tension dials, testing on scrap fabric until you achieve the right balance.
This simple fix can get your machine sewing smoothly again in no time.
Consulting The User Manual
Regularly consulting your sewing machine’s user manual can be a game-changer when troubleshooting a jammed needle.
The manual often provides detailed guidance on clearing jams, adjusting tension, and performing maintenance – straight from the manufacturer.
Keep that trusty manual close by, and you’ll have a reliable go-to for resolving most needle-related issues.
Best Practices for Avoiding Future Sewing Machine Jams
Avoid future sewing machine jams by keeping your machine well-maintained. Regularly check components, use the right tools, and follow your user manual’s instructions to guarantee smooth sewing sessions.
Regularly Checking The Machine
Is your sewing machine throwing tantrums? Regular checks keep it happy and humming.
- Machine Health: Give it a quick look weekly to catch minor issues before they grow.
- Oil Level: A light massage with oil prevents noisy disruptions.
- Thread Tension: Keep the tension smooth to avoid tantrums.
- Needle Condition: Swap those needles regularly; they get tired too!
Keeping The Machine Clean
Keeping your sewing machine squeaky clean is the key to smooth sailing.
Regularly remove lint and dust from the inner workings – the bobbin case, feed dogs, and needle area.
Use a soft brush or compressed air to banish debris.
Then, apply a few drops of sewing machine oil to the moving parts.
Your machine will purr like a kitten.
Using The Right Tools and Accessories
Your sewing machine runs best when you equip it with the right tools.
Choose a presser foot suited for your fabric and invest in high-quality thread, as well as the perfect sewing machine needles, and consider specialty attachments like quilting or walking feet.
These thoughtful selections can make all the difference in preventing future needle jams and ensuring smooth, professional-looking results.
Following The User Manual’s Instructions
When your sewing machine is jammed, the user manual is your most valuable resource.
Follow the manufacturer’s guidance to the letter – from threading the machine properly to adjusting the tension.
With their expert advice, you’ll get your needle unblocked and keep your machine running smoothly for years to come.
| Step | Instruction | Reason |
|---|---|---|
| 1 | Refer to user manual | Manufacturer-recommended procedures |
| 2 | Rethread machine carefully | Prevent misalignment and jamming |
| 3 | Adjust tension per manual | Optimize stitch quality and prevent issues |
| 4 | Perform regular maintenance | Extend machine lifespan and prevent future jams |
Frequently Asked Questions (FAQs)
How to fix a stuck sewing machine needle?
First, check for bends or nicks in the needle.
If it’s damaged, replace it with a new one.
Make sure the needle is properly aligned and pushed all the way up into the holder.
Rethread the machine carefully to get it back on track.
How do you remove a jammed needle?
Unscrew the needle holder, gently remove the jammed needle, and inspect it.
Replace with a new, undamaged needle, ensuring it’s inserted all the way up to the top of the holder.
Rethread the machine and test it on a scrap fabric.
Why is my sewing machine jamming?
Looks like your sewing machine’s hitched a ride on the struggle bus, partner. But don’t worry, we’ll get it back on track.
Start by checking for pesky threads, bent needles, or clogged feed dogs – those little critters love causing mayhem.
How do you remove a needle from a sewing machine?
To remove a jammed needle, simply unscrew the needle clamp and gently pull out the stuck needle.
Don’t force it – you might bend or break it.
Then, replace it with a new, properly inserted one.
What is a sewing machine needle?
A sewing machine needle is the unsung hero that pierces through fabric, interlocking threads to create your masterpieces.
It’s the heart of your machine, so treat it with care to avoid any jamming mishaps.
What should I do if my sewing machine keeps jamming?
If your sewing machine’s incorrect threading or needle issues are causing jams, a thorough check of the threading paths and needle alignment is necessary. If your sewing machine keeps jamming, check the needle, threading, and maintenance. Clean the feed dogs, replace the needle, and oil the machine regularly to prevent future issues.
How to fix a needle stuck in a sewing machine?
Unscrew the needle, inspect it for damage, and reinsert it with the flat side facing the rear of the machine.
Push the needle up to the farthest point in the holder and secure it.
If the needle’s still stuck, replace it.
Why won’t my needle go up and down on my sewing machine?
Your needle’s not budging? Don’t worry, it’s probably just a simple fix.
Check if the needle’s fully inserted, the thread’s not tangled, and the machine’s properly lubricated.
With a few quick tweaks, you’ll have that needle humming again in no time.
Why is my sewing machine needle jamming?
Over 80% of sewing machine issues stem from the needle, so if yours is jamming, try replacing it with the right size and type.
With a fresh needle, the machine should hum along smoothly again.
How do you unjam your sewing machine?
First, check if the needle’s stuck – it’s often caused by tangles or debris.
Gently remove the needle, rethread the machine, and sew slowly.
If it keeps jamming, you may need to oil or service your sewing machine.
What are the signs of a loose sewing machine needle?
You know, about 80% of sewing machine issues are related to the needle.
If your needle’s loose, you might notice uneven stitching, excessive thread breakage, or the needle getting stuck.
Tighten that needle up to keep your machine humming.
How do I adjust the needle threader on my machine?
To adjust your sewing machine’s needle threader, simply locate the threader lever or button, then gently pull or press it according to your machine’s instructions.
This should guide the thread through the needle’s eye with ease.
Can I use a dull needle to sew through heavy fabrics?
You shouldn’t use a dull needle for heavy fabrics.
It’ll only cause more problems, like skipped stitches and frustrated seams.
Grab a fresh, sharp needle designed for the job – it’ll sail right through that heavyweight material.
What is the correct way to insert a twin needle?
Threading a twin needle is a dance between precision and patience.
Align the needles, guide the threads, and watch your sewing machine glide through fabric like a seasoned pro – all it takes is a few careful steps.
How often should I replace the sewing machine bobbin?
Your sewing machine’s bobbin needs replacing when you notice issues like thread breakage, uneven stitching, or skipped stitches, which can also be caused by problems with the needle plate such as those related to needle plate issues.
Bobbin replacement is also recommended every few projects to keep your machine humming.
Conclusion
No more jamming, snapping, or sewing machine woes!
With the right troubleshooting tricks, you’ll be a sewing machine whiz in no time.
From inspecting your needle to perfecting your threading, this guide has your back.
So don’t let a pesky jammed sewing machine needle derail your sewing projects – use these proven fixes to get your machine purring like a kitten and breeze through your next sewing session.

