This site is supported by our readers. We may earn a commission, at no cost to you, if you purchase through links.

Getting your sewing machine’s timing right is important for smooth, consistent stitches and preventing damage to your machine.
To get started, you’ll need to loosen the needle bar and slide it up or down to align the top timing mark just below the bottom of the timing bar bushing.
If your needle bar doesn’t have timing marks, lower the needle completely using the hand wheel, then raise it 2.4 millimeters.
That’s a quick rundown of adjusting your sewing machine’s timing! But, there’s more to learn for the best results…
Table Of Contents
- Key Takeaways
- Importance of Sewing Machine Timing
- Identifying Timing Issues in Sewing Machines
- Consequences of Timing Errors in Sewing Machines
- Adjusting Sewing Machine Timing for Optimal Performance
- Timing Considerations for Different Sewing Machines
- Troubleshooting Timing Issues in Sewing Machines
- Additional Considerations for Sewing Machine Timing
- Timing Looper and Coverstitch Machines
- Frequently Asked Questions (FAQs)
- Conclusion
Key Takeaways
- You’ll want to adjust your sewing machine’s timing when you notice issues like skipped stitches, thread breakage, or a scraping noise – don’t worry, it’s an easy fix once you identify the problem.
- To get started, locate the needle bar clamp and hook timing adjustment clamp – these are usually set screws or clamps that allow you to adjust the position of the needle and hook. Some machines, like the Necchi Lydia, have unique timing adjustments, so be sure to consult your user manual.
- Perfect timing on a sewing machine means the hook and needle are harmoniously aligned, with the hook positioned slightly behind the needle’s eye when it’s down, creating smooth, consistent stitches. Think of it like a perfectly choreographed dance between the needle and hook.
- Regular maintenance is key to preventing timing issues. Clean and lubricate your machine every 1-3 months, check and adjust timing every 3-6 months or after 100 hours of use, and don’t neglect Thread Tension basics, like setting the upper and lower tensions correctly, to keep your machine running smoothly and prevent costly repairs.
Importance of Sewing Machine Timing
You’re probably here because your sewing machine is skipping stitches or breaking threads, and you’re on the verge of pulling your hair out. Don’t worry, we’ve got this – understanding and adjusting your sewing machine’s timing is key to smooth, consistent stitches and preventing damage to your machine.
Ensuring Smooth and Consistent Stitches
To achieve smooth and consistent stitches, you need to master sewing machine timing. Think of it like a perfectly choreographed dance between the needle and hook. Here are key factors to keep in mind:
- Thread tension: not too tight, not too loose
- Needle size: choose the right one for your fabric
- Bobbin tension: don’t overlook it!
- Fabric type: different fabrics require different settings
- Foot pressure: gentle, yet firm
Preventing Skipped Stitches and Thread Breakage
To prevent skipped stitches and thread breakage, you need to fine-tune your sewing machine’s timing.
Think of it like a perfectly choreographed dance between the needle and hook.
If they’re out of sync, you’ll get uneven stitches or broken threads.
Adjust the timing so the hook catches the thread loop formed by the needle’s upward movement, and you’ll be sewing like a pro in no time.
Avoiding Damage to the Needle and Hook Assembly
To avoid damage to the needle and hook assembly, you’ll want to stay on top of maintenance. Here are three important tasks to keep your machine running smoothly:
- Needle maintenance: Regularly check for bent or damaged needles.
- Hook alignment: Make sure the hook tip is properly aligned with the needle eye.
- Proper lubrication: Keep your machine well-oiled to prevent wear and tear.
Identifying Timing Issues in Sewing Machines
You’re frustrated with skipped stitches, thread breakage, and mysterious clunks coming from your sewing machine – it’s time to investigate if timing issues are the culprit. By learning to identify common symptoms of timing problems, you’ll be well on your way to troubleshooting and adjusting your machine’s timing for smooth, consistent stitches.
Common Symptoms of Timing Problems
You’re frustrated with your sewing machine’s wonky stitches! Don’t worry, friend, let’s troubleshoot together. Here are common symptoms of timing problems:
| Symptom | Description | Probable Cause |
|---|---|---|
| Unusual stitching patterns | Uneven or irregular stitches | Incorrect timing |
| Thread breakage | Thread snaps or breaks frequently | Misaligned hook or needle |
| Machine noise | Scraping, grinding, or clunking sounds | Worn or damaged parts |
These issues can be a real pain, but we’ll get to the bottom of them!
Skipped Stitches and Needle Strikes
The frustration of skipped stitches and needle strikes! Don’t worry, we’ve got you covered. Here are three key things to check:
- Needle tension: Is it too tight or too loose? Adjust the set screw to get it just right.
- Bobbin case: Is it properly seated? Make sure it’s securely in place.
- Thread type: Are you using the right thread for your fabric and needle size?
Bird Nests or Snarls and Incorrect Needle Installation
Don’t let bird nests or snarls ruin your sewing flow! Check your needle installation – a bent or improperly installed needle can cause skipped stitches. Make sure the needle is straight and secure. Prevent bird nests by regularly cleaning your machine, winding bobbins correctly, and keeping the thread tension just right.
| Bird Nest Prevention | Needle Size | Machine Maintenance |
|---|---|---|
| Regularly clean machine | Use correct needle size | Oil machine regularly |
| Wind bobbins correctly | Check needle for damage | Check thread tension |
| Maintain thread tension | Replace needle as needed | Clean bobbin area |
Incorrect Threading and Its Effects on Timing
Timing is everything when it comes to sewing, and incorrect threading is a common culprit. Don’t let it get the best of you! Check your threading to avoid skipped stitches, thread breakage, and improper loop formation. Here are some things to keep in mind:
- Top thread tension should be balanced, not too tight or too loose.
- Bobbin winding matters – make sure it’s not twisted or uneven.
- Skipped stitches can be a sign of incorrect threading or tension.
- Thread breakage is often caused by improper threading or worn-out threads.
- Regular sewing machine service can help prevent timing issues and keep your machine running smoothly.
Consequences of Timing Errors in Sewing Machines
If your sewing machine’s timing is off, you’ll likely encounter a host of frustrating problems, including skipped stitches, thread breakage, and potentially even damage to the needle and hook assembly.
To avoid costly repairs and replacement of damaged parts, you need to fix timing errors quickly and correctly.
Let’s explore the consequences of timing errors in sewing machines and how to fix them.
Skipped Stitches and Thread Breakage
You’re dealing with skipped stitches and thread breakage – the ultimate sewing machine timing woes! Don’t worry, friend, it’s an easy fix. Check your tension issues, needle size, and bobbin case for any culprits. Even thread quality can be a sneaky offender. And, if you’re rocking a vintage sewing machine, double-check that sewing machine clamp.
Damage to the Needle, Hook, or Hook Gears
- A bent or broken needle can cause skipped stitches and fabric damage.
- Hook gear problems can lead to inconsistent stitching and thread breakage.
- A damaged hook can cause the thread to snag or break.
- Worn-out hook gears can make a grinding or screeching noise.
Preventing needle damage and addressing common hook issues can save you from costly sewing machine repairs down the line.
Expensive Repairs and Replacement of Damaged Parts
Now that you know the damage that timing errors can cause, let’s talk turkey – or rather, the cost of repairs. If you’re not covered by warranty, DIY repairs or replacement of damaged parts can be expensive. Preventative maintenance is key! Regularly check and adjust your timing to avoid costly fixes down the line.
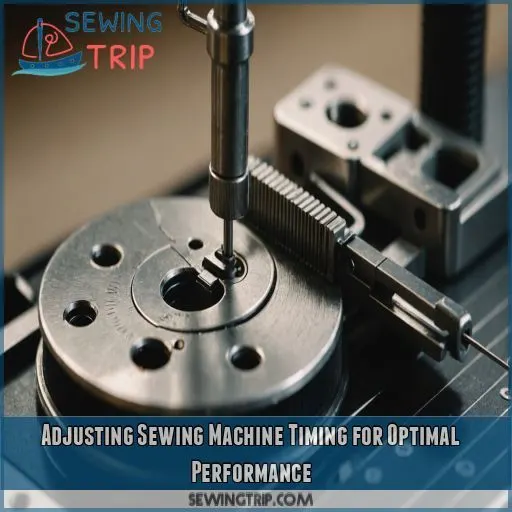
Adjusting Sewing Machine Timing for Optimal Performance
Now that you know the consequences of timing errors, it’s time to adjust your sewing machine’s timing for the best performance. You’re about to become the master of your machine’s timing! To get started, locate the needle bar clamp and hook timing adjustment clamp. These are usually set screws or clamps that allow you to adjust the position of the needle and hook.
Some things to keep in mind when adjusting your timing:
- Don’t be afraid to get a little messy – adjusting the timing can be a bit of a puzzle!
- Keep your machine’s manual handy for specific instructions
- Use timing tools, like a ruler or calipers, to make sure you’re accurate
- If you’re still having trouble, consider seeking professional help to avoid making common mistakes
Timing Considerations for Different Sewing Machines
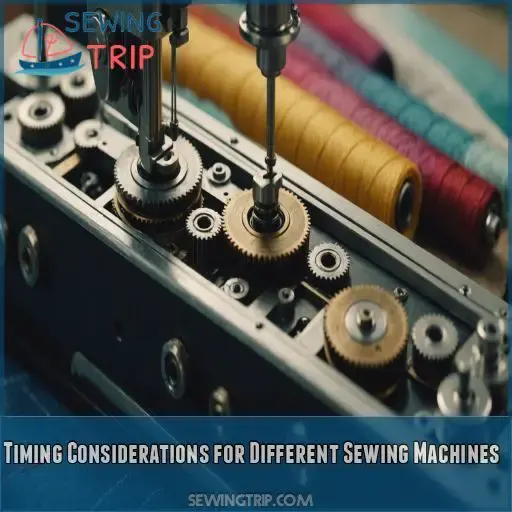
As you tackle timing adjustments on your sewing machine, keep in mind that different machines have unique considerations to make sure your stitches are smooth. From straight stitch machines to zigzag and Necchi Lydia models, understanding the specifics of your machine’s timing will save you from frustration and costly repairs down the line.
Needle and Hook Position in Straight Stitch Machines
Now that you’ve got the basics of timing adjustments down, let’s talk about needle and hook position in straight stitch machines. Make sure the hook is aligned with the needle’s eye by checking your machine’s timing lines. Then, perform a visual inspection at bottom dead center (BDC) to verify the hook is catching the thread loop. Easy peasy!
Left Homing Needles and Zigzag Stitch Width
Now that you’ve got your needle and hook position dialed in, let’s talk about left homing needles and zigzag stitch width.
If you’re working with a zigzag stitch, the wider the stitch, the more precise your timing needs to be.
Check your needle position at the widest point of the stitch to make sure your stitches are smooth and even, and to avoid timing issues.
Machine Type and Its Impact on Timing Adjustments
When adjusting timing, consider your machine type. Straight stitch machines are relatively straightforward, while zigzag machines require a bit more finesse. Sergers and coverstitch machines have loopers that need to be synchronized with the needle. Don’t worry, it’s not as complicated as it sounds! Just remember to consult your user manual for specific instructions.
Necchi Lydia Machines and Their Unique Timing Adjustment
Ah, Necchi Lydia machines – the divas of the sewing world! Their unique timing adjustment requires finesse. Unlike other machines, the hook timing adjustment is made by loosening the screw on the bobbin case, not the needle bar. Consult your Lydia user guide for specific instructions, as improper adjustments can lead to costly repairs.
Troubleshooting Timing Issues in Sewing Machines
You’re just a few tweaks away from perfect stitches, but pesky timing issues are getting in the way – don’t worry, we’re here to help. In this section, we’ll walk you through the troubleshooting process to identify and fix common timing problems, so you can get back to sewing with ease and confidence.
Visual Inspection for Visible Damage
Time to get up close and personal with your sewing machine! Perform a visual inspection to spot any visible damage. Check for needle damage, hook wear, gear damage, bobbin case wear, and thread guide wear. Look for any signs of collision or misalignment. This quick check can save you from costly repairs down the line.
Timing Adjustment and Feed Dog Timing
Now that you’ve visually inspected your machine, it’s time to tackle timing adjustments! If you’re comfortable with DIY maintenance, you can try adjusting the feed dog timing to make sure the fabric feeds smoothly. Be cautious not to over-tighten or over-loosen the feed dog adjustment, as this can lead to more problems. Troubleshooting tips will help you avoid common mistakes.
Regular Maintenance and Thread Tension
Don’t neglect your sewing machine’s regular maintenance! Create a cleaning schedule to keep it running smoothly. Lubrication tips include using the right oil and avoiding over-oiling. Thread tension basics involve setting the upper and lower tensions correctly. Tension troubleshooting can be frustrating, but by adjusting the tension dials, you’ll be back to sewing in no time.
Additional Considerations for Sewing Machine Timing
Now that you’ve mastered the basics of sewing machine timing, it’s time to think about a few extra factors that can make or break your stitching experience. Your machine’s model, regular maintenance habits, thread tension, and even needle size can all impact timing, so let’s explore how to fine-tune these details for seamless sewing.
Machine Model and Its Impact on Timing Adjustments
Your trusty sewing machine’s model plays a significant role in timing adjustments.
Don’t assume one-size-fits-all; consult your manual for specifics.
Variations in design, like the Necchi Lydia’s angled bobbin area, require unique adjustments.
Make sure you follow the manufacturer’s guidelines to get the right fit.
Troubleshooting becomes a breeze when you understand your machine’s quirks.
Know your machine, and you’ll master timing adjustments in no time!
Regular Cleaning and Lubrication for Preventing Timing Issues
Regular cleaning and lubrication are really important for preventing timing issues in your sewing machine. Think of it like car maintenance – you wouldn’t skip oil changes, would you? Clean your machine every 1-3 months, and lubricate it with a few drops of sewing machine oil. This will keep rust at bay and your machine purring smoothly.
Thread Tension and Its Relationship to Timing Problems
Now that you’re a pro at regular cleaning and lubrication, let’s tackle thread tension. Think of thread tension like a delicate dance between too loose and too tight. If it’s off, you might experience skipped stitches, needle breakage, or bobbin issues. The ideal tension varies depending on fabric type, so be prepared to adjust for different materials.
Needle Size and Its Effect on Sewing Performance
Using the correct needle size for your fabric and thread type is really important for good sewing results.
A mismatch can lead to bad stitches, thread breakage, or even damage to your machine.
Think about the fabric weight, needle type, stitch length, thread thickness, and sewing speed.
Don’t let the wrong needle mess up your sewing project!
Timing Looper and Coverstitch Machines
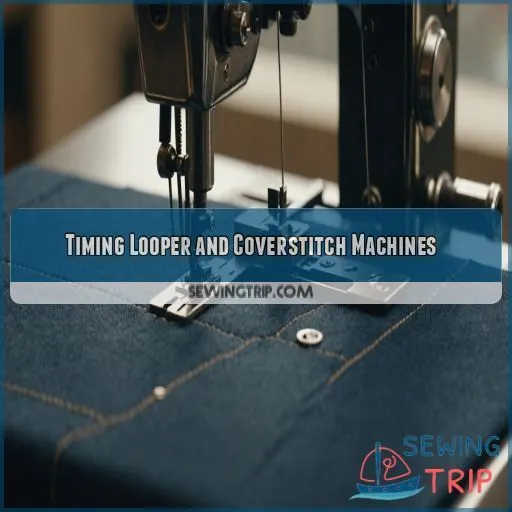
You’re about to dive into the world of looper and coverstitch machines, where timing is everything – and we’re here to help you master it. From adjusting loopers on multi-needle machines to understanding the intricacies of vertical axis rotating shuttle machines, we’ll break it down in a way that’s easy to grasp, even if you’re not a seasoned sewing pro.
Adjusting Loopers on Multi-Needle and Coverstitch Machines
Now that you’ve got a handle on additional timing considerations, let’s tackle those pesky loopers on multi-needle and coverstitch machines! When adjusting loopers, pay close attention to the looper type, coverstitch needle, and timing tools. Don’t forget to check looper tension and troubleshoot any issues that arise. With patience and practice, you’ll be a pro in no time!
Vertical Axis Rotating Shuttle Machines and Their Timing
Now that you’ve mastered adjusting loopers on multi-needle and coverstitch machines, let’s tackle vertical axis rotating shuttle machines. These machines require precise shuttle hook alignment, the best looper tension, and a snug bobbin case fit. Check the needle plate fit to make sure thread flows smoothly. Make timing adjustments as needed to prevent skipped stitches and thread breakage.
Setting Needle Timing for Loopers and Coverstitch Machines
Time to get your looper in sync! For most machines, position the looper or hook 1/16" above the needle’s eye. Adjust the gap for smaller threads and machines. Use a small ruler to measure, making tweaks in tiny increments. Class 7 machines and loopers follow similar rules, but always consult your manual for specific guidance.
Understanding Looper Machines and Their Timing Adjustments
Now that you’ve set your needle timing, let’s talk about looper machines. These single-thread wonders create a chain stitch by having the looper "peck" into the loop, holding the thread open for the needle. To adjust the timing, tweak the looper holder until it almost touches the needle when passing.
Here are three things to keep in mind:
- Looper types matter: Class 7 machines and sergers have different timing requirements.
- Regular maintenance is key: Clean and lubricate your looper regularly to prevent issues.
- Troubleshooting is an art: Pay attention to your looper’s behavior and adjust accordingly.
Frequently Asked Questions (FAQs)
What is the perfect timing on a sewing machine?
Let’s get ‘in sync’! Perfect timing on a sewing machine means the hook and needle are harmoniously aligned, with the hook positioned slightly behind the needle’s eye when it’s down, creating smooth, consistent stitches.
How to tell if sewing machine timing is off?
Is your sewing machine acting wonky? Check for skipped stitches, thread breakage, or a scraping noise. If you notice these symptoms, your timing is likely off. Don’t worry, it’s an easy fix once you identify the problem!
What should my length be set on my sewing machine?
For a smooth stitch, set your sewing machine‘s length to around 5-3 mm, but it really depends on your fabric and desired stitch type. Let’s get sewing, and remember, practice makes perfect!
How do I know when to adjust the tension on my sewing machine?
You’ll know it’s time to adjust the tension on your sewing machine when you notice issues like puckering, uneven stitches, or thread breakage – so keep an eye out for these red flags as you sew!
What are the typical signs of incorrect sewing machine timing?
Timing is everything" in sewing, and spotting the signs of incorrect timing is really important. Look out for skipped stitches, thread breakage, unusual stitching patterns, and a scraping or sliding noise – these are the telltale signs that your machine’s timing is off.
Can sewing machine timing errors cause damage to fabric?
You might be surprised, but sewing machine timing errors can indeed wreak havoc on your fabric! If the needle and hook aren’t in sync, you may end up with uneven stitches, runs, or even holes in your fabric.
How often should sewing machine timing be checked and adjusted?
Just like a well-tuned orchestra, your sewing machine’s timing needs regular checks to harmonize the needle and hook. Check and adjust timing every 3-6 months or after 100 hours of use to prevent skipped stitches and damage.
Is it possible to adjust sewing machine timing at home?
You can adjust sewing machine timing at home, but it requires patience and precision. Before attempting, consult your machine’s manual and online resources to make sure you understand the process and avoid costly mistakes or damage.
Can professional sewing machine technicians adjust timing accurately?
Professional sewing machine technicians have the expertise and specialized tools to accurately adjust timing, ensuring your machine hums along smoothly and produces flawless stitches.
Conclusion
The sweet taste of victory – your stitches are finally smooth and consistent!
Who’d have thought that mastering the art of sewing machine timing adjustment would be the key to reaching your full sewing potential?
By following this ultimate sewing machine timing adjustment guide, you’ve saved your machine from damage but also saved yourself from the frustration of skipped stitches and thread breakage.
Happy sewing with your perfectly timed machine!

