This site is supported by our readers. We may earn a commission, at no cost to you, if you purchase through links.
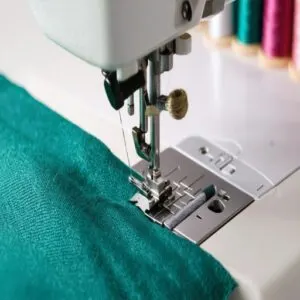
Follow your machine’s numbered guide, keep the thread taut, and double-check the tension.
Practice basic stitches like straight and zigzag on scrap fabric—don’t eyeball the needle, watch the fabric edge for straight lines instead.
Adjust stitch length based on your project: short for delicate fabrics, longer for thick ones.
Use these settings wisely, as a too-short stitch may pucker while a too-long one could unravel.
If your machine acts up, check for tangles, bent needles, or tension issues.
Ready to tackle zippers or French seams? They’re easier than they look!
Table Of Contents
- Key Takeaways
- Sewing Machine Basics
- Machine Selection Guide
- Needle Insertion Techniques
- Threading and Fabric Selection
- Setting Up Sewing Machines
- Garment Construction Tips
- Seam Finishing Techniques
- Advanced Sewing Methods
- Essential Stitches Guide
- Workspace and Tool Setup
- Frequently Asked Questions (FAQs)
- Conclusion
Key Takeaways
- Follow your sewing machine’s threading guide and keep the thread taut to avoid tangles and ensure smooth stitching.
- Practice basic stitches like straight and zigzag on scrap fabric, watching the fabric edge for accuracy instead of the needle.
- Adjust stitch length to fit your fabric type—short for delicate materials and longer for thicker ones—to prevent puckering or unraveling.
- Maintain your machine regularly by checking for tangles, bent needles, and thread tension to avoid skipped stitches or jams.
Sewing Machine Basics
Getting started with a sewing machine might feel tricky, but it’s all about mastering the basics.
Once you learn to thread the machine, pick the right stitch, and adjust the length, you’ll be sewing like a pro in no time!
Threading Sewing Machine
Threading a sewing machine can feel tricky, but it’s easy with a little practice.
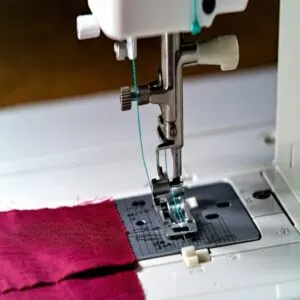
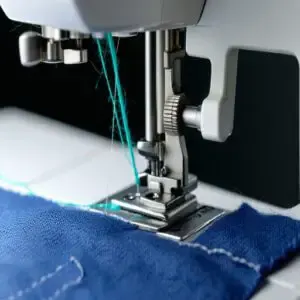
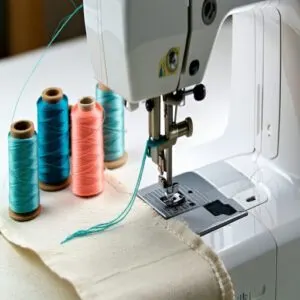
Follow your machine’s numbered guide—those arrows aren’t just for looks! Keep your thread taut to avoid tangles, and double-check the tension dial for smooth stitching.
If you’ve got automatic threading, lucky you—use it! Regular threading checks prevent headaches like thread breakage and skipped stitches later.
Mastering Basic Stitches
Got your machine ready? Let’s tackle the basics!
Start with the straight stitch—it’s the bread-and-butter of sewing techniques.
Practice stitch control by sewing lines on scrap fabric; keep it straight by watching the fabric edge, not the needle.
Play with sewing speeds to find your comfort zone. Soon, zigzag and decorative machine stitches will feel easy too!
Adjusting Stitch Length
Adjusting stitch length is like fine-tuning your machine’s rhythm.
Short stitches work best for delicate fabrics or tight seams, while longer ones suit thicker materials.
Use your machine’s stitch length settings to match fabric density.
Too short? Your fabric puckers. Too long? Stitches may unravel.
Play with speed settings and thread tension to master consistent, clean sewing machine stitches.
Machine Selection Guide
Choosing the right sewing machine feels like picking a new best friend—it needs to match your goals, skills, and projects.
Don’t worry, though, with a bit of guidance, you’ll find one that sews like a dream and fits your budget.
Choosing Right Machine
Choosing the right machine makes all the difference.
Start by evaluating your needs for fabric compatibility, stitch quality, and sewing speed.
Consider these steps:
- Compare models’ features like buttonholes or adjustable settings for better sewing machine techniques.
- Read user reviews to discover beginner-friendly options.
- Prioritize adaptable machines for seamless sewing machine operation and setup.
When choosing a machine consider the various types and their specialized tasks to confirm the best fit for your sewing goals.
Perfect match = smoother stitching!
Locating Key Parts
Before stitching, get cozy with your sewing machine parts.
Spot the thread path, locate the bobbin, and understand the sewing mechanism. Familiarizing yourself with sewing machine anatomy will improve your overall experience.
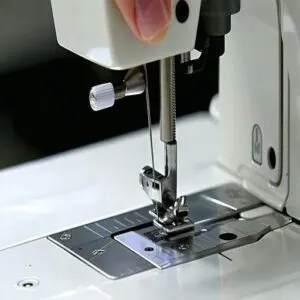
Key areas like tension knobs, presser feet, and feed dogs might seem tricky, but they’re your new best friends. Knowing these machine controls makes sewing smoother, faster, and, dare we say, more fun.
Explore these sewing machine features confidently!
Troubleshooting Common Issues
Dealing with sewing mistakes is frustrating, but common. Tackle machine errors and save time with these tips:
Regular sewing maintenance helps prevent issues.
- Re-thread and raise the presser foot for thread breakage.
- Inspect the bobbin for tangles causing fabric tears.
- Replace a bent needle to prevent needle damage.
- Adjust tension for smoother stitches.
- Clean lint buildup, avoiding machine jamming.
Keep calm—problems happen!
Needle Insertion Techniques
Getting the needle in just right might sound tricky, but it’s easier than threading a wobbly needle by hand.
With a steady grip and a few tips, you’ll prevent skipped stitches, broken needles, and those frustrating machine jams, including machine jams.
Proper Needle Handling
Handling sewing needles isn’t tricky if you’ve got a system.
Always insert the sewing machine needle with care; a crooked needle can snap or damage the needle plate.
Keep needle safety in mind—store your extras in a labeled container to avoid hand-sewing mishaps.
Broken needle? Stop immediately, clean up, and resume. Sharp tools deserve respect!
Tension Adjustment
Thread tension is the heart of stitch quality—it keeps everything smooth, not too loose or tight.
Adjust your sewing machine tension using the tension dial; test on scrap fabric first.
Watch for puckering or loops.
Fine-tuning takes patience, but once you calibrate your needle tension for fabric stretch, your stitches will look pro-level.
Think of it as sweet-spot magic!
Preventing Accidents
Accidents happen fast, but a few habits keep you safe.
Avoid sewing over pins—it’s like tempting fate with a flying needle! Double-check your needle’s secure before stitching, and always turn off the machine when threading.
Good thread management prevents tangles that could jam your machine.
Regular maintenance keeps parts sharp and smooth, so nothing catches you off guard.
Threading and Fabric Selection
Choosing the right thread and fabric will save you frustration and make your sewing look polished.
Think of them as best friends—pick ones that match well, and your project will thank you!
Thread Compatibility
Picking the right thread can feel tricky, but it’s all about balance.
Match fiber types—cotton thread for cotton fabric, polyester for synthetics.
Think about thread weight; lightweight fabrics need thinner thread.
A wide variety of sewing thread types are available for various sewing projects.
And don’t forget color matching, whether blending or highlighting.
Top tip: Keep tension steady to avoid bunching or breakage.
Ready? Your machine’s thread game is everything!
Fabric Preparation
Before sewing, fabric prep is like setting the stage for success.
Start with prewashing to avoid shrinkage surprises, then smooth wrinkles with fabric ironing. Pay attention to the fabric grain—it affects how garments drape.
Material choice matters too; sleek silks and sturdy cottons need different care. A quick fabric identification guarantees the right textile treatment every time!
Understanding thread selection basics is important for a strong and durable seam.
Pattern Selection
Once your fabric is prepped, it’s time to tackle sewing patterns.
Patterns are like roadmaps to your garment-making adventure. Start simple! Here’s how:
- Pick beginner-friendly designs: Think skirts, tops, or elastic waistbands.
- Check sizing: Use your bust, waist, and hip measurements.
- Favor detailed Sewing Guides.
- Avoid tricky lined garments.
- Prep for pattern adjustments as needed!
Using sewing patterns can help you create beautiful garments with ease.
Setting Up Sewing Machines
Setting up your sewing machine might seem tricky at first, but it’s all about understanding its key parts, like the needle, thread, and tension settings.
Don’t worry—once you’ve got the hang of it, threading the machine correctly becomes as natural as tying your shoelaces!
Choosing Right Needle
Choosing the right needle makes or breaks your project.
Sewing machine needles aren’t one-size-fits-all—different needle sizes handle specific fabrics and thread types.
Lightweight cotton? Use a smaller size.
Heavy denim? A thicker needle’s your friend.
Fabric compatibility matters, so match needle materials with your material.
Sewing at high speed? Avoid cheap needles that snap.
Keep extras handy to avoid mid-project chaos, and don’t skip this step—it’s a lifesaver in sewing machine troubleshooting!
Threading Machine Correctly
Correct threading makes or breaks your project.
Start by placing the spool on the holder and feeding it through the guide, keeping the thread tension smooth. Follow your machine’s numbered path—it’s like a sewing machine threading treasure map!
Pay attention to the take-up lever; if missed, chaos (aka tangles) ensues. Proper threading techniques is important for a smooth sewing experience.
Verify needle placement aligns, and double-check bobbin threading. Correct threading isn’t hard—it’s basic sewing machine setup. Master this, and you’ve nailed a key sewing basic!
Garment Construction Tips
When you’re sewing garments, mastering the basics like lining, bias binding, and zippers can feel like gaining sewing superpowers.
Don’t worry, with a little practice and patience, you’ll have clothes that look so professional, people might think you bought them.
Sewing Lining
Lining adds polish to garment construction, transforming projects from "meh" to professional.
Start by pinning your lining fabric to your garment’s wrong side. Use hidden stitches or your sewing machine seams to secure it neatly.
For smoother sewing, try sewing interfacing to stabilize slippery fabrics. Remember, dress lining isn’t just practical—it’s your secret to achieving clean inner construction and refined finishes!
Applying Bias Binding
Bias binding adds a polished finish to fabric edges, but it takes practice to master.
Here’s how:
- Prep your tape: Press folded edges of your bias tape for clean lines.
- Wrap fabric smoothly: Avoid bunching by securing bias tape as you sew.
- Master corners: Pin carefully for sharp, stitched corners.
- Practice binding techniques: Start on scraps before committing to big sewing projects.
Attaching Zippers
Sewing zippers can feel tricky, but with practice, it’s a breeze.
Start by using a zipper foot for precision. For invisible zippers, align the zipper teeth carefully, face-down on the seam.
Sew slowly and adjust needle position for consistency. Remember, zipper alignment matters—crooked zippers ruin the look!
Pro tip: press the zipper flat before sewing for smooth results. Voilà!
Seam Finishing Techniques
For finishing seams, you want your projects to look polished and last longer.
From clean hems to French seams, mastering these techniques keeps your edges neat and fabric from unraveling—think of it as giving your work a tidy little haircut!
Raw Edge Finishes
Fabric fraying can turn your project into a mess, but raw edge finishes save the day.
Here are five ways to keep edges tidy:
- Use seam binding for hidden, polished edges.
- Master overlock stitches with a serger.
- Opt for zigzag stitches for quick fray prevention.
- Pinking shears keep edges neat.
- Stay inspired with online sewing machine tutorials!
French Seams
Think raw edges are a hassle? With French seams, you’ll banish fraying fabric forever.
This two-step seam finishing technique produces a clean, professional look, inside and out. It’s perfect for lightweight fabrics like chiffon or silk, where neat seams stand out.
The process involves several steps, which are outlined in the following table:
| Tip | ||||
|---|---|---|---|---|
| 1 | Wrong sides together | Straight stitch | 2-2.5 | Use pins for accuracy |
| 2 | Trim seam allowance | N/A | N/A | Leave ¼ inch extra |
| 3 | Flip, press flat | N/A | N/A | Smooth wrinkles first |
| 4 | Sew right sides together | Straight stitch | 2-2.5 | Keep seam even |
| 5 | Final press | N/A | N/A | Press for a crisp finish |
Try it, and you’ll feel like a pro seamstress!
Sewn Hems
Hemming doesn’t have to be tricky. With sewing machine hems, you’ll nail those neat folded edges every time.
Follow these simple steps to achieve professional-looking hems:
- Mark your hem allowance clearly.
- Fold and press your edges twice for clean sewn folds.
Use a straight stitch for smooth edge stitching, and adjust stitch length for flexibility.
Test your technique on scraps to ensure you’ve mastered the method.
Advanced Sewing Methods
When you’re ready to take your sewing skills up a notch, advanced techniques like sewing French seams or creating gussets are game-changers.
They might sound fancy, but with a little patience, you’ll sew like a pro in no time—plus, it’ll impress anyone who peeks inside your seams!
Sewing French Seams
French seams are perfect when you want garments that look polished inside and out.
They hide raw edges, ensuring seam reinforcement and high-quality stitch quality.
| Step | Explanation | Tip |
|---|---|---|
| First Stitch | Sew with ¼" seam allowance | Wrong sides together first! |
| Trim Edges | Cut excess for crisp lines | Use sharp scissors for accuracy. |
| Final Stitch | Sew right sides at ⅜" seam | Test on scrap for perfect fit. |
Creating Gussets
Adding gussets is like giving your garment breathing room.
For better gusset design and comfort, follow these steps:
- Measure and cut the gusset fabric, matching it to the garment.
- Stitch it into seams using sewing techniques for clean curves.
- Reinforce stitches for durability.
With careful pattern making, gussets improve fit, movement, and style effortlessly!
Altering Trousers
Altering trousers might sound tricky, but with a sewing machine, it’s simple!
For waist adjustments, fold and stitch; for pant hemming, measure, cut, and sew. Leg shortening? Mark, trim, and finish the seam.
Here’s a quick guide:
| Alteration | Steps | Tip |
|---|---|---|
| Waist Adjustment | Fold, stitch, press seams | Check fit before sewing |
| Pant Hemming | Measure, cut, sew | Wear shoes for accuracy |
| Leg Shortening | Mark, trim, finish seam | Keep fabric symmetrical |
Essential Stitches Guide
Learning a few essential stitches is like discovering the secret code to making almost any sewing project work.
Whether it’s a strong zigzag stitch or using interfacing for a polished finish, these techniques make your work look sharp and professional every time.
Creating Zigzag Stitches
Mastering the zigzag stitch feels like discovering a new level of sewing techniques.
This handy stitch isn’t just flashy; it’s practical for securing fabric edges and stretchy seams.
Adjust your stitch width and zigzag length for different looks—wide for bold, narrow for delicate.
Watch fabric tension and stitch density to keep things smooth.
Machine calibration matters too—practice on scraps after threading your sewing machine.
Understanding hand sewing techniques can also enhance your overall sewing skills.
Nail it, and zigzag becomes your fabric’s best friend!
Using Interfacing
Interfacing adds magic to your sewing projects, giving structure and support where it’s needed most.
Choose wisely—lightweight for delicate fabrics, heavyweight for sturdy items. Match interfacing types to your fabric, like knit interfacing for stretchy materials.
Always test on scraps to avoid disasters. Follow interfacing techniques: place adhesive side down, use a press cloth, and press gently. Cooling time matters!
These simple steps turn flimsy fabric into well-behaved masterpieces in your machine sewing projects.
Workspace and Tool Setup
Setting up your workspace doesn’t have to feel overwhelming—just start by clearing a spot that’s comfortable and well-lit.
Grab the right tools, like sharp scissors and extra bobbins, because nothing’s worse than hunting for supplies mid-project, with the right tools.
Designating Workspace
Got your stitches down? Great, now let’s talk workspace. A good sewing station isn’t just a spot—it’s your creative zone.
Keep it organized and ergonomic with these tips:
- Lighting essentials: Bright, even lighting saves your eyes and avoids stitching mistakes.
- Workspace organization: Use small bins or jars to sort thread, needles, and sewing machine accessories.
- Comfortable seating: Your back will thank you during long projects.
- Storage solutions: Shelves or baskets keep fabric neat and within reach.
Selecting Right Tools
Once your sewing spot’s ready, it’s time to gather your sewing notions and must-haves.
A well-stocked tool kit saves time and frustration. Make friends with a seam ripper (you’ll use it more than you think), a rotary cutter, and quality fabric cutters for smooth edges.
Keep a variety of needle sets, thread types, and presser foot options handy too. Don’t overlook sewing machine accessories—they make tricky stitches easier and realize your machine’s full potential!
Having the right measuring tools is important for achieving professional results in your sewing projects.
Frequently Asked Questions (FAQs)
How do I start sewing a sewing machine?
Start by threading your machine carefully—follow the numbered guides, like a treasure map.
Insert the needle snugly, pick the right thread and fabric, and practice straight stitching on scrap fabric.
Adjust tension for smooth seams!
What are the different sewing techniques?
Master straight stitches, zigzags, and backstitches.
Practice hemming, sewing curves, and adding zippers.
Explore techniques like French seams, fabric gathering, and topstitching.
Adjust tension, switch needles, and troubleshoot problems to keep everything rolling smoothly.
How do I learn sewing machine techniques?
Begin with tutorials, practice on scrap fabric, and explore your machine’s settings.
Experiment with basic stitches like straight and zigzag, adjust tension, and master turning corners.
Patience, persistence, and a few laughs work wonders!
How do you use a sewing machine?
Using a sewing machine is like learning to drive—start simple.
Thread the needle, adjust tension, and try straight stitches first.
Practice controlling speed and fabric feed.
With patience, you’ll create smooth lines and sharp corners easily.
What are free sewing machine tutorials for beginners?
You’ll find tons of free sewing machine tutorials online.
Check YouTube channels like Made to Sew or Melly Sews, explore beginner-focused blogs.
Or join Facebook sewing groups for videos, guides, and tips designed for newcomers.
How to choose a sewing machine for beginners?
Start with a reliable, beginner-friendly sewing machine that’s easy to thread, offers basic stitches, and includes adjustable settings.
Brands like Singer or Brother are great picks, don’t splurge; pick features you’ll actually use.
How to get better at machine sewing?
Think of sewing like riding a bike—practice straight stitches, take on curves, and adjust your tension settings.
Use scraps to try new techniques, keep your machine clean, and don’t stress over mistakes—they’re your best teacher!
What are advanced sewing techniques?
Master advanced sewing techniques like sewing French seams, perfecting darts, or working with tricky fabrics like silk.
Add flair by creating gussets, scalloped edges, or invisible zippers.
Precision and patience are your best tools here!
What is the method of sewing a machine?
Sewing with a machine starts by threading it properly, choosing the right needle and fabric, and adjusting tension settings.
Guide your fabric steadily with both hands, using foot pedal control for smooth, even stitches.
What are the different stitch settings on a sewing machine?
Ever wonder why sewing machines have so many knobs and dials?
Those stitch settings let you pick straight, zigzag, decorative, and stretch stitches.
Adjust stitch length, width, and tension for smooth seams and creative designs!
Conclusion
Mastering sewing techniques for machines is like learning to ride a bike—start small, build your skills, and you’re off creating!
Thread correctly, keep an eye on tension, and practice those straight and zigzag stitches until they feel natural.
Don’t stress over mistakes; they’re just part of the learning curve.
Test your stitch lengths on scraps, troubleshoot common issues, and you’ll be sewing zippers and French seams in no time.
Now, it’s your turn—go stitch something amazing!

