This site is supported by our readers. We may earn a commission, at no cost to you, if you purchase through links.

Clean out lint from the bobbin area and under the needle plate.
Re-thread your machine carefully, making sure the thread follows the correct path.
Check your needle—it should be straight and sharp.
Fix tension by adjusting the dial slowly.
If your machine jams, gently remove fabric and thread scraps.
Use a small screwdriver to tighten loose screws.
A drop of sewing machine oil keeps things running smoothly.
You’ll be surprised how these steps solve most problems.
Stick around for some tricks that can keep your machine humming for years.
Table Of Contents
- Key Takeaways
- Common Sewing Machine Issues
- Importance of Regular Cleaning
- Basic Sewing Machine Maintenance
- Troubleshooting Techniques
- Needle and Thread Management
- DIY Sewing Machine Repairs
- Essential Tools and Equipment
- Safety Precautions and Best Practices
- Advanced Troubleshooting and Repair
- Extending Sewing Machine Lifespan
- Frequently Asked Questions (FAQs)
- Conclusion
Key Takeaways
- You’ll prevent most sewing machine problems by cleaning lint from the bobbin area, re-threading carefully, and replacing needles every 8-10 hours of use.
- You can fix thread breakage and skipped stitches by adjusting tension settings, checking needle condition, and ensuring your thread quality matches your fabric type.
- You’ll save money on repairs by learning basic maintenance like applying sewing machine oil monthly, clearing thread tangles with tweezers, and keeping spare needles handy.
- You should unplug your machine before any maintenance work and store it with a dust cover in a dry, temperature-controlled location to extend its lifespan.
Common Sewing Machine Issues
Your sewing machine will occasionally throw tantrums, from snapping threads to jamming mid-seam, but most problems have straightforward fixes you can handle yourself.
Understanding these common issues—thread breakage, needle troubles, and motor hiccups—puts you back in control of your projects without expensive repair bills, and allows for straightforward fixes.
Thread Breakage and Skipped Stitches
Thread breakage and skipped-stitch nightmares can derail any project, but tension adjustment is your secret weapon. Start by checking these culprits that cause most problems.
Thread breakage often stems from improper needle condition or poor thread quality. Bobbin issues like incorrect threading create additional headaches.
Your troubleshooting roadmap:
- Adjust tension adjustment settings to manufacturer specifications
- Replace needles showing wear or damage
- Check thread type matches your fabric choice
Master sewing machine troubleshooting by addressing these fundamentals first.
Needle and Fabric Issues
Your needle choice makes or breaks successful sewing. Wrong Needle Types cause Feeding Problems and poor Fabric Compatibility. Universal needles can’t handle delicate silk or heavy denim properly.
Bent or Broken Needles from improper Needle Insertion create skipped stitches. Check your needle condition regularly. Tension Balance suffers when needles don’t match fabric weight.
Follow this needle replacement guide: change every eight hours of use to maintain peak performance.
Machine Jamming and Motor Problems
Your sewing machine’s worst enemies lurk in plain sight. Tangled Threads wrap around moving parts like sneaky saboteurs, while Lint Buildup creates invisible roadblocks. Fabric Debris wedges into tight spaces, and an Overworked Motor screams for mercy through grinding sounds.
Common jamming causes and motor overheating stem from:
- Poor Ventilation Issues blocking airflow around motor housing
- Worn Belt Issues creating slippage and erratic performance
- Electrical Problems in foot pedals causing speed fluctuations
- Accumulated debris requiring immediate Motor Repair attention
Start troubleshooting by unplugging your machine and clearing visible obstructions before expensive repairs become necessary. Regular maintenance can also prevent thread tension problems.
Importance of Regular Cleaning
Your sewing machine collects dust and lint with every stitch, and this buildup can turn a smooth operation into a frustrating nightmare.
Regular cleaning prevents expensive repairs and keeps your machine running like new for years to come, which is a key benefit of maintaining your sewing machine, and it is also important for preventing frustrating issues.
Removing Dust and Lint
Your machine’s worst enemy isn’t time—it’s the invisible army of dust and lint building up inside. These particles sneak into every crevice, turning smooth operation into a stuttering mess that’ll drive you nuts.
Lint brush types matter more than you’d think. Stiff bristles tackle heavy debris around the motor housing, while soft ones protect delicate tension mechanisms.
Here’s your attack plan:
- Start with compressed air use to blast particles from tight spots around feed dogs
- Focus on thread path debris from needle bar to take-up lever
- Pay special attention to tension disc cleaning where fibers love to hide
Feed dog cleaning deserves extra attention since fabric fibers collect there most. For ideal cleaning, consider using a specialized duster product.
Don’t skip the areas around threading guides—they harbor surprising amounts of buildup that compromises your stitching. Lint removal becomes second nature once you establish this routine.
Cleaning The Bobbin Case
Hidden debris loves to lurk in your bobbin case, creating tension issues and frustrating thread buildup that’ll ruin your projects. Remove the bobbin and case completely for thorough bobbin case cleaning—this isn’t optional maintenance.
Your bobbin cleaning routine should tackle every corner systematically. Use a small brush for visible lint removal, then grab tweezers for stubborn threads wrapped around tension springs.
Different bobbin type models require specific approaches, so check your manual. Focus on thread path clearing around tension mechanisms where debris causes the most problems.
Consider using a specialized cleaning tool for ideal results. Regular cleaning frequency depends on usage—heavy sewers need weekly attention, while occasional crafters can manage monthly cleanings.
This simple step prevents expensive repairs down the road.
Oil Moving Parts
Since you’ve thoroughly cleaned your bobbin case, it’s time to give your machine’s moving parts the lubrication they crave. Picture machine lubrication as giving your sewing companion a revitalizing drink after hard work.
Apply specialized sewing machine oil to designated oiling locations where metal meets metal. Oil Types matter tremendously – household oils will gum up your machine faster than you can say "repair shop." Target application points like bearings, pivot joints, and sliding surfaces with single drops.
You can find the correct sewing machine lubricants at many online retailers. Here’s your Oil Frequency and maintenance roadmap:
- Use only manufacturer-specified sewing machine oil – never substitute with cooking or automotive oils
- Apply one drop per lubrication point every 8-10 hours of active sewing
- Focus on metal-to-metal contact areas shown in your manual
- Avoiding Over-Oiling prevents lint magnets and messy fabric stains
- Perform Residue Removal immediately after oiling by wiping excess with clean cloth
Run your machine briefly on scrap fabric after lubricant types application to distribute oil evenly.
Basic Sewing Machine Maintenance
Regular maintenance keeps your sewing machine running smoothly and prevents costly breakdowns.
You’ll tackle three key areas: checking bobbin and thread quality, lubricating moving parts, and adjusting tension settings for different fabrics.
Checking The Bobbin and Thread
Your bobbin and thread work together like dance partners—when one’s out of step, your stitches suffer. Start with bobbin tension using the drop test: hold your threaded bobbin case and let it drop. It should descend slowly and steadily. If it plummets or hangs motionless, adjust the tension screw carefully.
Perfect tension means smooth sailing—too tight or too loose turns your project into a tangled mess.
Examine your thread quality next. Old, cheap, or mismatched threads cause more headaches than they’re worth. Check your bobbin threading path, ensuring it follows your machine’s diagram exactly.
Wind bobbins evenly without gaps or overlapping threads. Inspect your bobbin case for lint buildup or scratches that snag thread. Use correct bobbins designed for your specific machine—generic ones often create tension balance issues.
A clean sewing machine bobbin and proper threading technique prevent thread tangles before they start.
Lubricating The Machine
Keep your sewing machine running smoothly with proper machine lubrication. Application points like needle bars and feed mechanisms need attention every 8-10 hours of use.
Follow these oiling frequency guidelines:
- Apply sewing machine oil to bearings and joints – one drop per spot
- Target sliding surfaces and pivot points for efficient movement
- Clean residue with scrap fabric after oiling to prevent buildup
- Check oil types – only use specialized sewing machine lubricants
Avoiding over-oiling prevents lint attraction and sticky mechanisms.
Adjusting Tension Settings
After lubrication, proper tension adjustment prevents stitch quality issues and guarantees fabric type compatibility. Upper tension and bobbin tension work together to create balanced stitches across different thread weights.
Regular needle replacement can help avoid common tension problems.
Master proper tension settings with these steps:
- Start test stitching on scrap fabric matching your project
- Adjust upper tension dial gradually – higher numbers tighten, lower numbers loosen
- Fine-tune bobbin tension only when upper adjustments aren’t enough
Perfect tension balance transforms frustrating sewing sessions into professional results.
Troubleshooting Techniques
When your sewing machine starts acting up, you’ll need a systematic approach to pinpoint the problem before attempting any fixes.
Start by examining the most common culprits—thread tension, needle condition, and threading path—since these account for roughly 80% of typical sewing issues, involving complete concepts that are critical to understanding the problem.
Identifying and Resolving Thread Issues
Thread problems don’t have to derail your sewing session. You can identify and fix most issues quickly with the right approach.
Most sewing hiccups have simple fixes once you know where to look.
Start with needle condition—a dull or bent needle causes immediate thread breakage and skipped stitches. Replace it if there’s any doubt.
Next, examine your thread quality. Cheap thread creates thread tangles and breaks under normal tension.
Check your thread path from spool to needle. Look for snags, burrs, or lint that catch the thread. Any obstruction disrupts smooth flow and creates tension problems.
bobbin tension
Test your tension adjustment on scrap fabric before starting your project. Proper bobbin tension should create balanced stitches without loops or puckering.
Most thread issues stem from these basic factors working against each other.
Inspecting and Clearing Thread Path Obstructions
Spotting blockages in your machine’s thread path requires a systematic approach.
Start by examining the Thread Path Guide from spool to Bobbin Case Cleaning area, checking for lint buildup or twisted threads.
Remove the Needle Plate Removal to inspect Feed Dog Inspection areas thoroughly.
Use tweezers to clear thread tangles and brushes for lint removal.
Check Tension Disc Check areas where debris often hides, causing thread breakage and thread jamming.
Regular bobbin case inspection prevents future obstructions.
Replacing Old or Damaged Thread
When old thread becomes brittle or weak, it’s time for replacement.
Poor thread quality leads to constant thread breakage and thread tangles that’ll drive you crazy. Check your thread storage – heat and light degrade thread over time.
Replace thread immediately if you notice:
- Thread weight inconsistencies or visible fraying along the strand
- Thread compatibility issues causing uneven thread tension during stitching
Quality spool compatibility guarantees smooth operation while preventing those frustrating mid-project interruptions that waste your valuable time.
Needle and Thread Management
Your machine’s performance depends heavily on proper needle and thread choices. Most sewing problems stem from using worn needles, wrong thread weights, or cheap materials that break under tension.
Using Manufacturer-Recommended Bobbins
Choosing the right bobbin isn’t rocket science, but it makes all the difference. Your machine’s manual lists specific bobbins for good reason—they’re designed to work perfectly with your system.
Generic bobbins might seem like money-savers, but they’ll cost you time and frustration. Wrong Bobbin Material creates tension headaches, while incorrect Size Matters leads to jamming.
A key factor is understanding balanced thread tension, which is essential for smooth, even stitches. Here’s what you need to know:
| Aspect | Right Choice | Wrong Choice |
|---|---|---|
| Material | Metal for metal machines | Plastic in metal systems |
| Size | Exact manufacturer specs | "Close enough" generics |
| Winding | Smooth, even layers | Loose, sloppy thread |
Proper Thread Compatibility prevents sewing machine bobbin problems. Tension Consistency depends on correct fit in your bobbin case tools.
Winding Correctly in your bobbins area guarantees smooth operation and prevents bobbin tension issues during bobbin maintenance.
Changing Needles Regularly
Regular needle changes prevent 90% of sewing frustrations before they start. Most sewers underestimate how quickly needles dull—every 6-8 hours of use demands fresh needles for ideal fabric compatibility.
Needle inspection reveals telltale signs: burrs catch thread, bent tips skip stitches, and dull points struggle through fabric. Different needle types match specific projects—ballpoint for knits, sharp for wovens, leather needles for tough materials.
Insertion technique matters: flat side faces back, needle pushed firmly upward until it clicks. Poor needle storage in magnetic holders or original packaging prevents damage.
Here’s your needle replacement checklist:
- Check needle condition every few projects
- Match needle size to thread weight
- Replace immediately when bent needles appear
- Store needles in labeled containers by type
- Keep spare needles near your machine
This simple habit extends needle lifespan and eliminates most common machine hiccups.
Selecting High-Quality Thread
After installing that fresh needle, your thread material choice makes all the difference.
Cheap sewing thread snaps constantly and creates lint that jams your bobbin case. Thread compatibility prevents thread breakage and thread tangling that’ll ruin your project.
Smart thread weight selection means:
- Match thread strength to fabric weight – heavy denim needs sturdy polyester, delicate silk prefers fine cotton
- Check thread colorfastness by testing a sample in warm water before starting your project
- Choose quality brands with consistent thread finishes that won’t shed or fray during stitching
Getting the right thread weight saves hours of frustrating repairs later.
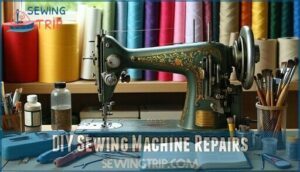
DIY Sewing Machine Repairs
You can tackle many sewing machine problems yourself with basic tools and patience. Most jams and broken needles require simple fixes that take just minutes to complete.
Fixing Jammed Machines
Jammed machines can stop your project cold, but you’ve got this. Power off immediately—never force stuck fabric or you’ll create bigger problems.
Remove the bobbin case first for Bobbin Case Cleaning. Look for thread clumps and lint hiding underneath. Thread Nest Removal comes next—gently pull out tangled masses using tweezers.
Feed Dog Inspection reveals debris that blocks fabric movement. Clean thoroughly around these metal teeth. Check for Shuttle Hook Issues by examining the curved metal piece that catches your bobbin thread.
Most jams stem from thread tangling in the bobbin area. After clearing everything, rethread completely before testing. These machine troubleshooting steps solve common sewing machine problems without expensive sewing machine repair visits.
Replacing Broken Needles
After freeing a jammed machine, you’ll often spot a broken or bent sewing machine needle. Don’t sweat it—grab a fresh needle, unplug the machine, and use a steady hand with the right insertion technique.
Always match needle size and needle types to your fabric. Toss bent needles in a safe needle disposal container.
Keep your workspace tidy and needles organized. Here’s a quick checklist:
- Check needle types
- Use proper insertion technique
- Replace bent needles
- Practice safe needle disposal
Essential Tools and Equipment
You’ll need specific tools to tackle sewing machine repairs effectively and safely.
Having the right equipment on hand means you can fix most common problems without expensive service calls or frustrating delays, which is a key concept to effectively tackle repairs.
Screwdrivers and Pliers
Success hinges on having the right screwdriver types and pliers uses in your toolkit for sewing machine repair tools.
You’ll need flathead and Phillips head screwdrivers with torque control for precise adjustments, plus needle-nose pliers for gripping small components during simple repairs.
Essential features for DIY sewing repair success:
- Grip strength matters – choose tools with ergonomic handles that won’t slip during delicate work
- Insulated handles provide vital safety tips when working near electrical components
- Precision tips enable accurate work in tight spaces without damaging surrounding parts
Quality screwdrivers and pliers transform frustrating repairs into manageable tasks, giving you the confidence to tackle common issues yourself.
Seam Ripper and Brush
In the context of DIY sewing repair, your seam ripper and brush are true workhorses.
Seam ripper uses go far beyond picking stitches; you’ll find it handy for clearing tangled threads from feed dogs and tension discs.
Brush types matter too—choose natural bristles for delicate fabrics, synthetic for everyday lint removal.
Regular cleaning frequency keeps your machine running smoothly and saves you from expensive sewing machine repair.
Use these tools for simple repairs and maintenance. With the right seam ripper and brush, you’ll tackle lint removal like a pro.
For accurate measurements, consider using a flexible measuring tape.
Compressed Air and Lubricating Oil
Compressed air becomes your precision partner for sewing machine cleaning, blasting stubborn lint from tight corners where brushes can’t reach.
Air compressor types vary, but controlled bursts work best for safe air usage.
Lubricating oil keeps moving parts smooth—apply drops strategically using proper oil application methods. Sewing machine oil beats lubricant alternatives every time.
Follow manufacturer oiling frequency factors for ideal machine lubrication.
Together, compressed air and quality oil prevent costly repairs.
Safety Precautions and Best Practices
You’ll want to unplug your machine before doing any maintenance work to avoid electrical shock or accidental needle injuries.
Proper care during repairs protects both you and your equipment from damage.
Unplugging Before Maintenance
Before grabbing your tools, remember: Safety First. Always use the unplug reminder before any sewing machine repair or DIY fixes.
This simple step prevents electrical hazards and damage prevention, keeping your warranty intact. Take a moment for cord inspection.
It’s all about user responsibility and smart machine maintenance.
- Unplug before repairs
- Check for frayed cords
- Prevent power surges
- Avoid warranty voidance
- Protect yourself
Handling The Machine With Care
Treating your machine like delicate equipment prevents expensive repairs down the road.
These sewing machine maintenance tips guarantee proper lifting and careful transport every time you move your equipment.
- Always lift by the solid base or designated handles – never grab thread guides, tension dials, or the needle area
- Clean your hands thoroughly before handling – oils and dirt transfer easily to sensitive internal mechanisms
- Move slowly and deliberately – rushed movements cause misalignment and costly damage to precision components
- Support the full weight evenly – avoiding overload during transport protects gears and prevents internal stress fractures
Storing The Machine Properly
One simple step can make all the difference in sewing machine care: always use a dust cover after each session.
Covering your machine keeps lint and moisture out, which helps protect against humidity effects. Choose a storage location with temperature control—avoid basements or garages, since moisture can cause rust.
To further protect your machine, consider regular machine maintenance. For long-term sewing machine storage or safe transport, stick with the original packaging if you have it.
Here’s a quick table:
Dust Cover
Moisture Protection
Safe Location
Advanced Troubleshooting and Repair
When your sewing machine faces complex issues like motor problems or gear failures, you’ll need advanced troubleshooting skills to determine what’s fixable at home.
Some mechanical problems require professional expertise, but many motor issues can be resolved with careful inspection and the right approach, using careful inspection to identify the root cause of the problem.
Identifying and Resolving Motor Problems
After covering safe handling, let’s tackle motor trouble—where things can get a bit noisy.
If your sewing machine motor is acting up, start with these steps:
- Check for motor sparking—replace worn brushes if needed.
- Inspect belt tension—loose or tight belts call for Belt Replacement.
- Confirm your Power Supply—loose wires or blown fuses can kill speed control.
- Use proper Motor Lubrication—just a drop keeps bearings happy.
- If you find seized motors, work gently to free them up.
Keep these checks handy for smoother motor repair.
Repairing Complex Mechanical Issues
Complex mechanical failures demand patience and precision when your machine’s gears start grinding or timing issues throw everything off balance.
Gear replacement becomes necessary when plastic components shatter after decades of use—you’ll need to remove base plates and realign everything perfectly.
Motor overhaul requires careful disconnection of electrical components before tackling frozen shafts through "half-splitting" techniques.
Shuttle alignment and timing adjustments fix skipped stitches by loosening grub screws and repositioning the hand wheel.
Belt repair restores power transmission when performance gets sluggish.
These sewing machine repair jobs need methodical photo documentation, quality replacement parts, and thorough testing before reassembly.
Seeking Professional Help
Sometimes you’ll hit a wall with complex electrical issues or major mechanical failures that need professional assistance. When your machine has an unresponsive motor, broken gears, or internal damage, it’s time to call an expert technician.
Start with warranty claim assistance if your machine’s still covered. Then get repair cost analysis from local shops to compare options.
Professional tuneup benefits include:
- Access to specialized diagnostic equipment you don’t have at home
- Genuine replacement parts that’ll last longer than generic fixes
Extending Sewing Machine Lifespan
You can keep your sewing machine running smoothly for years by sticking to a few simple habits like regular check-ups, preventative maintenance, and following the manual.
These steps help you avoid breakdowns and make sure your machine is always ready for your next project, which is crucial for preventative maintenance.
Scheduling Annual Professional Check-Ups
While DIY maintenance handles everyday upkeep, professional sewing machine service catches problems you’ll miss.
A qualified technician spots worn gears, timing issues, and electrical faults before they cause expensive breakdowns.
Annual professional tuneup benefits include warranty compliance and precision adjustments that extend your machine’s life.
Finding technicians through local sewing shops guarantees proper qualifications and reasonable cost considerations for long-term savings.
Practicing Preventative Maintenance
While professional check-ups catch major issues, you control your machine’s daily health through preventive maintenance.
Think of it as giving your sewing companion regular vitamins instead of emergency surgery.
- Regular Inspections – Check tension balance and needle condition every few projects
- Proper Lubrication – Apply sewing machine oil to moving parts monthly
- Consistent Cleaning – Remove lint from feed dogs after each sewing session
- Needle Replacement – Swap dull needles every 8-10 hours of use
Regular oiling and machine maintenance prevent expensive repairs down the road.
Proper storage helps, as humidity control matters.
Following Manufacturer Instructions
After you’ve set up a regular maintenance routine, grab your sewing machine manual—it’s more than a dust collector.
Following model specifics keeps your warranty concerns in check and helps you spot part compatibility issues.
The user manual’s troubleshooting guide saves headaches.
Stick to recommended supplies for sewing machine repair and maintenance, as it’s your ticket to smooth sewing and fewer costly surprises, emphasizing the manual importance and understanding of warranty concerns.
| Feeling Confident | Feeling Overwhelmed |
|---|---|
| Manual Importance | Warranty Concerns |
| Troubleshooting Guide | Part Compatibility |
| Specific Models | User Manual |
The combination of a well-maintained sewing machine and adherence to the user manual instructions ensures a better sewing experience, highlighting the need for specific models to be considered.
Frequently Asked Questions (FAQs)
What is the most common problem for a sewing machine?
Over 90% of sewing frustrations stem from threading problems. You’ll face thread breakage most often, caused by improper tension settings, dull needles, or incorrect threading paths that create snags and tangles.
Can a sewing machine be repaired?
You can fix most sewing machine problems yourself.
Check for tangled threads, clean out lint, and replace worn needles.
If you spot electrical issues or broken gears, it’s best to call in a repair expert.
How to repair a sewing machine without calling a professional?
First, identify what’s broken by checking common issues like thread jams, skipped stitches, or tension problems.
Clean out lint, replace the needle, re-thread properly, and adjust tension settings for your fabric type.
Where can I learn to repair a sewing machine?
Like apprentices in medieval guilds, you’ll learn sewing machine repair through your machine’s manual, online tutorials, local sewing classes, experienced sewers, and hands-on practice with basic tools and patience.
How do you fix a sewing machine problem?
Check the needle, thread, and bobbin for damage or tangles.
Clean out lint and debris with a brush. Adjust tension settings.
Re-thread both top and bobbin. If it still acts up, consult your manual.
What should I do if my sewing machine keeps breaking?
Don’t throw in the towel just yet! Check your threading, replace the needle, clean out lint buildup, and adjust tension settings to get back on track.
How much does a sewing machine repair cost?
Basic sewing machine repairs typically cost $75-150, while major issues like motor problems can reach $200- You’ll save money by learning simple fixes like needle replacement and tension adjustments yourself.
What is the most common sewing machine problem?
Thread breakage happens most often with you’ll find improper tension settings, worn needles, or incorrect threading causing the majority of frustrating stops during your sewing projects.
What is the average cost to repair a sewing machine?
Don’t break the bank on repairs! You’ll typically spend $75-150 for basic fixes, while major overhauls can reach $200- Simple issues like tension adjustments cost less than complex motor problems.
Is it worth getting a sewing machine repair?
You’ll typically save money repairing your machine if it’s under ten years old and the fix costs less than half its replacement price.
Conclusion
Without proper maintenance, your sewing machine will eventually break down when you need it most.
But mastering simple sewing machine repairs doesn’t have to be intimidating, and regular maintenance prevents most problems before they start.
These basic fixes will keep your machine running smoothly and save you countless trips to repair shops, by cleaning, oiling, adjusting tension, and replacing needles, which are all within your reach.
Your wallet and your projects will thank you.
- https://edisonvacuums.com/sewing-machine-issues-diy-or-visit-a-repair-shop/
- https://sewingusa.com/guides/top-10-sewing-machine-problems-fixes/
- https://pubs.nmsu.edu/_c/C202/index.html
- https://www.diaryofaquilter.com/how-to-clean-your-sewing-machine/
- http://www.palindromedrygoods.com/2015/09/how-to-service-your-sewing-machine.html

