This site is supported by our readers. We may earn a commission, at no cost to you, if you purchase through links.

Across garment factories, thread breakage accounts for 35-40% of all downtime, and most failures trace back to three overlooked details: tension settings, needle wear, and mismatched materials.
When you’re losing hours to jams, skipped stitches, or frayed seams, the culprit is rarely mysterious. Industrial sewing machines follow predictable patterns, and once you know what signs to look for, most problems reveal themselves quickly. The right diagnostics can cut your troubleshooting time in half and keep your line moving.
Table Of Contents
Key Takeaways
- Thread breakage causes 35-40% of industrial sewing downtime, and most failures stem from three fixable issues: incorrect tension settings, worn needles, and mismatched needle-thread-fabric combinations.
- Replacing needles every 7-8 hours of continuous use and maintaining proper hook clearance of 0.05-0.1 mm prevents the majority of skipped stitches and can reduce production downtime by 25%.
- Regular maintenance—cleaning bobbin cases every 8-10 hours, removing lint from feed dogs biweekly, and checking tension discs—cuts bobbin-related jams by 70% and improves tension consistency by 35%.
- Most mechanical problems follow predictable patterns that reveal themselves through specific symptoms, allowing operators who understand basic diagnostics to cut troubleshooting time in half before calling a technician.
Diagnosing Thread and Needle Problems
Thread and needle problems often show up first when a machine starts acting up. You’ll need to check several areas—from tension settings to the needle itself—before you can pin down the real culprit.
Let’s walk through the most common causes so you can get back to running smoothly.
Causes of Thread Breakage
When excessive upper thread tension pushes beyond proper settings, thread breaking becomes your most frequent disruption—accounting for roughly 35–40% of production line failures.
You’ll also face breakage from worn needles that fray fibers, incorrect thread path alignment that spikes tension by 60%, low-quality or unlubricated thread with high friction, and needle–thread mismatch against dense fabric resistance.
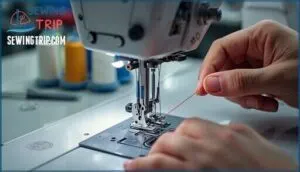
Addressing these issues often requires careful attention to proper threading techniques to minimize downtime.
Preventing Needle Damage
Proper needle replacement frequency keeps your machine running smoothly. Replace needles every 7–8 hours of continuous use, or every 4–6 hours when working with heavy fabrics. This simple habit cuts skipped stitches and can reduce downtime by 25%. To maintain peak performance, consider the fabric density when scheduling needle changes.
Here’s how you prevent the most common needle issues:
- Needle Size Selection — Match needle diameter to fabric weight. Oversized needles cut fibers and create holes, while undersized ones break under tension.
- Needle Alignment — Check weekly that your needle bar sits correctly with 1/16 inch hook clearance above the eye to avoid deflection.
- Reduce Needle Stress — Never pull fabric manually or sew over pins. These habits cause most needle breaking incidents in production settings.
- Fabric Damage Prevention — Inspect needle points for burrs before each shift. Rough tips tear brittle or over-dyed materials, especially in low-humidity environments.
Operator training on proper handling reduces needle-related defects by over 40%.
Matching Needle and Thread to Fabric
Getting needle types and thread material matched to fabric weight isn’t guesswork—it’s engineering. Lightweight silk works with 60/8 needles and fine 50–60 weight thread, while denim demands 90/14–100/16 needles paired with 40–50 weight thread.
The 40% rule matters here: thread diameter can’t exceed 40% of the needle groove width, or you’ll see friction spikes and breakage. Balanced pairings cut thread jams by 42% and boost stitch density consistency by up to 35%, keeping tension balance stable and your fabric type performing as expected.
Thread diameter must stay under 40% of needle groove width to prevent friction spikes, cutting jams by 42% and boosting stitch consistency by 35%
Identifying Thread Fraying Issues
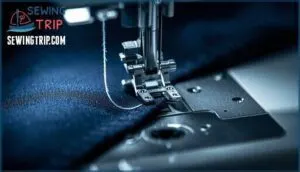
Thread fraying shows up when fiber quality drops or tension disk issues throw off the balance. Needle eye grooves snag filaments after 250,000 cycles, while ambient humidity effects below 30% spark static that roughens polyester threads by 22%.
Thread lubrication use cuts friction and heat buildup at high speeds.
Watch for uneven twist, lint on guides, or breakage spikes—those signal thread tension problems before they tank your production line.
Fixing Stitch Quality and Tension Issues
Stitch quality issues can slow production and waste materials, but most tension and stitch problems trace back to a handful of adjustable settings. Before you start swapping parts or calling for service, check the basics—thread tension, needle position, and feed alignment often hold the key.
Here’s what to adjust first when your seams aren’t lining up the way they should.
Adjusting Upper and Lower Thread Tension
When upper and lower thread tension falls out of balance, you’ll see the telltale signs—bobbin thread showing topside or loops forming underneath. Adjust the tension dial in quarter-turn increments, testing with contrasting thread colors to check where threads interlock mid-fabric.
Clean tension discs regularly and apply thread lubrication to reduce friction. Standard needle thread tension measures 150–250 cN, while bobbin tension should allow the case to descend slowly when held by thread. Seam testing confirms balanced tension when both threads pull equally at 20–25 N.
Resolving Skipped or Uneven Stitches
Skipped stitches and uneven stitch quality problems often trace back to needle alignment and hook timing issues. When needle hook timing drifts even 0.1 mm off specification, you’ll see missed loops and irregular seams. Check these first:
- Needle insertion: Verify the needle sits fully seated and oriented correctly—misalignment causes 30–40% of skipped stitches
- Hook clearance: Maintain 0.05–0.1 mm between needle and hook for proper thread capture
- Fabric feeding: Adjust presser foot pressure to prevent material slippage during seam transitions
Thread lubrication factors and operator technique matter too. Clean feed dogs and tension discs every 40 hours, and replace needles every 8 operating hours.
Machine maintenance like recalibrating timing quarterly cuts skip rates by 60% in high-speed operations.
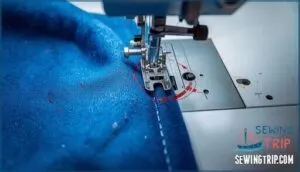
Addressing Seam Puckering
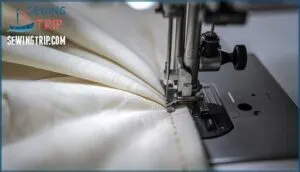
Seam puckering occurs when thread tension, fabric properties, or machine settings fall out of balance. Excessive needle thread tension can result in subjective pucker grades ranging from 2 to 5 on AATCC scales.
You’ll also encounter fabric feeding problems when presser foot pressure exceeds the material’s buckling load. Higher stitch density compresses the seam, worsening distortion.
To improve results, match synthetic threads to reduce post-treatment shrinkage and adjust tension to minimum working levels for cleaner industrial sewing machine performance.
Correcting Wavy or Inconsistent Seams
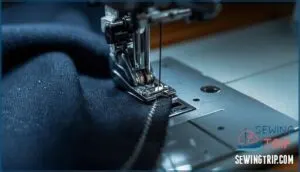
Wavy seams often signal a disconnect between machine calibration and fabric behavior. Uneven feed dog height causes roughly 35% of seam distortion, while thread tension balance outside ±5 cN can stretch the top layer.
Fabric stabilization with paper or starch cuts waviness by 50–70%.
Check presser foot pressure, adjust tension, and recalibrate feed timing every 150 hours under high-speed conditions to restore stitch quality.
Solving Bobbin and Thread Bunching Problems
Bobbin-related issues are some of the most frustrating problems you’ll encounter, but they’re also among the most fixable. Most thread bunching and tangling happens because of improper bobbin setup or a dirty bobbin case.
Here’s what you need to know to get your lower thread system running smoothly again.
Proper Bobbin Insertion and Winding
Bobbin winding issues can derail production fast if you’re not paying attention to the basics. Start with winding tension—keep it between 20–25 grams for consistent stitch quality. A properly wound bobbin fills evenly, with less than 1 mm variation edge to edge.
Check bobbin orientation during insertion: front-loading systems usually need clockwise thread release, while drop-in units go counterclockwise. Thread compatibility matters too—polyester offers 20% higher strength than cotton for heavy fabrics.
Always leave a 5–7 cm thread tail and see that it engages the case slot. Run diagnostic stitching on scrap fabric to catch seating problems early, and clean the bobbin case every 8 hours to prevent tension disruptions.
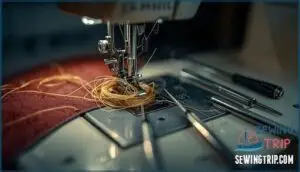
Eliminating Bird’s Nest Under Fabric
Thread tangling under your fabric—what many call birds nesting syndrome—happens when upper-thread tension is too loose, accounting for 70–80% of these jams.
Start troubleshooting by rethreading with the presser foot raised to open tension discs fully. Hold 2–3 inches of thread tails during startup to cut tangling by over 60%.
Check needle compatibility and bobbin issues next, then verify thread pathing through every guide.
Regular maintenance procedures—cleaning lint every 10 hours—drop recurrence from 28% to under 5%.
Maintaining Bobbin Case Cleanliness
Lint accumulation beneath your bobbin case causes 40% of tension irregularities and can knock timing out of alignment. Unplug your machine, then remove the bobbin case and brush away debris—never use compressed air, which drives lint deeper into sealed compartments.
Follow these cleaning procedures:
- Clean every 8–10 hours of operation to extend component life by 30%
- Use a small nylon brush or vacuum attachment on the case seat and raceway
- Wipe metal surfaces with alcohol-free cloths to prevent varnish damage
- Check for oil-soaked clumps that accelerate wear by 15% over six months
Biweekly maintenance schedules improve tension consistency by 35% and cut costly bobbin-related stoppages by up to 70%, based on shop service records tracking technical practices across high-output facilities.
Adjusting Bobbin Tension
Once your case is clean, proper tension adjustment prevents loops and breakage. Turn the screw clockwise to tighten and counterclockwise to loosen—just 1/16 of a turn makes a noticeable difference. Test using the yo-yo drop: suspend the loaded case by thread; it should descend slightly, not plummet.
Check readings with a TOWA gauge for consistency across production lines.
| Machine Type | Tension Range | Thread Weight |
|---|---|---|
| Industrial | 190–220 mN | 60–90 wt |
| Domestic | 0.2–0.5 N | 60 wt standard |
| Heavy Industrial | up to 1.0 N | V138 and heavier |
Resolving Fabric Feeding and Machine Jams
When fabric won’t feed smoothly or your machine keeps jamming, the problem often lies with a handful of mechanical adjustments you can fix yourself. These issues cost production time and create frustration, but most have straightforward solutions.
Let’s walk through the key areas that control fabric movement and prevent those maddening jams.
Cleaning and Aligning Feed Dogs
Over time, lint accumulation near the feed dog teeth cuts fabric feeding efficiency by up to 40%, causing skipped stitches and uneven seams. Remove the needle plate and brush the feed dogs with cleaning fluid every two weeks to prevent jamming. Then check height adjustment—aim for 0.8 to 1.2 mm above the throat plate.
Design innovations like rubber-coated feed dogs reduce fabric marking by 30%.
Maintenance scheduling, including biannual professional servicing, prevents most fabric feeding problems in industrial sewing machines.
Setting Correct Presser Foot Pressure
Proper presser foot pressure is crucial for smooth fabric feeding and preventing stitch quality issues. Light materials like silk require 40–60% of standard pressure to avoid puckering, while heavy denim needs 120–150% for even feeding.
You’ll notice skipped stitches when pressure drops below 10 N, or fabric distortion when it exceeds 25 N on delicate goods. Adjust using your machine’s dial or push-button system, testing on scrap fabric first.
Industrial calibration methods recommend checking pressure every 100–200 hours to maintain accuracy within ±5% and reduce defect rates by up to 22%.
Handling Fabric Obstructions and Jams
When your machine suddenly stops mid-seam, fabric gets pushed down into the throat plate, or lint or debris causes a jam, quick action prevents bigger headaches. Around 60% of sewing machine jams trace back to hook assembly tangles, while bent needles account for another 25–30%. Emergency shutdown within three seconds protects both you and the motor.
Safe removal means lifting the presser foot, manually rotating the balance wheel, and using tweezers to extract trapped material without scratching components. Post-jam inspection catches needle burrs in nearly half of cases, preventing immediate re-jamming.
Preventative maintenance—cleaning every eight hours and checking needle-thread-fabric compatibility—cuts obstruction rates by 50% and keeps your line moving.
Preventing Material Slippage
When fabric isn’t moving forward smoothly, you’re fighting a three-way problem: feed dog maintenance, presser foot pressure, and fabric friction control. Standard feed teeth advance the bottom layer 3–8% faster than the top without correction, causing visible misalignment.
Dual feed systems cut slippage by up to 80% on multilayer work, while proper pressure adjustment reduces drift by over 60% on light materials.
Operator synchronization and routine cleaning every 40 hours drop misfeed incidents by 35%, keeping fabric feeding consistent across shifts.
Addressing Mechanical and Timing Malfunctions
When your machine starts acting up beyond simple thread or tension fixes, you’re likely dealing with mechanical or timing problems. These issues can shut down production fast if you don’t catch them early.
Let’s walk through how to spot and address the most common mechanical failures before they cost you serious downtime.
Fixing Hook Timing Issues
When skipped stitches and thread jams become routine, hook timing is often the culprit. Fixing sewing machine hook timing starts with checking hook-needle clearance—industrial standards call for 0.05–0.1 mm when the needle rises about 3 mm from its lowest point. Adjustment procedures involve loosening hook assembly screws and rotating slightly until the hook tip aligns just above the needle eye.
Preventive maintenance like cleaning every 40 hours and oiling every 8 hours keeps timing stable. Sophisticated calibration with laser tools improves precision, while a professional technician should handle persistent timing symptoms or complex multi-needle synchronization.
Identifying Electrical and Motor Faults
When electrical problems halt production, you’re looking at thousands in lost revenue per hour. Motor Overheating accounts for roughly 55% of motor breakdowns—temperatures above 90 °C degrade winding insulation fast. Watch for these warning signs:
- Wiring Defects and insulation breakdown cause 40% of electrical faults; inspect cords every six months to catch brittleness early.
- Bearing Faults and excessive vibration signal misalignment or contaminated lubricant, accelerating wear by 15%.
- Encoder Errors like disconnected signals stop 12% of automated lines; redundant monitoring cuts synchronization issues by 40%.
Predictive Diagnostics using AI models now identify developing Motor Replacement needs up to 24 hours before failure occurs.
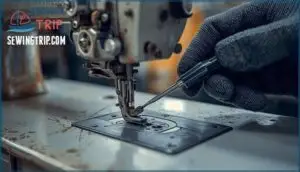
Checking for Loose Parts and Burrs
Loose screws and rattling machine components don’t just make noise—they’re early warnings before a breakdown. Regular inspection of moving parts catches vibration-loosened fasteners that, left untreated, can slash precision by up to 25%.
Run your fingers along needle plates and feed dogs to identify burrs—those tiny rough spots where needle hook interaction went wrong. Burrs spike thread breakage by 18–25% and tear delicate fabrics.
Maintenance practices like monthly torque checks and weekly lint or debris removal keep machine adjustments stable and cut loosening events by 30%.
When to Consult a Professional Technician
When your machine fails to respond after you’ve ruled out simple fixes, it’s time to bring in a professional technician. Complex issues requiring professional attention—persistent timing malfunctions, electrical faults, or alignment corrections beyond basic adjustment—demand diagnostic tools you won’t have on hand.
Professional servicing every six months under heavy use prevents breakdowns that cost $10,000+ per hour in lost production, making that $75–$100 repair bill smart cost justification for keeping operations running smoothly.
Frequently Asked Questions (FAQs)
Are sewing machine problems common?
Yes, common industrial sewing machine problems happen frequently in production environments. Operator errors, improper maintenance frequency, and mechanical wear contribute to higher failure rates.
Downtime costs add up fast when machines aren’t running smoothly, making proper troubleshooting essential for extending lifespan expectancy.
How to troubleshoot a sewing machine?
If you think your industrial sewing machine has a mind of its own, you’re not imagining things—but fortunately, troubleshooting sewing machine issues follows a logical pattern. Start with an initial inspection: check power issues, review error codes if your machine has them, and listen for unusual noises that signal specific problems.
Regular maintenance schedules prevent most common industrial sewing machine problems before they snowball into costly repairs.
Why is my sewing machine not sewing correctly?
When your machine won’t sew correctly, think root cause analysis first. User error prevention starts with checking threading, tension, and needle installation.
Power supply issues or machine part failure like timing misalignment need professional attention. Regular maintenance schedule impact reduces industrial sewing machine troubleshooting needs considerably.
Why is my sewing machine thread not going through the fabric?
When your needle won’t penetrate fabric, check for needle damage first—bent or dull tips can’t pierce properly.
Thread path obstruction, tension imbalance effects, and bobbin case issues also prevent penetration.
Mechanical timing errors between needle and hook are common culprits too.
Can a sewing machine cause a stitch malfunction?
Absolutely—tension imbalance, timing misalignment, and component defects frequently trigger stitch issues. Machine wear and maintenance neglect compound these sewing machine problems, making regular troubleshooting essential for reliable remedies and preventing costly malfunctions.
Are industrial sewing machines reliable?
Industrial sewing machines demonstrate strong reliability when properly maintained, lasting 10 to 20 years—sometimes exceeding 50 years.
Maintenance impact is significant; regular servicing keeps downtime below 10% and failure rates low.
High production demands require proper care to minimize downtime costs and prevent sewing machine malfunctions.
How do you maintain industrial sewing machines regularly?
Regular preventative maintenance keeps your machine running smoothly. Clean lint from the bobbin case and feed dogs weekly. Apply proper lubricant types every 7-8 hours of operation—oiling frequency matters. Check components for loose parts or burrs monthly.
These preventive maintenance tips reduce downtime and extend equipment life considerably.
What causes excessive vibration during high-speed sewing?
High-speed operation amplifies problems from motor imbalance, shaft misalignment, and worn bearings. Structural integrity issues and resonance frequency mismatches cause troubleshooting challenges, increasing vibration amplitude and risking machine malfunction.
How can workplace ergonomics reduce operator musculoskeletal pain?
Adjustable workstations and ergonomic training directly reduce musculoskeletal pain by improving posture and tool placement. Proper lighting optimization and seating prevent strain during machine operation, boosting operational efficiency and production workflow while preventing sewing machine malfunctions.
What impact does humidity have on thread performance?
Moisture acts like a double-edged sword—cotton threads gain tensile strength as humidity rises from 55% to 85%, yet silk weakens. Thread moisture content alters the friction coefficient, reducing heat at needle-thread interfaces during high production demands.
Proper humidity control between 50-70% cuts thread breakage rates up to 30%, prevents seam puckering, and stabilizes thread tension. Maintaining industrial sewing machines includes monitoring environmental conditions to improve thread performance and minimize breakage.
Conclusion
Here’s the reality: most operators blame the machine when the real issue is maintenance routine. Your line doesn’t stop because equipment fails randomly—it stops because small mismatches snowball.
Thread tension drifts. Needles dull. Timing shifts by fractions of a millimeter. When troubleshooting common industrial sewing issues becomes second nature, you catch problems before they cascade.
Check the basics first, trust the patterns, and you’ll spend less time diagnosing and more time running production clean.
- https://eujournal.org/index.php/esj/article/view/12670/12383
- https://pubs.nmsu.edu/_c/C202/index.html
- https://www.groz-beckert.com/en/news/newsletter/sewing/2018/m2_sewing_sewing_problems.html
- https://klasseneedles.com/why-needles-break
- https://www.textileschool.com/28883/textile-machinery-maintenance-and-downtime-calculations/

![Common Sewing Machine Error Codes: Fix Your Machine in Minutes [2025 Guide] 2 common sewing machine error codes](https://sewingtrip.com/wp-content/uploads/2025/04/common-sewing-machine-error-codes-300x300.jpeg.webp)


