This site is supported by our readers. We may earn a commission, at no cost to you, if you purchase through links.
First, gather your essentials: fabric, embroidery floss, needles, and a trusty hoop to anchor your canvas.
Think of fabric as your blank page, ready to tell a vibrant story.
Choose a design, transfer it to your fabric, and start stitching, one knot at a time.
Simple stitches like the running stitch are your new best friends.
There’s magic in transforming plain cloth into art with a flick of your wrist.
Want a deeper mastery of stitches and designs?
There’s a whole world of embroidery waiting to explore.
Table Of Contents
- Key Takeaways
- Choosing Your Embroidery Supplies
- Setting Up Your Embroidery Project
- Mastering Basic Embroidery Stitches
- Practicing and Refining Your Stitches
- Working With Embroidery Designs and Patterns
- Essential Tools and Supplies for Embroidery
- Advanced Embroidery Techniques and Stitches
- Embroidering Letters and Text by Hand
- Finishing and Caring for Your Embroidery
- Advancing Your Hand Embroidery Skills
- Frequently Asked Questions (FAQs)
- Conclusion
Key Takeaways
- Gather essential supplies like fabric, embroidery floss, needles, and hoops to start your embroidery project effectively.
- Master basic stitches like running stitch and backstitch, including the foundation stitches like straight stitch, which 85% of embroiderers favor for precision, for a solid foundation in creating beautiful embroidery patterns.
- To create visually appealing hand-embroidered designs, consider mastering common hand stitches uses, such as the backstitch and running stitch. Personalize your projects by choosing the right fonts for hand embroidery and utilizing techniques like outlining and filling lettering.
- Prevent and fix common issues such as hoop marks and threading mistakes by using tools like seam rippers and adjusting tension properly.
Choosing Your Embroidery Supplies
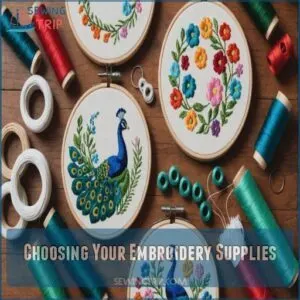
Before you start stitching, gathering the right supplies is as essential as picking the perfect thread color for that lively peacock you’re excited to bring to life.
You’ll find yourself needing to choose a sturdy fabric, colorful embroidery floss, the right needles, and an adjustable hoop to keep your work tight and neat.
Selecting The Right Fabric
Choosing the right fabric is like picking the perfect canvas for your masterpiece. Trust me, it’s essential!
- Fabric weight: Think about how heavy or light you want it.
- Weave: Affects how your stitches look.
- Texture: Adds personality.
- Finish: Determines shine.
- Project type: Guides your choice between cotton and linen.
Don’t worry, you’ll get it!
Choosing Embroidery Floss
Why settle for typical when choosing embroidery floss can be an art form?
Explore vibrant floss colors, consider the smooth sheen, and don’t overlook the weight for different embroidery stitches.
Brands vary—DMC, Anchor, and others—but floss care is universal.
Make sure your embroidery thread sings on the fabric.
| Floss Aspect | Consideration |
|---|---|
| Color | Vibrant or subtle |
| Sheen | Matte or glossy |
| Weight | Light or heavy |
| Brand | DMC, Anchor, etc. |
Selecting Embroidery Needles
After picking your floss colors, tackle the art of selecting embroidery needles—a joy all its own.
Finding the perfect needle size is key; a size 5 works wonders for most beginners.
Explore needle types and brands, focusing on those with a comfy grip.
Remember, needle care shapes your craftsmanship.
From cross stitch to needlepoint, exploring various embroidery techniques such as those found in Aida cloth stitching, can elevate your handmade projects and provide a soothing creative outlet. Happy stitching and embrace those beautiful embroidery techniques!
Using Embroidery Hoops
Got your needles sussed out? Let’s talk hoops.
With embroidery hoops, tension is key for those neat stitches.
Consider using magnetic embroidery hoops for ease of use and reduced strain on your fabric.
Here’s how to pick:
- Hoop size: Depends on your design size.
- Hoop types: Try wooden for a classic feel, or plastic for ease.
- Hoop placement: Keep the fabric taut. Think like tuning a drum!
Setting Up Your Embroidery Project
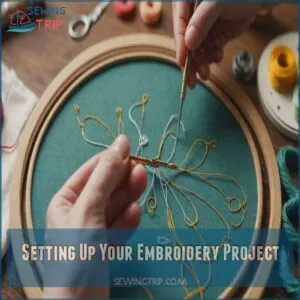
Now that you’ve gathered your supplies, let’s get your embroidery project set up!
We’ll transfer your design, stretch your fabric nice and tight in the hoop, and then thread your needle—let’s get stitching!
Transferring Your Design to Fabric
Feeling ready to bring your embroidery design to life?
Use tracing methods like fabric marking or a light box for precise pattern tracing.
If you decide to use fabric marking, you can find the right tools, such as a water soluble pen online.
Stencil techniques also come in handy for easy transferring patterns to fabric.
Here’s a mini-guide:
| Technique | Tool Needed | Difficulty |
|---|---|---|
| Tracing Methods | Light Box | Easy |
| Stencil Use | Stencil Sheets | Medium |
| Fabric Marking | Water-Soluble Pencil | Easy |
Stretching and Securing Fabric in a Hoop
You’ve got your design ready. Let’s talk fabric tension.
To start hand embroidery, you’ll need to understand the basics of this decorative art, which uses needle and thread to create intricate designs. Select an embroidery hoop that’s the right size for your fabric type.
Place your fabric with precision, ensuring it’s smooth as a drum to avoid pesky hoop marks.
Tailor the hoop placement perfectly—tighten it just enough.
Enjoy watching your colorful stitches harmonize as you work with your embroidery tools.
Threading Your Needle
Imagine it’s time to thread your needle.
Choose the right needle size for your embroidery floss—big enough to glide through fabric but not leave craters.
With steady hands (and perhaps a deep breath), push the floss gently through the needle’s eye.
Adjust for tension; too tight, and it’s like wrestling spaghetti.
Hand embroidery begins here, sparking creativity!
Mastering Basic Embroidery Stitches
Learning the basic stitches is like gaining access to the secret handshake of the embroidery world; you can start by mastering the how to do sewing stitches and it starts with the running stitch, backstitch, and a few delightful twists like the split and stem stitch.
Once you get the hang of these, you’ll be on your way to creating beautiful patterns that transform plain fabric into a canvas of art and expression.
Running Stitch Technique
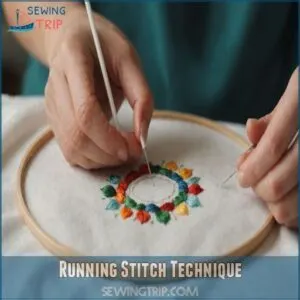
Once your fabric’s snug in the hoop, it’s time to play with the running stitch.
It’s like a dance—needle in, needle out, simple steps with flair.
Keep your thread tension controlled, ensuring stitch length stays consistent.
Experiment with variations, like changing stitch direction, to add flair to your embroidery project ideas.
You’ll master basic stitches in no time!
Backstitch Technique
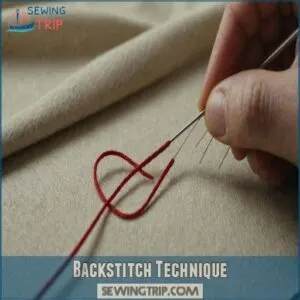
Backstitch is your go-to magic for sharp, bold outlines and precise lines. Keep your lines straight, focus on stitch direction, and you’ll create embroidery that’s as tight as a drum. Use the right needle size to manage thread tension and secure those stitches—practice makes perfect!
- Explore backstitch variations
- Maintain even thread tension
- Choose correct embroidery needle sizes
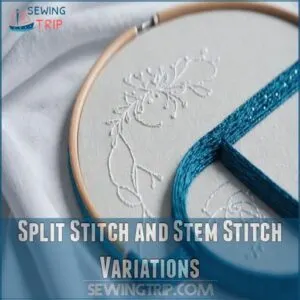
Split Stitch and Stem Stitch Variations
Ready to move on from backstitching? Let’s explore the split stitch! It’s like a backstitch’s more elegant cousin.
Try varying the slant for texture; experiment with color combinations for depth.
Then, master the stem stitch—perfect for outlining petals or leaves.
It’s all about stitch practice and creative details! These embroidery stitches are surprisingly versatile.
You’ll find countless stem stitch applications and split stitch variations. Have fun experimenting with these hand embroidery techniques!
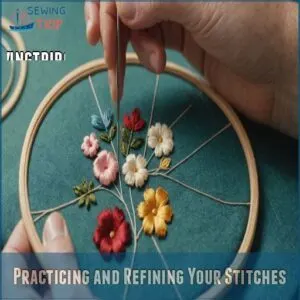
Practicing and Refining Your Stitches
As you refine your embroidery stitches, you’ll discover the satisfying art of making lines that are as straight as your grandma’s old ruler.
Practicing on different fabric types hones their skill but also teaches you how to troubleshoot those pesky little issues like loose threads and uneven tension.
Creating Even and Aligned Stitches
Master even and aligned stitches by focusing on stitch tension and direction.
Needle size and hand position are key—hold your needle like a paintbrush, gently guiding your floss.
Practice tips: start with simple patterns, gradually add complexity.
Adjust your embroidery floss selection to match your project, experimenting with different embroidery stitches.
Remember, it’s about progress, not perfection!
Working With Different Fabric Types
Imagine your fabric as the canvas of your masterpiece.
Each type demands a unique stitch approach.
Here’s how to elevate your embroidery:
- Texture Impact: Experiment with different fabric weights to see how stitches change.
- Stitch Adaptation: Tailor your techniques for smoother finishes.
- Choosing Wisely: Discover which fabrics work best with your stranded embroidery floss.
Practice makes perfect!
Troubleshooting Common Stitching Issues
Switching from fabric exploration, let’s smooth out those pesky stitching snags.
Got uneven stitches? Check thread tension!
Knots and tangles? Keep thread length shorter.
Fabric puckering? Adjust that trusty embroidery hoop.
Needle breakage? Opt for the right needle from your embroidery materials.
Whether it’s French knots or a glossed-over satin stitch, this small guide’s here to help!
| Problem | Solution |
|---|---|
| Uneven stitches | Check thread tension |
| Knots & tangles | Use shorter thread lengths |
| Fabric puckering | Adjust embroidery hoop usage |
| Needle breakage | Choose correct needle size |
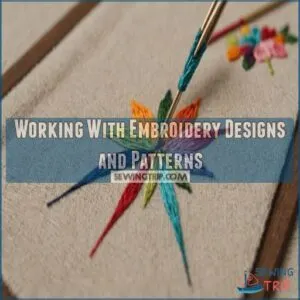
Working With Embroidery Designs and Patterns
Explore embroidery designs and patterns to breathe life into your stitching projects, whether you’re tracing a favorite pattern or playing with your own creative flair.
You’ll find that stencils and light tracing methods make transferring your ideas onto fabric as easy as threading a needle, adding a personal touch to each piece.
Finding and Creating Embroidery Designs
So, you’ve been refining those stitches, and now it’s time to express your creativity.
Finding embroidery designs is like a treasure hunt.
Scour the internet for free patterns, or sketch your own for a custom touch.
Get inspired by digital embroidery platforms and create unique hand embroidery patterns.
Remember, embroidery kits often provide a great starting point for your journey.
Using Stencils and Tracing Methods
Now that you’ve found your perfect design, let’s talk stencils!
They’re a lifesaver for beginners.
Use stencils with:
- Tracing paper
- Light boxes
- Fabric markers
These tools make transferring your design onto fabric a breeze.
Water-soluble pens are also great for embroidery projects, especially appliqué and couching stitch.
Remember, proper thread selection is key!
Transferring Designs to Fabric
Ready to bring your design to life on fabric? Whether you’re tracing with a light box, using stencils, or fabric markers, getting your patterns just right is key.
Try water-soluble markers for easy adjustments.
Join embroidery classes or online communities for embroidery inspiration.
Start transferring designs to fabric and watch your artistic vision take shape, stitch by stitch.
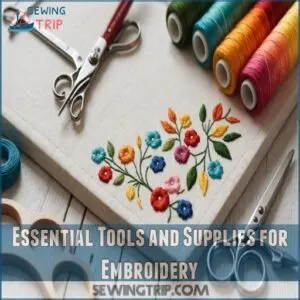
Essential Tools and Supplies for Embroidery
To start your embroidery journey, you’ll need a few trusty tools like sharp needles, quality scissors, and reliable hoops to keep your fabric steady.
Picking the right supplies is like choosing the perfect brush for painting—each piece is important to create something beautiful without the knots!
Embroidery Needles and Their Uses
Choosing your embroidery design is thrilling, but the needle truly matters in your craft journey.
Let’s talk embroidery needles—their types, sizes, and uses.
Finding the right needle is easy with online shops like embroidery needles stores.
With a trusty needle:
- Needle sizes affect ease when threading.
- Needle types suit various projects and threads.
- Needle care helps them last longer.
Trust these tips as you thread your creative needle!
Scissors and Cutting Tools for Embroidery
Every embroidery enthusiast knows scissors are essential.
With them, you’ll cut fabric gracefully and trim threads with precision.
Embroidery shears help you shape embroidered ornaments, while sharp blades enliven color choices during embroidery events.
Remember: the right tool enhances your project and connects you to the embroidery community.
Here’s a quick guide:
| Tool Type | Purpose |
|---|---|
| Embroidery Shears | Detail cutting |
| Fabric Scissors | Cutting fabric |
| Thread Snips | Trimming threads |
| Paper Scissors | Pattern paper cutting |
Embroidery Hoops and Frames
Now that your scissors are neatly put away, tackle embroidery hoops and frames!
Hoop sizes matter—think of them like choosing the right pair of shoes.
You want something snug.
Frame styles can fit your flair, adjusting hoop tension feels like tuning a guitar.
Try DIY hoops for fun, and remember, hoop care keeps everything tidy!
Advanced Embroidery Techniques and Stitches
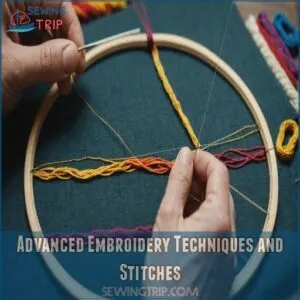
You’ve mastered the basics, and now it’s time to explore advanced techniques like the intricate satin stitch and playful French knot.
Discover the magic of texture and depth in your embroidery by experimenting with different thread weights and colors; who knew creating a masterpiece could be this much fun?
Satin Stitch and French Knot Techniques
With your trusty tools gathered, let’s move on to fancier stitches! Satin stitch creates smooth, solid areas of color; experiment with variations! French knots add texture—practice their placement for perfect little dots. Mastering thread tension is key for both; a loose stitch looks sloppy, while too tight breaks the thread. Secure knots prevent unraveling.
Want to level-up your embroidery game? Try stitch combinations!
- Practice different satin stitch fills.
- Experiment with French knot sizes.
- Master thread tension control.
- Secure your knots properly.
- Combine stitches for interesting effects.
Creating Texture and Depth With Stitches
Imagine your embroidery as a mini landscape.
To achieve intricate designs and monogramming, consider mastering the basic embroidery stitches, such as the split stitch, perfect for monogramming letters as seen in embroidery stitches for monogramming clothes.
Layering stitches like a maestro creates hills and valleys, adding texture and depth.
Try raised stitches for a 3D effect, giving your design life.
Play with fabric manipulation techniques to add surface texture, making each piece a tactile journey.
Your hands become the brush, painting with threads.
Using Different Thread Weights and Colors
Adding texture is just the beginning. Embracing thread weights and vibrant colors can elevate your embroidery to a whole new world of artistry. Lighter threads can create delicate details, while heavier ones offer bold lines. Blend colors using basic color theory for emotional impact. Metallic threads shimmer like stars, bringing life to your designs.
- Bold lines, delicate details
- Blending and impact
- Shimmering metallic magic
Embroidering Letters and Text by Hand
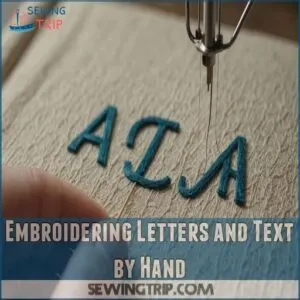
Embroidering letters by hand adds a personal touch to your projects, whether you’re stitching names, quotes, or cute sayings.
You’ll learn to choose the right fonts, outline, and fill techniques, turning plain fabric into your own written work of art.
Choosing Fonts for Hand Embroidery
Choose your embroidery fonts wisely to give your project personality.
Think about script choice—playful or elegant?
Font styles can transform a simple hand lettering job into art.
Consider readability and size, especially on fabric.
With a sprinkle of typography tips, your text can stand out beautifully off the fabric, making every stitch count.
Trust your instincts!
Outlining and Filling Lettering Techniques
Settling on the perfect font was just the start.
Next, outlining and filling lettering bring your designs to life.
Use creative stitch variations to add flair, explore shading effects for depth, and watch your letter spacing to keep it neat.
When working on your project, selecting the right thread choice for embroidery is essential to make your design stand out.
- Backstitching: Perfect for bold outlines.
- Satin Stitch: Ideal for rich fills.
- Seed Stitch: Sprinkles of texture.
Monogram and Cursive Embroidery Methods
Monogram and cursive embroidery involve a playful dance with needle and thread, where font selection and stitch variations breathe life into your letters.
Start with simple scripts, letting your hand’s rhythmic motions create beautiful curves and lines.
Experiment with thread choices, and remember, practice makes perfect.
Imagine your initials swirling gracefully on fabric, a tactile signature of personal art.
Finishing and Caring for Your Embroidery
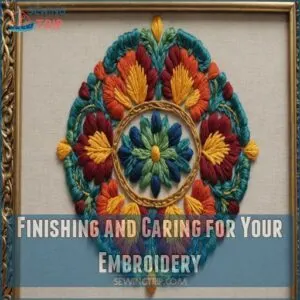
You’ve poured your heart into this embroidery, so let’s make sure it looks its best!
We’ll cover how to remove those pesky hoop marks, give your masterpiece some lasting protection, and even teach you how to wash and iron it without ruining your beautiful work.
Removing Hoop Marks and Blocking
After perfecting your monogram, turn your attention to those pesky hoop marks.
Ensuring even tension, as you’d when first learning how to hoop fabric for embroidery, is also key in preventing these marks from forming in the first place.
To banish them, dampen the fabric lightly, grab your trusty iron, and gently steam away the creases.
Mind the tension as you do this; too tight and it distorts, too loose and they linger.
Choosing the right hoop size from the start also helps prevent these marks.
Backing and Framing Embroidery Art
Your embroidery is a masterpiece ready to be shown off!
Think about your embroidery backing options and choose one that suits your piece.
Consider lightweight, acid-free materials for preservation.
Next, explore framing materials—wooden frames add warmth and style.
Display ideas can be fun; maybe hang your framed art in unexpected places to surprise and delight viewers.
Washing and Ironing Embroidered Items
While washing embroidered fabrics, chuck your worries aside by handling them with love.
Use gentle soap and cold water to avoid fabric shrinkage and color bleeding.
Embrace the precision of ironing techniques to keep stitches smooth.
- Cold water cleans
- Gentle soap loves your art
- Stain removal is therapy
- Shrinkage? Not today!
- Colors stay vibrant
Dry flat, and they’ll shine like new.
Advancing Your Hand Embroidery Skills
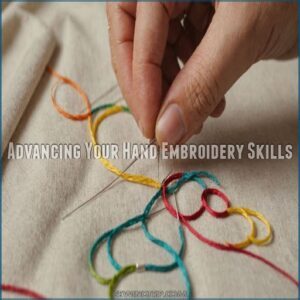
As you take your embroidery skills to the next level, try mixing different stitch combinations and explore vibrant color palettes to create eye-catching designs.
Don’t be afraid to let your imagination run wild as you craft custom patterns that bring your artistic visions to life.
Experimenting With Complex Stitch Combinations
You’ve perfected your piece, and now it’s time to jazz up those stitches with flair.
Play with stitch layering and texture exploration to add a wow factor, considering the right thread selection to complement each other in color and texture.
Try mixing color gradients and introduce free motion for a dash of spontaneity.
Experiment with 3D effects, making your designs leap from the fabric—a creative twist that’s sure to impress!
Color Theory in Embroidery Design
Picture yourself as an artist with a needle instead of a brush.
Explore color theory to elevate your embroidery designs.
Explore how color palettes create mood, while color harmony pleases the eye.
Color symbolism adds meaning, and blending soft gradients can evoke feelings effortlessly.
Mix and match threads to watch your stitches transform into a vibrant story, one color at a time.
Creating Custom Patterns and Designs
Now that you’ve mastered color, let’s design.
You can also find inspiration in pre-made embroidery patterns online.
Start by sketching your ideas; drawing inspiration from nature or anything that sparks joy.
You can even use digitizing software to create intricate patterns.
Experiment with different shapes and lines.
Don’t be afraid to play with scale and placement!
Remember, it’s your unique vision that counts.
Experimenting with various crewel embroidery stitches can add unique texture and visual appeal to your embroidery designs. Have fun creating your own stunning embroidery designs!
Frequently Asked Questions (FAQs)
How to fix embroidery mistakes without damaging fabric?
Stitching errors haunt 25% of embroidery attempts.
Undo mistakes gently by using a seam ripper, carefully picking out threads without tugging the fabric.
Start from the end, work slowly, and your fabric stays flawless.
Easy peasy!
What are the best workouts for uneven stitches?
Curing uneven stitches? Try running stitch drills and practice tension with a sampler fabric hoop.
Keep your hand steady and relax your grip—think of it like yoga for your fingers!
Enjoy the journey to perfect stitches.
How can I frame and display finished embroidery?
Displaying embroidery isn’t just art, it’s personal expression.
First, pick a frame complementing your piece; a neutral mat highlights colors.
Stretch the fabric snugly over cardboard, making it taut.
Hang it, and let your masterpiece shine.
Which fabrics are easiest for teenage beginners?
For your first embroidery project, cotton, linen, or felt are your best bets.
They’re forgiving, easy to work with, and won’t frustrate you as you learn!
You’ll master those stitches in no time.
What storage methods prevent embroidery floss tangling?
Tame that wild embroidery floss with bobbins, snack-sized bags, or floss organizers.
Imagine it as a tidy library instead of a tangled jungle.
Use color-coded systems to keep your creative palette beautifully organized and frustration-free.
Conclusion
Embroidery binds imagination with art, creativity with hands, patience with beauty.
You’ve learned how to embroider by hand—from picking the perfect supplies to stitching stunning designs.
Each step, a thread closer to mastering this timeless craft.
Dive deeper, explore new patterns, and watch your confidence bloom.
Embroidery’s like storytelling with threads; your hands, the narrators.
Whether for gifts or personal joy, embrace the journey, share your creations, and let needlework weave new possibilities for you.

