This site is supported by our readers. We may earn a commission, at no cost to you, if you purchase through links.
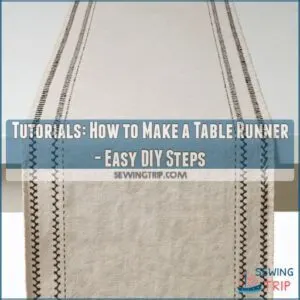 Creating a table runner is a breeze and a fun way to spruce up your dining area!
Start by choosing fabric that complements your décor—cotton works well for beginners.
Measure your table and cut the fabric accordingly, leaving extra for seam allowances.
Stitch the right sides of the fabric together along the long sides with a simple straight stitch, then turn it right side out.
A quick topstitch along the edges adds polish.
Iron the edges flat for a sharp look.
With these simple steps, you’re halfway to a stunning table centerpiece.
Curious about finishing touches and decorative options?
Stay tuned!
Table Of Contents
- Key Takeaways
- What is a Table Runner?
- How to Make a Table Runner Easily
- DIY Table Runner Materials and Supplies
- Basic Sewing Techniques for Table Runners
- Step-by-Step Guide to Sewing a Simple Runner
- DIY Table Runner Variations and Styles
- Quilted Table Runner Tutorial
- No-Sew Table Runner Options and Methods
- Customizing and Embellishing Your Table Runner
- Tips and Tricks for Making a Perfect Table Runner
- Frequently Asked Questions (FAQs)
- Conclusion
Key Takeaways
- Choose durable and stylish fabric, taking care to pre-wash it and ensure that it complements your table’s decor.
- Measure your table accurately and cut the fabric, allowing for seam allowances to ensure a perfect fit.
- Use straightforward sewing techniques like straight stitching along the edges, and consider embellishments for a personalized touch.
- Keep your runner looking fresh by washing it on a gentle cycle and pressing it with a warm iron as needed.
What is a Table Runner?
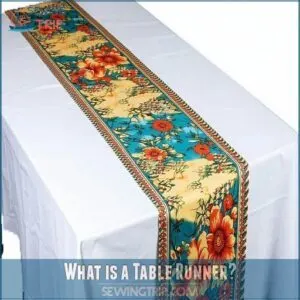
A table runner is a long strip of fabric that adds style to your table by running down its center.
It’s perfect for showcasing themes, complementing decor, and providing a versatile backdrop for your dining setting.
Types of Table Runners
So, you’re exploring table runners? Awesome! Let’s explore the different types. Think of them as the unsung heroes of table decor.
- Rectangular Table Runners: Classic and versatile, these are your go-to choice.
- Pointed Table Runners: Add a touch of elegance with their unique shape.
- Patchwork Table Runners: Showcase your creativity with mixed fabrics and patterns.
- No-Sew Table Runners: Perfect for beginners—easy and fast!
Runner sizes and themes are endless.
Materials for Table Runners
After exploring the types of table runners, consider fabric types when picking materials.
Natural fibers like cotton or linen lend a warm touch, offering varied runner weights.
If you’re eco-conscious, explore sustainable options.
Choosing from diverse color palettes helps personalize your design.
Remember, the right material sets the stage for a homey, welcoming table.
Importance of Table Runners in Home Decor
A table runner is like the dressing on your table salad; it’s all about style and flair.
By choosing the right runner style and color, you can transform your dining space’s vibe, making it suitable for trends or special events.
Whether it’s adding warmth or a pop of color, runners become an impactful decor hero.
How to Make a Table Runner Easily
Making a table runner is a fun and rewarding project that you can complete with just a few materials and basic sewing skills, which can be mastered by practicing fundamental stitches and techniques found in guides on how to practice sewing basic sewing skills.
Choose a fabric you love, measure and cut it to fit your table, and gather your tools to bring your table runner to life.
Choosing The Right Fabric for DIY Table Runner
Picking fabric for your table runner can feel like choosing shoes that match your favorite outfit—exciting yet tricky!
Look for a weight that’s easy to sew, with print patterns that fit your style.
Consider color coordination for your decor and pick durable materials.
Don’t forget the care instructions; washing should be a breeze, not a chore.
Measuring and Cutting Fabric for Table Runner
Getting your fabric dimensions spot-on is essential for a perfect table runner. Measure your table’s length and width, remembering to add an overhang for a chic finish.
For inspiration, check standard table runner dimensions at popular home decor stores, like standard table runner sizes.
- Factor in table size and desired overhang length.
- Make sure fabric width matches your design idea.
- Use precision cutting tools for clean edges.
- Double-check pattern accuracy.
- Embrace creativity with bold fabric choices.
Essential Tools for Making a Table Runner
Now that your fabric is ready, it’s time to gather your tools.
You’ll need a sewing machine for precision, a rotary cutter or fabric shears for clean cuts, and a trusty measuring tape to get dimensions right.
An ironing board helps create crisp edges, making your table runner look homemade yet professional.
Don’t skip these basics for a smooth DIY journey!
DIY Table Runner Materials and Supplies
Before you start sewing, gather your materials.
You’ll need fabric (cotton works great!), thread, scissors, and maybe some interfacing for extra body.
Don’t forget an iron and ironing board – a wrinkle-free runner is a happy runner!
Fabric Selection and Measurement
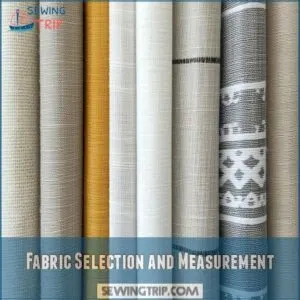
Choosing the right fabric for your table runner sets the stage for a masterpiece. Pay attention to fabric weight, which affects the fall of your runner. Keep pattern matching in mind for a polished look, and embrace color coordination to match your decor. Before sewing, always pre-wash fabrics to avoid surprises like shrinkage.
- Fabric Weight matters.
- Pattern Matching is key.
- Pre-wash Fabrics first.
Thread and Needle Choices
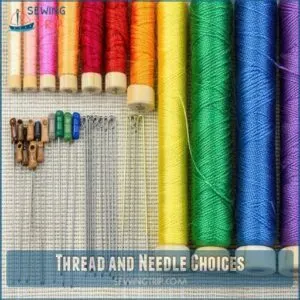
You’ve got the fabric sorted, now let’s talk thread and needle choices. Thread weight is like the cake’s icing—too thick or thin, and it looks off.
Match thread type to your fabric.
As for needles, size matters—choose a needle size that pierces smoothly.
Play with thread color to add flair.
Remember, your choice of needle material matters for durability.
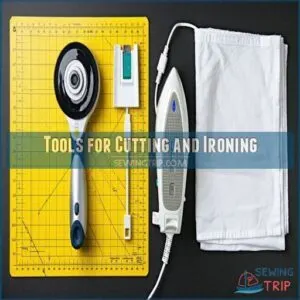
Tools for Cutting and Ironing
Having settled on the right needle and thread, it’s time to gather cutting and ironing tools.
Imagine setting up shop like a pro with:
- Rotary cutters for sharp, clean cuts
- Cutting mats to protect surfaces – you can find a great selection of cutting mats online at Cutting Mat Store
- Ironing boards for seamless pressing
- Pressing cloths to avoid fabric shine
- Steam irons for wrinkle-free perfection
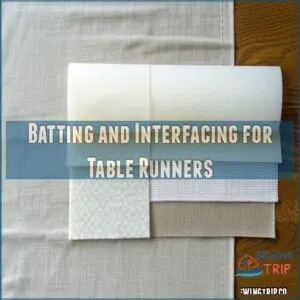
Batting and Interfacing for Table Runners
Adding some batting or interfacing to your table runner can give it the oomph you’re looking for, affecting both weight and aesthetics.
Batting types range from low-loft for a sleek finish to thicker options for that plush feel.
Choose interfacing thickness based on your fabric; lighter fabrics need lighter support.
Get creative and let each stitch express your style!
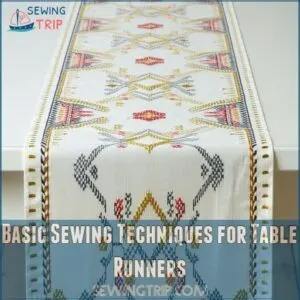
Basic Sewing Techniques for Table Runners
Creating a table runner involves mastering some basic sewing techniques, such as learning how to use a sewing machine, that can transform your dining setup with a personal touch.
You’ll learn straight stitching along edges, creating neat mitered corners, and applying hemming and finishing techniques to make sure your runner looks professional and polished.
Straight Stitching Along Edges
Now that you’ve got your fabric cut, let’s get stitching.
Straight stitching along the edges is your first step.
It’s easier than it sounds.
To make sure you get accurate results, consider using seam allowance guides, which are essential for maintaining consistent seam allowances.
Here’s how to make those edges look sharp:
- Set your machine for a straight stitch.
- Choose a stitch length that’s even.
- Keep the tension right.
- Sew close to the edge, creating a neat seam.
With those simple steps, you’ll have perfectly finished edges!
Creating Mitered Corners
Creating mitered corners feels like crafting a corner with finesse. Picture this: You’re pinning the fabric, aligning edges perfectly, then folding it diagonally to form a triangle. Stitch from the fold and voilà—not just any corner, but a masterpiece! With corner sewing tricks like these, watch your table runner transform with crisp, professional edges that scream "I’ve got this!"
| Step | Action | Result |
|---|---|---|
| 1 | Pin edges | Aligns fabric for accuracy |
| 2 | Fold diagonally | Forms a neat triangle |
| 3 | Stitch from fold | Secures the mitered corner |
| 4 | Press flat | Creates crisp edges |
| 5 | Admire work | Professional finish achieved |
Hemming and Finishing Techniques
Mastering hemming methods can make your table runner pop!
Seam finishing techniques like pinking shears and zigzag stitches, such as those found in serger-free seam finishing options, are essential for polished edges and preventing fabric fraying.
Try a double-fold edge treatment: simply fold the fabric edge over twice, press, and stitch.
Experiment with finishing styles like decorative stitches or bias tape.
Remember, a well-finished table runner adds that "perfect touch" to your table setting.
Step-by-Step Guide to Sewing a Simple Runner
You’re ready to create a beautiful table runner, starting with pinning and ironing the fabric edges for a neat finish.
Let’s sew the main body and add decorative elements or trims to personalize your masterpiece.
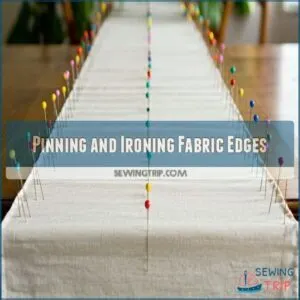
Pinning and Ironing Fabric Edges
To nail the fabric edge prep, you start by pinning the edges to hold them steady.
Picture your fabric as a blank canvas just waiting for your touch.
As you begin, remember to select a thread color that closely matches the fabric for a seamless look, such as by considering thread selection for a professional finish.
Follow these steps:
- Pinning Tips: Space pins evenly for a sturdy hold.
- Ironing Techniques: Use steam for crisp lines.
- Edge Finishing: Make sure edges are smooth for a polished look.
Sewing The Main Body
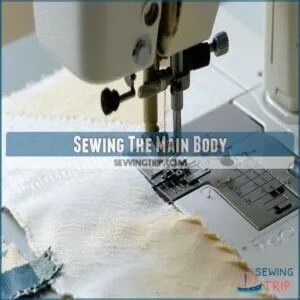
After pinning and ironing, it’s time to sew the main body.
Keep your seam allowance steady, and use precise machine stitching.
Align fabrics to keep those straight edges flawless.
| Step | Action | Tip |
|---|---|---|
| 1 | Thread your machine | Use matching thread |
| 2 | Sew all sides | Maintain consistent speed |
| 3 | Inspect seams | Correct any puckering |
Smile—your runner’s coming together!
Adding Decorative Elements or Trims
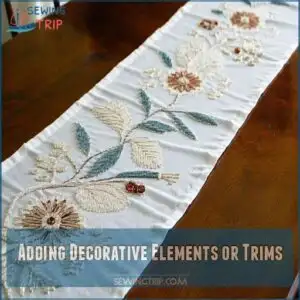
Adding tassels or fringe can jazz up your table runner in no time!
Imagine this: as you attach buttons or lace, imagine the delighted gasps of your dinner guests.
Try your hand at embroidery for a personal touch, and suddenly, you’re not just crafting—you’re storytelling!
Embrace creativity and sprinkle some flair; it’s the little details that speak volumes.
DIY Table Runner Variations and Styles
Ready to spark your creativity? Let’s explore different table runner styles, from simple rectangular designs to fun patchwork creations – there’s a perfect runner waiting for you to make!
Rectangular Table Runner
Imagine this: You’ve got a rectangular table runner adding flair to your dining table. To craft one, remember these key steps:
- Choose a Color Scheme: Match it to your table setting for harmony.
- Select Fabric Weight: Go for medium to heavy fabric for durability.
- Size Matters: Account for a 6-inch overhang for elegance.
Keep it stylish and practical!
Pointed Table Runner
Switching gears from the classic rectangular style, let’s explore the charm of pointed table runners.
With their elegant triangular ends, they’re a stylish twist for your table.
Pick eye-catching fabrics, like vibrant prints or seasonal patterns, to add flair.
Don’t forget to add tassels for a playful touch.
You’ll love how these runners change your table’s look!
No-Sew Table Runner
For a no-sew table runner, fuse creativity with efficiency.
Grab some fabric, iron-on hem tape, and scissors—your trusty tools.
Simply measure, cut, and fold your fabric, securing edges with the hem tape.
This technique keeps it quick, like whipping up instant coffee—perfect for last-minute decor.
Choose vibrant fabrics to jazz up a room and impress your guests!
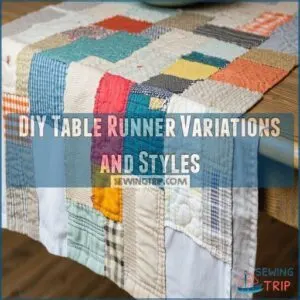
Patchwork Table Runner
Patchwork table runners let you express your creativity like piecing together a vibrant mosaic.
Start with fabric scraps in delightful patchwork patterns.
Mix color combinations that’ll brighten any room.
Enjoy these creative projects:
- Collect fabric scraps – Recycle old fabrics.
- Experiment with quilting techniques – Try different stitches.
- Create unique runner styles – Play with shapes and sizes.
Applique Table Runner
Applique table runners are where creativity meets practicality.
Picture adding fabric pieces, like a cute butterfly or elegant leaf, to your runner’s surface.
Choose bright colors or patterns that pop.
Use simple stitching for a polished look.
It’s like dressing up your table with a custom outfit, such as a burlap table runner with autumn-inspired appliques or stenciled designs from various beautiful fall crafts, offering countless project ideas to match your home’s vibe and seasons.
Quilted Table Runner Tutorial
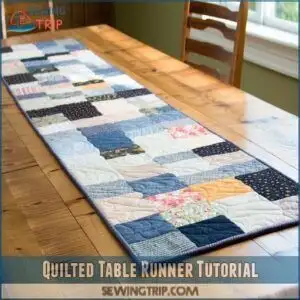
Ready to make your dining table stand out with a quilted table runner?
With the right quilting patterns, careful layering of fabric and batting, and a bit of machine quilting, you’ll have a stunning piece in no time.
Choosing Quilting Patterns
Selecting your quilting pattern is the fun part!
Consider classic quilting pattern styles like geometric designs or traditional patterns.
Think about your fabric choices and how different color combinations will look.
You’ll find tons of inspiration online; browse and pick a design that speaks to you.
Don’t be afraid to experiment—quilting is all about self-expression!
Layering Fabric and Batting
Balancing fabric weight with batting thickness lets you create a cozy table runner that stands out.
Whether you’re layering those materials right or just guessing, getting it wrong can feel like using an umbrella for a snowstorm.
Choosing the right batting essentials can make all the difference.
Here’s your guide:
- Fabric on top: Feature your favorite print.
- Batting in the middle: Adds plushness.
- Backing fabric underneath: Completes the sandwich.
Machine Quilting Techniques
You’ve got your layers in place.
Now, it’s time to put that walking foot to work for smooth, even quilting stitches.
Free-motion quilting can be a game changer, letting you play with quilting patterns like a seasoned pro.
Don’t forget quality quilting thread – it’s the backbone of your design, keeping everything tight and tidy.
No-Sew Table Runner Options and Methods
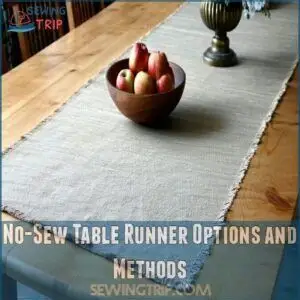
Don’t worry if sewing isn’t your thing; you can still create beautiful table runners using fabric glue or fusible tape for a neat finish.
Embrace your creative side by considering diverse sources of inspiration, such as images, fabrics, and connecting with others on social platforms and sewing communities, to spark unique table runner ideas, by opting for frayed edge designs or repurposing old materials to quickly craft unique runners.
Using Fabric Glue or Fusible Tape
Want alternatives to sewing and avoid quilted hassles? Consider using fabric glue or fusible tape for a no-sew table runner. Here’s your quick guide:
- Pick your fabric and desired size.
- Apply glue or tape along the edges.
- Press firmly to make sure the glue sticks.
- Admire your creation—quick and fuss-free!
Perfect for adding flair without the needlework.
Creating Frayed Edge Designs
Think of your table runner as a piece of rustic charm.
To create DIY frayed edges, simply cut your fabric slightly longer than needed.
You can also purchase a frayed edge tool online from frayed edge retailers to help you achieve a more refined look.
Tug gently at loose threads along the edges to create that lived-in look.
Use frayed edge tools to control the process.
These frayed edge techniques add a cozy, artisanal touch to any home.
Repurposing Materials for Quick Runners
Got a stash of old shirts or fabric scraps you can’t bear to toss? Jump into upcycling with a quick table runner project! You can draw inspiration from projects like upcycling old jeans to create unique pieces. Repurpose vintage linens or leftover fabric for a unique touch.
- Choose fabrics with interesting patterns.
- Cut to desired length.
- Use fabric glue for clean edges.
- Add decorative trims.
- Press with an iron for a polished look.
Customizing and Embellishing Your Table Runner
Now that you’ve got your basic table runner sewn, it’s time to get creative!
Let’s explore fun ways to personalize your runner with embellishments, adding unique details that reflect your style.
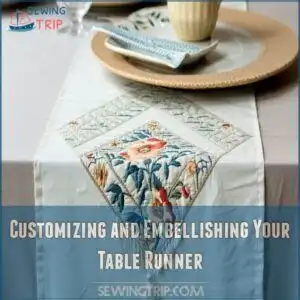
Adding Appliqués or Embroidery
Appliqué designs and embroidery stitches transform any table runner into a work of art.
Picture your favorite fabric choices adorned with whimsical patterns.
Perfect placement tips? Try a mock-up first.
Add finishing touches like a pro, with straight stitching and neat hems.
Ready to impress?
| Technique | Tip |
|---|---|
| Appliqué | Mock layout |
| Embroidery | Use stabilizer |
| Fabric Choice | Pre-wash |
| Placement | Initial sketch |
| Finishing | Iron carefully |
Incorporating Seasonal Themes
Craft a table runner that celebrates each season by playing with holiday-inspired patterns and seasonal color palettes.
Imagine autumn leaves for a festive table setting or snowflakes for winter charm.
Choose themed fabric that speaks to the time of year, and add DIY decorations like tiny pumpkins or ornaments.
Let your creativity shine as you transform your table into a cozy, seasonal haven.
Experimenting With Textures and Layers
As you shift from seasonal motifs, picture your table runner dressed in a cozy quilt of textures.
Try layered tablecloths and textured fabrics for playful depth.
Mix materials like burlap and lace or velvet and linen.
These fabric combinations create a dynamic look, sparking curiosity.
Use layering techniques to experiment, adding flair and personal style without breaking a sweat.
Tips and Tricks for Making a Perfect Table Runner
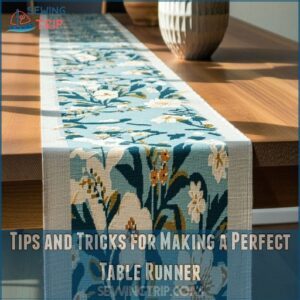
Creating a perfect table runner doesn’t have to be intimidating.
Ensure you pre-wash fabrics and take time with ironing for sharp, crisp edges.
Avoid common pitfalls by following these practical tips, making your table runner project a fun and rewarding experience.
Pre-washing Table Runner Fabrics
Pre-wash your table runner fabrics for a masterpiece!
This simple step prevents surprises like fabric shrinkage and color bleeding.
Plus, it makes sure your creation stays vibrant wash after wash.
Here’s how to do it:
- Use mild detergent and cold water
- Tumble dry on low or air-dry
- Check for any leftover marks or stains
Stay confident with fabric care!
Pressing and Ironing Table Runners
You’ve got your fabrics ready, now let’s flatten those wrinkles.
Ironing table runners is like a zen moment—choose steam or dry based on fabric types.
Press along seams thoughtfully, and when you reach the corners, imagine them as sharp as your wit.
A well-pressed table runner feels smoother, making the finished piece shine like a star!
Common Mistakes to Avoid When Making a Table Runner
A perfectly pressed runner is almost done! But don’t trip up now.
Avoid uneven seams by using a seam guide.
Inaccurate measurements lead to a wonky runner, so measure twice!
Make sure to choose the right fabric for your project, like cotton or linen fabrics, which can withstand spills and everyday use.
Fabric shrinkage? Pre-wash your fabric.
Choose the right batting; wrong batting can ruin your project.
Finally, neat finishing touches create a polished look.
You got this!
Frequently Asked Questions (FAQs)
How do you make a table runner?
With guidance from beginner-friendly sewing machine projects on YouTube like sewing machine tutorials, many people have successfully completed their first DIY projects. Did you know 85% of DIY projects succeed on the first try?
Making a table runner is simple: measure fabric, cut, sew edges, turn inside out, and iron.
It’s a fun way to personalize your dining space.
How do you decorate a table with a runner?
Lay the runner down the center of your table for a splash of style.
Centerpiece
Anchor with a centerpiece like flowers or candles, and complement it with matching tableware.
Mix textures and colors for a cozy, inviting look.
Is a table runner easy for beginners?
Creating a table runner might seem tricky at first, but it’s a breeze for beginners!
Just think of it as crafting a stylish scarf for your table—simple steps, basic sewing skills, and a bit of creativity.
Are table runners easy to customize?
Absolutely, table runners are a breeze to customize!
You can play with fabrics, patterns, and embellishments, making it uniquely yours.
Whether it’s a holiday theme or everyday decor, you’re only limited by your imagination.
Can a beginner sew a table runner?
Even if you’ve never touched a needle, you can totally sew a simple table runner.
It’s easier than you think; plenty of beginner-friendly patterns are out there.
You’ll feel so proud when it’s done!
How long does it take to make a table runner?
Making a table runner can take about 1-3 hours, depending on complexity and your sewing skills.
It’s like baking—a basic recipe is quick, but add some extra flair, and you’ll need more time.
How do I choose the right fabric?
Choosing fabric is like picking the perfect outfit—prioritize durability and style.
Opt for absorbent cotton or linen for everyday use, while festive occasions call for decorative fabrics.
Consider ease of care and match it with your table’s personality.
Whats the best length for my table runner?
Aim for a table runner that’s 12 inches longer than your table to allow a nice overhang on each end.
This creates a balanced look that’ll make your table feel fancy without being too over the top.
Can I make a reversible table runner?
You can craft a reversible table runner by sewing two layers of fabric, right sides together, leaving a small opening.
Turn it inside out, press it flat, and topstitch the edges for a neat, finished look.
How do I care for a table runner?
Did you know that 80% of table runners are made from cotton?
To keep yours looking fresh, wash it on a gentle cycle in cold water, hang it to dry, and press with a warm iron if needed.
What are some seasonal table runner ideas?
Embrace the seasons with table runners featuring autumn leaves, winter snowflakes, vibrant spring florals, or summer beach motifs.
Personalize with themes like Thanksgiving, Christmas, or Easter to create a festive and welcoming table setting year-round.
Conclusion
So, you’ve finished your table runner! Wasn’t that easier than you thought?
Now you’re a pro at this whole "how to make a table runner" thing.
Seriously, you might even start making them as gifts!
This tutorial showed you how to make a table runner, from choosing fabric to adding those finishing touches.
Remember, practice makes perfect, so don’t be afraid to experiment.
Your next table runner could be even more amazing!
Go ahead and show off your new skills; you deserve a pat on the back (and maybe a slice of cake!).

