This site is supported by our readers. We may earn a commission, at no cost to you, if you purchase through links.
To sew knits like a pro, you’ll need to master seaming techniques.
Align your knit pieces with right sides together, using a yarn needle slightly smaller than your project yarn.
Work the running back stitch for an elastic seam, consistently inserting the needle through each stitch for even tension.
Secure ends by weaving through the final stitches and trimming excess.
For shaping, utilize German short rows by turning mid-row to create double stitches.
Fix mistakes like dropped stitches using a crochet hook.
With these fundamentals under your belt, you’re ready to level up your finishing skills.
Table Of Contents
Key Takeaways
- Align knit pieces with right sides together and use a yarn needle that’s the same size or slightly smaller than the yarn for sewing.
- Utilize the running back stitch for creating an elastic seam, ensuring even tension by consistently inserting the needle through each stitch.
- Master German Short Rows (GSRs) to turn mid-row and create double stitches for shaping and adding fabric to the knitting project.
- Fix common knitting mistakes such as dropped stitches or holes in brioche stitch using a crochet hook to pick up and secure the stitches.
Preparing Your Knitted Pieces
To start preparing your knitted pieces for sewing, you’ll want to align the edges carefully, ensuring they match up evenly. Choosing the right yarn needle is essential — aim for one that’s the same size or slightly smaller than the yarn you’re using.
Aligning Edges for Sewing
Aligning fabric for sewing is essential to achieve a neat and professional finish for your knitted pieces. Here’s a step-by-step guide to help you prepare your knitted fabric for sewing:
- Place the two pieces of fabric with their right sides together: This ensures that the front sides of the fabric are facing each other.
- Align the edges: Make sure the raw edges of the fabric are even and lined up. This will help prevent any puckering or unevenness in the seam.
- Thread the needle with yarn: Use a yarn needle that’s the same size or slightly smaller than the yarn you’re using for sewing.
- Running Back Stitch: Insert the needle into the first stitch on the left-hand fabric, then bring the needle out through the second stitch on the right-hand fabric. Repeat this process, inserting the needle back into the first stitch on the right-hand fabric and bringing it out through the second stitch on the left-hand fabric. This will create a running back stitch.
- Continue sewing: Follow the same pattern of inserting and bringing the needle out to create a seam. Be sure to keep the stitches even and consistent, and pull the yarn taut to secure the seam.
- Finishing touches: Once you’ve sewn around the edges of the fabric, tie off the yarn securely and weave in any loose ends.
Choosing the Right Yarn Needle
To choose the right yarn needle for your knitted pieces, consider the yarn weight, needle size, stitch gauge, fabric type, and needle material.
For a running back stitch or brioche stitch, a yarn needle that’s the same size or slightly smaller than the yarn is recommended.
For fixing mistakes such as dropped stitches, a crochet hook can be used to pick up the dropped stitch and knit it back onto the needle. Remember to tighten the stitch to match the tension of the rest of the fabric and secure with a knot before resuming knitting.
Running Back Stitch Technique
To master the running back stitch technique, you’ll first insert the needle precisely into the first stitch on the left-hand fabric.
Then, bring it out through the second stitch on the right-hand fabric.
Next, you’ll create even, consistent stitches by reinserting the needle into that first right-hand stitch and out through the second left-hand stitch.
Repeat this back-and-forth motion while keeping the yarn taut to secure the seam.
Inserting the Needle Correctly
To insert the needle correctly for a running back stitch, start by inserting the needle into the first stitch on the left-hand fabric.
Then, bring the needle out through the second stitch on the right-hand fabric.
Next, insert the needle back into the first stitch on the right-hand fabric.
Finally, bring the needle out through the second stitch on the left-hand fabric. This process creates a secure seam and prevents tension issues.
For twisted stitches, use a crochet hook to pick up dropped stitches and knit them together.
Practice on a scrap piece of fabric before sewing the actual pieces together.
Creating Even Stitches
Creating regular stitches is critical for seam durability and fabric smoothness. Here’s how to do it:
- Choose the right needle: Use a yarn needle that’s the same size or slightly smaller than the yarn.
- Maintain stitch consistency: Keep your stitches even and consistent.
- Control tension: Pull the yarn taut to secure the seam.
- Practice: Try out different techniques to find what works best for your project.
Securing the Seam
Once you’ve got your running back stitch rhythm down, it’s time to lock it in.
Securing stitches is like closing a good book—satisfying and final.
Choose yarn that’s a team player, working with you to create flat seams.
Keep your tension consistent, like a steady drumbeat, ensuring even stitches that won’t play peek-a-boo.
There, you’re not just knitting; you’re crafting heirlooms.
Finishing Touches
After you’ve sewn your knitted pieces together using the running back stitch, it’s essential to secure the yarn effectively. Tie off the yarn by weaving it through the last few stitches, then trim the excess, leaving a short tail that can be woven into the underside of the fabric to hide the ends.
Tying Off Yarn Securely
Fastening yarn securely is a vital step in finishing your seam. Here’s how:
- Select the appropriate yarn needle size: A needle that’s of the same size or slightly smaller than your yarn works best.
- Tighten the yarn: This guarantees the seam is secure.
- Create a knot: Tie a knot in the yarn, then intertwine the end into the seam.
Weaving in Loose Ends
To weave in loose ends, choose a yarn weight that matches your project.
Select a sewing machine with a needle that’s the same size or slightly smaller than your yarn.
Finish your seam allowance by ironing it flat.
For mending knitwear, weave in loose ends on the wrong side of the fabric, securing the yarn with a knot.
Practice these techniques to perfect your knitting skills.
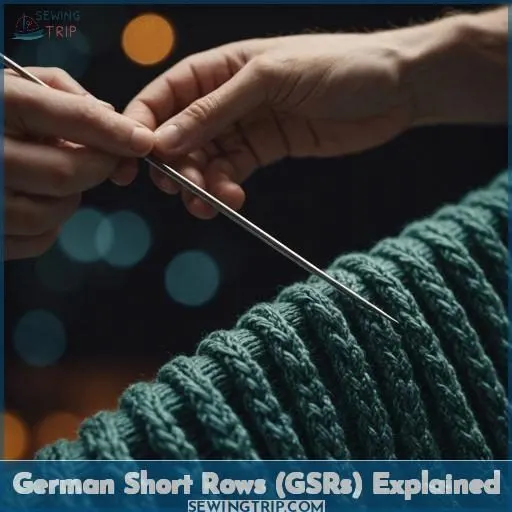
German Short Rows (GSRs) Explained
You’ll want to master German Short Rows (GSRs) – a technique that allows you to turn mid-row, creating dimensional shaping and pops of color in your knitting. GSRs, also known as make double stitches, enhance projects like toe-up socks with precisely placed heel turns and intricate colorwork designs.
Turning Mid-Row With GSRs
Mastering German Short Rows (GSRs) is a game-changer for knitters, allowing you to turn mid-row without the need for seams.
GSRs are also known as make double stitches (mds) and are compatible with all knitting needles.
To start, knit to your desired double stitch placement, then turn the work and bring the yarn forward.
Slip the stitch back purlwise onto the right needle, create a double stitch, and continue purling the remaining row.
GSRs add fabric, affecting the flatness of the fabric, but they can be used on both knit and purl sides.
For better fabric balance, try twisted double stitches or the twisted technique.
If you encounter large holes on one heel side, twisted double stitches may be necessary.
Practice on a swatch before starting your project to find the best fit.
Using GSRs for Shape and Color
Now that you’ve mastered turning mid-row with German short rows, it’s time to explore their potential for colorwork and shaping. German short rows allow you to add fabric to your knitting, which can enhance your designs.
By placing double stitches at specific points, you can create intricate patterns and shapes.
Experiment with different stitch placements to achieve the desired effect.
Fixing Common Knitting Mistakes
Missing yarnovers, dropped stitches, and holes in brioche stitch are common knitting mistakes that can disrupt your project’s flow. You’ll learn techniques to correct these issues, ensuring your knitted pieces maintain their structural integrity and aesthetic appeal.
Correcting Missed Yarnovers
Missed yarnovers can disrupt your knitting rhythm, but don’t worry! Retrieve your faithful crochet hook and embark on the rescue. Delicately guide the elusive loop back into place, integrating it effortlessly with its counterparts. This prompt solution not merely preserves your project from the dreaded unraveling but strengthens your connection with each stitch. Proficiency is within your grasp!
Handling Dropped Stitches
When knitting, it’s common to encounter dropped stitches. These can be frustrating, but they’re easy to fix with the right tools and techniques. Here’s how to handle dropped stitches:
- Retrieve the dropped stitch: Use a crochet hook to retrieve the dropped stitch. If it’s on a stitch holder or DPN, you can simply pick it up.
- Secure the yarn end: Tie off the yarn securely to prevent the dropped stitch from unraveling further.
- Match the tension: Make sure the tension of the repaired stitch matches the rest of the fabric. This may involve adjusting the yarn tension or needle size.
- Weave in loose ends: Once the dropped stitch is repaired, weave in any remaining yarn ends to keep your work neat and tidy.
Repairing Holes in Brioche Stitch
To fix holes in your brioche stitch, you’ll need to pick up the dropped stitches using a crochet hook.
Then, knit the stitches together and secure them with a knot.
Finally, darn in the yarn ends and resume knitting.
Count stitches regularly.
Practice on a small swatch before starting your project.
Frequently Asked Questions (FAQs)
What is the best needle size for sewing with knit fabric?
You’ll want a sharp, thin needle like a microtex or sharps. Knits stretch, so a too-thick needle will leave funky, stretched-out holes. Stick to a size 9-11 needle for best results when sewing those cozy knits, my friend.
How do I prevent my knit fabric from stretching while sewing?
You’ll want to use a walking foot or even feed foot to help feed knits evenly. Stabilize with fusible knit interfacing if needed. Go slowly, don’t stretch, and use a zigzag or stretch stitch. Adjusting tension and stitch length helps too.
What is the best stitch length for sewing with knit fabric?
You’ll want to use a short stitch length, around 2-5mm. This prevents the stitches from popping or the fabric distorting when stretched. But don’t go too short – that can cause puckering and tunneling. Balance is key for smooth, stretchy knit seams.
Can I use a walking foot when sewing with knit fabric?
A walking foot grips both layers, preventing stretching – a game-changer when taming unruly knits. It’s like having a trusty sidekick guiding your fabric dance with effortless precision.
How do I prevent my knit fabric from puckering while sewing?
Avoid puckering by using a lightweight knit stabilizer or tissue paper underneath. Go slowly with a walking foot, keeping tension loose. Use stretch stitches like zigzag or triple stretch. A larger needle helps too – it opens up the knit loops.
Conclusion
As the old saying goes, practice makes perfect.
By conquering these tutorials on how to sew knits, you’ll enhance your finishing skills to expert levels.
Steadily guiding the needle through each stitch guarantees consistent tension.
While German short rows facilitate seamless shaping.
Handle common errors like lost stitches with a crochet hook, and you’ll be joining knits flawlessly in no time.

