This site is supported by our readers. We may earn a commission, at no cost to you, if you purchase through links.
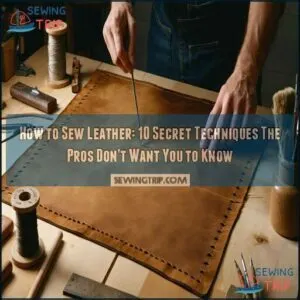 To sew leather, you’ll need specialized tools like a leather needle, waxed thread, and an awl.
First, prepare your workspace and mark your stitch lines. Punch holes through the leather using an awl or diamond chisel—leather’s too tough for standard needles to penetrate.
Use a saddle stitch for strength; it won’t unravel even if one thread breaks. Keep your stitches evenly spaced and maintain consistent tension—not too tight or you’ll pucker the leather.
Like breaking in a new pair of boots, your first few projects might feel stiff, but you’ll soon develop a rhythm that transforms raw hide into something remarkable.
Table Of Contents
- Key Takeaways
- Getting Started With Leather Sewing
- Mastering Leather Sewing Techniques
- The Saddle Stitch: a Strong and Durable Hand Stitch
- Common Leather Sewing Mistakes to Avoid
- Adding Finishing Touches to Your Leather Project
- Exploring Seam Variations for Leather Projects
- Leather Project Ideas and Inspiration
- Tips for Successful Leather Sewing
- Troubleshooting Common Leather Sewing Issues
- Advanced Leather Sewing Techniques
- Frequently Asked Questions (FAQs)
- Conclusion
Key Takeaways
Here are 4 key takeaways about how to sew leather:
- You’ll need specialized tools specifically designed for leatherwork, including leather needles, waxed thread, stitching awls, and edge bevelers to achieve professional results that last for years.
- The saddle stitch is your essential technique for durability – using two needles with waxed thread creates seams that won’t unravel even if one thread breaks, making it stronger than machine stitching.
- You must prepare leather properly before stitching by marking stitch lines, punching holes with an awl or diamond chisel, and maintaining consistent tension throughout your work.
- Different leather types require specific approaches – beginners should start with chrome-tanned leather (2-3oz for wallets, 4-6oz for bags), while matching your stitch type to your project ensures both functionality and aesthetic appeal.
Getting Started With Leather Sewing
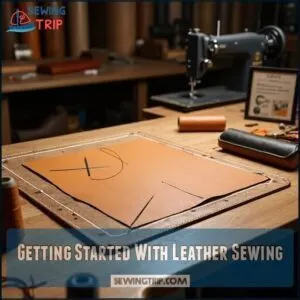
You’ll need the right leather type, proper tools, and waxed thread before you start sewing leather like a pro.
Prepare your workspace with sharp needles and a cutting board, then mark your stitch lines with chalk instead of pins which can damage the material, to ensure a smooth sewing process with leather.
Choosing The Right Leather for Your Project
Selecting the right leather from among the various types can make or break your project’s success.
When choosing leather, consider these essential factors:
- Full-grain leather showcases natural markings and develops a rich patina over time—perfect for heirloom projects that tell a story with each scratch and scuff
- Top-grain leather offers a smoother, more refined surface ideal for sleek designs where uniformity matters
- Chrome-tanned leather provides excellent pliability for beginners, unlike its stiffer vegetable-tanned counterpart
Thickness matters too—thinner leathers (2-3oz) work well for wallets and clothing, while thicker cuts (8-10oz) suit belts and bags.
Pay attention to grain direction when cutting; align it with stress points for durability.
Remember, quality leather might cost more upfront, but it’ll reward you with years of service and character.
Understanding full grain leather properties is essential for making informed decisions about your leather projects.
Prepping Your Needle and Thread
Prepping your needle and thread properly separates amateur work from professional leather crafting.
Choose waxed polyester or nylon thread that’s 2.5 times your seam length for ideal stitch tension. Pair with blunt-tipped leather sewing needles (sizes 14-16) that pierce without tearing.
Flatten thread ends between your fingers before threading – this simple hack prevents frustrating fraying. When hand sewing leather, lock everything in place by looping through twisted thread ends.
Proper thread selection and needle choice guarantee your leather stitching looks polished and holds for years.
Essential Tools for Leather Sewing
Now that your thread and needles are ready, let’s arm your workbench with proper leather sewing tools. Think of these as your leathercraft arsenal.
Here’s what the professionals keep within arm’s reach:
- Leather cutters and leather shears for clean, precise cuts
- Stitching awls to punch perfect holes for sewing
- Edge bevelers to smooth rough edges for a polished finish
- Thimbles to protect your fingers during lengthy projects
- Leather scissors for trimming thread and detailed cutting
You don’t need everything at once. Start with basics and add specialized tools as you grow. Most beginners can create impressive projects with just 5-6 quality tools. When selecting a machine, consider the best leathercrafting sewing machine options to guarantee compatibility with your tools and projects.
Mastering Leather Sewing Techniques
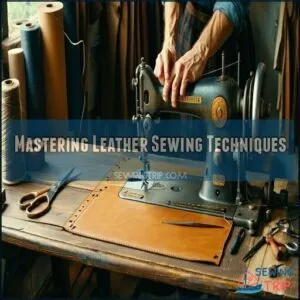
You’ll master leather sewing faster when you understand grain direction and choose the right stitch for your project.
Once you’ve got these basics down, you’ll notice your stitches become smoother and more even, just like the pros who’ve spent years perfecting their technique.
Understanding Leather Grain and Thickness
You’ll dive deeper into leather work when you understand grain and thickness. These fundamentals separate amateur projects from professional masterpieces.
- Leather types: Full-grain leather showcases natural textures while top-grain offers smoother, uniform surfaces for easier stitching.
- Leather density: Use calipers to measure thickness accurately—this determines your needle choice.
- Grain direction: Always stitch with the grain to prevent unsightly tears and maintain leather flexibility.
- Edge finishing: Different leather thicknesses require specific edge treatment techniques for professional results.
Using The Right Stitch for The Job
Through mastering various stitch types, you’ll transform your leather projects.
Saddle stitch offers unmatched durability, while running stitch works for lightweight pieces.
Choose polyester or nylon thread that complements your leather grain.
Control thread tension to prevent puckering, and adjust stitch length based on thickness.
For professional results, always secure your work in a stitching awl or pony—pros swear by this simple leather sewing technique!
Tips for Smooth and Even Stitching
Seven essential techniques guarantee smooth, even leather stitching every time. Maintaining proper stitch tension is your foundation—too tight warps the leather; too loose creates sloppy seams.
Your leather prep directly impacts results. Always:
- Clean cuts with sharp tools before attempting any stitching
- Mark even hole spacing using stitching chisels or an awl
- Use binder clips instead of pins to hold leather pieces together
Thread choice matters—waxed thread slides through leather without snagging. Pair it with the right needle selection for your leather thickness.
When finishing, burnish your edges for that professional look the pros charge extra for. This final step completes the leather stitching process.
The Saddle Stitch: a Strong and Durable Hand Stitch
You’ll master the saddle stitch quickly with this time-tested technique that professional leatherworkers rely on for projects that last generations.
This hand-sewing method creates seams twice as strong as machine stitching because each stitch remains secure even if another breaks, making it perfect for wallets, bags, and other items that need to withstand daily wear.
Preparing Your Leather for The Saddle Stitch
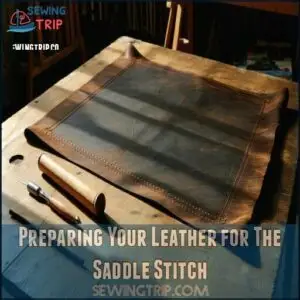
To prepare leather for the saddle stitch, you’ll need to clean and condition it thoroughly first.
Using a groover tool, mark precise stitch lines 1/8" to 1/4" from the edge. Punch clean, evenly spaced holes along these lines with an awl or stitching chisel.
Secure your work in a stitching pony to maintain stability while working. Bevel the edges for a professional finish, and always follow the leather’s grain direction for maximum strength and durability.
Having the right leather sewing tools is essential for achieving a high-quality stitch.
Step-by-Step Saddle Stitch Guide
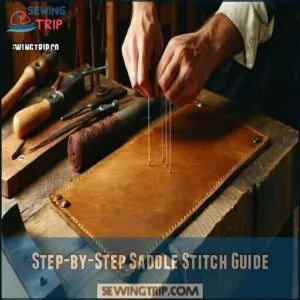
Now that your leather is prepped, let’s execute the perfect saddle stitch. Thread both needles with equal length, then push your first needle through hole one from back to front.
The second needle follows, crossing behind the first. Pull with firm but gentle tension. Continue this pattern, maintaining consistent pressure throughout.
A stitching pony will steady your work, leaving your hands free to create those enviable, professional stitches.
Maintaining Consistent Stitch Quality
Your stitches reveal whether you’re a pro or just playing around with leather.
Transform your saddle stitch from mediocre to magnificent by maintaining consistent quality with these four critical techniques:
- Thread Tension: Apply even pressure with each pull—firm enough to create a flat seam but gentle enough to prevent leather puckering. A properly tensioned stitch lies flat against the surface.
- Stitch Spacing: Use an overstitch wheel or ruler to mark uniform hole spacing before punching. Inconsistent gaps between stitches instantly signal amateur work.
- Needle Choice: Select harness needles specifically designed for leather—they pierce cleanly without tearing fibers, resulting in cleaner holes.
- Practice Consistency: Work on scrap pieces first, focusing on maintaining identical stitch length throughout. Try using a seam roller after stitching to flatten and set your work.
Remember: backstitching at the end secures your work for years of durability.
Common Leather Sewing Mistakes to Avoid
You’ll save yourself hours of frustration and ruined leather projects by learning what not to do before you start.
Even experienced leatherworkers make these common mistakes, but you won’t after reading this essential guide.
Uneven Hole Punching and Feeding The Needle
The perfect saddle stitch depends on precise hole punching. You’ll ruin your leather project with uneven holes and frustrated needle feeding attempts.
Use a sharp leather hole punch and consistent pressure to create uniform holes. Mark your stitch line first, then maintain equal spacing with a ruler.
When threading, use pliers for tough spots. Test on scraps—pros practice plenty before tackling real projects.
Mastering leather sewing techniques is essential for achieving professional results.
Pulling The Thread Too Tight or Too Loose
Your thread’s tension makes all the difference in leather sewing results.
Too tight, and you’ll damage the leather; too loose, and your seam strength suffers.
Master consistent tension with:
- Practice consistency on scrap leather before tackling your project
- Stitch length adjustments based on leather thickness
- Sewing machine settings calibration for ideal thread feed
Watch your stitch appearance improve as you develop feel for proper tension.
Not Using The Right Needle or Thread
Three critical mistakes will doom your leather project before you even start stitching. Using the wrong needle or thread isn’t just inefficient—it’s project suicide.
For successful leather work:
- Use leather-specific needles with sharp, triangular tips
- Select waxed thread designed specifically for leather
- Match needle size to your leather thickness
- Test thread tension on scraps before committing
Don’t compromise—proper Thread Selection prevents frustration, and it’s essential to remember that leather-specific needs are crucial for a successful project.
Adding Finishing Touches to Your Leather Project
You’ll transform your leather project from amateur to professional with the right finishing techniques that pros use daily.
Adding edge binding, creating braided straps, or using a seam roller will elevate your work and make people wonder where you bought that handsome leather piece, which showcases professional finishing.
Edge Binding for a Professional Finish
Even after avoiding common stitching errors, your project’s edges can make or break its professional appearance.
Edge binding transforms rough leather edges into refined borders that whisper "expert craftsmanship".
Select your binding material carefully—thin leather strips (2-3oz) work beautifully for most projects.
Cut strips slightly wider than your edge thickness for proper coverage.
Before attaching binding, use an edge beveler to smooth corners and create a gentle curve.
This prevents binding from slipping off sharp edges.
Apply a thin layer of leather cement along the edge, then position your binding strip.
Secure with saddle stitches using a leather stitching tutorial technique—evenly spaced holes guarantee consistent results.
For curved sections, gently stretch the binding as you work for a snug fit without puckering.
Mastering various edge finishing techniques is essential for achieving a polished look on leather projects, which requires proper coverage and gentle curve techniques to ensure a professional finish with refined borders.
Braided Straps for Visual Interest
Beyond edge binding, your leather projects can gain dramatic appeal through braided straps. Braiding techniques transform ordinary leather into eye-catching visual embellishments.
You’ll find that different strap materials create varied textures—try combining smooth and pebbled leathers for striking contrast. For a basic leather sewing tutorial, start with simple three-strand weaving before advancing to more complex leather stitching patterns.
When working with decorative threads, match colors that complement or boldly contrast your leather. Remember to cut strips wider than needed as braiding tightens the overall width.
For attachments, secure braids with double stitching at connection points—this prevents unraveling while maintaining that professional, handcrafted look every leather crafting tutorial promises.
Using a Seam Roller for a Crisp Finish
A seam roller is the unsung hero of leather finishing that transforms ordinary projects into professional masterpieces. After stitching your leather pieces together, this simple tool creates crisp edges and perfectly flattened seams with just a few passes.
You’ll notice an immediate difference in your work when you incorporate seam rolling into your leather sewing techniques.
- Apply firm, even pressure while rolling to guarantee consistent stitch alignment and prevent puckering
- Work from the center outward to push air bubbles away from your seams
- Follow up with edge finishing techniques for a completely polished look
Don’t let the pros keep this secret! A quality seam roller is an affordable investment that’ll elevate your leather crafting results from homemade to handcrafted.
Exploring Seam Variations for Leather Projects
You’ll discover that different seam types drastically change your leather project’s final appearance and durability.
The right seam choice transforms your work from amateur to professional, whether you’re looking for the refined elegance of turned edges or the rugged charm of cut edges.
Turned Edge Seam for a Polished Look
After perfecting your leather project, it’s time to master the turned edge seam technique for that professional finish.
The turned edge seam creates elegantly polished edges by folding and gluing the leather’s edge before stitching. You’ll need:
Benefits Leather Sewing Tips
First, skive the leather edge thinly where you’ll fold. Apply strong adhesive, fold carefully, and secure with clamps until dry.
Your leather edge beveler and seam roller are non-negotiable tools for Edge Finishing. Don’t rush this process – quality Leather Binding requires patience.
Backstitch at each end for Stitch Reinforcement that won’t unravel with use.
Cut Edge Seam for a Rustic Look
While turned edge seams deliver a refined finish, cut edge seams create that raw, authentic character many leather crafters desire.
The cut edge seam showcases your leather’s natural beauty and rustic edge appeal. This technique leaves raw edges visible, creating an intentionally unfinished look that’s both stylish and practical.
To achieve perfect cut edge techniques:
- Position stitches 1/4 inch from the edge for ideal unfinished seam strength
- Skip edge finishing tools—let those natural edges remain untreated
- Use heavy-duty thread that complements your leather’s color for visual impact
The result? A rugged, timeless piece with undeniable craftsman appeal.
Choosing The Right Seam Type for Your Project
The right seam choice is the foundation of a successful leather project.
Match your seam to both your project’s purpose and the leather’s characteristics.
durability
flair
sturdy
For wallets, consider cross stitches.
Making bags? Opt for the reliable saddle stitch.
Your leather’s thickness should always guide your seam selection.
Leather Project Ideas and Inspiration
You’ll find endless creative possibilities once you’ve mastered your leather sewing techniques.
You’ll find endless creative possibilities once you’ve mastered your leather sewing techniques.
Master leather stitching, and you’ll create treasures that tell stories while lasting generations.
From stylish wallets and bags to custom belts and unique home décor items, your new skills can transform simple leather pieces into valuable handcrafted treasures.
You’ll be able to create a wide range of items, and with practice, your skills will become more refined, allowing you to take on more complex projects.
Leather Bags and Wallets
While seams give leather projects structure, they’re just the beginning. Now let’s create something practical with your skills.
Leather bags and wallets showcase your craftsmanship while serving everyday needs. Choose the right leather thickness: 2-3oz for wallets and 4-6oz for sturdy bags.
- Select quality hardware for professional finishes
- Test stitching methods on scraps before final assembly
- Follow leather sewing tutorials for proper tension
- Consider minimalist wallet styles for beginners
These projects teach patience while delivering heirloom-quality accessories you’ll use daily.
Leather Belts and Accessories
Beyond bags and wallets, leather belts offer a perfect entry into functional accessories.
You’ll need quality leather straps (1-1/2" width for standard belts), attractive belt buckles, and basic accessory hardware.
Consider exploring sewing ideas for accessories to broaden your project horizons.
Apply your leather sewing skills to create personalized belt tips with clean edge finishing. A leather punch creates perfect holes every time—no guesswork needed!
For smaller accessories like keychains or bookmarks, thinner leather straps work beautifully.
Remember to condition all finished pieces to maintain suppleness and prevent cracking with use.
Leather Jewelry and Home Decor
While belts and accessories showcase practicality, leather jewelry and home decor let your creativity truly shine.
Transform scraps into statement pieces with these pro techniques:
- Create leather earrings with geometric cutouts using sharp leather shears
- Craft minimalist leather-wrapped vases for elegant home accents
- Make stamped leather coasters with sealed edges for durability
- Design leather wall hangings with simple saddle stitching for texture
Always condition finished projects for lasting beauty, and remember that leather jewelry and home decor can be a great way to express your creativity.
Tips for Successful Leather Sewing
You’ll master leather sewing faster if you test techniques on scrap pieces before working on your main project.
Your results will improve dramatically when you pair quality tools with patient, unhurried stitching methods.
Practicing on Scraps of Leather
Now that you’ve discovered exciting leather project possibilities, master your skills before diving into your wallet or bag.
Test your hole punching technique on leather scraps first. Perfect your thread tension and edge finishing on these practice pieces.
Scraps reveal your strengths and weaknesses without wasting expensive materials.
"My workshop floor is covered with practice scraps," admits master leatherworker Tim Halstead. "That’s where I solved all my stitching problems.
Being Patient and Taking Your Time
Now that you’ve practiced on scraps, remember that leather sewing rewards those who don’t rush. Time management is your best friend in this craft.
Every stitch counts when working with leather. You can’t simply unpick mistakes without leaving permanent holes. Mindful crafting leads to professional results that last decades.
- Your fingers tracing the leather grain before cutting, feeling for imperfections
- The gentle pull of waxed thread through pre-punched holes, steady and rhythmic
- Your shoulders relaxing as you complete each perfect stitch
- The leather warming in your hands as you work
- The satisfying tap of your mallet when setting each stitch firmly in place
Patient practice transforms beginners into craftspeople. When fatigue sets in, take breaks. Slow stitching produces cleaner lines and more durable seams than rushed work ever will. This approach to leather crafting ensures high-quality outcomes, and with time management, you can achieve professional results.
Using The Right Tools and Equipment
To sew leather properly, you need specific tools that make all the difference. Most projects fall apart without the right equipment.
Investing in quality leather sewing tools, such as those found in leather workshops, is essential for achieving professional results.
| Essential Tool | Why You Need It |
|---|---|
| Leather Cutters/Shears | Creates clean, precise edges |
| Edge Bevelers | Smooths rough edges for professional finish |
| Stitching Awls | Punches perfect holes for even stitches |
| Rotary Cutters | Handles straight cuts efficiently |
| Leather Needles | Penetrates tough material without breaking |
Don’t skimp on quality—your finished project will show it. The right tools are crucial for a leather sewing project, and using them correctly is key to achieving the desired outcome, with essential tools making all the difference in the final result.
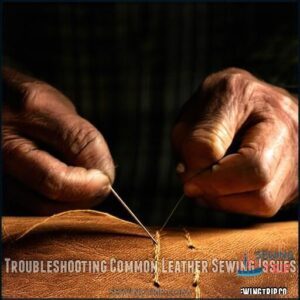
Troubleshooting Common Leather Sewing Issues
Even the most skilled leather crafters run into trouble with stubborn hides and wayward stitches.
You’ll learn practical fixes for common leather issues like stretching, uneven stitches, and how to seamlessly correct mistakes without starting over, including solutions for stubborn hides.
Dealing With Leather Stretch or Shrinkage
Leather stretch-and-shrink headaches can derail even the most fastidious projects if you’re not prepared. Understanding how to manage these natural leather movements is essential for professional results.
Leather’s natural movement can make or break your project. Master it, and your creations will stand the test of time.
Here’s how to control leather’s natural tendencies:
- Pre-condition your leather with a quality leather conditioner 24 hours before cutting to stabilize the grain structure
- Test shrinkage patterns on scrap pieces by wetting and drying under different tensions
- Allow for movement in your patterns by adding 1/8" extra to seam allowances when working with stretchy leathers
- Store leather flat between heavy books to maintain tension management after cutting
Fixing Uneven or Wavy Stitches
While leather stretch can be frustrating, uneven or wavy stitches can ruin your entire project. It’s not magic—it’s technique.
- Stitch tension issues are the primary culprit—adjust your machine or hand pressure accordingly
- Choose the right thread choice for your leather thickness
- Increase your stitch length for thicker leathers
- Use a seam roller after stitching to flatten ripples
- Prepare with proper leather prep—marking consistent stitch lines with a stitching awl
Test your adjustments on scrap leather before tackling your main project.
Removing Mistakes and Making Adjustments
Even the experts make mistakes when working with leather, so don’t panic when things go wrong.
Fixing leather sewing mishaps is simpler than most beginners realize:
- Remove stitches carefully using a quality seam ripper, working slowly to prevent hole enlargement.
- Realign leather pieces precisely, applying gentle pressure to flatten warped areas.
- Restitching requires fresh thread and consistent tension; an awl helps maintain existing holes.
Patching holes? Add a thin leather backing piece for reinforcement. With patience, your leather repair will be virtually invisible!
Advanced Leather Sewing Techniques
You’ll take your leather projects to the next level with these professional techniques that transform basic skills into true craftsmanship.
Once you’ve mastered the walking foot attachment and practiced creating complex patterns, you’ll handle even the most challenging leather types with confidence.
Using a Walking Foot for Smooth Stitching
Now that you’ve handled those tricky sewing issues, let’s access a pro-level technique.
Your walking foot acts like magic when tackling thick leather projects.
Unlike standard feet, it grips both top and bottom layers, eliminating the dreaded feed problems. Adjust foot pressure lightly, increase stitch length slightly, and maintain even thread tension.
This game-changing attachment prevents puckering while delivering perfectly smooth stitching—even on the thickest hides.
Creating Complex Designs and Patterns
While your walking foot opens new doors, pattern making takes your leather craft to artistic heights.
Stencils help map intricate designs before cutting, allowing you to incorporate decorative stitching techniques like embroidery.
Try laser cutting for precise patterns or combine different leather colors and textures for visual interest.
Advanced leather sewing techniques include experimenting with folding to create stunning 3D effects.
These leather embellishments transform basic projects into conversation pieces with depth and personality, using techniques like decorative stitching and leather craft.
Experimenting With Different Leathers and Techniques
Now that you’ve mastered complex designs, it’s time to play with different leather types.
Each variety—from slick patent to buttery suede—responds uniquely to your needle. Try unconventional stitch variations like cross stitches on thicker hides or blanket stitches on softer pieces.
Experiment with edge finishing techniques to elevate simple projects. Remember to respect grain direction when cutting, and always condition your leather after working it.
You’ll discover techniques that transform ordinary projects into personal masterpieces. Always keep in mind the importance of conditioning your leather to ensure the best results.
Frequently Asked Questions (FAQs)
Can I sew leather with a regular sewing machine?
My neighbor transformed her old leather jacket using her standard Singer machine with special adjustments.
You can use your regular sewing machine for leather, but you’ll need leather needles and heavier thread for success.
What is the basic stitch for leather?
The saddle stitch is your essential leather stitch.
You’ll need two needles, waxed thread, and an awl to create this durable, professional-looking stitch that won’t unravel even if a section breaks.
What tension should I use to sew leather?
Like a goldsmith using just enough pressure, you’ll want slightly looser tension than normal.
For leather, adjust your machine to 2-3 or hand-stitch with consistent, firm pulls without warping the material.
How to stitch leather by hand without a machine?
Use a saddle stitch with waxed thread and two needles. Punch evenly spaced holes first, then weave through both sides. This creates stronger seams than machine stitching when done properly.
What is the best stitch for sewing leather?
Thought you’d try just any stitch for leather? Think again! The saddle stitch reigns supreme for leatherwork, offering unmatched durability and professional appearance. You’ll need two needles for best results.
How to sew leather on a sewing machine for beginners?
Install a leather needle, loosen tension slightly, and set longer stitch length.
Attach a Teflon foot, use heavy-duty thread, and practice on scraps.
Don’t rush—steady pressure works best with leather.
Do you need a special needle to sew leather by hand?
Contrary to popular belief, you do need special needles for hand-sewing leather.
Yes, you’ll want blunt-tipped harness or glovers needles that can penetrate tough leather without breaking or damaging the material.
Can I sew leather on a regular sewing machine?
You can use a regular sewing machine for leather, but you’ll need special leather needles, a walking foot, and longer stitch lengths.
Light to medium-weight leather works best; thicker pieces may require industrial machines.
How to join two pieces of leather together?
When Joe wanted to join leather pieces for his handmade wallet, he used the saddle stitch technique.
Mark stitch lines, punch holes with an awl, apply adhesive, align carefully, then sew with waxed thread.
What type of leather is best for beginners to work with?
Chrome-tanned leather is your best starting point. It’s softer, more forgiving, and doesn’t require special tools to work with. You’ll find it easier to cut and stitch than vegetable-tanned varieties.
Conclusion
At the end of the day, learning how to sew leather transforms ordinary materials into extraordinary creations.
You’ve now mastered ten professional techniques that elevate your craftsmanship.
Remember to practice regularly, invest in quality tools, and be patient with yourself.
Each stitch brings you closer to perfection.
Whether crafting wallets, bags, or decorative pieces, your new skills open endless possibilities.
The journey to becoming a leather artisan is challenging but immensely rewarding.
Happy stitching!

