This site is supported by our readers. We may earn a commission, at no cost to you, if you purchase through links.
These patterns skip complicated darts and seams, making them perfect for first-time sewers who think they’ve bitten off more than they can chew.
Just grab your fabric, measure twice to avoid becoming a DIY disaster meme, and follow the step-by-step instructions to sew your way to success.
Whether you’re working with lightweight cotton for summer or soft flannel for fall, this pattern adapts like a chameleon to different fabrics and styles.
There’s a secret technique that makes your hem look professional every time.
Table Of Contents
- Key Takeaways
- What is a Tent Dress
- How to Create a Tent Dress Pattern
- Choosing The Right Fabric for Your Tent Dress
- Sewing a Tent Dress From a Pattern
- Beginner-Friendly Dress Sewing Patterns
- Pattern Adjustments and Fitting
- Styling and Accessorizing Your Tent Dress
- Variations and Inspiration for The Tent Dress
- Sewing a Tent Dress From Fabric Squares
- Tips and Tricks for Sewing a Tent Dress
- Frequently Asked Questions (FAQs)
- Conclusion
Key Takeaways
- You’ll need just two simple rectangles of fabric to create a flowing tent dress, making it perfect for beginners who want a comfortable garment that flatters all body types.
- Your fabric choice significantly impacts the dress’s style and comfort—opt for lightweight cotton or linen for summer breathability, rayon for elegant drape, or wool blends for cozy winter versions.
- You can easily customize your tent dress by modifying sleeves, necklines, or adding pockets and embellishments to transform a basic pattern into a unique piece that reflects your personal style.
- You’ll achieve a professional finish by using proper seam techniques, pressing as you go, and applying bias binding for clean necklines—these small details elevate your homemade dress to look store-bought.
What is a Tent Dress
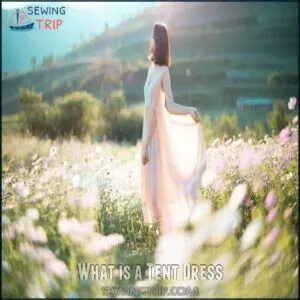
A tent dress is a loose, flowy dress that flares out from the bust, giving it an airy, comfortable fit.
Life’s too short for dresses that don’t dance with you as you walk.
It’s perfect for staying cool and stylish, especially on warm days when you’d rather not deal with tight waists, and is a great option because it provides a comfortable fit.
Benefits of Wearing a Tent Dress
You’ll love the comfort and ease of a tent dress—it’s like wearing a stylish breeze! This oversized dress pattern isn’t just about feeling cozy; it’s incredibly versatile and body-positive.
Here’s why it’s a wardrobe essential:
- Comfort at its core – Flowy fabrics let you move freely, keeping things cool and comfy all day.
- Body positivity – Skims over curves beautifully, showcasing effortless grace without clinging.
- Effortless styling – A tutorial tent dress transforms from a casual dress pattern to evening chic just by switching accessories.
It’s the ultimate blend of comfortable clothing and easy styling!
Types of Fabrics for a Tent Dress
Let’s talk about fabric choices for a tent dress—you’ve got plenty of options to make it comfy and stylish.
Start with cotton for breathability and ease, perfect for summer days and warm-weather adventures. Linen adds structure with its relaxed, textured vibe, making any dress feel timeless yet effortless. If you want a dress that flows beautifully, rayon is your best friend, offering unmatched drape. Meanwhile, knit fabrics are forgiving, beginner-friendly, and don’t fray, so goodbye, hem drama!
Here are some great options for different needs:
- Light cotton voile or gauze for breezy, hot days.
- Medium-weight knits that stitch up easily without a fuss.
- Taffeta or wool for cozy seasonal dresses.
- Eco-friendly fabrics, like Tencel, for a sustainable touch.
The right fabric turns your tent dress into wearable art!
Measuring for a Perfect Fit
Getting your body measurements right is the backbone of making a perfectly fitting tent dress pattern.
Don’t cut corners here—it saves time and frustration later! Follow these simple steps to nail it:
- Accurate Bust Measurement: Measure the fullest part of your bust and add 2-3 inches for the dress’s flowy ease.
- Shoulder Width Precision: Measure shoulder-to-shoulder for balanced draping and proper sleeve placement.
- Torso Length Importance: Measure from your shoulder to the desired hem.
- Waist Definition Omission: Note your waist for reference, but remember the dress won’t hug this area.
- Hip Circumference Consideration: Include hips to double-check the dress’s overall flow.
Measure twice—errors here can turn fun sewing into a headache!
How to Create a Tent Dress Pattern
Creating a tent dress pattern is easier than it sounds, and it starts with taking a few simple measurements.
Grab some paper and a pencil, and you’ll be ready to map out your stylish, flowy masterpiece in no time!
Taking Body Measurements
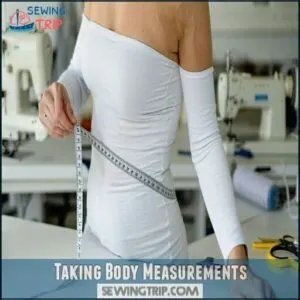
Before making a tent dress pattern, it’s key to get accurate body measurements. Grab a measuring tape, wear fitted clothes, and stand naturally—it helps the dress fit like a charm.
Start with your bust measurement by wrapping the tape snugly around the fullest part of your chest, keeping it level with the ground. For waist definition, measure at the narrowest section of your torso (usually above your belly button).
For hip placement, measure around the widest part of your hips. Don’t skip shoulder width (across your back) and torso length (from neck to waist).
Add 2–4 inches to the bust for that flowy shape. Write everything down—those numbers are your sewing pattern’s best friend!
Creating a Pattern From Scratch
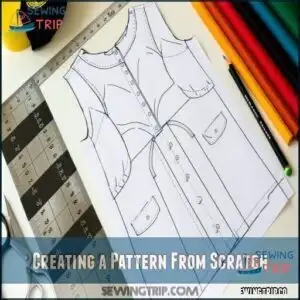
Creating your own tent dress pattern is easier than it sounds. Grab your body measurements, craft paper, ruler, and pencil to get started.
Here’s how to draft a simple A-line design:
- Start with a centerline: Draw a vertical line for the dress’s length. Mark key points like the neckline, shoulders, and hemline.
- Shape the silhouette: From the shoulders, widen the lines gently to the hem for that flowy shape.
- Check symmetry: Verify both sides mirror before cutting.
Simple pattern adjustments later will fine-tune the fit or customize for fabric choices and size preferences.
Modifying a Pattern for a Plus Size Tent Dress
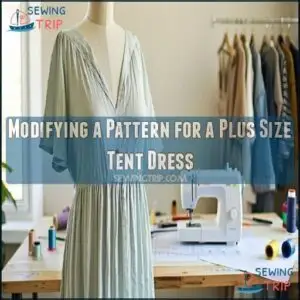
If you’re crafting a plus-size tent dress, thoughtful pattern adjustments are key to a flattering silhouette.
Add darts placement for gentle shaping without losing flow, include side panels for extra room, and adjust armholes slightly deeper for comfort.
Prioritize fabric considerations—look for materials with drape that complement the design’s airy feel, these pattern customizations create a plussize dress fitting beautifully while keeping it stylish and comfortable for all-day wear.
Choosing The Right Fabric for Your Tent Dress
Picking the right fabric for your tent dress is the first step to creating something both comfy and stylish.
You’ll want a material that’s lightweight, breathable, and flows beautifully—think cotton, rayon, or linen.
Fabric Types for a Breezy Tent Dress
A tent dress’s charm comes from its drape and flow, and your fabric choices play a big role.
Picking lightweight, breathable fabrics is key to a breezy summer dress pattern.
- Cotton and Linen: These natural fabric types are top choices for their crisp texture, seasonal suitability, and ability to hold shape while staying cool.
- Rayon Blends: Perfect for a softer drape, they bring elegance to any tent dress pattern and wrinkle less than linen.
- Knits: Beginner-friendly with forgiving texture variety, they stretch and don’t fray—ideal for easy sewing.
To guarantee comfort, consider fabrics with moisture-wicking properties.
Avoid heavy or overly stiff fabrics.
A lightweight material ensures your dress sways effortlessly, creating that iconic tent-dress flow!
Seasonal Fabric Options for a Tent Dress
When seasons shift, so should your fabric choices for a tent dress.
Lightweight cotton voile brings airy Spring Colors, while rayon challis guarantees Summer Breathability.
Autumn Textures like chambray add style without fuss, and wool crepe delivers Winter Warmth.
For Year-Round Versatility, try silk blends—classy yet adaptable.
Sustainable fabrics, like Tencel or peace silk, are ecofriendly and chic.
Consider cotton voile options for your next spring dress.
Here’s a quick guide:
| Season | Fabric | Key Benefit |
|---|---|---|
| Spring | Cotton Voile | Light and colorful |
| Summer | Rayon Challis | Cool and breathable |
| Winter | Wool Crepe | Warm and stylish |
Fabric Weight and Drape for a Comfortable Fit
Fabric weight and drape can transform how your tent dress feels and moves.
Choosing comfortable fabrics guarantees breathability, movement, and flow. Lightweight to medium-weight fabric types work best for the A-line silhouette.
Hang fabric over your hand to test its drape before cutting.
- Lightweight (2-6 oz): Breathes well, excellent flow.
- Medium-light (4-7 oz): Balances structure, comfort.
- Medium (7-11 oz): Adds body for cooler days.
- Avoid stiffness: Preserve natural movement.
- Silhouette Impact: Flowy fabric enhances shape effortlessly.
Focus your fabric selection on graceful movement and comfort.
Sustainable Fabric Options for a Tent Dress
Looking for fabric that’s kind to the planet and perfect for a tent dress? Sustainable fabrics are your answer! Besides feeling amazing, they also have an eco-friendly edge.
Here’s a quick guide to some standout options:
| Fabric Type | Why It’s Great | Best For |
|---|---|---|
| Tencel™ Lyocell | Soft, breathable, drapes beautifully | Flowy, all-weather dresses |
| Organic Cotton | Classic, comfortable, and durable | Everyday casual wear |
| Recycled Fabrics | Reduces waste, often uses plant-based dyes | Unique, eco-friendly styles |
| Peace Silk | Luxurious, ethical sourcing | Special occasions |
When picking your fabric, think about how it will drape and last. Ecofriendly fabrics like Tencel and organic cotton are versatile, while peace silk makes any dress feel couture. Sustainable fabrics make your dress not just stylish but also meaningful!
Sewing a Tent Dress From a Pattern
You’re ready to bring your tent dress to life, and it’s easier than you think!
With your fabric cut and pattern prepped, sewing everything together will feel like piecing a puzzle—fun and satisfying.
Cutting Out Fabric Pieces
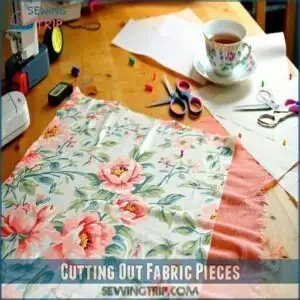
Cutting fabric is a fun but precise step in sewing your tent dress, so let’s make it count! Start by laying your fabric on a flat surface, following the fabric grain and aligning the pattern pieces with the arrows—this makes your dress flow beautifully.
Use sharp cutting tools like fabric scissors or a rotary cutter for clean edges. Lay your fabric as instructed, often requiring unique folding techniques, like diagonals for extra flare. Don’t rush—double-check your measurements. Mistakes can’t be undone once the fabric is cut!
Before you snip, transfer all markings like darts or notches with marking methods: tailor’s chalk, washable pens, or even pins for quick reference. Next, keep things smooth and steady—grab a cup of tea, turn on some music, and focus!
- Tips for clean cuts:
- Long, scissor strokes
- Layer fabric carefully
- Bright workspace to spot details
Sewing Seams and Adding Sleeves
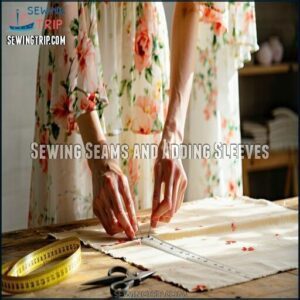
Now it’s time to bring your tent dress pieces to life! Start with the seams by pinning the fabric pieces together, keeping the right sides facing each other. Verify your seam allowances are neat and even by sticking to a 1/2-inch margin.
Ready? Here’s your sewing checklist:
- Backstitch for strength – It keeps your seams secure and prevents unraveling.
- Press seams open – Consistent pressing reduces bulk and gives your dress that professional finish.
- Match notches precisely – Especially important for sleeve insertion to avoid puckering.
For additional help, consider sewing seams tutorial resources.
For a simple cap sleeve, align it with the armhole, pin carefully, and use secure stitching. Keep calm and sew confidently—you’re almost there!
Finishing The Neckline and Hem
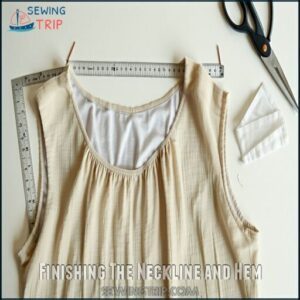
Once your seams are secure, it’s time to perfect the edges! For a polished neckline, use a 2-inch bias binding strip. Fold it in half, pin to your neckline’s raw edge, and sew carefully. Flip it inward, then edge stitch for clean finishes that look refined, not homemade.
When it’s hemming time, try a baby hem. Fold the bottom edge twice—½ inch each time—press with an iron (because professional pressing matters!), and sew evenly.
Want a stylish twist? Experiment with decorative edges for fun flair. These small details, like hemming and binding, transform your dress into a show-stopper!
Adding Pockets and Embellishments
Transform your tent dress pattern into a masterpiece by adding pockets and embellishments! These details make your dress practical and one-of-a-kind. Side-seam pockets stay discreet, patch pockets add personality.
For embellishments, don’t shy away from ribbons, appliqué, or fun buttons—they’re like jewelry for your dress! Position your pockets about 7 inches below the armholes for easy access (who doesn’t love that?). You can match your pocket fabric or go bold for contrast.
Pocket placement is key for both aesthetics and function.
- Pocket Styles: Side-seam for hidden, patch for bold looks
- Embellishment Types: Ribbons, buttons, appliqué
- Placement Ideas: 7 inches below armholes
- Fabric Interaction: Match or mix pocket fabric
- Closure Options: Add buttons or zippers for flair
Beginner-Friendly Dress Sewing Patterns
You don’t need to be a sewing pro to make a beautiful dress. Beginner-friendly patterns keep things simple, so you can focus on learning the basics and having fun.
Easy Dress Sewing Patterns Ranked
If you’re just starting out with sewing, these four easy dress patterns will boost your confidence while keeping things fun:
- Tilly and the Buttons Stevie: This beginner-friendly tunic uses only 2-3 pattern pieces—no stress with closures!
- Threads Monthly Simple Shift: A quick sew for lightweight fabrics like cotton or linen.
- Georgia T-shirt Dress: Learn basic seams with this oversized tee-inspired design.
- Orchard A-line Dress: Simple straps and easy hems make it ideal for summer wear.
Try them for quick sewing wins and style versatility! Many resources offer dressmaking pattern options for beginners.
Features of a Beginner-Friendly Dress Pattern
Let’s explore why a tent dress pattern is perfect for your beginner sewing project. It’s all about keeping things simple and stress-free with features that help build your confidence.
Look for a pattern with minimal pieces—fewer pieces mean less cutting and stitching! A tent dress usually has just 2-4 main parts, making it an easy dress pattern to sew. A forgiving fit is another must-have. Its loose, flowy shape guarantees you don’t have to stress about precise sizing.
Combine that with clear instructions, ideally with illustrations or video tutorials, for a smooth sewing experience. Here’s how features stack up:
| Feature | Benefit | Example |
|---|---|---|
| Minimal Pieces | Faster assembly | 2-4 pieces per dress |
| Clear Instructions | Easier to follow steps | Illustrated guides |
| Forgiving Fit | Reduces sizing challenges | Loose, flowy style |
| Simple Seams | Hassle-free stitching | Straight seams only |
Stick to cotton fabric for stability, skip zippers, and enjoy learning!
Essential Sewing Techniques for Beginners
Sewing your first dress? Start with these beginner sewing skills to make your tent dress pattern a breeze:
- Seam Basics: Practice straight and zigzag stitches like you’re doodling on fabric—it’s simple, and scrap fabric works great for this.
- Fabric Handling: Treat your fabric gently—pin it securely, cut steadily, and guide it through the machine without tugging (you’re not wrestling it).
- Pressing Matters: Use your iron! It’s not just for touch-ups—press each step as you sew. Crisp seams and hems will give your dress that professional finish.
Tips for Making a Pattern More Beginner-Friendly
Making a tent dress pattern beginner-friendly is simpler than you think! Break complex steps into bite-sized tasks and use simplified instructions to stay on track.
Try fabrics like stable cotton—it’s easier to manage. Add visual aids like color-coded lines for alignment or arrows to guide you.
Design patterns with minimal pieces and use a larger seam allowance to fix mistakes easily. Follow a sewing tutorial if you’re unsure; step breakdowns and tips for sewing for beginners make a world of difference.
| Tip | Why It Works |
|---|---|
| Stable cotton fabric | Prevents frustrating fabric slipping |
| Large seam allowance | Easier to fix fit errors |
| Color-coded markers | Tracks pattern alignment easily |
| Small pattern pieces | Reduces overwhelming complexity |
| Online tutorials | Visual guidance for tricky sections |
Pattern Adjustments and Fitting
Getting the right fit for your tent dress doesn’t have to be tricky if you know what to adjust.
You’ll tweak the pattern to match your body shape, and before you know it, you’ll have a dress that’s comfy and flattering!
Understanding Your Body Type
Understanding your body shape is key to nailing a flattering tent dress pattern.
The Aline design works for everyone if you consider your unique silhouette while planning. Here’s a quick Body Shape Guide:
- Apple shapes: Opt for loose upper fits and a slightly tapered hemline for balance.
- Hourglass figures: Keep that breezy silhouette but add soft waist definition.
- Pear shapes: Enhance flow by flaring gently from shoulders to accommodate wider hips.
Take accurate measurements—focus on your bust, waist, and hips. Confidence comes from proportional dressing, so match patterns to your exact sizing.
Avoid fitting issues later by checking sizes carefully. A perfect tent dress is just good planning (and a few tweaks) away!
Adjusting The Pattern for a Perfect Fit
If your tent dress pattern doesn’t feel just right, tweaking a few areas can make a huge difference.
Start with bust adjustments—add 1 inch for a relaxed fit or reduce slightly for a sleeker silhouette.
Pay attention to shoulder slope by adjusting angles if the fabric pulls or gapes.
For length alterations, measure from your shoulder to the desired hemline, adding 1 inch for hemming.
Fix torso length by adding ease for a looser fit or shrinking lighter areas near curved parts.
Sl are neck shapings Allignownie properly
Customizing The Pattern for Style
Once your tent dress pattern fits perfectly, it’s time to make it uniquely yours.
A few tweaks can turn a simple dress into a stylish masterpiece. Let your creativity shine with these pattern customization options:
- Sleeve Options: Try cap, bell, or no sleeves for summer flair.
- Neckline Changes: Experiment with V-necks, boat necks, or even add a classic collar!
- Length Adjustments: Go for a casual mini, breezy midi, or dramatic maxi.
- Adding Details: Add flair with pockets, chic color blocking, or playful trims.
Dive into these variations and discover endless dress design inspiration!
Troubleshooting Common Fitting Issues
Fit issues can sneak up even with a flowy tent dress pattern, and solving them is easier than you’d think.
Is fabric pulling at the bust? Widen the front panel by an inch. Shoulder width off, or the dress slides forward? Try tweaking the neckline depth.
Armhole gaping or length issues? A quick dart or side panel adjustment will do wonders. If the waist feels too billowy, add soft darts to shape it up.
Remember, fabric choice changes how your sewing pattern fits—light fabrics flow, stiffer ones need adjustments. Mistakes happen, but troubleshooting fitting issues is like finding the perfect puzzle piece—totally satisfying! Don’t skip your measurements! It’s about finding the perfect fit.
Styling and Accessorizing Your Tent Dress
Your tent dress can go from cozy to chic with the right styling tricks and accessories.
Add a belt, throw on some sneakers, or pair it with bold jewelry to make it uniquely yours.
Casual Styling Ideas
Casual outfits built around a tent dress pattern are all about effortless charm. This easy dress excels in blending comfort and style, making it an ideal pick for laid-back days.
Ready to dress it down and step out?
- Pair your tent dress with Everyday Shoes like white sneakers, and toss on a denim jacket for a polished, relaxed vibe—great for running errands or farmer’s markets.
- For sunny days, opt for Layering Options like a light cardigan, sandals, and maybe a floppy hat to dial up those outdoor-friendly feels.
- Keep things interesting by cinching the flow with a belt. Belted Styles add a hint of shape while keeping things breezy.
- Add a pop of Casual Jewelry—think simple hoops or layered charm necklaces—and grab a Daytime Bag, like a tote, to tie it all together.
Many styles, including the tent dress, are considered casual and versatile.
Dressing Up for Formal Events
For formal events, give your tent dress a glamorous twist with elegant fabrics like satin, velvet, or silk charmeuse.
These luxe materials create formal silhouettes that feel both sophisticated and comfortable. Deep jewel tones or metallic accents are perfect for evening wear, blending boldness with class.
Hemlines also play a huge role—try floor-length for black-tie affairs or a dramatic high-low cut for cocktail parties. Press seams well and finish edges neatly for that red carpet shine.
Here’s a quick fabric guide:
| Fabric | Uses | Occasions |
|---|---|---|
| Velvet | Dramatic & textured | Evening events |
| Satin | Smooth & shiny | Weddings, galas |
| Metallic Brocade | Structured & bold | Fancy cocktail parties |
Your tent dress pattern truly shines when sewn with care!
Accessorizing for a Personal Touch
Now that you’ve mastered formal occasions, let’s add that special flair that makes your tent dress uniquely yours!
Your handmade creation deserves accessories that showcase your personality. The flowing silhouette of a tent dress provides the perfect backdrop for both subtle and bold styling choices.
- Belt magic: Try a slim leather cord to hint at a waistline or a wide fabric sash to create dramatic silhouettes without compromising comfort
- Jewelry pairings: Dainty chains work for everyday wear, while chunky statement pieces transform your dress for evening outings
- Scarves and wraps: Loop a colorful silk square at your neck or drape it over shoulders when evenings turn cool
- Bags and shoes: Match a woven crossbody with flat sandals for running errands, or grab a clutch and ankle boots for dinner plans
Remember, the right accessories can take your tent dress from "just finished sewing" to "where did you buy that amazing outfit?
Mixing and Matching With Other Pieces
Your tent dress can transform into five different outfits with smart mixing and matching. Think of it as your wardrobe’s Swiss Army knife!
Experiment with layering options like throwing a cardigan over your tent dress pattern in fall. Try seasonal combinations—pair with sandals in summer, boots in winter. Your simple dress pattern becomes a canvas for outerwear choices, shoe pairings, and jewelry styles that reflect your personality.
"My tent dress works harder than I do!" as one sewing enthusiast joked, highlighting the versatility of the dress in creating various outfits with different outerwear choices.
Variations and Inspiration for The Tent Dress
You’ll transform your basic tent dress into something uniquely yours with just a few creative tweaks to the pattern, fabric choice, or finishing touches.
Whether you’re making a breezy summer version with colorful trim or a cozy fall edition with pockets deep enough for your phone and snacks, the possibilities are as endless as your imagination.
Pattern Variations for Different Seasons
Throughout the year, your tent dress pattern can transform with the seasons, much like a chameleon adapting to its environment.
When summer calls, reach for lightweight cotton or linen to create breathable silhouettes that keep you cool. Winter fabrics like ponte knits and wool blends maintain the dress’s flowy charm while providing necessary warmth. Your fabric choices determine whether your creation becomes a breezy summer companion or a cozy winter staple.
- Summer silhouettes shine with sleeveless cuts, shorter hemlines, and pastel seasonal hues
- Winter versions benefit from long sleeves, thermal linings, and rich jewel tones
- Fall adaptations embrace medium-weight fabrics in amber and burgundy with festive patterns
- Spring variations bloom with floral prints and three-quarter sleeves for perfect layering options
Smart sleeve variations create dramatic seasonal transformations – from cap sleeves that free your arms in summer to bell designs that add winter warmth. For casual styling or formal events, seasonal adjustments guarantee your tent dress remains a year-round favorite.
Inspiration From Fashion Trends
Looking beyond seasons, fashion trends offer fresh ideas for your tent dress pattern. The 2025 runway inspiration shows these loose, flowing dresses making a comeback with both vintage influence and modern twists.
Street style stars and celebrities like Lady Gaga are wearing tent dress styles that mix comfort with bold statements.
Take cues from trend forecasting by incorporating:
- Dramatic sleeve variations that add flair
- Nature-inspired prints in earthy colors
- Sustainable fabrics that tell a story
- Unexpected texture combinations for visual interest
Your dress design can blend these fashion inspirations for a one-of-a-kind creation. Who knew a simple shape could be so stylish?
Creating a Capsule Wardrobe
Simplicity stands at the heart of a well-planned capsule wardrobe, with your tent dress serving as a versatile cornerstone piece.
Turn your tent dress pattern into the foundation of your Wardrobe Color Palette by creating two versions: a neutral for everyday wear and a patterned option that adds personality. These Investment Clothing Items work harder than store-bought alternatives because you’ve customized them perfectly to your measurements.
Your tent dress adapts effortlessly through seasons—pair with sandals in summer or layer over turtlenecks with boots when temperatures drop. For Minimalist Outfit Ideas, add a belt to define your waist or keep it flowing for comfort-first days.
Mix up your Versatile Accessory Choices to transform the dress for different occasions. A simple scarf, statement necklace, or structured blazer creates entirely new Seasonal Capsule Pieces without additional sewing!
Upcycling and Repurposing Old Clothes
From festival tents to forgotten garments, your closet holds untapped potential for DIY fashion.
Transform textile waste into stunning tent dresses with these sustainable sewing techniques:
- Convert abandoned festival tents into unique dresses, following the example of designers like Alice Bowen-Churchill who’s turning 250,000 discarded tents into wearable art
- Repurpose thrifted sheets in seasonal colors, adding just 2 inches per side to your chest measurement for a flattering fit
- Disassemble old shirts to create tent dress components, using sleeves and body sections creatively while preventing fraying
- Transform vintage garments like men’s suits with minor alterations that dramatically change their appearance
Instead of clothing swaps, try refashioning ideas that give your old clothes new purpose, reducing waste while creating ecofriendly, one-of-a-kind pieces that reflect your style.
Sewing a Tent Dress From Fabric Squares
You’ll transform simple fabric squares into a flowing tent dress with just a few folds and seams, making this project perfect even for sewing newbies.
The magic happens when you position the squares at angles, creating that signature tent shape without the fuss of complex patterns, and this is where the magic happens.
Measuring and Cutting Fabric Squares
The DIY square method is a genius approach to creating your tent dress with minimal waste.
Start with two identical fabric squares that will transform into your flowy masterpiece.
| Square Size | Fabric Type | Cutting Tool |
|---|---|---|
| 45" × 45" | Light Cotton | Sharp Scissors |
| 50" × 50" | Linen Blend | Rotary Cutter |
| 60" × 60" | Rayon | Fabric Shears |
| 40" × 40" | Knit Jersey | Pinking Shears |
| 55" × 55" | Tencel | Pattern Weights |
Measure twice, cut once! Mark your squares clearly with chalk or fabric pencil, adding a ½-inch seam allowance all around for proper fabric alignment and cutting precision to ensure a minimal waste approach.
Folding and Marking The Fabric
With your fabric squares ready, let’s turn them into a beautiful tent dress with some clever folding!
Start by spreading your fabric on a clean, flat surface. The magic happens when you fold it diagonally from corner to corner. This diagonal folding creates that gorgeous tent dress flare we’re after.
Grab your marking tools and add these important reference points:
- Mark the neckline about 8 inches from the folded corner using chalk or pins
- Draw smooth armhole curves 7 inches down from the top fold
- Add your seam allowances (typically 5/8 inch) on all edges
- Place notches at key alignment points for easier assembly later
Always check your fabric grain – it should run parallel to your fold for the best drape. Proper marking now means less fixing later!
Double-check all measurements before cutting to confirm your finished dress will fit just right.
Sewing The Dress Together
With your marked fabric squares in hand, it’s time to bring your tent dress to life!
| Sewing Stage | Key Action | Time Required | Joy Factor |
|---|---|---|---|
| Join shoulders | Match notches carefully | 10 minutes | ★★★ |
| Attach sleeves | Pin before sewing | 15 minutes | ★★★★ |
| Finish neckline | Apply bias binding | 20 minutes | ★★★★★ |
| Close side seams | Sew from armpit to hem | 10 minutes | ★★ |
Use a 1/2-inch seam allowance for shoulders and 3/8-inch for sleeve attachment.
Press each seam as you go—even seasoned seamstresses know this trick makes homemade look store-bought!
Hemming techniques vary, but a narrow double-fold works perfectly for tent dress patterns.
Tips and Tricks for Sewing a Tent Dress
You’ll find these simple tent dress tricks will save you time and prevent those "why didn’t I think of that" moments during your sewing project.
From pressing seams properly to using the right needles for your fabric, these practical tips will help you create a flowy masterpiece that doesn’t look homemade.
Common Mistakes to Avoid
Sewing your tent dress shouldn’t lead to a seam-ripped mess! Let’s tackle the most common sewing mistakes that can turn your project into a frustrating experience.
First up: uneven hems happen when you skip measuring or rushing through cutting. Always use sharp scissors and check your measurements twice.
Poor fit often stems from ignoring fabric grain lines. Your tent dress needs proper alignment to drape correctly. When placing pattern pieces, follow the arrows – they’re not just pretty decorations!
Fabric fraying drives beginners crazy, especially with lightweight materials. Edge-finish your pieces before assembly, and you’ll avoid those annoying threads everywhere.
Here’s a beginner sewing golden rule: never skip basting stitches for tricky areas. Think of them as training wheels for your sewing techniques. Incorrect seams usually result from sewing too fast or using the wrong stitch length.
These common sewing mistakes are easily avoidable with patience and proper preparation. Your flowy tent dress deserves better than skipped seams or wonky hems!
Tips for Working With Different Fabrics
Before diving into fabric selection, let’s explore how to handle different materials for your tent dress. Each fabric choice presents unique challenges and opportunities for creating your perfect flowy dress.
Working with different fabrics becomes easier when you:
- Pre-wash fabrics to prevent shrinkage nightmares later
- Keep fabric grain aligned for better drape and fit
- Use tissue paper when cutting slippery fabrics like silk
- Try eco-friendly fabric options for sustainable dresses
- Test pressing techniques on scraps first
Stabilizing seams prevents stretching on lightweight cottons. For knits, remember the golden rule: stretch needles are your best friends. When selecting sustainable fabrics, linen behaves beautifully with proper pressing techniques. Slippery silks? They’ll behave like well-trained pets with paper beneath while cutting. Heavier weaves need wider seam allowances – consider them the seat belts of sewing. Smart fabric handling transforms your tent dress from homemade to handcrafted.
Pattern Hacks for a Professional Finish
Want your tent dress to look like you bought it from a fancy boutique? Start with clever seam finishes—French seams and Hong Kong finishes are your secret weapons.
For those tricky curved edges, master stay-stitching to keep everything smooth. Beautiful necklines need bias binding, while pocket placement demands precision.
Don’t forget sleeve refinement and hem perfection with horsehair braid for that flawless drape. Many designers have had an impact on trends.
These professional pattern hacks transform basic sewing techniques into dressmaking magic.
Frequently Asked Questions (FAQs)
How many easy dress sewing patterns are there?
A whopping 50 easy dress sewing patterns await you.
You’ll find printable PDFs with step-by-step instructions for women and kids.
They’re perfect for beginners and include styles from casual A-lines to fancy formal wear.
Can a beginner make a dress from these patterns?
You’ll find patterns specially designed for beginners with clear instructions and forgiving fits.
They typically have fewer pieces, simpler construction techniques, and don’t require advanced skills.
You can definitely start your sewing journey here!
Where can I find free dress sewing patterns?
You’ll find free dress sewing patterns on websites like Craftsy, AllFreeSewing, and Mood Fabrics.
Check Pinterest for curated collections, and don’t forget to look at sewing blogs and YouTube channels for downloadable PDFs, which can include free resources.
Are dress sewing patterns a good idea?
Like a roadmap through unfamiliar terrain, dress sewing patterns guide you confidently through the creative process.
They’re a fantastic idea for beginners and experienced sewers alike, saving you time and preventing costly mistakes.
What are the best striped dress tutorials?
Try Pattern Emporium’s "Go With The Flow" tent dress tutorial for striped fabrics—it’s perfect for beginners.
You’ll love Sinclair patterns’ Vera A-line dress tutorial too, especially their no-burrito facing method that makes striped linen shine!
Are there free dress patterns for beginners?
Just as a gardener finds free seeds to grow beautiful flowers, you’ll discover plenty of free dress patterns online perfect for beginners.
Many websites offer printable PDFs with step-by-step instructions for various styles.
What types of dress tutorials are available?
You’ll find dozens of dress tutorials ranging from beginner-friendly shift dresses to elegant wedding gowns.
Many include step-by-step videos, printable patterns, and specialized guides for different body types and skill levels.
They also provide step-by-step videos.
How do you make a plus-size dress?
Take accurate measurements of your bust, waist, and hips.
Choose a pattern with size inclusivity, add strategic darts or panels for shape, and make certain deeper armholes for comfort.
Don’t forget ample ease for movement.
Are there any free dress sewing patterns for beginners?
You’ll find many free dress patterns perfect for beginners online.
Download printable PDFs for women and kids at various skill levels, including A-line, maxi, and tent dress options to practice your sewing skills.
Can a beginner make a dress?
You can definitely make a dress as a beginner.
Start with simple patterns like tent dresses that don’t require zippers or buttons.
With patience and basic sewing skills, you’ll create something wearable and lovely.
Conclusion
Now you’re ready to tackle your tutorialstent dress pattern with confidence! Your simple rectangle transforms into a stylish, comfortable garment that adapts to any season or occasion.
You’ve learned how to measure correctly, choose the right fabric, and finish edges professionally. Don’t forget that secret hemming technique that makes all the difference!
When your friends ask where you got your gorgeous dress, you’ll proudly say, "I made it myself!" Happy sewing your tutorialstent dress pattern journey!

