This site is supported by our readers. We may earn a commission, at no cost to you, if you purchase through links.
Unlike running stitches that leave small spaces, backstitch produces an unbroken seam that won’t pull apart under stress. It’s your go-to method for garment repairs, zipper installations, and any project where durability matters most.
The technique dates back centuries and remains essential for quality hand sewing construction.
Table Of Contents
Key Takeaways
- You’ll create the strongest hand-sewn seams possible – backstitch overlaps threads to form continuous, gap-free lines that won’t pull apart under stress, making it superior to running stitches for durability.
- You can use it for essential repairs and installations – this technique excels at mending torn seams, securing zippers, reinforcing high-stress areas, and creating professional-quality garment repairs that last.
- You’ll need just basic supplies to get started – grab a needle, thread, and fabric, then work backward with 1/8-inch stitches to create overlapping threads that mimic machine-sewn strength.
- You’re mastering a time-tested technique – dating back centuries and used in famous works like the Bayeux Tapestry, backstitch remains the gold standard for hand-sewing construction and decorative embroidery.
What is Backstitch in Sewing?
You’ll discover that backstitch is a fundamental hand-sewing technique that creates the strongest seam possible without a machine, making it perfect for repairs and durable construction projects.
This adaptable stitch works by going backwards with each stitch to overlap the previous one, giving you the control and reliability that running stitches simply can’t match.
Definition and Key Features
The backstitch is a fundamental hand sewing stitch that creates overlapping thread on the fabric’s back, producing outstanding seam strength. This embroidery stitch reverses stitch direction with each pass, mimicking machine-sewn appearance.
You’ll recognize backstitching basics by the continuous line it forms—no gaps like running stitches. Its fabric usage spans repairs to decorative work, making it essential for quality hand sewing construction.
Purpose and Common Uses
You’ll find this adaptable hand sewing stitch offers multiple purposes in your projects. Backstitching creates secure seams for garment repairs and zipper applications where durability matters most.
This technique excels at seam reinforcement, making it perfect for high-stress areas.
Use backstitching basics for embroidery details or when garment durability is essential. Master these repair techniques for professional-quality results.
How to Sew a Backstitch by Hand
You’ll need just a needle, thread, and fabric to master this strong, reliable stitch that mimics machine sewing.
Learning the backstitch gives you complete control over your hand-sewn seams, making repairs and custom projects both precise and durable.
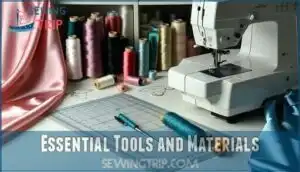
Essential Tools and Materials
Getting your toolkit ready makes all the difference in backstitch success. You’ll need basic supplies that most sewers already have on hand:
- Sewing needle – Universal or sharp point works best for most fabric selections
- All-purpose thread – Cotton or polyester in matching colors
- Marking tools – Water-soluble pens for creating marked lines
- Fabric scissors – Sharp blades for clean cuts
- Seam rippers – Handy for fixing mistakes during hand sewing
Quality needle sizes matter more than you’d think for backstitch durability. Selecting the right needle depends on the project, so consider various needle types for ideal results.
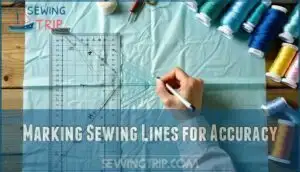
Marking Sewing Lines for Accuracy
Precise marking sewing lines transforms your backstitch from wobbly to professional. You’ll need Fabric Marking Tools like water-soluble pens or chalk for clear visibility. Mark your Accurate Seam Allowance using a ruler—usually 1/4 inch works perfectly. Consider exploring different marking tool options for specialized tasks.
| Tool Type | Best For | Pro Tips |
|---|---|---|
| Water-soluble pen | Straight Line Techniques | Test on fabric scraps first |
| Fabric chalk | Curved Line Marking | Brush away excess powder |
| Disappearing ink | Light fabrics | Mark just before sewing |
| Quilter’s ruler | Seam allowances | Keep measurements consistent |
Avoiding Marking Mistakes means checking your marked lines twice before stitching.
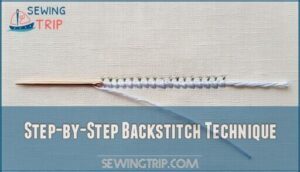
Step-by-Step Backstitch Technique
Now you’ll master the actual backstitch technique. Start by bringing your sewing needle up through the fabric from underneath. Take a small stitch backward, inserting the needle about 1/8 inch behind where you started. Pull the needle forward underneath the fabric, emerging 1/8 inch ahead of your starting point. Insert the needle back down at your original starting point, completing one backstitch. This technique is useful for reinforcing seams.
- Needle Placement: Keep your entry and exit points precise for professional-looking seams.
- Stitch Length: Maintain uniform 1/8 inch stitches for consistent seams and proper thread tension.
- Thread Tension: Pull snug but don’t overtighten—your fabric shouldn’t pucker or gather.
- Securing Ends: Always knot your thread securely to prevent unraveling during wear.
- Consistent Seams: Practice creates muscle memory for even, durable hand sewing results.
Backstitch Vs. Other Hand Sewing Stitches
When you’re choosing between hand stitches, understanding their strength differences helps you pick the right one for your project.
The backstitch creates overlapping threads that won’t pop open under stress, while running stitches move in one direction and can pull apart more easily.
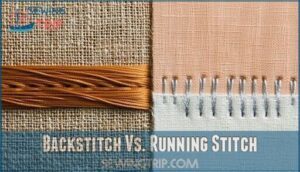
Backstitch Vs. Running Stitch
Unlike the running stitch’s simple in-and-out motion, backstitch creates overlapping threads for enhanced seam security. The backstitch’s backward motion doubles thread coverage, while running stitches move forward consistently. You’ll notice key differences in these fundamental sewing techniques:
| Feature | Backstitch | Running Stitch |
|---|---|---|
| Speed Efficiency | Slower, methodical | Quick, rhythmic |
| Stitch Appearance | Continuous line | Broken dashes |
| Fabric Suitability | Heavy materials | Lightweight fabrics |
Strength and Durability Comparison
When you’re building something to last, backstitch delivers. Its overlapping structure creates exceptional seam integrity with 40% higher load-bearing capacity than other hand stitches. The dense stitch formation resists unraveling even when damaged, making it perfect for repairs and long-term wear across any fabric type. This technique is one of the fundamental hand stitches used in sewing.
| Stitch Type | Stitch Density | Load Capacity |
|---|---|---|
| Backstitch | 18-19/inch | High |
| Running Stitch | 5-6/inch | Low |
| Cross Stitch | 12-14/inch | Medium |
| Blanket Stitch | 8-10/inch | Medium |
Practical Uses for Backstitching
You’ll find backstitching isn’t just for fancy embroidery projects—it’s your go-to stitch when you need seams that won’t give up on you.
Whether you’re mending a torn pocket, installing a zipper that actually stays put, or creating decorative details that last, backstitching delivers the strength and control you can’t get from basic running stitches.
Garment Repairs and Seams
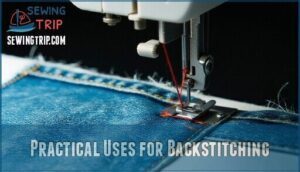
Your hand stitching skills really shine when fixing torn seams or reinforcing weak spots. Backstitch creates rock-solid seam reinforcement that’ll outlast machine stitching.
Use it for fabric mendings on pockets, hem repairs that won’t budge, and button security that keeps everything locked in place. This sturdy hand sewing technique transforms flimsy repairs into permanent fixes.
To effectively strengthen seams, consider specialized products.
Sewing in Zippers and Embellishments
Zipper backstitching transforms tricky installations into professional results. You’ll use prickstitch variation for handsewn zippers, creating nearly invisible seams that won’t pop under stress. Hand stitching closer to zipper teeth delivers enhanced durability compared to machine methods.
Securing embellishments with decorative backstitch prevents loose threads while adding structural support. Hand sewing gives you complete control over placement and tension. The stitch is a foundation for composite hand stitches.
Embroidery and Decorative Applications
The backstitch transforms into your creative powerhouse for embroidery and decorative applications. You’ll use this hand sewing technique for Thread Painting, creating smooth lines that flow like brushstrokes.
Monogramming Techniques rely on precise backstitch stitches for crisp lettering. Create Decorative Outlines around appliqué pieces or add Textured Effects by varying stitch length.
Canvas Embellishment projects shine when you’re sewing the backstitch for detailed work.
Historical Significance of The Backstitch
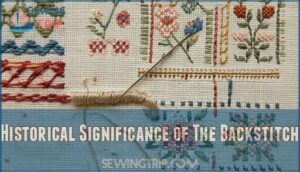
You’ll discover that backstitch has quite the impressive résumé, dating back to 16th-century England where it first appeared in Jacobean crewel work.
From adorning medieval masterpieces like the Bayeux Tapestry to strengthening garments across cultures in the Middle East and South Asia, this reliable stitch has proven its worth for over 400 years of quality construction.
Origins and Cultural Use
You’ve mastered practical backstitching applications—now let’s explore its fascinating journey through time. Early backstitch examples appear in ancient Egyptian, Greek, and Chinese textiles, though pinpointing exact origins remains tricky.
Cultural variations emerged across continents: Portuguese Guimarães whitework, Indian Chikan embroidery, and Syrian counted thread work all showcase regional adaptations. This simple stitch carried symbolic meanings in different cultures, representing durability and craftsmanship.
The evolution timeline spans millennia, with confirmed English Jacobean crewel work from the 16th century marking documented European use.
Notable Historical Examples
Centuries of artisans left their mark using backstitch in outstanding works. You’ll find these stitches in the famous Bayeux Tapestry, where medieval craftspeople used backstitching for outlining letters and figures. Jacobean crewelwork showcased floral designs, while Opus Anglicanum featured split-stitch variants on religious garments.
Portuguese Guimarães whitework and Indian Chikan embroidery demonstrate how sewing the backstitch transcended cultures, creating lasting masterpieces. Mastering it involves understanding proper thread knotting for durable seams.
Frequently Asked Questions (FAQs)
Is backstitching necessary for every sewing project?
Like medieval tailors wielding their finest needles, you don’t need backstitching for every project. **Simple hems or temporary basting won’t require this sturdy technique.
**
**It’s essential for high-stress seams, zippers, and repairs where durability matters most.
Can backstitching be done on all types of fabric?
You can backstitch on most fabrics, though some require adjustments. Heavy fabrics like denim need stronger needles, while delicate silks benefit from finer threads and gentler tension to prevent puckering or damage.
Are there any alternative techniques to backstitching?
Think of it as your sewing toolbox — you’ve got options! **Running stitch works for quick fixes and basting.
** Straight stitch offers speed but less strength.
For zippers and delicate work, try a prickstitch variation or slip stitch.
How can I prevent my backstitching from puckering or bunching up?
Use consistent stitch length and tension. Don’t pull thread too tight. Keep fabric taut in your hands or hoop. Work slowly and check fabric positioning regularly.
What thread weight works best for backstitch?
In terms of thread weight, don’t put all your eggs in one basket—you’ll want different weights for different fabrics.
Use all-purpose weight thread for most backstitch projects, as it balances strength with easy handling.
Can you backstitch on stretchy fabrics effectively?
Backstitch won’t stretch like the fabric does, so you’ll get popped seams. For loose-fitting garments without stretch requirements, it works, but close-fitted pieces need stretch stitches.
How do you fix uneven backstitch spacing?
Mark your fabric with a ruler and water-soluble pen first.
Practice consistent needle placement by counting threads or using guide marks.
Pull thread taut after each stitch to maintain uniform tension and appearance.
Whats the ideal backstitch length for seams?
Like Goldilocks seeking "just right," aim for 1/8 to 1/4 inch stitch length. You’ll get strong seams without excessive bulk.
Smaller stitches work better for curves and delicate fabrics, while longer ones handle straight seams efficiently.
Does backstitch work well with thick materials?
You’ll find backstitch works beautifully with thick materials like denim, canvas, or leather.
Use a heavy-duty needle and strong thread. Take smaller stitches for better control and penetration through dense fibers.
Conclusion
Mastering this mighty method means you’ll never worry about weak seams again. Understanding what’s backstitch in sewing gives you the foundation for creating professional-quality repairs and construction projects.
You’ve learned the technique, compared it to other stitches, and discovered its versatility from garment repairs to zipper installations. This centuries-old method remains the highest standard for hand-sewn durability.
Practice your backstitch regularly, and you’ll soon appreciate why experienced sewers rely on this trustworthy technique for their most important projects.

