This site is supported by our readers. We may earn a commission, at no cost to you, if you purchase through links.
You’re basically hiding your stitches by following the natural depression created when seams are pressed.
This technique creates nearly invisible topstitching on the front while securing layers from behind.
It’s called "sewing in the ditch" because you’re literally stitching into the valley or "ditch" of existing seams.
The seam line acts as your guide, eliminating guesswork and creating professional results.
You’ll use this method to secure quilt bindings, anchor garment facings, or finish waistbands without visible stitching lines showing on the right side.
The magic happens when you match your thread color to your fabric—your functional stitching disappears completely.
However, mastering this technique requires understanding proper tension, specialized feet, and fabric preparation methods that can make or break your results.
Table Of Contents
- Key Takeaways
- Stitch in The Ditch Supplies
- How to Sew in The Ditch
- Benefits of Sewing in The Ditch
- Drawbacks of Sewing in The Ditch
- Tips for Successful Sewing in The Ditch
- Different Uses for Sewing in The Ditch
- Step-by-Step Guide for Sewing in The Ditch on Quilts
- Step-by-Step Guide for Sewing in The Ditch With Bias Tape
- Step-by-Step Guide for Sewing in The Ditch on Waistbands
- Decorative Options for Sewing in The Ditch
- Frequently Asked Questions (FAQs)
- Conclusion
Key Takeaways
- You’ll use a specialized stitch-in-the-ditch foot and matching thread to achieve invisible seam securing – this foot guides your needle precisely into the seam valley while matching thread makes your functional stitching disappear completely
- You’re stitching directly into existing seam grooves to secure fabric layers without visible topstitching on the front – this technique works by following the natural depression created when seams are pressed, creating nearly invisible results
- You’ll need proper fabric preparation with well-pressed seams to create clear ditches that guide your needle placement – poorly pressed seams shift during sewing and make accurate stitch-in-the-ditch work nearly impossible
- You can apply this technique to secure quilt bindings, attach waistbands, and anchor facings invisibly – it’s your go-to method whenever you need functional stitching that won’t show on the finished project’s right side
Stitch in The Ditch Supplies
You’ll need specific supplies to achieve professional-looking stitch in the ditch results. The right foot and thread selection make all the difference between invisible stitching and obvious mistakes.
Stitch in The Ditch Foot
A stitch in the ditch foot transforms your sewing machine into a precision instrument for seam precision.
The specialized foot cradles your seam perfectly, delivering flawless stitch placement every single time
This specialized foot features a central guide that cradles the seam’s ditch, ensuring perfect stitch alignment every time.
You’ll achieve superior fabric control compared to standard feet, making ditch quilting and sewing in the ditch effortless and accurate.
The correct usage of a stitch in the ditch foot relies on understanding the proper stitch foot techniques to optimize sewing results with accurate methods.
Stitch in The Ditch Thread
Thread selection makes or breaks your ditch sewing success. Choose thread that matches your fabric’s dominant color for invisible results.
Clear thread works wonders on multicolored fabrics but can be tricky to handle. Polyester thread offers strength and durability, while cotton thread provides better stitch quality on natural fabrics.
Proper tension control prevents puckering and guarantees smooth stitches.
Mastering the hand stitching technique is essential for achieving professional-looking results in sewing in the ditch.
How to Sew in The Ditch
Now that you’ve gathered your supplies, you’re ready to learn the actual technique.
Sewing in the ditch might seem tricky at first, but with these three simple steps, you’ll master this professional finishing method in no time.
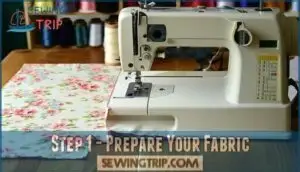
Step 1 – Prepare Your Fabric
Proper fabric preparation sets the foundation for clean, professional-looking stitches in the ditch. Your seam preparation directly impacts how easily you’ll navigate the ditch during sewing.
Perfect seam preparation creates the roadmap your needle follows for flawless ditch stitching results
Follow these fabric cutting and preparation steps:
- Press seams open or to one side using proper ironing techniques to create distinct valleys
- Select matching thread that blends with your fabric selection for invisible results
- Trim seam allowances evenly to reduce bulk at intersections
- Test stitch length on fabric scraps to confirm proper tension
Well-pressed seams create clear ditches that guide your needle placement. This sewing technique requires precise seam preparation – think of it as creating roadways for your stitches to follow.
Fabric seams that aren’t properly pressed will shift during sewing, making accurate stitch in the ditch work nearly impossible. Understanding fabric selection basics is vital for achieving professional results in sewing projects.
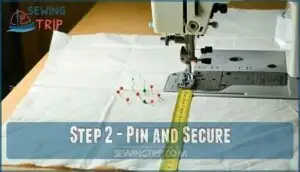
Step 2 – Pin and Secure
Now that your fabric’s ready, securing everything properly makes all the difference. Smart pinning techniques prevent frustrating fabric shifts during stitch in the ditch work. Position pins perpendicular to your seam line for maximum stitch control. This fabric preparation step sets you up for perfect seam alignment.
Here’s your pinning strategy for flawless sewing in ditch results:
- Pin Techniques: Place pins every 3-4 inches along the seam, avoiding thick intersections
- Secure Methods: Use fine pins that won’t distort fabric or catch your presser foot
- Remove pins just before your needle reaches them to prevent deflection
- Ditch stitching works best when fabric layers can’t wiggle around
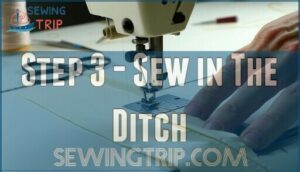
Step 3 – Sew in The Ditch
With your fabric properly pinned, slowly guide the needle into the seam valley. This sewing technique requires steady ditch alignment for ideal seam security.
Keep stitch control tight by sewing at reduced speed. Gently manipulate fabric to maintain perfect in the ditch positioning.
Watch your needle placement closely—ditch stitching demands precision for invisible results, ensuring steady control throughout the process.
Benefits of Sewing in The Ditch
Sewing in the ditch offers several practical advantages that make it a go-to technique for both beginners and experienced sewers.
You’ll discover how this method creates professional-looking results while solving common sewing challenges, making it a valuable technique to learn for achieving experienced outcomes.
Neat and Tidy Finish
One major advantage of stitch in the ditch technique is achieving professional seam finishing without visible stitches on your project’s right side.
This invisible approach creates clean, polished results that look store-bought.
Here’s what makes ditch stitching perfect for neat finishes:
- Invisible Hems – Secures fabric layers without surface stitching
- Edge Stitching – Maintains crisp seam lines and fabric folding
- Precision Stitching – Eliminates bulk and puckering
- Professional Results – Creates couture-quality seam finishing every time
Easier to See Where to Sew
Finding your mark becomes effortless when stitching in the ditch.
The visible seams create natural needle guidance that eliminates guesswork.
Your stitch alignment follows the existing groove, making precision automatic rather than challenging.
This sewing aid proves invaluable with intricate fabric choice patterns or delicate materials where traditional markings might show.
Whether you’re ditch quilting complex blocks or using a stitch in the ditch foot for garment construction, the seam’s valley acts like railroad tracks for your needle, ensuring consistent results every time, with precision automatic and natural needle guidance.
Prevents Shifting
Layer security transforms your sewing projects from amateur to professional.
When you stitch in the ditch, you’re creating fabric stability that locks seam allowances in place.
This technique provides superior seam security by catching both fabric layers without visible stitching.
Proper stitch alignment prevents bunching and maintains edge control throughout your project.
With careful tension management, ditch quilting eliminates shifting that can ruin your hard work, ensuring a professional finish with fabric stability.
Drawbacks of Sewing in The Ditch
While stitch in the ditch offers many advantages, it’s not without its challenges that can frustrate even experienced sewers.
You’ll encounter visibility issues with dark fabrics and risk damaging your needle if you’re not careful with your technique.
Difficulty Seeing on Dark Fabrics
Precision becomes your biggest enemy when working with dark fabrics during stitch in the ditch projects.
The seam lines virtually disappear against darker materials, making accurate needle placement feel like threading a needle in a blackout.
You’ll find yourself squinting and second-guessing every stitch.
Combat this visibility challenge with contrast threads that stand out against your fabric.
White or light-colored thread creates the visual reference you need.
Consider fabric markers to lightly mark your stitching path beforehand.
Proper lighting makes all the difference—position a bright lamp directly over your work area.
A stitch in the ditch foot with its center guide becomes invaluable for dark fabric tips.
The foot’s metal guide helps you stay on track when your eyes can’t distinguish the ditch.
Sewing aids like magnifying glasses attached to your machine provide extra needle visibility for precision work.
Additionally, understanding eye strain factors is essential to maintaining your vision health during long sewing sessions.
Potential Needle Damage
Sewing in the ditch poses real risks to your equipment that many sewers learn about the hard way.
Needle breakage becomes a frequent frustration when you accidentally strike thick seam allowances or intersecting layers.
These dense areas can bend or snap needles instantly, especially when using inappropriate needle sizes for the fabric weight.
Thread tension issues multiply when traversing through multiple fabric layers, causing skipped stitches or thread bunching.
Your machine works harder during stitch in the ditch projects, increasing wear on internal components.
Dull needles compound these problems, creating sewing errors and potentially causing fabric tears.
Thick quilted sections challenge even quality machines, leading to jams or inconsistent stitching.
Replace needles more frequently during ditch quilting sessions, and consider using walking feet to reduce strain.
Monitor your machine’s performance closely – unusual sounds or resistance indicate it’s time to stop and assess potential damage before continuing, to avoid sewing errors and ensure the longevity of your sewing equipment with proper maintenance and care.
Tips for Successful Sewing in The Ditch
Mastering stitch in the ditch takes practice, but these essential tips will help you achieve professional-looking results every time.
Focus on these three key techniques to transform your sewing from amateur to expert level.
Use a Short Stitch Length
In the context of stitch control, shorter is definitely better.
Reducing your machine settings to 1.5-2mm creates tighter, more secure seams that won’t unravel over time.
This adjustment dramatically improves seam accuracy while preventing fabric shifting during walking foot sewing.
Here’s why short stitch length transforms your sewing in the ditch results:
- Enhanced thread tension control – Smaller stitches distribute stress evenly across seam allowances
- Superior fabric guidance – Tight stitches grip materials firmly, preventing movement during stitching
- Reduced needle deflection – Less distance between entry points means straighter, more accurate seam lines
- Professional finish quality – Dense stitching creates smooth, durable seams that withstand washing and wear
Press Seams Open and Flat
Proper seam pressing transforms your stitching in the ditch results from amateur to professional.
Press seam allowances open completely, creating a flat surface without ridges or bumps.
This seam pressing technique prevents fabric puckering and makes certain your presser foot glides smoothly along the ditch.
Use steam and firm pressure during flat ironing for crisp seam allowances.
Effective pressing techniques eliminate bulk, making sewing in the ditch substantially easier and more accurate.
Utilize a Walking Foot
A walking foot transforms your stitch in the ditch experience from frustrating to flawless.
This specialized presser foot feeds both fabric layers evenly, preventing the dreaded fabric bunching that makes sewers want to throw their projects across the room. Utilizing proper walking foot techniques can substantially improve sewing results.
- Foot Alignment: Guide bar keeps your needle tracking perfectly in the seam valley
- Stitch Control: Even feed mechanism maintains consistent tension on all fabric layers
- Fabric Guidance: Prevents top layer from shifting during ditch quilting sessions
- Walking Technique: Grips fabric like tiny mechanical hands for precision sewing control
Different Uses for Sewing in The Ditch
You’ll discover that sewing in the ditch has three main applications that’ll make your projects look professionally finished.
Whether you’re securing facings on garments, attaching cuffs or waistbands invisibly, or finishing quilts with clean lines, this technique keeps your stitches hidden while providing strong, durable results.
This technique is useful for various applications, including securing facings on garments, attaching cuffs or waistbands invisibly.
Securing Facings on Garments
Mastering facings security through ditch stitching transforms your garment construction from amateur to professional. This invisible stitches technique anchors facings perfectly without disrupting your garment’s clean lines.
Position your needle precisely in the seam’s groove and sew slowly from the right side. The facing techniques you’ll master prevent those annoying roll-outs that plague homemade garments. Pull fabric gently while stitching to maintain smoothness and avoid puckering.
Key steps for flawless facing techniques:
- Match thread color to fabric for truly invisible stitches
- Pin through seam lines to secure facing placement before stitching
- Use short stitch length for stronger seam finishing
- Press seams flat before beginning your ditch stitching
- Test needle position with hand wheel before starting
Don’t stress about minor imperfections—even experienced sewists occasionally wander outside the ditch. Your topstitching mistakes won’t show on the finished garment.
Attaching Cuffs or Waistbands
Stitch in the ditch transforms waistband attachment from a tedious hand-sewing chore into a quick machine technique.
Position your waistband, then topstitch directly in the seam groove to catch the inner layer invisibly. This cuff attachment method works beautifully on dress pants and skirts.
Choose matching thread for fabric choice success. Maintain steady stitch control while sewing slowly.
These sewing tricks deliver professional waistband tips every time. Mastering sewing machine techniques is essential for achieving consistent results with this quick machine technique and professional waistband tips.
Finishing Quilts
Quilters discover that stitch in the ditch quilting creates invisible stabilization between quilt layers without disrupting patchwork designs.
This ditch quilting technique secures your quilt top, batting, and backing along existing seam lines.
You’ll achieve professional seam finishing while preserving fabric preparation work.
The quilting techniques hide stitches perfectly, making quilt binding attachment easier, and sewing in the ditch prevents layer shifting during use.
Step-by-Step Guide for Sewing in The Ditch on Quilts
Quilting in the ditch secures your quilt layers while keeping stitches nearly invisible on the front.
You’ll follow four main steps: joining patchwork pieces, layering with batting, switching to a walking foot for stitching, and finishing with binding, which involves complete concepts and requires attention to each step for a professional finish, using techniques like quilting.
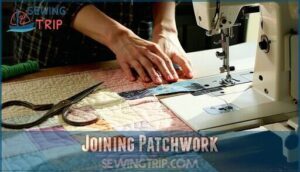
Joining Patchwork
The foundation of quality quilting begins with precise patchwork alignment and careful fabric selection.
Your seam allowance consistency determines how well pieces fit together. Choose complementary colors and consider pattern complexity before starting.
This quilting technique requires attention to detail—misaligned seams create visible bumps when you’re sewing in the ditch later, which is why seam allowance consistency is crucial.
Layering Batting
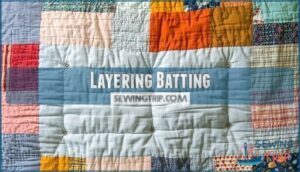
With your patchwork pieces successfully joined, you’re ready to create the quilt sandwich that makes stitch in the ditch quilting possible. This layering step determines your project’s final weight and warmth.
Start by selecting your batting based on these key factors:
- Batting Types – Cotton provides breathability and structure, while polyester offers loft and easy care
- Batting Density – Low-loft works best for detailed quilting, high-loft creates puffy warmth
- Quilt Weight – Heavier batting suits bed quilts, lighter options work for wall hangings
Cut your batting slightly larger than your quilt top to prevent shifting during the quilting technique. Place it between your pieced top and backing fabric, smoothing out wrinkles as you go.
The secret to successful ditch quilting lies in proper layering techniques – use safety pins every 4-6 inches or spray basting for securing layers without bulk.
Remember, batting that’s too thick makes quilting in ditch challenging, while too-thin batting won’t provide adequate structure for your finished quilt.
Changing Foot and Stitching
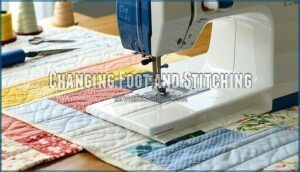
After layering your quilt sandwich, switch to a stitch in the ditch foot for precise needle positioning.
This specialized foot features a center guide that tracks seamlines perfectly.
Adjust your machine’s stitch length to 2.0-2.5mm and reduce thread tension slightly.
Lower feed dogs if your machine allows better control during ditch quilting.
| Setting | Recommended | Purpose |
|---|---|---|
| Foot Pressure | Medium-light | Prevents fabric distortion |
| Needle Position | Center guide | Follows seam accurately |
| Stitch Length | 2.0-2.5mm | Secure, invisible stitches |
| Thread Tension | Slightly reduced | Smooth stitch formation |
| Feed Dogs | Lowered (optional) | Enhanced manual control |
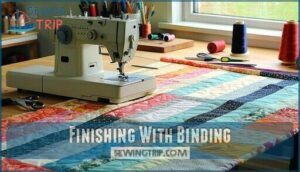
Finishing With Binding
After completing your quilting through all the seam lines, you’ll finish with binding to protect raw edges and create a polished look.
This final step transforms your quilt from a work-in-progress into a finished masterpiece.
Here’s how to finish with binding using stitch in the ditch:
- Prepare your quilt binding – Cut binding strips and join them with mitered corners for decorative binding that frames your work beautifully.
- Attach binding to front – Pin quilt binding along the front edge, matching raw edges, and sew with a consistent seam allowance.
- Fold and press to back – Wrap binding around to the quilt’s back, creating clean scalloped edges if desired, and press firmly.
- Stitch in the ditch – Using your stitch in the ditch foot, sew along the original seam line to catch the binding’s back edge invisibly.
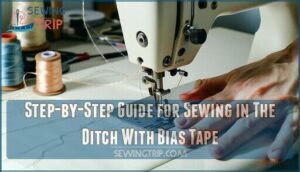
Step-by-Step Guide for Sewing in The Ditch With Bias Tape
Bias tape attachment becomes virtually invisible when you master the stitch in the ditch technique.
You’ll sew directly into the seam groove to catch the bias tape’s back edge without any visible stitching on the front.
Preparing Bias Tape
Before cutting bias, choose fabric that matches your project’s weight and care requirements.
Cut bias strips at a 45-degree angle for maximum flexibility around curves. Join strips with diagonal seams, then press open.
Fold the bias tape in half lengthwise, press, then fold raw edges toward the center crease and press again for crisp, even folds.
You can find tools to aid in bias tape preparation, which is crucial for complete concepts, and helps in achieving crisp, even folds, and working with bias tape.
Stitching and Clipping
When stitching bias tape, pin it carefully along the seam line before sewing your first pass.
Clip curved seams at regular intervals to prevent puckering, making small diagonal cuts into the seam allowance. This technique prevents bunching around corners and curves.
- Reinforcing seams: Use a stitch in the ditch foot for precise needle placement along the seam line
- Notching fabric: Make V-shaped cuts at sharp angles to reduce bulk and create smooth curves
Pressing Bias to Back
Pressing bias tape to the fabric’s back creates the foundation for invisible stitching methods that define professional sewing techniques.
- Steam press the bias tape flat against the fabric back, using even pressure to eliminate wrinkles and set the fold permanently.
- Work from center outward to prevent fabric bunching, especially important for curved edge challenges where bias binding techniques require careful handling.
- Cool fabric completely before handling to lock the pressed position and prevent shifting during final stitch in the ditch work.
- Check seam line alignment ensuring the bias tape covers all raw edges while considering fabric type considerations for desirable results.
Final Stitching and Pressing
With your bias tape pressed to the back, you’re ready for the final stitch in the ditch.
Position your needle directly in the seam line where the tape meets fabric.
Sew slowly with matching thread, maintaining precise alignment for invisible stitches.
This seam securing technique creates exceptional seam concealment while ensuring finish durability through proper fabric manipulation and pressing techniques.
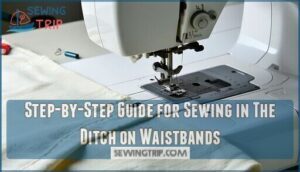
Step-by-Step Guide for Sewing in The Ditch on Waistbands
Sewing in the ditch on waistbands creates a professional, invisible finish that secures the inner waistband without visible stitching on the garment’s exterior.
This technique works by stitching directly into the seam groove where the waistband meets the garment, catching the folded inner portion while keeping your topstitching perfectly hidden.
Stitching The Waistband
Begin with your waistband piece right-side up, aligning it carefully with your garment’s waist edge. This foundational step sets you up for success in the ditch quilting process ahead.
- Waistband interfacing should already be fused to provide structure and support
- Elastic insertion points need marking if you’re creating a partially elasticized waistband
- Button placement and belt loops require precise positioning before sewing in the ditch
Stitch along the waistband’s lower edge, securing both layers together. Your decorative topstitching will come later, so focus on creating a solid foundation seam that’ll hold up to wear.
Pressing
A smooth waistband sets the foundation for professional results.
Proper pressing eliminates wrinkles and creates sharp edges for accurate stitch in the ditch placement.
- Set iron temperature according to your fabric types – cotton needs higher heat than synthetics
- Use pressing tools like a pressing cloth to prevent shine on delicate materials
- Press seam allowances open first, then fold waistband with crisp edges
- Apply even pressure along the ditch where you’ll be sewing the final stitches
Folding and Pressing
Once you’ve pressed the seams properly, fold the waistband in half lengthwise with right sides together.
This creates a clean crease that guides your stitch in the ditch placement. Press firmly to set the fold.
| Folding Technique | Fabric Manipulation | Edge Finishing |
|---|---|---|
| Lengthwise fold | Keep fabric grain straight | Creates sharp crease line |
| Right sides together | Prevents stretching | Aligns seam allowances |
| Press with steam | Smooths curved seams | Sets permanent fold |
| Check alignment | Guarantees even edges | Prepares for ditch quilting |
Final Stitching
With your waistband neatly folded and pressed, you’ll perform the final stitch in the ditch along the original seam line.
Keep your needle positioned precisely in the groove while sewing slowly for accuracy.
This ditch stitch secures the inner waistband invisibly while providing essential seam reinforcement and professional edge finishing without visible stitching.
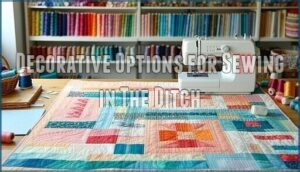
Decorative Options for Sewing in The Ditch
While stitch in the ditch typically creates invisible seams, you can transform this practical technique into eye-catching design elements.
Decorative stitches and embellishments turn functional seaming into artistic focal points that add personality to your projects, making decorative stitches and embellishments key to this transformation.
Using a Decorative Stitch
Adding decorative stitching transforms basic ditch quilting into eye-catching artwork. Choose zigzag, serpentine, or wave-like stitch patterns that adapt smoothly over seam layers. These forgiving options disguise minor misalignment while creating visual texture.
Thread selection makes all the difference. Contrasting colors highlight your decorative stitching, while matching threads provide subtle enhancement. Metallic or variegated threads add shimmer but may require needle types adjustments to prevent breakage.
Adjust your machine’s tension settings for ideal results over thick seam areas. Open, elongated sewing stitches work best with walking feet, avoiding dense loops that cause fabric bunching. You can find more about this technique on their Stitch in the Ditch webpage.
Consider fabric considerations when selecting stitch patterns. Heavy quilting stitches create pronounced texture, while lighter decorative stitching offers delicate appeal. Experiment with stitch width and length to match your project’s visual weight and seam spacing perfectly.
Adding Embellishments
Beyond basic stitch in the ditch work, you can transform plain seams into stunning focal points with carefully chosen embellishments.
Beads and sequins create sparkle when hand-sewn at seam intersections after your ditch quilting is complete.
Ribbon accents work beautifully when zigzagged alongside existing sewing stitches, adding texture and color contrast.
For elegant touches, try lace insertion by positioning narrow lace strips over the seam before stitching with decorative quilting stitches.
Corded edges give dimension—simply couch thin cording along the ditch using a zigzag stitch.
Fabric painting offers unlimited creativity; apply dimensional paints directly over completed in the ditch work for raised designs.
Remember to test thread tension and needle size when switching between techniques, as embellishments can affect your machine’s performance.
Frequently Asked Questions (FAQs)
What is a stitch in the ditch?
Ever wonder how to secure seams without visible stitches showing?
Stitch in the ditch involves sewing directly into the groove between two joined fabric pieces, creating an invisible finish that secures layers while maintaining a clean, professional appearance, using a technique that involves sewing.
How do you stitch in the ditch with a sewing machine?
Position your needle directly in the seam’s groove, lower machine speed, and guide fabric slowly while gently pulling seam open to keep stitches invisible.
How to make a ditch quilt?
Create your ditch quilt by first piecing fabric sections together, then layering with batting and backing.
Baste all layers, attach a walking foot, and slowly stitch directly in the seam ditches to secure everything invisibly.
When do you stitch in the ditch?
Like a surgeon’s precise incision following natural tissue lines, you stitch in the ditch when securing layers without visible marks—finishing quilt bindings, attaching waistbands, and anchoring facings invisibly.
Is stitching in the ditch the most common sewing skill?
No, stitching in the ditch isn’t the most common sewing skill.
You’ll learn basic stitches like straight seams and hems first.
This technique’s more specialized, used for finishing touches on quilts, waistbands, and bindings when you need invisible results.
How do you sew in a ditch with a band?
Mastering band stitching is like threading a needle in the dark—you need steady hands and perfect aim.
Fold your waistband over the seam, pin it securely, then stitch directly into the existing seam line from the right side to catch the inner band invisibly, which requires perfect aim.
What are some common mistakes to avoid when sewing in the ditch?
Avoid veering off the seam line, rushing your pace, or using thick thread that creates visible tracks. Don’t skip securing stitches at start and end points.
Are there any specific fabrics or materials that are more difficult to sew in the ditch?
Thick fabrics like denim challenge 60% of sewers.
You’ll struggle with bulky materials, stretch knits, and slippery satins that shift easily.
Heavy canvas resists precise needle placement while delicate silks require extra care.
Can you hand sew in the ditch?
Yes, you can hand sew in the ditch using a running stitch or backstitch.
Work slowly, keeping your needle precisely in the seam groove.
It’s more time-consuming than machine stitching but offers excellent control.
What happens if you miss the ditch?
Nearly 70% of beginners struggle with accurate ditch placement.
If you miss the ditch, your stitching becomes visible on the fabric’s right side, creating an unprofessional appearance and potentially weakening the seam’s integrity.
Conclusion
Before television sets became household fixtures, seamstresses relied on candlelight and oil lamps to illuminate their intricate needlework.
Now you’ve mastered what sewing in the ditch truly means—creating invisible stitches that secure layers professionally. This technique transforms amateur projects into polished pieces through proper preparation, specialized feet, and matching thread colors.
You’ll find countless applications from quilt binding to waistband finishing. Practice on scraps first, maintain consistent tension, and remember that patience yields the cleanest results every time.
- https://weallsew.com/stitch-in-the-ditch-with-bernina-walking-foot-50/
- https://freemotionproject.com/2017/01/quilting-basics-6-stitching-in-ditch/
- https://handiquilter.com/5-tips-for-stitch-in-the-ditch/
- https://snugglebugstitching.com/?p=1213
- https://quiltsocial.com/stitch-in-the-ditch-its-what-you-use-not-what-you-know/

