This site is supported by our readers. We may earn a commission, at no cost to you, if you purchase through links.
When sewing stretchy fabric, the appropriate tension is essential to avoid your stitches from breaking. You don’t need to modify the thread tension dial; rather, prioritize using a walking foot if accessible and adjusting the presser foot pressure in accordance with the fabric’s weight: 1 for light, 2 for medium, and 3 for heavy.
Select stitches that inherently have stretch, such as the zigzag or lightning stitch, to accommodate the fabric’s elasticity.
Table Of Contents
- Key Takeaways
- What Tension Should I Use for Stretchy Fabric?
- Machine Settings for Stretchy Fabric
- Importance of Stretchy Fabric Settings
- Presser Foot Pressure
- Stitch Settings
- Definition of Jersey Fabric
- Essential Tools and Equipment
- Sewing Techniques for Stretch Jersey
- Tips for Sewing Stretch Jersey
- Alternate Methods for Sewing Stretch Jersey
- Frequently Asked Questions (FAQs)
- Conclusion
Key Takeaways
- Use a walking foot if available to ensure uniform feeding and prevent puckering.
- Adjust presser foot pressure based on fabric weight: 1 for light, 2 for medium, and 3 for heavy.
- Select stitches with inherent stretch, such as zigzag or lightning stitch.
- Use appropriate needle selection and stitch width and length for the specific fabric type.
What Tension Should I Use for Stretchy Fabric?
To sew stretchy fabric, you should use a stretch stitch or a long and narrow zigzag stitch instead of a straight stitch. This will allow your seams to stretch with the fabric and prevent puckering. Additionally, you should use a ballpoint or stretch needle, depending on the fabric’s stretchiness.
Machine Settings for Stretchy Fabric
Regarding sewing with stretchy fabric, the tension settings on your sewing machine play a vital role in attaining a successful outcome. Here are some guidelines for machine settings for stretchy fabric:
- Walking Foot (if Available): If you have a walking foot, utilize it to guarantee uniform feeding and prevent shirring.
- Reduced Presser Foot Pressure: Modify the presser foot pressure based on the fabric weight. For light-weight fabrics, use 1; for medium-weight fabrics, use 2; and for heavy-weight fabrics, use 3.
- Triple Zigzag Stitch (light-weight): For light-weight fabrics, use a triple zigzag stitch with a width of 6 and a length of 1.
- Zigzag Stitch (medium-weight): For medium-weight fabrics, use a zigzag stitch with a width of 6 and a length of 1.5.
- Lightning Stitch (heavy-weight): For heavy-weight fabrics, use a lightning stitch with a width of 5 and a length of 4.
- Stretch Needles: Use ballpoint or stretch needles to sew stretchy fabrics.
Walking Foot (if Available)
If your sewing machine has a walking foot attachment, employ it! This foot attachment guarantees consistent feeding of stretchy fabrics, preventing fabric deformation and enabling seamless sewing. It’s ideal for stitching stretchy fabrics such as jersey, interlock, and tricot. Moreover, it aids in stabilizing the fabric with tissue paper.
Reduced Presser Foot Pressure: 1 (light-weight), 2 (medium-weight), 3 (heavy-weight)
Venturing into the realm of stretch fabric sewing? Your clandestine ally is presser foot pressure manipulation. Envision it as your fabric’s level of ease—1 for delicate, 2 for moderate, and 3 for the robust. It’s akin to bestowing a tender embrace upon your fabric, ensuring its seamless passage under the needle without contortions.
Bear in mind, the optimal tension holds the key to success.
Triple Zigzag Stitch (light-weight): Width 6, Length 1
When working with light-weight stretch fabrics like stretch jersey, a triple zigzag stitch is a great choice. This stitch provides the necessary stretch and elasticity for your seams. Here are some key settings for a triple zigzag stitch:
- Width: Set the width to 6.
- Length: Adjust the length to 1.
- Number of Zigzags: Choose 3 for a triple zigzag stitch.
- Stitch Type: Select the triple zigzag stitch option on your sewing machine.
Zigzag Stitch (medium-weight): Width 6, Length 1.5
When working with medium-weight stretch fabrics, a zigzag stitch with a width of 6 and a length of 1.5 is advisable. This stitch offers the required stretch while preserving a secure hold on the fabric.
Bear in mind to modify the presser foot pressure to deter stretching and utilize a walking foot for uniform feeding.
For superior results, consider employing a twin ball point needle and a stretch stitch or extended and narrow zigzag stitch.
Lightning Stitch (heavy-weight): Width 0.5, Length 4
When sewing with heavy-weight knit fabric, the lightning stitch is the ideal choice. This stitch provides the perfect balance of strength and stretch, with a width of 0.5 and a length of 4. It’s perfect for stretchy materials that need a bit more support.
Remember to adjust your sewing tension accordingly to guarantee a seam that won’t break or stretch out of shape. Happy sewing!
Importance of Stretchy Fabric Settings
When stitching with flexible fabrics, it’s essential to utilize zigzag stitches as they grant the required elasticity to hinder your seams from snapping. Modifying the pressure exerted by the presser foot and incorporating a walking foot assist in preserving the fabric’s structure and guaranteeing uniform feeding throughout the machine.
Straight Stitches Break Due to Lack of Stretch
When sewing with stretchy fabric like jersey or interlock, straight stitches can easily break due to the lack of stretch. This is where zigzag stitches come in handy. They provide the necessary elasticity and prevent the fabric from puckering or pulling.
Regarding machine settings, using a ball point needle and adjusting the presser foot pressure to the fabric weight is essential. Additionally, using a walking foot guarantees even feeding and prevents stretching.
Always remember to service your sewing machine and use a sacrificial fabric to begin your project.
Zigzag Stitches Provide Necessary Stretch
Zigzag stitches are the go-to choice for sewing stretchy fabrics like jersey. They provide the necessary stretch and flexibility for knit fabrics, ensuring seam techniques like serging, overlocking, and needlework are successful.
By adjusting the stitch width and length on your sewing machine, you can achieve the perfect balance of strength and stretch for your projects. Remember to use ballpoint or stretch needles and maintain a smooth fabric feed to avoid breaking stitches.
Reduced Presser Foot Pressure Prevents Fabric Stretching
To prevent stretching when sewing with stretchy fabrics, reduce the presser foot pressure. Walking feet are ideal for this task, as they eliminate the need for adjustment. For standard feet, adjust the pressure based on the fabric weight.
Zigzag stitches and ballpoint needles are recommended for stretchy fabrics. Fabric stabilization and twin ball point needles can also help maintain tension. Stitch settings like triple zigzag or tricot stitches, lightning stitch, and triple straight stitch can provide the necessary stretch.
Consider using a stabilizing backing or sacrificial fabric to start.
Walking Foot Ensures Even Feeding
After dialing down the presser foot pressure to prevent your fabric from stretching out like a yoga instructor, it’s time to bring in the big guns: the walking foot. This nifty tool teams up with your machine’s feed dogs, ensuring your fabric moves as one, like synchronized swimmers. No more ironing wavy seams or battling with uneven feeding, even on the trickiest woven fabrics.
The walking foot is a valuable tool for sewing projects that involve tricky fabrics. It works in tandem with the machine’s feed dogs to ensure the fabric moves evenly, preventing issues like wavy seams or uneven feeding. This is especially helpful when working with woven fabrics, which can be prone to stretching and distortion.
By adjusting the presser foot pressure, you can further optimize the fabric’s movement and prevent stretching. This step helps create a smooth, professional-looking finish on your sewing projects.
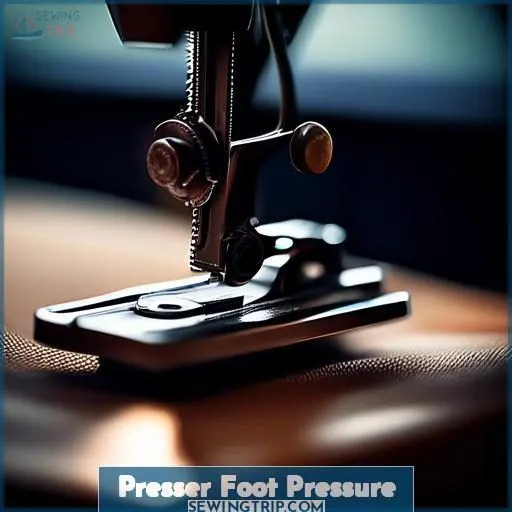
Presser Foot Pressure
When using a walking foot for sewing stretchy fabrics, you don’t need to worry about adjusting the presser foot pressure. It’s also essential not to tamper with the thread tension dial, as proper tension is key for achieving smooth, even stitches.
Walking Foot Eliminates Need for Adjustment
When sewing with a walking foot, you don’t need to adjust the presser foot pressure. This foot is designed to work with knit fabrics, eliminating the need for manual adjustments.
If you’re using a standard foot, you’ll need to adjust the pressure based on the fabric’s weight: 1 for light, 2 for medium, and 3 for heavy. Remember, don’t adjust the thread tension dial.
Do Not Adjust Thread Tension Dial
When sewing with stretchy fabrics, it’s essential not to adjust the thread tension dial on your presser foot. This setting is already optimized for the fabric type, so changing it could lead to uneven stitching or fabric distortion.
Instead, focus on needle selection, stitch width, and stitch length to achieve the best results. Remember, the walking foot and reduced presser foot pressure are your allies in ensuring a successful sewing experience.
Stitch Settings
To sew stretchy fabric, it’s crucial to make sure your sewing machine settings are right for the stretchiness of the fabric. Here are the suggested stitch settings for different types of stretchy fabric:
- Zigzag stitch: Width 6, Length 5
- Three-step zigzag or tricot stitch: Width 6, Length 1
- Lightning stitch: Width 5, Length 4
These settings will give the fabric the stretch it needs and stop it from bunching or breaking when you sew. Keep in mind to use a ballpoint or stretch needle to make sure the sewing goes smoothly.
Zigzag Stitch: Width 6, Length 1.5
When working with stretchy fabric like jersey, it’s essential to alter your sewing machine settings accordingly to guarantee a successful sewing experience. One of the key settings to ponder is the zigzag stitch, which offers the required stretch for your project. Here’s a breakdown of the recommended settings for a zigzag stitch on various types of stretch fabric:
- Light-weight fabric: Width 6, Length 1
- Medium-weight fabric: Width 6, Length 1.5
- Heavy-weight fabric: Width 0.5, Length 4
These settings will help you attain the desired stretch and prevent problems such as straight stitches breaking due to insufficient stretch or fabric stretching during the sewing process. Remember to always test your stitches on a scrap piece of fabric before starting your project to assure the best results.
Three-step Zigzag or Tricot Stitch: Width 6, Length 1
When working with stretchy fabrics, setting the appropriate stitch length and width is essential for achieving the desired outcome. One such stitch that’s frequently used for sewing lightweight fabrics is the three-step zigzag or tricot stitch. This stitch is a variation of the basic zigzag stitch, but it offers greater stretch and minimizes the risk of creating a ridge or tunnel in the fabric.
To configure your sewing machine for the three-step zigzag stitch, follow these steps:
- Stitch Width: Set the stitch width to 6. This will ensure that the stitch covers a sufficient area and provides adequate stretch.
- Stitch Length: Set the stitch length to 1. A shorter stitch length helps to maintain the fabric’s shape and prevents bunching.
- Presser Foot: Adjust the presser foot pressure to prevent stretching. For lightweight fabrics, a reduced presser foot pressure is advisable.
Once you have set these parameters, you can begin sewing your project with confidence. Remember to adjust your seam guide to account for the needle’s position when sewing zigzag stitches. With the appropriate settings and techniques, you can create beautiful, stretchy seams that will enhance the appearance and feel of your finished garment.
Lightning Stitch: Width 0.5, Length 4
Regarding sewing stretchy fabric, tension adjustments are paramount for ensuring seam durability and preventing fabric harm. One stitch particularly suitable for stretchy fabrics is the Lightning Stitch, with a width of 0.5 and a length of 4.
The Lightning Stitch is an ornamental stitch that can lend a distinctive flair to your creations. It’s frequently employed for hems and other decorative components, as it provides a robust yet malleable stitch that can withstand the elasticity of various fabrics.
To utilize the Lightning Stitch, you’ll need to modify your sewing machine settings accordingly. Commence by setting the stitch width to 0.5, which will produce a narrow but discernible zigzag pattern. Afterwards, adjust the stitch length to 4, which will result in a more extended stitch that can better accommodate the stretch of your fabric.
Definition of Jersey Fabric
Welcome to the realm of elastic fabric tension insights! As we embark on this journey, let’s explore the essence of jersey fabric. Jersey, a knitted fabric, is formed by interlacing threads, enabling exceptional flexibility and stretch. It manifests in two forms: jersey (single knit) and interlock (double knit). Jersey stands out as the most prevalent knit fabric, renowned for its versatility and comfort.
- Fabric construction: Intertwining threads results in a supple, resilient fabric.
- Yarn twist: The yarn’s twist influences the fabric’s knit stability and drape.
- Knit stability: The knit’s tightness affects the fabric’s ability to maintain its shape.
- Fabric drape: The manner in which the fabric falls dictates its suitability for various garments.
- Stitch security: The stitch type employed impacts the fabric’s overall strength and durability.
Jersey fabric holds immense value for sewers, offering countless opportunities for crafting garments that prioritize comfort and style.
Essential Tools and Equipment
To sew stretchy fabric, you’ll need the right tools. Start with a jersey or ball point needle for loosely woven knits. For super stretchy fabrics, use a stretch needle. Select a stitch with an element of stretch, like a zigzag or a long and narrow zigzag.
Consider overlock stitches for a serged edge. Use an overcast presser foot for the best possible results.
Sewing Techniques for Stretch Jersey
To sew stretchy fabric successfully, you should lower your sewing machine tension, use stitches with an element of stretch, avoid over-stretching the fabric, and cut the jersey with a rotary blade. These techniques make sure that your seams are strong and the fabric isn’t damaged during the sewing process.
Lower Sewing Machine Tension
Reducing the sewing machine tension is essential when working with stretchy fabrics. Here’s a 4-item list to assist you:
- Tension Adjustment: Modify the tension release to facilitate the needle’s passage through the fabric, minimizing the risk of thread breakage.
- Needle Selection: Choose a ballpoint or stretch needle with a smooth, rounded tip to diminish fabric damage and achieve a neat stitch.
- Seam Treatments: Avoid finishing inside seams, as it can create bulk and restrict the fabric’s stretch. Instead, opt for a twin needle or overlock stitch for a more seamless finish.
- Support Options: Consider adding a stabilizing backing or interfacing to provide additional support and prevent the fabric from stretching or puckering during sewing.
Use Stitches With an Element of Stretch
In the realm of sewing stretchy fabric, utilizing stitches with inherent elasticity is of paramount importance. Zigzag stitches emerge as an indispensable ally in this context, owing to their inherent flexibility, enabling the fabric to expand without compromising its integrity. A conventional zigzag stitch proves effective on lingerie fabrics, catering seamlessly to knit seams, necklines, and hems. For fabrics exhibiting exceptional elasticity, consider experimenting with a narrow zigzag stitch, boasting an optimal level of oscillation to accommodate the fabric’s stretch while maintaining a refined appearance on hems.
An alternative solution resides in the stretch stitch, also known as the lightning bolt stitch, a derivative of the zigzag. Its narrow side-to-side and elongated up-and-down characteristics render it ideally suited for thicker lycra knits. The 3-step zigzag stitch presents another viable option for knits demanding a broader stitch, proving particularly useful when securing elastic to knit fabrics.
When embarking on the task of sewing knit fabrics, it’s imperative to employ an overcast presser foot to achieve optimal outcomes. This specialized foot aids in concealing the fabric’s raw edges, thereby preventing fraying. It’s worth emphasizing that the key to success lies in identifying the most appropriate stitch width and length for the specific fabric in question, as each fabric possesses unique characteristics. To ensure a flawless execution, it’s always advisable to conduct a preliminary test on a scrap of the intended fabric before embarking on the actual project.
Avoid Over-stretching the Fabric
To prevent over-stretching your fabric when sewing, consider these techniques:
- Adjust presser foot pressure: For light-weight fabrics, use a reduced presser foot pressure of 1; for medium-weight fabrics, use 2; and for heavy-weight fabrics, use 3. This guarantees the fabric doesn’t stretch excessively.
- Use zigzag stitches: Zigzag stitches provide the necessary stretch for your fabric. For light-weight fabrics, use a triple zigzag stitch with a width of 6 and a length of 1; for medium-weight fabrics, use a zigzag stitch with a width of 6 and a length of 1.5; and for heavy-weight fabrics, use a lightning stitch with a width of 0.5 and a length of 4.
- Cut with a rotary cutter: Always cut your fabric with a rotary cutter to guarantee precise measurements and minimize stretching.
Cut Jersey With a Rotary Blade
Cutting jersey fabric with a rotary blade is a vital step in sewing techniques for stretchy fabrics. The rotary cutter, which consists of a handle with a circular blade that rotates, is an indispensable tool for this task. It allows you to cut multiple layers of fabric simultaneously, making it easier to cut out patchwork pieces of the same shape and size than with scissors.
To use a rotary cutter effectively, make sure the blade is sharp and the cutting mat is placed beneath the fabric to protect surfaces from damage. The blade size should be chosen based on the size of the project and the fabric’s thickness. For most sewing projects, a 45mm blade is recommended, as it’s suitable for both sewing and quilting projects of small to medium size.
When cutting jersey fabric, it’s essential to align the fabric grain with the ruler to achieve a straight cut. This can be done by placing the fabric on the cutting mat and lining it up with the ruler, making sure that the grain runs parallel to the edge of the ruler. This will help prevent any distortion or stretching of the fabric during the cutting process.
Additionally, using a rotary cutter for cutting bias binding is a popular technique, as it ensures a clean and accurate cut. To do this, place the 45-degree line of the ruler on the fold of the fabric and cut along it, making sure that the fabric is folded evenly. This method is faster and more accurate than using scissors for cutting bias strips.
Tips for Sewing Stretch Jersey
When sewing stretchy jersey, it’s essential to leave the inside seams unfinished and to keep your sewing machine in good condition. Employing a walking foot, incorporating a stabilizing backing, and commencing with expendable fabric can greatly enhance your sewing experience with elastic materials.
Don’t Finish Inside Seams
Don’t finish inside seams when working with stretch jersey. Instead, stabilize the knits by using basting stitches or clips. This helps prevent puckering and stretch marks. Remember to maintain your sewing machine regularly for peak performance. Here are some tips for finishing seams:
- Use a twin needle for a double row of stitches on the right side with a zigzag on the bottom.
- Use knit stay tape for hem stabilization.
- Avoid double fold hems.
- Use a walking foot or a knit foot for gentle feeding.
- Keep seam allowances consistent for a polished look.
Maintain Sewing Machine Regularly
Maintaining your sewing machine is essential for achieving superior results when working with stretchy fabrics. Here are some tips to help you keep your machine in excellent condition:
- Clean your machine frequently: Dust and debris can accumulate in the machine, affecting its performance. Regularly clean your machine to guarantee smooth operation.
- Lubricate your machine: Apply a suitable lubricant to the moving parts of your machine to reduce friction and wear.
- Inspect for loose parts: Tighten any loose screws or bolts on your machine to prevent movement during sewing, which can lead to uneven stitches.
- Replace worn-out parts: If you notice any worn-out parts, such as needles or thread guides, replace them promptly to maintain peak performance.
- Adjust your presser foot pressure: Adjust the pressure on your presser foot to prevent stretching of the fabric. Use a walking foot if possible, as it eliminates the need for adjustment. If using a standard foot, reduce the pressure based on the fabric weight (light-weight: 1, medium-weight: 2, heavy-weight: 3).
- Use the appropriate needles: Select ballpoint needles for loosely woven knits and stretch needles for super stretchy fabrics.
- Regularly check your stitches: Inspect your stitches after each project to ensure they’re even and consistent. Adjust your machine settings as needed to maintain superior stitch quality.
Use a Walking Foot
Using a walking foot is crucial when working with stretchy fabrics like knits. This foot guarantees consistent feeding, preventing fabric stretching and puckering, which can be a common pitfall when sewing with stretchy fabrics.
The walking foot has its own set of feed dogs that move alongside the fabric, allowing it to feed smoothly through the machine. This is especially beneficial when sewing with knits, as the fabric can elongate under the presser foot, leading to uneven feeding and possible fabric damage.
By utilizing a walking foot, you can accomplish professional results and sidestep the annoyance of dealing with wavy seams or stretched-out fabric.
Add a Stabilizing Backing
To make sure seam stability and avoid puckering when sewing stretchy fabric, consider adding a stabilizing backing. This can be achieved through various interfacing options, such as fusible interfacing, knit interfacing, or even using a different layer of fabric as a baste layer.
Fusible interfacing is a popular choice for stabilizing the wrong side of the fabric, providing beautiful and stable buttonholes. Knit interfacing, which is lightweight and knitted, can be used for stretchy, jersey fabrics. If you don’t have interfacing available, you can also use a different layer of fabric as a baste layer, similar to sew-in interfacing.
When choosing the right interfacing, consider the weight or thickness of your fabric and the type of stitch you’re using. For example, lightweight interfacings are better for cotton lawns, viscose, rayon, and modal, while medium weight interfacings are suitable for stiffer cottons, denim, twills, wools, and canvas.
Remember to follow the grainline when cutting out your interfacing, as it will have a selvedge for woven interfacings and no grainline for non-woven interfacings. Additionally, make sure that the weight or thickness of your interfacing matches your fabric, and it’s best to go with a slightly lighter weight if in doubt.
Start With Sacrificial Fabric
Start with sacrificial fabric to test tension settings before sewing your project. This initial piece of fabric will help you determine the right needle choice, stitch length, and fabric stabilizer for your sewing machine. By testing on a small piece, you can avoid potential issues and guarantee a successful sewing experience.
Alternate Methods for Sewing Stretch Jersey
If you’re still encountering problems with sewing your stretch jersey despite following all the advice, don’t despair. There are a few alternative methods you can explore to achieve optimal results.
- Employ a walking foot: A walking foot is engineered to delicately and consistently feed your fabric, which is particularly advantageous when working with elastic fabrics. It can help mitigate rippling and guarantee that your seams are uniform and smooth.
- Incorporate a stabilizing backing: A stabilizing backing can provide support to your fabric, preventing it from stretching or deforming as you sew. This is especially valuable when working with highly elastic fabrics, such as activewear or dancewear.
- Utilize sacrificial fabric: Commence your sewing project with a piece of scrap fabric to experiment with your machine settings and gain an understanding of how the fabric behaves. This can assist you in avoiding any issues with your primary fabric.
Frequently Asked Questions (FAQs)
How does a walking foot help in sewing stretchy fabric?
A walking foot helps in sewing stretchy fabric by evenly feeding the layers of fabric through the machine, preventing puckering and shifting. It works by gripping onto the top layer of fabric and moving it at the same pace as the machine’s feed dogs, ensuring both layers move together.
This is particularly useful when working with knit fabrics, which have a tendency to stretch under the presser foot, causing uneven seams. The walking foot is also beneficial for sewing multiple layers or when matching plaids across seams, as it helps maintain fabric alignment and prevents shifting.
Is it necessary to use a twin needle for sewing stretchy fabric?
You don’t absolutely need a twin needle for stretchy fabric, but it’s your secret weapon for a pro finish. It mimics commercial hems, adding stretch and flair without the fuss. Give it a whirl!
Can I use a serger or overlocker for sewing stretchy fabric?
Sure, you can definitely use a serger or overlocker for sewing stretchy fabric. Sergers are specifically designed for knit fabrics and can be used to construct seams on these materials.
However, it’s crucial to keep in mind that the stitches on a serger are often looser than those on a sewing machine, which can result in the seam appearing wavy. To address this, you can adjust the differential feed on your serger to help alleviate the seam back into place.
Additionally, using a shorter stitch length on your serger can also help make it stretch more, but it may also make the seam wavy. Experimenting with different stitch lengths and differential feed settings can help you find the ideal balance for your specific project.
What is the best stitch to use for sewing stretchy fabric on a standard sewing machine?
To sew stretchy fabric on a standard sewing machine, use a stretch stitch or long and narrow zigzag stitch instead of a straight stitch. If your machine doesn’t have a stretch stitch, set the stitch length to the narrowest zigzag setting (5) and the stitch length to a medium setting. This will give you the stretch you need.
How can I prevent my seams from breaking when sewing stretchy fabric?
To keep your seams from snapping on stretchy fabric, use a zigzag or stretch stitch, which allows the seam to stretch with the fabric. Remember, it’s all about giving your stitches room to groove!
Conclusion
In the realm of sewing stretchy fabrics, appropriate tension is paramount to avert stitch breakage. Rather than manipulating the thread tension dial, prioritize employing a walking foot (if accessible) and calibrating the presser foot pressure commensurate with the fabric’s weight: 1 for lightweight, 2 for moderate, and 3 for substantial.
Opt for stitches inherently elastic, such as the zigzag or lightning stitch, to cater to the fabric’s inherent stretchiness. By adhering to these guidelines, you’ll guarantee a fruitful sewing experience with stretchy fabrics.

