This site is supported by our readers. We may earn a commission, at no cost to you, if you purchase through links.
Properly washing and ironing fabric prevents shrinkage later.
Carefully layout patterns and make adjustments for the perfect fit.
Master your machine’s threading, stitch settings, and techniques like straight and curved seams.
With patience and practice, you’ll create professional-looking projects.
Nail these fundamentals, and you’ll be well on your way to sewing greatness – just keep these points in mind as you explore this rewarding craft.
Table Of Contents
Key Takeaways
- Fabric prep is a sewing must-do, folks! Washing and ironing your fabric before cutting will prevent shrinkage surprises later on. Trust me, you don’t want a garment that ends up looking like a crop top when it shouldn’t!
- Pattern basics may seem like a snooze-fest, but hear me out. Reading those instructions carefully and laying out the pattern properly is the key to unlocking a perfect fit. No one wants a wonky sleeve situation happening, am I right?
- Mastering your sewing machine is like taming a wild beast – it takes patience and perseverance, but oh, the payoff! Once you’ve got the threading and stitch settings down pat, you’ll be zipping through projects like a pro.
- Seam construction is where the magic happens, my friends! Straight seams, curves, French seams – get ready to impress with your top-notch techniques. Just remember, seam rippers are your trusty sidekicks when things go awry. Embrace the learning curve and keep those suckers handy!
Sewing Essentials
You’ll need a few essentials to embark on your sewing journey.
Invest in a quality sewing machine that suits your skill level and budget.
Gather the right tools like fabric shears, seam rippers, pins, and marking tools.
Familiarize yourself with different thread types, needle sizes, and fabric types to make sure you have the proper supplies for each project.
Understand seam allowances and pattern alterations, as these are important for achieving the perfect fit.
Mastering the sewing foundation will unlock endless creative possibilities.
With practice and patience, you’ll soon be confidently stitching like a pro.
Fabric Preparation
Before you embark on cutting your fabric, it’s essential to cleanse and iron it in accordance with the manufacturer’s guidance. Pay meticulous attention to the fabric grain, as this will guarantee that your finished project lies flat and hangs appropriately.
Washing and Ironing
Before starting any sewing project, you’ll need to properly prepare your fabric. Always prewash and iron your fabric to prevent future shrinkage and allow for easier cutting and sewing. Check the care instructions for specific washing and drying requirements based on the fabric type. Properly prepping your fabric now will save you headaches later on.
Fabric Grain
Mastering fabric grain is critical for impressive sewing projects. You’ll need to identify the grain – the fabric’s lengthwise threads – by gently tugging the fabric on the bias. Once located, always cut pattern pieces following the grainline arrows to guarantee proper drape and stability. Disregarding grain leads to ill-fitting, twisted garments no sewist desires.
Pattern Basics
Once you’ve prepped your fabric, the next step is pattern basics. Carefully read through the instructions – don’t skip this essential step! Refer to the guide often as you sew.
Properly laying out and pinning the pattern pieces is key for an accurate fit. Make any needed pattern adjustments like adding darts or gathers.
When cutting, transfer all markings from the pattern. Use chalk or disappearing ink to avoid damaging your fabric. Cutting with precision lays the foundation for successful seam construction.
With proper pinning and marking, even beginner sewists can create professional-looking garments. Mastering these pattern basics builds the skills for more complex projects down the road.
Sewing Machine Mastery
When learning to sew with a machine, mastering the threading process and understanding stitch settings are essential steps. Properly threading the machine following the manufacturer’s instructions and selecting the appropriate stitch length, width, and tension settings will guarantee your stitches are even and your projects turn out expertly.
Threading Techniques
You’ll need to master threading your machine. Follow these steps:
- Raise presser foot and needle
- Place thread through tension discs
- Bring thread down and through take-up lever
- Thread needle front to back, using a needle threader if needed
- Wind bobbin evenly with correct thread weight
Proper threading prevents skipped stitches and tension issues. Consult your manual or online tutorials for machine-specific instructions.
Stitch Settings
You’ll need to familiarize yourself with the stitch settings on your sewing machine. Adjust the stitch length, width, and tension based on your fabric and project needs. Here’s a handy reference:
| Stitch Setting | Description |
|---|---|
| Stitch Length | Stitches per inch (shorter for curves, longer for straight seams) |
| Stitch Width | How wide or narrow the stitch appears |
| Tension | Keeps stitches balanced between top and bobbin thread |
Experiment with different stitch types for various sewing techniques – the right settings prevent sewing mishaps.
Seam Construction
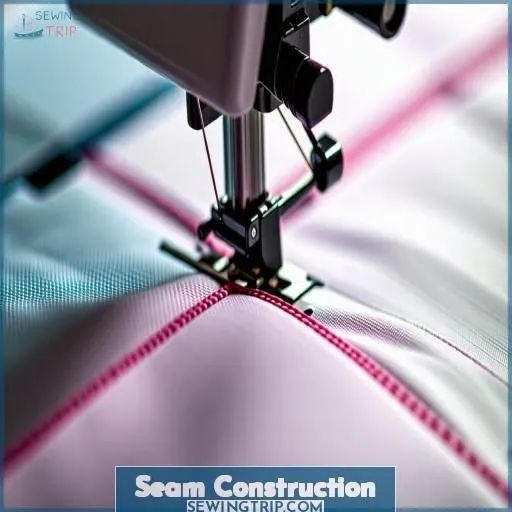
Mastering seam construction is essential when learning to sew. You’ll need to understand how to properly sew straight seams, curved seams, and apply various seam finishes for professional-looking results.
Straight Seams
Sewing straight seams demands precision. Use seam guides and needle positioning to maintain consistent seam allowances. Backstitching secures seam ends, preventing unraveling. For intersecting seams, sew one continuous line, pivot at corners. Evaluate seams for evenness, neat stitching, and proper seam type. Mastering straight seams lays the foundation for successful sewing projects.
Curved Seams
When sewing curved seams, adjust your needle position to the left or right to ease in or out. For tight curves, clip into the seam allowance. Use bias tape to encase curved hems for stability. Topstitch piping for polished seams on bags or cushions. Remember, curved seams demand patience – take your time and use a seam ripper fearlessly.
Seam Finishes
After sewing straight or curved seams, you’ll need to finish the raw edges. Machine finishes like zigzag, overlock, or mock overlock prevent fraying. Hand-sewn finishes include pinking shears or overcasting. For invisible seams, try the French seam or bound seam techniques. Consult sewing resources like books, blogs, and classes for mastering various finishes.
Fabric Cutting
For successful fabric cutting, you’ll need the proper tools, including sharp fabric shears and a rotary cutter. Follow cutting techniques such as pinning your pattern pieces to the fabric before cutting, cutting in one clean motion, and keeping your fabric flat on the surface to guarantee accurate cutting.
Proper Tools
After mastering seam construction, you’ll need the right tools to cut fabric precisely. Use these essentials:
- Fabric scissors – keep them sharp and only for fabric
- Seam ripper – correcting mistakes is part of learning
- Rotary cutter – glides effortlessly through layers
With the proper tools by your side, cutting fabric becomes an enjoyable first step in your sewing journey.
Cutting Techniques
Pin and cut carefully with sharp fabric shears to guarantee accurate fabric cutting. Follow the pattern guides, cutting notches, and markings precisely. For curved sections, cut slowly with short snips.
| Key Cutting Tips | Description |
|---|---|
| Precise cutting | Important for fabric pieces fitting together smoothly |
| Sharp shears | Dull blades can fray or tear delicate fabrics |
| Follow notches | Match up cutting lines and notches for proper assembly |
Stay engaged—making garments you’ll love wearing starts with careful cutting!
Sewing Notions
When learning to sew, it’s imperative to have the right sewing notions at hand – pins and needles for securing fabric pieces, and marking tools for transferring pattern markings accurately. Investing in quality notions will guarantee your sewing projects turn out neat and professional-looking.
Pins and Needles
Pins and needles are essential notions for any sewer. You’ll need:
- Quality pins with sharp points and plastic or glass heads
- A sturdy pincushion to store pins safely
- An assortment of hand sewing needles (sharps, betweens, milliners)
Store pins and needles neatly in a sewing box or magnetic dish. Stay organized and your sewing will be smoother.
Marking Tools
You’ll need marking tools like chalk, fabric pens, or water-soluble markers to transfer pattern lines onto fabric. Templates and tailor’s tacks also help position details accurately. Don’t worry about mastering every tool at first; focus on the 20% used 80% of the time for a strong foundation. Marking is a valuable skill worth learning well.
Pressing Techniques
When pressing seams or fabric pieces, pay close attention to the iron’s heat settings to avoid damaging delicate fabrics. Establish an efficient pressing order by first pressing seams, then darts or pleats, and finally the garment as a whole for professional-looking results.
Iron Settings
Mastering iron settings is essential for pristine results. Always check the fabric’s care label and set the temperature accordingly: 1) Synthetics – low heat, 2) Silk/Wool – low-medium, 3) Cotton – medium, 4) Linen – high. Steam or dry iron based on the fabric’s needs. Be patient – proper pressing elevates your sewing passion to new heights!
Pressing Order
You’ll want to press your fabric pieces in a specific order. First, press the seams as you sew them. Next, press darts and pleats. Then, press facings and collars. For garments, press the bodice first, then sleeves and finally, the skirt. Using proper pressing techniques with the right tools is essential for a professional finish.
Beginner Projects
When you’re learning to sew, start with simple projects like pillowcases or tote bags that involve straight lines and minimal embellishments. These beginner-friendly projects allow you to practice essential sewing skills, such as seam construction, fabric cutting, and pressing techniques, without overwhelming complexity.
Pillowcases
Feeling confident in your sewing skills? Why not try making a pillowcase! Pillowcases are a beginner-friendly project perfect for practicing seams and hemming. Choose a cotton or linen fabric in a fun print or solid color. Standard sizes include twin, full/queen, and king. Envelope closures are simple, or add a flange or ruffle for extra flair.
Tote Bags
After mastering pillowcases, try your hand at tote bags. Pay attention to fabric choice—sturdy canvas or denim work best. Experiment with bag design, like adding pockets or embroidery. Choose durable handle materials and reinforce stress points with zig-zag stitches. Adjust the bag size to suit your needs. Tote bags offer endless customization possibilities as your skills grow.
Frequently Asked Questions (FAQs)
What are the four basic sewing processes?
Perfectly prepare patterns, properly handle fabric with precision. Carefully lay out garment’s template, confidently cut following guidelines. Consistently practice these key processes.
What is the first thing you should learn to sew?
You should start by learning how to sew straight lines. Practice on scraps until you can guide the fabric at a consistent speed and stitch length. Mastering the basics builds confidence for more complex projects.
What is the most important sewing rule?
The most critical sewing rule? Take your time – rushing leads to mistakes. Be patient, follow instructions carefully, and don’t get discouraged when errors occur. View each misstep as a learning opportunity that’ll make you a better, more skilled sewist.
What are the 5 steps in sewing?
Mastering sewing is like learning a dance – start with the fundamentals. The 5 key steps are: prepare your pattern and fabric, lay out the fabric, cut carefully, construct seams precisely, and press each seam. Follow this rhythm, and you’ll sew with grace.
How do I match different fabric weights?
To match fabrics of different weights, you’ll need to adjust your stitch length and tension. Heavier fabrics require a longer stitch length and tighter tension, while lightweight fabrics call for a shorter stitch and looser tension. Test on scraps first until you achieve the ideal stitch balance.
What are the best sewing machine brands?
Some top sewing machine brands for beginners include Singer, Brother, Janome, and Bernina. Research reviews and features to find a user-friendly model within your budget. Quality machines can make the learning process smoother and more enjoyable.
How do I repair tears or holes?
To repair tears or holes, first trim loose threads with sharp scissors. Next, use a fusible web to stabilize the area around the hole. Then, carefully hand-stitch using a small curved needle and thread that matches your fabric. Remember, patience and careful stitching are key for a clean repair.
How do I sew curved seams neatly?
You never know, sewing curved seams might just be your hidden talent! The key is to clip into the seam allowance at regular intervals, easing the fabric along the curve. Take it slow, secure with plenty of pins, and voila – beautifully smooth curves await!
Conclusion
Mastering these 4 important things to remember when you’re learning to sew – fabric preparation, pattern basics, sewing machine mastery, and seam construction – takes patience and diligence.
But the rewards are immense. With each completed project, your skills will compound, transforming you from a beginner into a confident sewer capable of creating professional-quality garments and accessories.
Embrace the journey, stay focused on the fundamentals, and relish the satisfaction of your hard-earned sewing prowess.

