This site is supported by our readers. We may earn a commission, at no cost to you, if you purchase through links.
Most serger owners spend more time rethreading than actually sewing. One color switch, and suddenly twenty minutes vanish—along with your momentum. The machine that promised speed has become the thing slowing you down.
It doesn’t have to work that way. Knowing how to change thread on a serger in 3 minutes or less comes down to two things: preparation and the tie-on method. Skip either one, and you’re back to square one, squinting at looper paths with a flashlight.
The steps ahead will get you back to sewing fast—and keep you there.
Table Of Contents
- Key Takeaways
- Change Serger Thread in Three Minutes
- Gather Fast Thread-Changing Tools
- Prepare Your Serger First
- Set Tensions Before Cutting
- Cut and Tie New Threads
- Pull Threads Through Correctly
- Thread Needles After Loopers
- Reset Serger Sewing Settings
- Test The New Thread Chain
- Fix Slow Thread-Change Problems
- Frequently Asked Questions (FAQs)
- Conclusion
Key Takeaways
- The tie‑on method is the fastest way to swap serger thread — cut the old thread, tie new thread to it with a square knot, and pull it through the existing path instead of rethreading from scratch.
- Before cutting anything, prep your machine by powering it off, raising the presser foot, zeroing all tension dials, and photographing the current thread path so you’re not guessing your way back.
- Thread order matters every time: upper looper, lower looper, right needle, left needle — skipping or reversing this sequence causes tension problems before you’ve sewn a single stitch.
- Always test on scrap fabric after a thread change, and adjust one tension dial at a time until both sides of the stitch look balanced — fixing it now beats unpicking a real seam later.
Change Serger Thread in Three Minutes

Changing serger thread doesn’t have to eat up your whole afternoon. With the right moves, you can swap all four threads and be back at the machine in under three minutes. Here’s what actually makes that happen.
Once you nail the sequence, it clicks fast — beginner serger tips and threading techniques can help you build that muscle memory from day one.
Use The Tie-on Method
The tie-on method skips full rethreading entirely. Cut the old thread, tie your new color directly to it with a square knot, then pull it through the existing thread path.
Keep the knot snug — not strangled — and trim the tails close so there’s no bulk catching on your looper passages. One smooth pull does the job.
Keep Foot Raised
Once you’ve tied on your new thread, don’t lower that presser foot yet. Keeping it raised releases the tension discs, letting thread glide freely without drag or catching.
- Releases disc pressure for smooth pull-through
- Prevents looper jamming along thread paths
- Clears the presser foot from your thread line
- Gives you a clean view of color-coded guides
Pull Threads Slowly
With the foot raised and threads tied on, now comes the part most people rush — and regret.
Pull each thread slowly, using a smooth, continuous motion. Sudden tugs cause fraying and snags on internal guides.
If you feel resistance, pause, then ease forward at a slower pace. Steady tension pressure keeps your thread path clean through every looper.
Test Before Sewing
Grab a scrap of fabric and run a short test seam. Watch for balanced stitch tension — no loops, no nests, no skipped stitches.
If the feed moves smoothly and needle penetration looks clean across every layer, you’re good to go. Any wobble in the overlock chain? Adjust one tension dial at a time.
Gather Fast Thread-Changing Tools
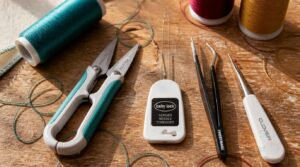
The right tools make the difference between a thread change that drags on and one that’s done before your coffee gets cold. You don’t need a full toolkit — just five specific items that tackle the trickiest parts of the job. Here’s what to keep within arm’s reach every time you sit down at your serger.
Five targeted tools beat a full toolkit when you need your serger rethreaded before your coffee goes cold
Bent-tip Tweezers
Long tweezers with a bent tip are the one tool that makes serger threading feel less like threading a needle in the dark. The angled tip — usually between 30° and 45° — lets you reach deep into looper passages without your hand blocking the view.
Look for anti-magnetic stainless steel; it won’t snag delicate threads.
Small Lint Brush
Before pulling any new thread through your serger, take thirty seconds to brush out the lint first.
A small lint brush with natural rubber bristles lifts dust and thread fuzz from tension discs and looper passages without snagging delicate fabrics. The oiled beech wood handle keeps it comfortable to grip, and unlike disposable rollers, this one lives in your toolkit permanently.
Sharp Thread Snips
You can’t rush the threading sequence if your cuts are ragged. Sharp thread snips make the difference — their ultrasharp, stainless steel blades slice cleanly through every strand without fraying the end you’ll be knotting.
- Razor-sharp pointed tip reaches tight looper passages
- Stainless steel blades resist rust and stay sharp longer
- Cuts threads cleanly, preventing fraying at knot points
- Blade edge stays stable under regular threading use
- Precise enough for trimming inside narrow seam allowances
Needle Inserter
Dropping a needle mid-change is a real time killer. A needle inserter grips it securely, so you’re not fishing around your machine’s throat plate.
Its carriage alignment guide keeps the entry angle consistent every time — no bent tips, no skipped stitches from a crooked install. One less fumble means your threading sequence stays fast and uninterrupted.
Lighted Magnifier
Even the sharpest eyes struggle with a serger’s tiny guides and color-coded paths in dim light. A lighted magnifier changes that fast.
- LED brightness levels cut eye strain
- Anti-glare coating clarifies tight threading order paths
- Ergonomic grip design keeps your hand steady
- Rechargeable via USB means it’s always ready
Prepare Your Serger First

Before you touch a single thread, your serger needs a moment of prep — skip this part and you’re asking for tangles. A little setup now is what separates a smooth three-minute change from a frustrating twenty-minute one. Here’s exactly what to do before you cut anything.
Turn Machine Off
Before you touch a single thread, turn your serger off completely. Not just idle — fully powered down. This disconnects the motor so needles and loopers can’t move unexpectedly.
Better yet, unplug the power cord to eliminate any residual electrical risk. Modern sergers have built-in surge protection, but a dead power switch is the only guarantee nothing surprises you mid-thread.
Raise Presser Foot
With the power off, your next move is simple: raise the presser foot.
Lifting it does two things at once — it creates clearance for thread access and releases upper thread tension, so threads pull through without fighting the discs. Here’s what that unlocks:
- Smoother thread movement through every path
- Reduced fabric drag during repositioning
- Easier looper access for clean tie-ons
Lift Needles Fully
Now raise the handwheel until both needles are fully up. This clears the needle plate gap so threads pass cleanly from the loopers without catching on the needle shanks — one of the quieter causes of machine downtime caused by threading errors.
All needles must rise to the same height. Uneven lift throws off tension balance before you’ve even started.
Extend Thread Stand
With both needles up, slide the extend thread stand into the main post, aligning it with the guide notches before tightening the collar.
The extra vertical clearance lets larger spools and cones feed without friction. Its vibration-damping mount keeps everything steady at full speed.
Lock the set screw, and you’re set.
Open Front Cover
With the thread stand locked, pop the front cover latch open — press or lift deliberately, since it’s designed to resist accidental release.
- Confirm the safety interlock activates, disabling the needle and blade.
- Check hinge pins for wear.
- Inspect the thread path visually.
- Locate color-coded guides inside.
- Wipe lint from the molded plastic cover.
Set Tensions Before Cutting

Before you cut a single thread, your tension settings need a moment of attention. Getting this wrong is one of the fastest ways to turn a quick color swap into a frustrating debugging session. Here’s what to do first:
Turn Dials to Zero
Every dial on your serger needs to hit exactly zero before you cut anything. Turn each dial slowly — you may feel a slight click when it lands on the mark.
Check all four dials show the numeral zero in their viewing window. This gives your tension baseline a clean reset, so new threads pull through without fighting old settings.
Release Tension Discs
Raising the presser foot does more than lift fabric — it releases the tension discs, creating a small but critical gap that lets threads move freely through their channels.
Without that gap, you’re fighting friction the whole way:
- Threads snag inside the channel
- Disc misalignment causes uneven tension
- Lint trapped between discs binds the release
- Looper paths resist smooth threading
Listen for a faint click confirming the discs have separated.
Note Original Settings
Before you cut a single thread, write down your tension dial settings — every one of them, with the machine at idle and fabric removed.
| Setting | What to Record | Why It Matters |
|---|---|---|
| Tension dials | Exact number per path | Restores baseline fast |
| Fabric variables | Type, weight, needle size | Prevents repeat guesswork |
| Threading order | Looper sequence and crossovers | Speeds troubleshooting later |
A digital log or quick photo note takes thirty seconds and saves you from re-diagnosing the same problem twice.
Photograph Current Threading
Your phone is the fastest documentation tool you own.
Before cutting anything, snap a photo of the full threading path — open the front cover and capture every color entering its guide. Use macro or close-up mode to reveal knot locations clearly. Include a coin for scale. Shoot two angles: one wide, one tight on the tension dials.
Cut and Tie New Threads

Now comes the satisfying part — actually swapping those threads. The tie-on method keeps things moving fast, but a few small details make the difference between a smooth pull-through and a knotted mess. Here’s exactly what to do at each step.
Cut Old Threads High
Snip each old thread as high as possible — right below the handwheel. A high cut keeps loose ends away from your fabric and presser foot, protecting the surface and speeding up knot formation.
Wear safety glasses when cutting; thread bits fly. Brush away any clipped tails so lint doesn’t drift into the tension discs and cause drag later.
Match Each Thread Path
Each thread on your serger has its own dedicated path — and swapping them is how tangles and tension disasters start. Before tying anything, hold the new thread against the old one and confirm they’ll follow the same route.
Color‑coded guides on most machines make this fast.
Match every path individually, upper looper to upper looper, needle to needle.
Tie Square Knots
Once each thread path is matched, it’s time to lock them together. Tie a square knot — right over left, then left over right — where old meets new.
Pull both ends snugly so the knot lies flat. A lopsided knot slips.
Keep tails two to three inches long so they don’t pull through under tension.
Trim Knot Tails
Your knot is tied — now clean it up. Snip tails to 4–6 inches, cutting perpendicular to the thread so they don’t fray at an angle. Small, sharp scissors work best here. Run a quick knot visibility inspection from both sides of the fabric to confirm nothing bulges or hides inside a looper path.
Avoid Bulky Knots
A square knot done right is barely there. The goal is knot flush with fabric — not sitting on top of it. Over-tighten and you compress the weave, creating visible bulk that ruins drape and snags delicate fabric.
Keep these in check:
- Tie once firmly, not twice desperately
- Clip tails to 4–6 inches post-knot
- Keep tension consistent across all four threads
- Bury the knot within the thread path, never on the surface
Pull Threads Through Correctly
This is where most people rush and end up unthreading half the machine by accident. Take it slow — each thread has a specific path, and pulling them through in the right way keeps your knots intact and your loopers happy. Here’s what to do as you pull each one through.
Pull One Thread Separately

One at a time — that’s the rule. Don’t pull all four threads simultaneously or you’ll create a cascading tangle that takes longer to fix than the change itself.
| Thread | Path Check | Common Snag |
|---|---|---|
| Upper looper | Through tension disc | Skips guide |
| Lower looper | Under looper arm | Catches needle |
| Right needle | Straight down slot | Misses disc |
Isolate each thread before pulling.
Guide Knots Gently

Slow and steady wins this race. Once your square knot is tied, pull with light, even pressure — not a sharp tug.
A knot yanked too fast can slip, bunch, or catch on a guide and snap. Keep the knot away from looper paths as it travels, so it seats cleanly without snagging mid-pull.
Watch Tension Discs

As each thread travels through, keep an eye on the tension disc gaps. The thread needs to sit cleanly between the discs — not ride over them.
If a disc feels like it’s gripping too tightly or skipping the thread entirely, re-thread that path before pulling further. Lint hiding inside disc gaps causes exactly this problem, so a quick brush clears it fast.
Stop Before Needles

Once the threads have pulled cleanly through the looper paths, stop right there — don’t push further toward the needles yet. The loopers need their threads locked in and forming a proper stitch chain before the needles ever enter the picture. Rush that step, and you’ll get tangles fast.
Thread the needles separately, in order: upper looper, lower looper, then needles.
Check Looper Paths

Before moving on, take ten seconds to actually look at the looper paths.
- Open the front cover for a clear view of both looper channels
- Confirm the upper looper thread exits toward the right
- Check the lower looper thread curves beneath correctly
- Look for any twists or misrouted sections
- Spot burrs or rough edges that could cause breakage
Thread Needles After Loopers

Once your looper threads are pulled through, you’re closer than you think to a finished setup. The needles come last, and the order you thread them actually matters. Work through the sequence below to get it right every time.
Upper Looper First
The upper looper goes first — no exceptions.
Before touching the needles, check the upper looper path for burrs or lint. Thread flows from the spool through the guide eye, then cleanly toward the needle zone without crossing itself.
Ensuring a balanced stitch tension will prevent fabric puckering.
| Check | What to Look For | Fix |
|---|---|---|
| Looper eye | Burrs or damage | Replace or file smooth |
| Thread path | Crossing or snagging | Re-route cleanly |
| Upper tension | Loose loops on fabric face | Adjust dial up slightly |
Lower Looper Second
With the upper looper set, the lower looper is your next move.
Thread path alignment matters here — the thread must pass cleanly under the foot plate and through every looper eyelet in sequence. A missed guide means loops sitting on top of fabric instead of forming a neat chain off the edge.
Check these three things before pulling through:
- Eyelet is lint-free — a clogged eyelet causes snags and skipped stitches
- Thread sits in the groove — misrouting throws off stitch balance fast
- Tension matches fabric weight — lighter fabrics need a looser setting; heavier ones need more tension
Right Needle Third
With both loopers set, the right needle is next. Thread it before the left — this order keeps tension balanced across the stitch chain.
Push the thread through the needle eye front to back, confirm it sits straight in the clamp, and check the path is kink-free. A bent or high-sitting needle causes skipped stitches every time.
Left Needle Last
The left needle is your final move — and it’s not just last for convenience. Threading order matters because the left needle thread completes the stitch chain, balancing tension across the left fabric edge.
- Mirrors the right needle path but follows its own looper route
- Anchors left edge consistency in multi-thread chains
- Prevents skipped stitches along the seam’s outer side
Follow Color Guides
Your serger’s color-coded guides aren’t decoration — they’re your cheat sheet. Each color maps directly to a specific thread path, so you know instantly which looper or needle that thread belongs to.
When your threading order is locked in and your colors match their channels, tension stays balanced and stitch formation stays consistent across every seam.
Reset Serger Sewing Settings

With your new threads pulled through and needles ready, it’s time to bring your machine back to life. Before you sew a single stitch, a few quick setting checks will save you from wonky tension and uneven seams. Here’s what to restore before you hit the foot pedal.
Restore Tension Dials
Once the new threads are pulled through, bring each dial back to where it was — not all at once, but one path at a time. Your four thread paths each need their own setting restored, usually in quarter or half increments to avoid overcorrection. That photograph you took earlier? Now it earns its keep.
Lower Presser Foot
With your tension dials restored, lower the presser foot before you do anything else. This single move releases thread tension correctly and sets the machine up to feed fabric evenly from the first stitch. Skipping it causes tangled nests fast.
Different shank styles and specialized feet seat differently — just make sure yours clicks or locks fully into place.
Set Stitch Length
Dial your stitch length to match what you’re actually sewing. Medium-weight fabrics land best at 2.5–3.0 mm. Go shorter for lightweight, longer for heavy.
- Knits: 2.5–3.0 mm prevents distortion
- Lightweight: 1.5–2.5 mm holds edges stable
- Heavy fabric: 3.0–4.0 mm avoids bulk
- Puckering fix: shorten slightly, then retest
Set Stitch Width
Width controls how far the stitch travels across your fabric edge. Start at mid-range, then test on a scrap before touching your actual project.
Wider settings work for thicker seams; go narrower for knits to avoid stretching or looping.
If edges start to curl, back the width down slightly. A rolled hem needs the smallest width setting to stay tight and neat.
Check Differential Feed
Your differential feed dial is the quiet troublemaker — ignore it, and even perfect threading means nothing on knits.
Knit fabric stretching during overlocking? Push the dial toward negative (0.6–0.9). Woven fabric puckering at the edge? Nudge it positive (1.2–2.0). Start at neutral 1.0, adjust in small 0.1 steps, and always test on scrap first.
Test The New Thread Chain

Before you sew a single real seam, run a quick test to make sure everything is working the way it should. A few seconds on scrap fabric can save you from ruining an actual project. Here’s what to check once your new thread is in place.
Leave Four-inch Tails
Before you sew a single stitch, pull each thread end until you have a four-inch tail hanging free. That length gives you enough slack to tie a secure knot, test the tension, and rethread fast if something fails.
Tuck all four tails to the left of the fabric edge, flat and untangled, so they clear the needle zone completely.
Sew Scrap Fabric
Grab a scrap piece of lightweight cotton — something you don’t care about — and run it under the serger foot.
Good scrap choices for this test include:
- Cotton quilting squares from your patchwork stash
- Knit jersey offcuts from old projects
- Linen scraps trimmed with rotary cuts
- Polyester blend pieces in coordinating colors
- Pre-frayed edges already finished with pinking shears
Sew three to four inches, then stop.
Inspect Stitch Balance
Flip that test strip over and look at both sides. Loop size symmetry is what you’re after — the loops on the front and back should look nearly identical in size. If you spot one thread hogging the spotlight, your tension is off. A balanced overlock stitch won’t favor either side.
Adjust Loose Loops
Once you’ve spotted a loose loop, don’t adjust every dial at once. Tighten one looper tension at a time, then run a quick test on scrap fabric.
Loops drooping off the top edge usually mean your upper looper is too loose. Bottom loops? Lower looper. Knits may need softer tension than wovens, so always match your test scrap to your actual project fabric.
Check Thread Color Placement
Once your loops sit balanced, take a look at the actual colors. Step outside or hold your seam under a daylight lamp — artificial light lies. What looks like a true match indoors can drift under sunlight.
Hold each thread against a neutral fabric swatch. Needle threads should blend into the seam; looper threads need enough contrast to stay visible while you sew.
Fix Slow Thread-Change Problems

Even the fastest sergers hit a snag when something’s off in the thread path. Most slowdowns come from the same handful of culprits, and once you know them, they’re easy to fix on the spot. Here’s what to watch for:
Broken Tie-on Knots
A broken tie-on knot doesn’t just slow you down — it unravels your whole three-minute goal.
What causes tie-on knot failure:
- Too few wraps reduce friction, letting threads slip under tension
- Crossed hands during tying create a weak granny knot instead of a square knot
- Knot friction heat from tightening too fast degrades slippery thread
- Tails cut too short give the knot nothing to grip
- Uneven tension loading while pulling causes the knot to loosen mid-path
Missed Tension Discs
Skipping a tension disc is like leaving a zip undone — everything looks fine until it falls apart mid-seam.
| Issue | Cause | Fix |
|---|---|---|
| Uneven stitch balance | Thread bypassed a disc | Rethread that path only |
| Loops under fabric | Disc not engaging | Zero tension, re-pull thread |
| Thread snags or squeaks | Lint between discs | Brush discs, rethread carefully |
Disc engagement checks take seconds: tug each thread gently after threading — you should feel slight resistance. No resistance means the thread missed the disc entirely. Also, lint buildup prevention matters more than people admit; debris stops discs from gripping, causing thread coating slippage before the loop even forms.
Looper Thread Tangles
Tangled looper threads usually trace back to one of three culprits: looper eye burrs, tension disc debris, or mismatched thread weight.
Run your fingernail across each looper eye — even a tiny rough edge snags thread and starts a bird’s nest fast.
Clean tension discs before rethreading, and make sure your thread weight actually matches your machine’s settings.
Skipped Needle Stitches
Skipped stitches after a thread change almost always point to the needle.
Check three things fast: needle type for your fabric (ballpoint for knits, sharp for wovens), whether it’s fully inserted, and whether it’s bent.
A misaligned needle misses the looper’s hook by a hair — enough to skip every stitch.
Re-seat it, then test on scrap.
Bird’s-nest Thread Jams
A bird’s-nest jam is basically a thread pile-up hiding under your fabric — and tension discs are usually the culprit. If they weren’t fully open when you pulled the new thread through, excess thread feeds straight into a tangle beneath the needle plate.
Zero your tension, re-pull the thread, clean the bobbin case, and check the needle for burrs before sewing again.
Frequently Asked Questions (FAQs)
How do I use a serger machine?
A serger feeds fabric through four interlocking thread paths — two loopers, two needles — trimming and overcasting the edge simultaneously. It’s faster than a regular machine and gives seams a clean, professional finish.
How to thread a serger machine like a pro?
Thread your serger in this order: upper looper, lower looper, right needle, left needle. Keep the presser foot raised, tensions at zero, and use color-coded guides to stay on track.
What is a 4 thread Serger?
A regular sewing machine finishes one thread at a time. A four-thread serger runs four separate threads simultaneously — two needles, two loopers — creating a stretchy overlock stitch that seams and finishes edges in one pass.
How do you Serge a 4-thread overlock stitch?
A four-thread overlock stitch runs two needle threads and two loopers simultaneously, interlocking them around the raw edge at 3–5 mm wide — finishing, seaming, and stabilizing knits or wovens in one pass.
Can I use different thread types?
Yes — but match your thread to the task. Polyester works on nearly everything. Avoid cotton on stretch seams. Metallic thread needs slower speeds and softer tension or it’ll shred before you finish a seam.
How do I clean my serger?
Keep your serger clean and it’ll reward you. Unplug first, then use a small brush to clear lint from the loopers and tension discs every 2–4 projects.
What if a thread breaks mid-stitch?
A snapped thread mid-stitch hits like a record scratch. Don’t panic — cut the broken ends cleanly, tie a small square knot, then pull gently to test before resuming.
My serger is jamming, what should I do?
A jam usually means lint buildup, a misaligned needle plate, or a threading error. Zero your tensions, clear any thread nests, and re-thread only the affected path.
Where can I find replacement parts?
Like any trusty tool, your serger needs genuine parts to stay sharp. Check authorized dealers, manufacturer service centers, or online retailers — most stock OEM parts with warranty protection and fast shipping.
What thread weight works best for serger machines?
40 weight polyester thread hits the sweet spot for most serger projects. Use 50 weight for denim, 60 weight for sheers like chiffon. Polyester’s stretch resistance keeps stitches from snapping under pressure.
Conclusion
Rethreading used to feel like untangling headphone cords in the dark—frustrating, endless, and somehow always urgent.
Now you have a system. Knowing how to change thread on a serger in 3 minutes or less isn’t just a trick; it’s the difference between a machine that works for you and one you dread touching.
Tie the knot, pull it through, test on scrap. That’s the whole game. Keep the method, keep the momentum.
- https://www.bsewinn.com/blogs/inspiration/how-to-thread-serger
- https://sarkirsten.com/blog/2021/4/21/the-easiest-way-to-change-serger-thread
- https://www.sewingjulie.com/post/5-game-changing-serger-techniques
- https://www.mygoldenthimble.com/never-re-thread-best-way-change-serger-threads
- http://bsewinn.com/