This site is supported by our readers. We may earn a commission, at no cost to you, if you purchase through links.
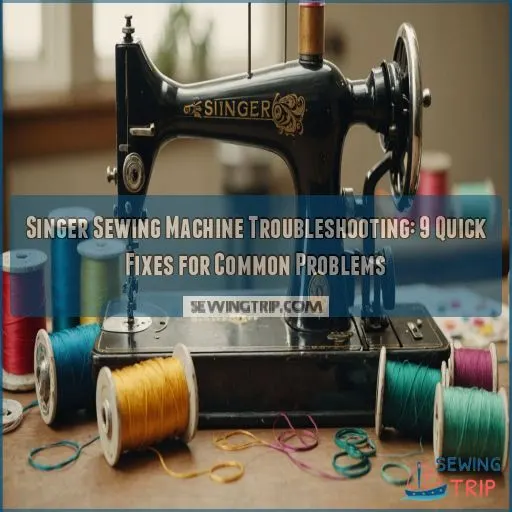
First, check the basics: make sure the needle’s in good shape, the thread tension’s balanced, and the feed dogs are working.
If your machine’s still acting up, try a little TLC – give it a thorough cleaning and a drop or two of oil. Sounds like a spa day for your trusty Singer!
And if all else fails, don’t be afraid to call in the experts. A quick tune-up can work wonders.
Now, let’s get into some more advanced troubleshooting tips to keep your machine humming along like a champ.
Table Of Contents
- Key Takeaways
- Common Singer Sewing Machine Problems
- Fixing Thread Tension Problems
- Resolving Needle and Fabric Feed Difficulties
- Addressing Singer Machine Power and Motor Issues
- Tackling Stitch Quality and Pattern Problems
- Maintenance Tips for Singer Sewing Machines
- Diagnosing and Fixing Timing Issues
- Troubleshooting Unusual Noises and Vibrations
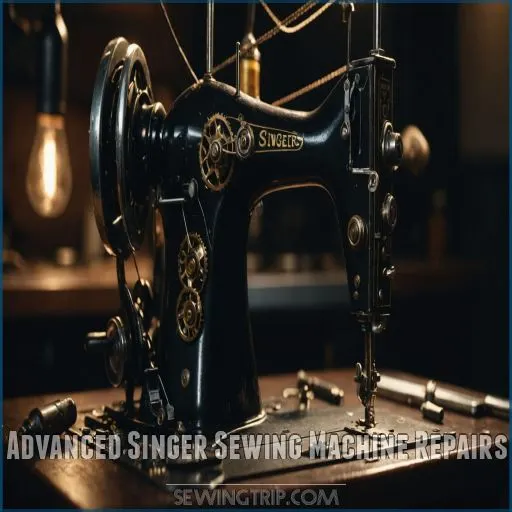
- Advanced Singer Sewing Machine Repairs
- Frequently Asked Questions (FAQs)
- Conclusion
Key Takeaways
- Got skipped stitches or tangled threads? Don’t worry, it happens to the best of us. First, double-check your needle and thread tension, and always make sure your machine is clean – consider it a spa day for your trusty Singer.
- Dealing with loud noises or that pesky thread bunching? It might be time for a little TLC. Inspect the bobbin and feed dogs – these troublemakers often hide lint like squirrels hide nuts.
- When your machine’s acting like it’s hit a roadblock, remember the basics: check the power, foot pedal, and any loose connections. It might sound like rocket science, but it’s usually something simple.
- For those curious about timing issues, consider the needle as a conductor in your sewing symphony. If things aren’t syncing up, a little adjustment to the hook timing and needle bar might just bring harmony back to your stitches.
Common Singer Sewing Machine Problems
Your Singer sewing machine‘s acting up?
Don’t worry, you’re not alone.
From skipped stitches to pesky tension issues, we’ll tackle the most common hiccups that can turn your crafting session into a comedy of errors.
Skipped Stitches
With your Singer sewing machine skipping stitches due to a worn-out needle type, you’re probably feeling as frustrated as a cat chasing its tail
.
Don’t worry, we’ll get you back on track! Here’s a quick fix checklist:
- Replace that sneaky bent needle
- Double-check your thread tension
- Give your machine a good clean
- Match needle size to fabric weight
Remember, even experienced sewers hit snags sometimes. It’s all part of the sewing adventure!
Thread Bunching or Tangling
Thread bunching got you in knots? Don’t sweat it! First, check your threading – it’s the usual suspect . Make sure you’ve threaded with the presser foot up, letting that thread snuggle into place.
If you’re still seeing a bird’s nest under your fabric, swap out your needle. It might be bent, causing mischief.
Clean out any lint hiding in your machine – it’s like giving your Singer a spa day!
Needle Breaking Frequently
Your sewing needle might be auditioning for a break-dancing gig if it keeps snapping. Check your needle size; it must match the fabric type.
Wrong needle insertion? That’s common too—double-check it’s secure. Look into tension issues or bobbin problems.
Broken needles could also hint at sewing machine timing issues
. Fix these, and your needle will stop its dramatic exits.
Fabric Puckering
Dealing with fabric puckering? It’s like a wrinkle in time, but less fun.
Here’s what to check:
- Tension Impact: Adjust upper-or-lower tension for smoother stitches.
- Stabilizer Types: Use a stabilizer to keep lightweight or stretchy fabrics steady.
- Feed Dog Issues: Make sure feed dogs are up and working, so your fabric glides like a breeze.
Uneven Stitch Length
Ah, the mystery of uneven stitch length!
Sometimes, it seems as baffling as a cat that gets into everything but its bed.
Check your Singer sewing machine’s feed dog alignment and adjust fabric tension.
The wrong needle size can also throw a wrench in the works.
Set things straight, and watch those stitch length inconsistencies disappear like magic!
Machine Making Loud Noises
Loud sewing machine noises have you pulling your hair out? Don’t worry, it’s a jungle we can tame.
- Check the bobbin winder – It might be engaged accidentally.
- Clean and lubricate – Your machine needs TLC.
- Inspect the motor – Sometimes it’s best to call a professional for repair.
Tension Issues
Sounds like your Singer’s got some tension troubles!
First, check that thread’s threaded right – even a tiny tug can throw it off.
Then, make sure your top and bobbin threads match up.
If that doesn’t do the trick, try adjusting the tension dial – too tight or too loose can both cause issues.
With a little TLC, you’ll have those stitches singing in no time!
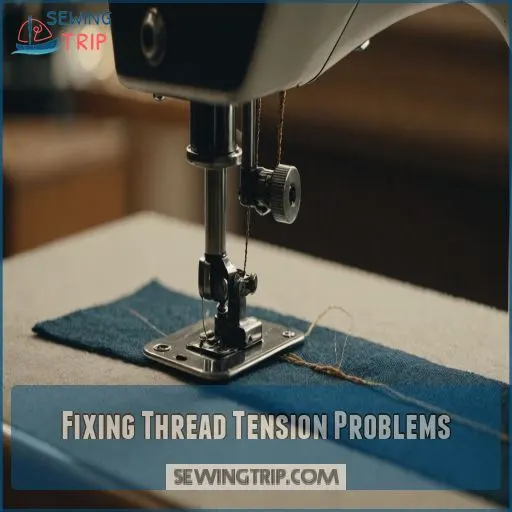
Fixing Thread Tension Problems
Struggling with thread tension on your Singer sewing machine can feel like you’re wrestling an alligator into a sweater, and mastering the art of sewing machine tension fixing is crucial to getting the perfect stitch
.
Take a deep breath, because with just a few quick tweaks, like adjusting the upper and lower tension, you’ll be back to stitching with ease.
Upper Thread Too Tight
Loosen that upper thread tension by checking your tension dial—lower the number slightly for balance.
Make sure the needle size fits your fabric type. A heavy needle on light fabric? That’s like using a sledgehammer on a fly!
Also, inspect bobbin tension and stitch length, ensuring all elements play nicely together.
Happy sewing!
Lower Thread Too Loose
When that upper thread stubbornly refuses to cooperate, it might be time to peek at the bobbin’s antics.
If your lower thread seems as slack as an old rubber band, tweak the bobbin tension.
Check the bobbin case for any mishaps during winding.
Sometimes, even the best-loved machines need a little TLC to avoid loose bobbin woes.
Balancing Upper and Lower Tension
Adjusting the upper and lower tension on your Singer sewing machine can transform your sewing from drab to fab in a stitch.
Balance is key—ensure your bobbin tension is set first .
Then, tweak the upper tension for perfect harmony.
Quality thread, right needle size, and fabric type all play a part in this delicate dance of tension troubleshooting.
Adjusting Tension for Different Fabrics
You’ve mastered balancing tension, so let’s tackle the puzzle of perfect settings for different fabrics.
Each fabric weight speaks its own language—light sheers whisper for loose tensions, while heavy denims demand a firm grip.
Consult tension charts and experiment with different thread types to avoid common mistakes.
Remember, a little playing around with tension saves headaches later and is key to finding the right tension charts.
Thread Breaking Frequently
Every stitch matters, so if your thread’s breaking often, let’s untangle this mess together.
Check the thread quality; cheap thread snaps easily.
Make sure the needle size suits the fabric type—it’s like trying to fit a square peg in a round hole otherwise.
Balancing tension is key; adjust it carefully. Watch for sneaky bobbin issues too.
Resolving Needle and Fabric Feed Difficulties
Having trouble with your needle or fabric feed?
Don’t sweat it – we’ve got your back.
From thread bunching solutions like these to needle positioning woes, we’ll walk you through the quick fixes to get your machine humming along smoothly again
.
Needle Not Moving
When your Singer needle’s stuck, it can feel like you’re sewing uphill!
First, make sure the bobbin-winding spindle isn’t locked in place.
If the needle’s jammed, check for a broken or bent needle and replace it if needed.
A misalignment can stop the show, so align it properly and resume your stitching adventure.
Fabric Not Feeding Properly
Wrestling with needle not moving before? Now, if your fabric isn’t feeding properly, it’s time to check those feed dog issues.
Adjust your needle position, and make sure your fabric type suits your settings. Tension problems or bobbin winding woes might be the culprits.
- Inspect feed dogs
- Adjust needle position
- Verify fabric type
- Check thread tension
- Confirm bobbin winding
Feed Dogs Not Engaging
Oh, those pesky feed dogs not engaging. It’s like they’ve gone on strike. Check for jammed lint or debris. Give them a good cleaning, align them, and apply a wee bit of lubrication.
Consider these quick fixes:
| Issue | Solution |
|---|---|
| Misalignment | Adjust feed dog alignment |
| Dirt/Debris | Clean feed dogs |
| Resistance | Lubricate feed mechanism |
| Dropped Position | Raise feed dog lever |
| Broken Assembly | Repair or replace parts |
You’ll be back to sewing in no time!
Needle Position Issues
Got a Singer sewing machine that’s misbehaving? Sometimes, needle placement causes chaos.
First, check if it’s not too high or low—needle depth matters! Make sure the needle size suits your fabric to avoid surprises.
Misalignment can bang needles against wrong surfaces, leading to needle breakage. Fix it, and soon your stitches will be flowing like a dream again! (Source)
Selecting Correct Needle Type
Choosing the correct needle type is like picking the right key for a lock.
Match your needle size to the fabric weight and needle point to your sewing project.
A ballpoint needle, for instance, pairs well with knits, while a sharp needle suits wovens.
Consider thread type, too—it’s all about harmony in crafting!
Addressing Singer Machine Power and Motor Issues
If your Singer sewing machine’s gone silent or seems to have a mind of its own, you might’ve power or motor issues on your hands.
Don’t worry; with a few checks and a bit of patience, you’ll get your machine back to humming smoothly.
Machine Won’t Turn On
Uh oh, your Singer sewing machine won’t turn on? Don’t worry, we’ve got this!
First, check the power cord – is it securely plugged in?
Next, inspect the fuse or circuit breaker.
If those are good, try the power switch. Still no luck?
Check the foot pedal connection.
Foot Pedal Not Responding
After ensuring your Singer machine’s plugged in, let’s focus on the foot pedal. If it’s not responding, foot pedal wiring might be the culprit.
Start with pedal troubleshooting: inspect for a power cord issue or check for an electrical fault. A stitch in time, right?
Here’s a quick look:
| Symptom | Possible Cause | Solution Guide |
|---|---|---|
| No Response | Frayed Wiring | Repair/Replace |
| Sporadic Power | Loose Connection | Secure Connections |
| Overheating Pedal | Internal Fault | Professional Repair |
Motor Running Slowly
Feeling fun yet frustrated because your machine’s in slow-mo mode? You’ve checked the foot pedal, but slow motor issues might lurk elsewhere. In some cases, this slowdown could be caused by field coil insulation deterioration or failing motor brushes, which can lead to motor malfunctions and overheating.
Try these quick fixes:
- Inspect for power cord issues.
- Check for voltage fluctuations.
- Clear any pesky lint buildup.
- Lubricate to prevent overheating.
Keep your Singer humming along smoothly, and soon you’ll be sewing like a pro!
Inconsistent Speed Control
Your Singer’s motor might be cruising leisurely, but inconsistent speed control can resemble trying to drive with a sticky gas pedal.
First, do a power supply check and consider the foot pedal issues.
Older machines may need a speed control calibration.
Avoid motor overheating by keeping an eye on use time.
Sometimes, age catches up even with beloved sewing machines.
Electrical Connection Problems
Imagine this: you’re ready to sew, but your Singer has other plans.
Check for power cord issues and outlet compatibility first. Sometimes, it’s a sneaky loose connection causing trouble.
The foot pedal wiring problem is another issue to consider.
Don’t forget the circuit breaker; it’s the unsung hero here.
With these checks, you’ll be back to stitching faster than you can say "bobbin!
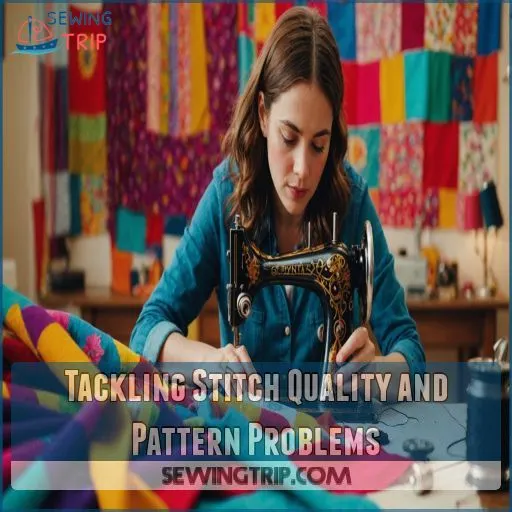
Tackling Stitch Quality and Pattern Problems
Imagine this: you’re almost finished with your latest sewing masterpiece when your Singer skips stitches or mangles a decorative pattern.
Don’t worry, with a few tweaks, you’ll be back to crafting flawless buttonholes and perfect zigzags in no time.
Irregular Stitch Formation
If, by chance, your stitches are wonky, let’s get to the bottom of it! First, check your needle size. A mismatched needle can cause chaos.
Then, consider the following adjustments to achieve better results:
- Adjusting bobbin tension for balance
- Varying stitch length cautiously
- Checking fabric type compatibility
Remember, thread quality matters too. Tame those stitches, and you’ll sew smoother than ever!
Pattern Selector Not Working
Ah, the pattern selector – that tricky little dial that can leave you scratching your head.
If it’s stuck or not registering, don’t fret. First, check for debris or hardened oil. Try gently cleaning and lubricating the mechanism.
If that doesn’t work, the buttonhole adjusting screw may need tweaking. And remember, raising the needle can sometimes do the trick.
| Possible Issue | Solution |
|---|---|
| Pattern selector jammed | Clean and lubricate mechanism |
| Selector wheel loose | Tighten selector wheel |
| Selector stuck | Adjust buttonhole adjusting screw |
| Selector not registering | Raise needle to highest point |
Decorative Stitches Distorted
Your decorative stitches might look like hieroglyphics if you’re wrangling with tension issues or the wrong needle size.
Make sure your needle matches your fabric type, adjust the tension, and verify the stitch width setting.
Bobbin issues can also twist your plans, so make sure it’s wound and inserted correctly.
A few tweaks and you’re sewing Picasso-level stitches! (Source)
Buttonhole Function Failing
While sorting out distorted decorative stitches, make sure your buttonhole function isn’t buttoning you up the wrong way.
Check these:
- Adjust buttonhole size for fabric needs.
- Make sure needle position is spot on.
- Resolve tension issues by cleaning and adjusting threads.
- Set foot pressure correctly for smooth movement.
- Make sure to clean out any debris to maintain stitching quality.
These tweaks can save your stitching mischief!
Zigzag Stitch Malfunction
Encountering zigzag stitch malfunctions? Let’s tackle it! Adjust the zigzag stitch width and make sure the needle size fits your fabric. Check for tension issues—tighten or loosen as needed.
A misaligned bobbin winding could also trip you up. Keep stitch length consistent to avoid hiccups.
Here’s a quick reference:
| Zigzag Width | Needle Size | Tension |
|---|---|---|
| Adjust | Match Fabric | Check |
| Test | Replace | Balance |
| Make sure | Correct | Examine |
| Correct | Adjust | Tighten |
| Align | Monitor | Loosen |
Maintenance Tips for Singer Sewing Machines
Keeping your Singer sewing machine in top shape is like having a trusty friend ready for any project, so make sure you clean, oil, and store it right.
A little regular maintenance can prevent those pesky breakdowns and keep your sewing sessions running smoothly.
Regular Cleaning Routine
Think of your Singer sewing machine as a trusty sidekick—it deserves some TLC!
Regular cleaning keeps it in tip-top shape.
Start by removing lint around the bobbin case and needle plate with cleaning tools like a soft brush.
Don’t forget to check underneath for any hidden dust bunnies. A clean machine means fewer headaches and more sewing fun!
Proper Oiling and Lubrication
Your Singer sewing machine craves attention just like a well-tended garden.
Grab sewing machine oil and a precision oiler—no salad dressing here! Dab oil onto moving parts like the hook race, but remember: a little goes a long way.
By avoiding over-oiling, you help make sure smoother stitches and longer machine life.
Keep it slick, not sticky!
Replacing Worn Parts
Once you’ve kept your Singer sewing machine well-oiled, it’s time to tackle those worn parts.
Refer to your manual to identify components like the bobbin case, needle, and feed dogs that may need replacing.
Don’t be afraid to DIY – with the right parts and a little patience, you can breathe new life into your trusty machine.
Storing Machine Correctly
Imagine storing your Singer sewing machine with care. Here’s how:
- Cleaning: Give it a gentle wipe to remove dust.
- Dust Covers: Use a cover to shield it from grime.
- Space: Find a dry, stable shelf—no wobbly tables!
- Environment: Avoid damp basements; they’re no friends to metal parts.
A well-kept machine lasts longer!
Scheduling Professional Servicing
While safely storing your beloved Singer keeps it cozy, regular professional servicing makes sure it runs smoothly.
Aim for servicing every six to twelve months. Find a reputable technician, and don’t forget to check warranty coverage to keep costs in check.
It’s like giving your sewing machine a spa day—preventative maintenance and expert care keep it purring longer.
Diagnosing and Fixing Timing Issues
When your Singer sewing machine’s stitches aren’t in sync, it’s like trying to dance while someone’s stepping on your toes.
Fixing timing issues, like adjusting the hook timing or aligning the shuttle hook, can make your machine hum a happy tune again.
Hook Timing Problems
Keeping your Singer purring like a kitten requires more than regular cleaning—hook timing issues can really ruffle feathers.
Aligning the hook with the needle at just the right moment makes for smooth stitching.
Use a strip of fabric to test; if the stitch quality falters, adjust the shuttle race and check bobbin tension to keep your machine humming.
Needle Bar Height Adjustment
Adjusting the needle bar height can fix pesky timing issues, making your Singer sing again.
- Loosen the needle bar screw: Shift it slightly.
- Check the needle’s eye: It should hover above the bobbin case.
- Tighten the screw: Like securing a treasure chest.
- Test stitch quality: Notice improved bobbin tension, needle size, and fabric thickness compatibility?
Take-Up Lever Synchronization
Got your needle bar height all set? Now, let’s talk about that pesky take-up lever. If it’s out of sync, your sewing can go haywire!
| Problem | Solution |
|---|---|
| Lever not moving | Check position |
| Thread jamming | Adjust lever function |
| Timing off | Try lever adjustment |
| Stuck lever | Consider lever replacement |
Keep calm; your machine will thank you!
Feed Dog Timing
Struggling with your Singer sewing machine‘s feed dogs? Don’t worry, we’ve got your back. First, check if the feed dogs are moving up and down properly as you turn the handwheel. If not, the timing might be off.
Try these tips:
- Inspect the feed dog mechanism for any wear or damage
- Make sure the stitch length is set correctly – not too long or short
- Make sure the stitch length is set correctly, as that can affect feed dog movement, but more specifically – Make sure the stitch length is set correctly, as incorrect stitch length can affect feed dog movement but more specifically also Make sure the stitch length is set correctly, as incorrect stitch length can affect feed dog movement but more specifically Make sure the stitch length is set correctly – not too long or short, as that can affect feed dog movement was changed to Make sure the stitch length is set correctly – not too long or short.
If the issue persists, it’s best to consult a professional technician to get your machine back in tip-top shape.
Shuttle Hook Alignment
Imagine this: your Singer sewing machine is like a symphony, and the shuttle hook alignment is the conductor.
Check the needle timing and make sure the bobbin race isn’t playing its own tune. Tightening the hook assembly can reduce hook tension issues.
Keep everything in sync, and you’ll stitch like a pro. Remember, a happy machine means smooth sewing!
Troubleshooting Unusual Noises and Vibrations
Ever notice how your Singer machine suddenly sounds like a mini construction site?
Let’s tackle those strange noises and vibrations so you can get back to sewing without the symphony of unwelcome clanks and buzzes interrupting your creative flow.
Identifying Source of Knocking Sounds
Is your sewing machine knocking louder than Grandma’s front door?
Let’s pinpoint the source:
- Check for loose parts—those gremlins love to rattle.
- Watch for a needle strike; it shouldn’t hit the bobbin case.
- Inspect the bobbin case alignment.
- Evaluate potential timing issues.
- Listen for motor noise; it shouldn’t sound like a runaway train.
Resolving Grinding Noises
When your Singer sewing machine starts sounding like a rock concert, it’s time to identify the source of the grinding noise.
First, check for worn parts and give your machine a thorough cleaning.
Lubrication can work wonders if your machine’s feeling rusty.
If all else fails, seek professional help—sometimes, even machines need a little pampering to sing again .
Excessive Vibration During Operation
Imagine your Singer sewing machine vibrating like a jumpy jackrabbit.
Address this with practical checks:
- Table Stability: Make sure your table’s rock-solid and level.
- Loose Parts: Tighten any screws or bolts.
- Motor Health: Listen for unusual sounds; motors need love too.
- Needle Size and Bobbin Tension: Use the right needle and adjust bobbin tension for smooth operation.
Happy sewing!
Rattling or Loose Parts
You’ve just tackled those vibrations, now let’s fix the rattling from loose parts.
Check screws and bolts for tightness. Sometimes, it’s like your machine’s trying to dance when it should be sewing! A scattered component might need replacement, but start with tightening.
Keep your machine stable and sewing smoothly with this handy table:
| Problem | Feeling |
|---|---|
| Rattling Noise | Frustrating |
| Loose Screws | Annoying |
| Machine Shakes | Worrying |
| Replacement Need | Empowering Solution |
Squeaking or Squealing Sounds
Hear that high-pitched squeal? It’s your Singer sewing machine’s way of begging for some TLC.
First, check the belt tension – a loose or worn belt can cause that pesky noise. Next, inspect the needle bar and gears for any signs of wear.
A quick lubrication session may be just what your machine needs to hush that squeak, providing your machine with some much-needed TLC.
Advanced Singer Sewing Machine Repairs
When your Singer sewing machine acts more finicky than a cat with a new collar, it’s time to tackle advanced repairs.
You’ll feel like a sewing superhero as you conquer tricky tasks like replacing gears and belts or fixing computer control panels.
Replacing Gears and Belts
Just tackled that noise issue?
Next, gears and belts are the heartstrings of your sewing machine.
Select compatible parts and deftly fit them in. Mind those quirky belt types and avoid common failures by following precise installation tips.
While repair costs can vary, mastering this task will have you sewing again like it’s nobody’s business—no sweat!
Repairing Electronic Components
Imagine your Singer sewing machine as a trusty sidekick, but now it’s throwing a digital tantrum.
Fear not! Start diagnosing electronic issues by checking for loose wires or failed circuits. Repairing or replacing minor components might do the trick.
Remember, if your troubleshooting adventures hit a wall, reaching out to a professional avoids further damage.
Fixing Computerized Control Panels
After repairing electronic components, tackling the computerized control panel feels like dealing with a moody teen—it’s sensitive yet essential.
If your machine’s screen flickers or buttons stick, try a hard reset by unplugging it for a minute.
Still no luck? Diagnosing issues with a manual in hand might be your best bet until you’re ready for a full-blown upgrade.
Rebuilding Tensioner Assembly
Rebuilding a Singer tensioner assembly isn’t rocket science, but it’s no walk in the park either. You’ll need patience, a screwdriver, and maybe a cup of coffee.
Disassemble the tensioner assembly parts carefully, paying attention to the thread controller components and potential worn discs or springs. This is especially important since worn or damaged parts can lead to issues like excessive thread slack or thread guide misalignment.
Follow the rebuilding process precisely, and don’t skip maintenance tips to make sure sewing goes smoothly. You’ll feel like a sewing wizard!
Overhauling Feed Mechanism
You know, mastering a Singer feed mechanism feels like kimchi—worth the effort.
First, check the feed dog alignment—it’s really important! Clean the mechanism to prevent any hiccups.
Timing adjustments? Think of them as seasoning; they make all the difference.
Replace any worn parts, and don’t forget lubrication tips—your best friend against squeak and wear!
Frequently Asked Questions (FAQs)
What are the most common Singer sewing machine problems?
Got a Singer sewing machine acting up?
Check for bent needles, tangled threads, and bobbin mishaps. Don’t overlook tension troubles and debris.
Tackle these issues calmly, and you’ll be sewing like a pro in no time.
Can a Singer sewing machine be repaired?
A Singer sewing machine can be repaired.
Whether it’s a bobbin issue or a strange noise, most problems have fixes.
Routine maintenance and proper care go a long way in keeping it running smoothly.
How do I know if my Singer Sewing Machine is bad?
Notice any odd noises, skipped stitches, or tangling threads?
It might indicate your Singer needs a tune-up.
Double-check needle, bobbin setup, and tension settings.
Regular maintenance can prevent small quirks from turning into big headaches.
Why is my Singer sewing machine too tight?
Your Singer sewing machine might feel too tight if the thread tension is off.
Double-check the threading, adjust the tension settings, and make sure the needle matches the fabric.
Clean the bobbin case and feed dogs too.
What are the 7 common sewing machine troubles?
Dealing with sewing machine troubles can feel like untangling a skein of yarn.
Common issues include skipping stitches, bobbin tension, inconsistent fabric feed, and strange noises.
The machine may also exhibit problems such as the needle not moving, decorative stitches not working, and jamming .
Why is my Singer sewing machine not sewing?
Hmm, let’s see what’s going on.
First, check the needle – is it bent or the wrong size?
Next, inspect the bobbin – is it wound properly and inserted correctly?
With a little troubleshooting, you’ll have that machine humming again in no time!
Why is my Singer sewing machine bunching thread on the bottom?
Check for incorrect threading, tension imbalance, lint in the bobbin area, and incorrect bobbin insertion.
Re-thread carefully, adjust tension, clean the bobbin case, and make sure the bobbin is placed correctly to stop thread bunching .
Why is the thread not going through fabric?
Make sure the needle isn’t bent and the thread is properly tensioned and threaded through the machine’s guides.
The presser foot should be down, and the feed dogs should be up to move the fabric.
Why isnt my bobbin winding correctly?
Your bobbin mightn’t be winding right due to incorrect tension, dirty parts, or a faulty winder.
Try cleaning, adjusting tension, and ensuring compatibility with your machine.
These simple checks can get things spinning smoothly. With a little effort, you can get back to work, and your machine will be running correctly and efficiently.
How do I stop fabric puckering?
Imagine your fabric scrunching up like an accordion in a mini symphony of chaos.
Tame it by adjusting your thread tension, using a walking foot, and ensuring the needle’s sharp. (Source)
It’s all about balance and technique!
What type of oil should I use?
Grab some light sewing machine oil, the fine wine of lubricants, to keep your Singer running smoothly.
Steer clear of household oils—they’re more like vinegar, leaving residue and causing damage.
Keep your machine purring!
Why is my needle hitting the plate?
Ever had your sewing machine needle hitting the plate?
It’s likely due to a bent needle, wrong size, or misaligned position.
Try replacing the needle, checking alignment, and tightening the clamp screw to solve it.
How to fix stitch skipping issues?
Stitches skipping? It’s like a dance gone wrong – time to diagnose the issue.
Check your needle, re-thread the machine, and adjust the tension.
With a few tweaks, you’ll be sewing smoothly again in no time.
Conclusion
When your Singer sewing machine sputters like a vintage car, don’t worry, you’ve got this!
From fixing thread tension issues to dealing with noisy hiccups, you’ve learned how to tackle common Singer sewing machine troubleshooting challenges head-on.
Keep your machine purring with regular maintenance, and if things get too tricky, remember that experts are just a call away.
Armed with these tips, you’ll be back to happy stitching, and keep that creativity flowing!




Louise Schumann
May 20, 2025 at 04:44 AM
What does CC (1st one is backward) in control panel mean? I have model S800 and only use it about once a year. It is set up, has power, but doesn't sew.
Mutasim
May 21, 2025 at 04:42 AM
@Louise Schumann, On your S800 sewing machine, the "CC" message on the control panel—especially if the first "C" is backward—typically means there is a sensor or initialization error during the startup sequence. This usually appears when the machine isn't correctly initialized, or if there is an issue preventing the machine from entering sewing mode.