This site is supported by our readers. We may earn a commission, at no cost to you, if you purchase through links.
 Sewing machine motor problems can derail your projects, but mastering troubleshooting skills liberates you.
Confront heating issues stemming from faulty insulation, incorrect capacitor values, or mechanical faults.
Identify shorted windings, rewire connections, and replace worn parts like foot pedals.
Thorough cleaning rejuvenates sluggish motors too.
Understand these common culprits and suitable fixes to maintain optimal sewing machine performance.
Table Of Contents
Key Takeaways
- Overheating can be caused by various factors, including failing to turn off the motor immediately if it stalls, failing motor bearings or other bearings in the machine, parts of the machine not moving freely, or misuse of the machine.
- To determine if the motor has shorted windings, it’s essential to examine the stator and rotor for variations in winding color, measure winding resistance, check the resistance between the windings and the rotor and stator iron core, and compare the resistance between adjacent segments on opposite sides of the rotor.
- Proper brush composition and springs are essential for the motor’s operation, as are the motor’s windings, which should be low in resistance (0.1 to a few ohms).
- Regular cleaning of the motor, including the shuttle race and feed dogs every 3 months, and more frequently with regular use, is essential for maintaining the machine’s performance.
Common Issues With Sewing Machine Motors
Your sewing machine motor might be giving you trouble, but don’t worry – we’ve got you covered. Overheating prevention, capacitor replacement, winding resistance testing, motor cleaning, foot pedal maintenance, and more are all crucial aspects of keeping your machine in top shape.
First, let’s talk about overheating. It can occur due to various reasons, such as failing to turn off the motor immediately if it stalls, failing motor bearings or other bearings in the machine, parts of the machine not moving freely, or misuse of the machine (e.g., prolonged use with heavy fabric). To determine if the motor has shorted windings, learn how to do so.
Next, the capacitor reduces electrical radio frequency interference and its value isn’t critical. Proper brush composition and springs are essential, as are the motor’s windings, which should be low in resistance (0.1 to a few ohms). Use an ohmmeter with a suitable scale for readings in this range.
Now, let’s discuss motor cleaning. Assess the amount of material removable from the commutator, adequacy of cleaning, and skill level before attempting a repair. Refer to detailed instructions, materials, and supply sources for guidance.
Finally, foot pedal maintenance is crucial. If it fails to send power or control speed, replace the foot pedal. Find the required part specific to your product. Remember, a well-maintained machine is a happy machine!
Causes of Motor Overheating
Motor overheating is a common issue that can be caused by several factors, including failing to turn off the motor immediately if it stalls or failing motor bearings or other bearings in the machine. Motor overheating can also be caused by parts of the machine not moving freely or misuse of the machine.
Field Coil Insulation
The field coil, a crucial component of a sewing machine motor, can experience insulation deterioration due to perished insulation on the wires. This issue can lead to motor malfunctions and overheating. To address this problem, the best solution is to rewind the field coil, which involves assessing the amount of material removable from the commutator, ensuring adequate cleaning, and considering the skill level of the person attempting the repair.
Detailed instructions, materials, and supply sources should be consulted for guidance.
The capacitor, another essential component, plays a role in reducing electrical radio frequency interference. Its value isn’t critical, and the motor is known as a universal motor. Proper brush composition and springs are essential for the motor’s operation.
Shorted stator turns can cause stator overheating, and vice versa. Overheating can occur due to various reasons, including failing to turn off the motor immediately if it stalls, failing motor bearings or other bearings in the machine, parts of the machine not moving freely, and misuse of the machine (e.
To determine if the motor has shorted windings, it’s essential to examine the stator and rotor for variations in winding color, measure winding resistance, check the resistance between the windings and the rotor and stator iron core, and compare the resistance between adjacent segments on opposite sides of the rotor.
Rewiring the motor can be a complex process, and it’s advisable to seek professional assistance. Belt-driven motors and potted/gear-driven motors have different requirements for rewiring, and the cost can vary accordingly.
Carbon brushes should be inspected and cleaned, and the motor housing should be cleaned inside and outside.
Replacing the foot pedal can be necessary if it fails to send power or control speed. The required part specific to the product should be found, and the foot pedal cords should be replaced with new ones that aren’t hard-wired into the terminal.
Sewing machine cleaning is essential for maintaining the machine’s performance. The shuttle race and feed dogs should be cleaned every 3 months, and more frequently with regular use.
Common symptoms and repairs for sewing machine motors include checking wiring connections between the foot pedal and motor, testing foot pedal continuity with a multimeter, spinning the hand wheel to check for binding, replacing the motor if it doesn’t run when activated, and replacing the foot pedal if it fails to send power or control speed.
Capacitor Value
Capacitors play a crucial role in the operation of sewing machine motors, ensuring stability and efficiency in performance. They’re integral components in the realm of textile manufacturing equipment. However, capacitor issues can lead to motor overheating, which can cause further problems.
- Capacitor Function: Capacitors in sewing machine motors are designed to control and maintain steady power through power fluctuations. They’re essential for the smooth operation of the motor and can affect the overall performance of the machine.
- Capacitor Interference: If the capacitor value isn’t correct, it can cause interference with the motor’s operation. This can lead to overheating, as the motor may not be able to handle the power fluctuations effectively.
- Capacitor Replacement: If a capacitor fails, it’s advisable to replace it with a new equivalent. This will help maintain the motor’s performance and prevent overheating issues. It’s important to consider the capacitance, voltage rating, and other specifications when selecting a replacement capacitor to ensure compatibility and optimal performance.
Motor Overheating Causes
Sewing machine motors can overheat due to several reasons, including running the motor for a prolonged period at a low speed, failing to lubricate the motor properly, or having a thread caught within the machine’s mechanisms.
Overheating can lead to potential damage to the machine and may cause it to shut off automatically to prevent further harm.
To prevent motor overheating, it’s essential to follow the manufacturer’s instructions for cleaning and oiling the sewing machine regularly. This includes lubricating motors that require oil or grease once a year, using the recommended lubricant, and checking for proper belt tension.
Additionally, ensuring that all electric connections to the motor control and motor are tight and that the cord covering is in good condition can help prevent overheating.
Identifying Shorted Windings
When dealing with a sewing machine motor, it’s crucial to know how to identify shorted windings in the motor. Shorted windings can lead to various issues, such as overheating or even a complete failure of the motor.
- Examine the Winding Color: Inspect the color of the winding on the stator and rotor. Shorted windings may cause variations in winding color, which can be a sign of a problem.
- Measure Winding Resistance: Use an ohmmeter to measure the resistance of the windings. Normal resistance for a sewing machine motor typically ranges from 0.1 to a few ohms. If you find a significantly lower resistance, it may indicate a short.
- Check the Rotor and Stator Iron Core: Shorts to the core can also cause issues. Measure the resistance between the windings and the rotor and stator iron core to ensure there are no shorts to the core.
- Resistance Between Adjacent Segments: The resistance between adjacent segments on the rotor may be too low to read, but it should be equal.
- Examine the Motor Wiring: Inspect the sewing machine wiring, as exposed wires can be dangerous. Many machines have low-quality wiring that can accumulate carbon dust and grime, which can lead to shorts.
- Clean the Motor: Regularly clean the motor to prevent the buildup of dirt and debris. Cleaning the shuttle race and feed dogs every 3 months, and more frequently with regular use, can help maintain the motor’s performance.
- Replace the Foot Pedal: If the foot pedal isn’t providing the correct power or control speed, it may be time to replace it.
By following these steps, you can identify potential issues with shorted windings in your sewing machine motor and take the necessary steps to address them. Remember, it’s always advisable to refer to detailed instructions, materials, and supply sources for guidance before attempting any repairs.
Rewiring the Motor
When it comes to motor repair, you might find yourself in a situation where you need to replace the winding or even rewire the entire motor. This process can be daunting, but with the right tools and knowledge, you can navigate the complexities of this task.
First, assess the condition of the field coil wires. If the insulation has perished, it’s essential to rewind the field coil. Before attempting a repair, consider the amount of material removable from the commutator, the adequacy of cleaning, and your skill level.
Always refer to detailed instructions, materials, and supply sources for guidance.
Rewiring the motor involves removing the old wiring and replacing it with new ones. This process can be time-consuming and requires meticulous attention to detail. Be sure to check the resistance between the windings and the rotor and stator iron core to ensure there are no shorts to the core.
In some cases, insulation failure can lead to issues with the commutator. Cleaning the commutator is crucial to maintaining the motor’s performance. Always use the appropriate tools and techniques to avoid damaging the commutator during the cleaning process.
Replacing the Foot Pedal
If you’re experiencing issues with your sewing machine’s foot pedal, it might be time for a replacement. The foot pedal is an essential component that sends power to the motor, controlling the speed of your machine.
To replace the foot pedal, you’ll need to find a compatible replacement part for your specific sewing machine model. Many sewing machine manufacturers offer replacement foot pedals for their machines. For example, Cutex Sewing Supplies offers a variety of foot pedals that fit different models, such as Bernina, Janome, and Singer sewing machines.
In addition to foot pedal replacements, you can also consider purchasing a power cord replacement if the original cord is damaged or lost. Many sewing machine parts retailers, like Sewing Machines Plus, offer a wide range of power cords for various brands and models.
If you’re looking for a more convenient solution, you might consider double-lead replacement cords. These cords allow you to easily store and use the foot pedal and power cord together, as they aren’t hard-wired into the machine.
To replace the foot pedal, follow these steps:
- Identify the make and model of your sewing machine.
- Search for a compatible replacement foot pedal or power cord for your machine.
- Purchase the replacement part from a reputable sewing machine parts supplier.
- Follow the manufacturer’s instructions for installation.
By replacing the foot pedal or power cord, you can restore the functionality of your sewing machine and continue your sewing projects without interruption.
Cleaning the Sewing Machine
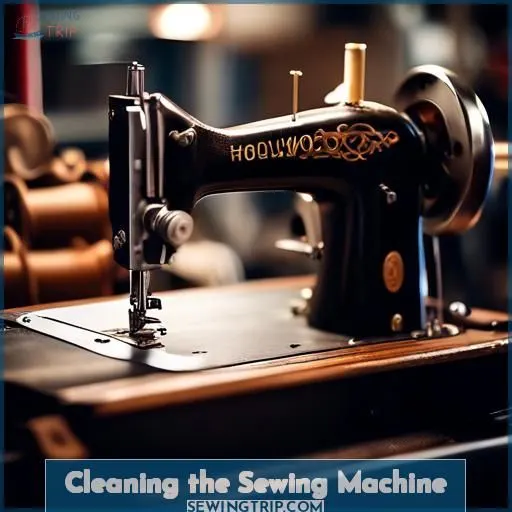
Keeping your sewing machine in tip-top shape is crucial for smooth, hassle-free operation. Make it a habit to clean the shuttle race and feed dogs every three months – more often if you use your machine regularly.
This simple maintenance task will ensure your stitches stay consistent and your machine runs like a dream.
After cleaning, don’t forget to oil your sewing machine. A few drops of the right lubricant can work wonders, keeping everything moving freely and preventing unnecessary wear and tear. Trust us, a well-oiled machine is a happy machine! Stay on top of this routine, and you’ll be sewing with confidence, knowing your trusty companion is in pristine condition.
Symptoms and Repairs for Sewing Machine Motors
If your sewing machine motor isn’t running, check the field coil insulation and capacitor value.
Field Coil Issues
When dealing with field coil issues in sewing machine motors, it’s crucial to assess the amount of material removable from the commutator.
Clean the commutator.
Determine the skill level before attempting a repair.
Insulation damage on field coil wires can lead to problems.
The best solution is to rewind the field coil.
Always refer to detailed instructions, materials, and supply sources for guidance.
Capacitor Function
Capacitors play a crucial role in the operation of sewing machine motors, ensuring stability and efficiency in performance. They’re designed to meet specific operational demands of industrial sewing machines, with various types available, each tailored for specific applications. Film capacitors, for instance, are commonly used due to their wide capacitance range, making them suitable for general applications. Electrolytic capacitors, including aluminum and tantalum varieties, are used in DC circuits to smooth out power supply fluctuations. Supercapacitors stand out for their high energy storage capacity, ideal for systems requiring rapid charge and discharge cycles.
When selecting a capacitor for a sewing machine motor, it’s essential to consider factors such as capacitance value, voltage rating, and tolerance to ensure compatibility and optimal performance. Additionally, the operating environment, including temperature and humidity, can impact capacitor performance.
Capacitor Replacement: When to Replace a Capacitor
If you encounter issues with your sewing machine motor, such as poor performance or motor malfunction, it may be due to a faulty capacitor. In such cases, it’s advisable to replace the capacitor to restore the motor’s performance. To replace a capacitor, follow these steps:
- Identify the type of capacitor needed based on the motor’s specifications and operating environment.
- Purchase a suitable replacement capacitor from a reliable supplier.
- Remove the faulty capacitor from the motor.
- Install the new capacitor, ensuring proper connection to the motor’s terminals.
Capacitor Testing: Ensuring Proper Functionality
To ensure the new capacitor is functioning correctly, perform a capacitance test using an ohmmeter or capacitance meter. This test will help you verify that the new capacitor is within the specified capacitance range and isn’t damaged.
Capacitor Overheating: Preventing Motor Damage
Overheating can occur in sewing machine motors due to various reasons, including capacitor issues. To prevent overheating, ensure that the capacitor isn’t overheating the motor by selecting a capacitor with appropriate capacitance and voltage ratings. Additionally, maintain a clean and well-ventilated environment for the motor to reduce the risk of overheating.
In conclusion, capacitors play a vital role in the operation of sewing machine motors, ensuring stability and efficiency in performance. By understanding the function of capacitors and how to test and replace them, you can maintain the performance of your sewing machine and prevent motor damage.
Overheating Causes
Overheating can be a significant issue with sewing machine motors, leading to various problems. Failing motor bearings, winding resistance, brush composition, and carbon dust can all contribute to overheating.
To troubleshoot, examine the stator and rotor for winding issues, measure resistance, and check for shorts to the core. Proper maintenance, such as cleaning and lubrication, can help prevent overheating.
Frequently Asked Questions (FAQs)
How can I tell if my sewing machine motor has a shorted winding?
You’ll want to examine the windings for discoloration and measure resistance. Low resistance between adjacent coils or a short to the core indicates faulty insulation and shorted turns.
What should I do if my sewing machine motor doesn’t make any noise when activated?
If your sewing machine motor doesn’t make a peep when activated, it’s a dead giveaway – that old workhorse has gone to the machine graveyard.
How can I fix a sewing machine motor that buzzes but doesn’t run?
If your sewing machine motor buzzes but won’t turn, it’s likely the brushes are worn.
What is the best way to clean a sewing machine motor?
Disassemble the motor housing carefully, brushing away dust and grime buildup. Clean armature and commutator surfaces gently with a soft cloth dampened with electrical contact cleaner. Allow it to dry thoroughly before reassembling. Proper cleaning extends motor life immensely.
How can I determine if my sewing machine motor is overheating?
Like a watchful sentry, feel for hot spots – a telltale sign the motor’s gulping more power than it can handle. Don’t let that midday sun beat down; scorching temps fry wires and windings alike.
Conclusion
Sewing’s no child’s play—it’s a passion where even tiny motor hiccups disrupt your flow. With proper diagnosis and strategic repairs, you’ll triumph over sewing machine motor problems. Clean meticulously, rewire connections, replace worn parts fearlessly. Uncovering root causes like faulty insulation or capacitors prevents future headaches, ensuring your sewing machine purrs smoothly through ambitious projects.

