This site is supported by our readers. We may earn a commission, at no cost to you, if you purchase through links.
Trim and moisten the thread’s end to avoid frays.
A contrasting paper or thread highlights the needle’s eye, easing your aim.
Use an automatic threader if your machine’s modern enough—it’s like having a tiny threading wizard!
Stabilize the thread by holding it close to the needle.
Bright lighting will show you the way, turning a challenge into a cinch.
Curious about more pro tips? Let’s unravel all the secrets!
Table Of Contents
- Key Takeaways
- Mastering The Art of Thread Preparation
- Essential Tools for Effortless Threading
- Pre-Threading Preparations for Success
- Foolproof Methods to Thread Sewing Machine Needles
- Overcoming Common Threading Challenges
- The Importance of Good Lighting and Magnification
- Choosing The Right Needle and Thread Combination
- Troubleshooting Machine-Specific Threading Issues
- Tips for Threading Delicate or Specialized Needles
- Frequently Asked Questions (FAQs)
- Conclusion
Key Takeaways
- Use sharp scissors to trim thread ends cleanly for easier threading and avoid frays by moistening the tip slightly.
- Invest in quality needle threading tools and good lighting to simplify the threading process and reduce eye strain.
- Match the thread thickness with the needle size to prevent tension issues and ensure smooth sewing.
- Regularly replace sewing machine needles and adjust machine settings for optimal performance to prevent threading headaches.
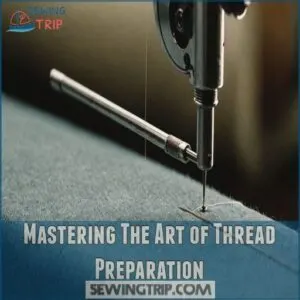
Mastering The Art of Thread Preparation
Getting your thread ready is essential for smooth needle threading, so let’s make sure those ends are cleanly cut and perfectly shaped.
Add a little moisture or use thread conditioners to keep it strong, and you’ll be threading like a pro in no time!
Cutting Thread Ends Cleanly and Precisely
A sharp pair of scissors is essential when dealing with sewing machine thread, especially when trying to cut through knots after threading a sewing machine. A sharp pair of scissors is your best friend when dealing with sewing machine thread.
Snip frayed ends to get clean cuts, which helps with better thread quality and reduces tension issues.
A perfect beveling tip helps the thread slide easily through sewing machine needles, and understanding how to thread a brother sewing machine, particularly threading the take-up lever, is crucial for smooth stitching.
Remember, precision here leads to smoother sewing machine threading, making your project a stitch in time!
Moistening Thread Tips for Smoother Insertion
Got a perfectly cut thread end? Great! Now, for super smooth insertion, try a tiny drop of water or even saliva on the thread tip.
It acts like needle lubrication, making threading a breeze. This simple threading hack helps the thread glide effortlessly through the eye of the needle.
Seriously, it’s a game-changer for those tiny needles! You’ll be amazed at how much easier needle threading becomes with this simple trick. No more frustration, just smooth insertion every time.
Using Thread Conditioners for Strength and Smoothness
Ever thought about using thread conditioners?
These nifty helpers can strengthen threads and smoothen your sewing experience.
Here’s how they improve your craft:
- Types: Explore beeswax and silicone-based varieties.
- Benefits: Reduce fraying and enhance durability.
- Application: Glide along the thread before threading.
- Impact: Achieve consistent thread tension.
- Alternatives: Consider fabric-specific lubricants.
Happy sewing adventures!
Shaping Thread Ends for Easier Eye Penetration
Every pro knows that shaping thread ends can save the day when threading a sewing machine.
Opt for crafting a neat bevel over a blunt end; it’s like giving your thread a pointed wingman.
Use sharp scissors or a thread end tool for precision.
With these thread shaping techniques, those pesky needle eyes won’t stand a chance.
Choosing The Right Thread Thickness for Your Needle
Aligning thread size with needle size is like finding your perfect dance partner.
Too thick, and you’ll struggle; too thin, and it won’t hold up the fabric’s weight.
Consider your fabric and project type.
For smooth sewing, balance the thread thickness and needle size, avoiding tension issues.
Let your sewing machine needles glide effortlessly, ensuring every stitch sings!
Essential Tools for Effortless Threading
You won’t believe how much easier threading can be with the right tools by your side!
From high-quality needles to handy threaders and good lighting, these essentials transform threading from a chore into a breeze.
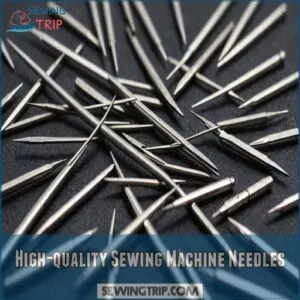
High-quality Sewing Machine Needles
You know how satisfying it’s when a perfectly chosen tool makes a task a breeze.
Investing in high-quality sewing machine needles is like that.
With the right needle types from renowned needle brands, you’ll extend your needle lifespan, avoid frustration, and make threading a sewing machine almost fun.
Needle maintenance helps your projects flow smoothly, snag-free.
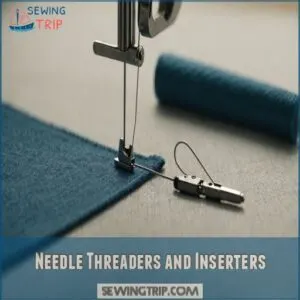
Needle Threaders and Inserters
Although threading a sewing machine needle can feel like wrestling a stubborn cat, needle threaders and inserters transform the task into child’s play.
To simplify the process, consider using a durable needle threader designed for sewing machines, which often feature sturdy designs and replaceable wires.
Equip yourself by:
- Picking a reliable threaded that suits your machine.
- Leveraging automatic needle threaders for stress-free sewing.
- Embracing handy tools like inserters for precise maneuvers.
It’s threading made easy, without the hassle!
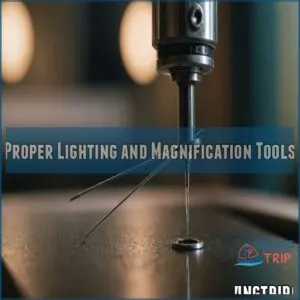
Proper Lighting and Magnification Tools
Okay, those needle threaders are great, but let’s talk lighting.
Poor lighting leads to eye strain, so grab a sewing lamp or even a good desk lamp options.
Craft lighting makes a difference.
Magnifying glasses or sewing machine vision aids can help you see that tiny needle eye.
Seriously, good lighting and magnification are game-changers for sewing machine needle threading!
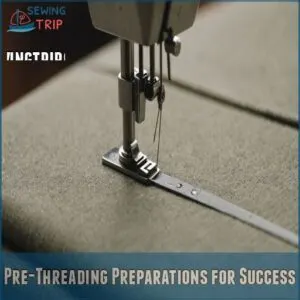
Pre-Threading Preparations for Success
Before you start threading your sewing machine, make sure success by raising the needle to its highest position and turning off the machine.
Lower or remove the presser foot and adjust the settings for a smoother experience, minimizing those pesky needle-threading woes!
Raising The Needle to Its Highest Position
Swapping your trusty needle for a high-quality one? Let’s talk needle position. It’s a must to raise the needle to its highest point before threading.
Here’s how:
- Turn the handwheel in your direction.
- Feel for the slight resistance.
- Stop when the needle reaches the top.
- Check the needle threader alignment.
Voilà, the first step done!
Turning Off The Machine for Safety
Before threading a sewing machine, remember: safety first.
As part of a safe sewing environment, make sure to maintain equipment and take breaks regularly learn more about safe sewing practices here.
Turn the power off and unplug the machine.
This simple step prevents any accidental starts and keeps fingers safe from unexpected needle jabs.
Think of it like putting on your seatbelt before driving—just common sense!
With the machine off, you’re set to thread those sewing machine needles with confidence.
Lowering or Removing The Presser Foot
After ensuring your sewing machine’s off, it’s time to focus on your trusty presser foot.
Lowering or removing it gives you more room when threading a sewing machine needle—it’s like having extra elbow space.
Follow these steps:
- Check presser foot types to match your task.
- Adjust foot pressure for smooth operation.
- Inspect foot positioning regularly for maintenance.
Adjusting Machine Settings for Optimal Threading
You’ve got the presser foot sorted—now nail those machine settings for smooth threading.
Adjust the needle position and fine-tune thread tension.
Don’t forget the bobbin and presser foot pressure.
Need a checklist?
Here’s a quick guide:
| Setting | Tip |
|---|---|
| Needle Position | Align to center |
| Thread Tension | Moderate, not tight |
| Bobbin Tension | Even with top thread |
| Presser Foot Pressure | Adjust for fabric thickness |
| Needle Plate Alignment | Make sure it’s straight |
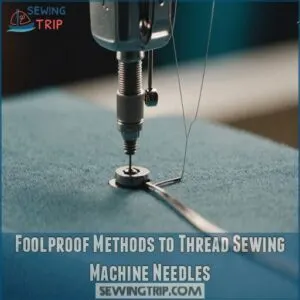
Foolproof Methods to Thread Sewing Machine Needles
Threading a sewing machine needle doesn’t have to feel like threading a camel through the eye of a needle.
With some foolproof methods, you’ll master the art of needle threading without breaking a sweat or squinting for hours.
Hand Threading Techniques for Precision
Now that your machine’s ready, let’s tackle threading the needle by hand.
It’s a skill that’ll boost your confidence!
Hold the thread firmly, using a good finger grip.
Gently guide the thread through the needle eye.
Remember, patience is key!
- Proper lighting is your best friend.
- Choose the right needle size for your thread type.
- Practice makes perfect!
Using Needle Threading Tools Effectively
Tackling needle threading can feel like threading a camel through a needle’s eye.
With the right needle threading tools, you’ll save time and stress.
Choose wisely—there’s a tool for every needle type.
Make sure your sewing machine threader is in tip-top shape for smooth operation.
Remember, maintaining needle threading tools—like keeping scissors sharp—is a threading hack everyone can master!
Leveraging Automatic Needle Threaders on Machines
Imagine threading a needle without the headache.
To get the most out of your sewing machine, it’s essential to choose the right needle for your fabric. Automatic needle threaders are like having a tiny helper inside your sewing machine.
They save time and reduce frustration, especially when you’re dealing with:
- Different machine models
- Thread compatibility checks
- Quick error fixes
- Smooth sewing machine maintenance
- Exploring threader types
Now, go ahead and conquer that fabric!
Working With Self-threading Needles
Mastering self-threading needles can feel like magic, slipping thread easily through a tiny side slit.
Perfect for kiddos or those with shaky hands, these needles save time but beware—they can drop threads during sewing.
Using a manual needle threader tool can also be helpful for those who struggle with threading.
Pros include convenience and speed, but their limitations, such as size constraints and thread slipping, mean they’re not your only option.
Consider alternatives like automatic needle threaders.
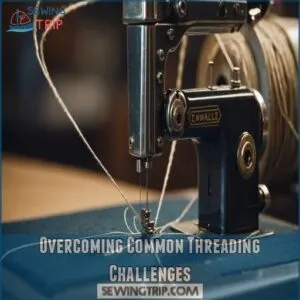
Overcoming Common Threading Challenges
Threading a sewing machine needle can feel like trying to solve a tricky puzzle, especially when you’re dealing with frayed thread ends or those sneaky needle eyes that just won’t cooperate.
But don’t worry—with a few clever tricks and some patience, you’ll overcome these challenges and get back to enjoying your sewing projects.
Dealing With Frayed Thread Ends
You’re not alone if frayed thread ends drive you nuts.
Cut those fuzzy tips cleanly with sharp scissors to dodge threading headaches.
For smooth sailing, try a thread conditioner to strengthen and prevent fraying.
Check out a thread conditioner online at this specialized store.
Investing in high-quality thread reduces this nuisance.
These simple sewing needles tricks boost your sewing machine troubleshooting confidence and make threading a breeze.
Overcoming Poor Visibility Issues
Poor visibility while threading your sewing machine can be frustrating.
Boost your vision with these helpful tips:
- Lighting Techniques: Use a bright desk lamp or an OttLite for better visibility.
- White Backgrounds: Place white paper behind the needle for contrast.
- Magnification Tools: Opt for magnifiers to ease eye strain.
- Vision Checkups: Regular eye exams make sure you’re seeing clearly.
Managing Difficult-to-thread Needle Eyes
Even with great lighting, tiny needle eyes can be tricky!
Sometimes, the needle size and thread type are just a bad match.
A needle threader is your best friend here.
Try a different thread, maybe a smoother one.
Here’s a helpful guide:
| Needle Size | Thread Type | Thread Condition | Lighting | Magnification |
|---|---|---|---|---|
| 8-12 | Polyester | Smooth | Bright | 2x-3x |
| 14-16 | Cotton | Good | Good | 1x-2x |
| 18-20 | Silk | Excellent | Adequate | None |
| 90/14 | All-purpose | Good | Excellent | 2x |
| 75/11 | Embroidery | Excellent | Excellent | 3x |
Addressing Thread Tension Problems
Thread tension can turn into quite the head-scratcher.
Start by checking your sewing machine settings to ensure you’re using the right type of needle, such as universal needles for versatile fabrics, to make sure they’re aligned with your fabric type and thread quality.
Adjust tension settings gradually; a little tweak can make a big difference.
Bobbin winding plays a role too, so rewind tightly.
Pay attention to needle position, keeping everything balanced for smooth seams.
The Importance of Good Lighting and Magnification
Let’s face it: threading a needle can feel like trying to pass a camel through the eye of, well, a needle!
To save yourself from eye strain and frustration, embrace the magic of proper lighting and magnification.
Imagine this: a well-lit sewing space transforms into a stage where those tiny needle eyes aren’t the stars of a tricky challenge, but simply part of your craft.
Specialty lights designed for sewing machine magnification can brighten your workspace, bringing visual clarity to each task.
And don’t underestimate the humble magnifying glasses—they’re your allies, amplifying those small details.
So, equip your sewing machine accessories with good lighting and magnification tools to make needle threading tips feel more like a walk in the park!
Choosing The Right Needle and Thread Combination
Choosing the right needle and thread combination can feel like pairing socks after laundry, but it’s essential for smooth sewing.
Make sure your needle’s eye is large enough and your thread is the right thickness to avoid unnecessary frustration.
Selecting The Right Thread Thickness for Your Needle
Imagine this: You’re selecting thread like a detective using a thread size chart and needle size guide.
Match thread sizes to your sewing machine needles for smooth stitching, considering fabric weight and project type.
Keep an eye on thread tension to avoid snags.
With the right combo, your sewing becomes a breeze, making needle threading tips almost unnecessary!
Ensuring The Eye of The Needle is Large Enough
Ever try threading a needle and wish the eye was a bit bigger?
Choosing the right needle size and thread thickness is very important.
You can find a wide range of sewing machine needles online at Sewing Machine Needles Market.
The needle’s eye should comfortably accommodate your thread to prevent frustration.
Misfit pairings mean frayed threads or a no-go through that tiny hole.
Match needle types to your thread selection for a sewing win!
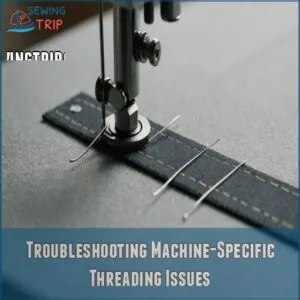
Troubleshooting Machine-Specific Threading Issues
Threading a finicky sewing machine can sometimes feel like threading a needle underwater—frustrating and seemingly impossible. But don’t fret! Focus on these key factors to keep your machine in line.
Make sure your needle plate alignment is correct; misalignment can mislead your thread path. Bobbin tension issues might also play a trick on you; make sure the bobbin is wound properly.
Then, address these:
- Check if needle position is misaligned; a small nudge can make a big difference.
- Make sure your sewing machine needles are the right size and type for your fabric.
- Adjust presser foot pressure to avoid thread snagging or tangling.
With these tips, you’ll master your machine’s quirks in no time!
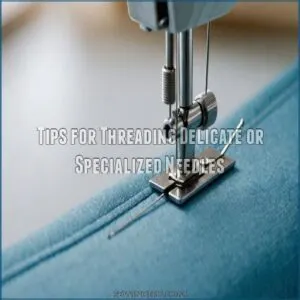
Tips for Threading Delicate or Specialized Needles
Many sewing projects require delicate needles.
Threading these tiny needles can be tricky, but with the right techniques, you’ll become a pro!
Here are some essential tips:
- Use a needle threader: These handy tools are lifesavers for those tiny needle eyes. Needle threader types vary; experiment to find your favorite.
- Match thread size: Always use the correct thread size for your needle. A too-thick thread won’t fit, and a too-thin one might break. Thread size match is key!
- Improve visibility: Good lighting is important. Try using a magnifying glass or a bright lamp to get a better view of that tiny needle eye. To guarantee proper threading, remember to thread from front to back without twisting, as outlined in thorough threading guides.
- Employ the right threading techniques: Practice makes perfect! Experiment with different threading tools and methods to find what works best for you. Mastering these techniques will boost your confidence. Remember, patience is key when working with delicate sewing needles and thread. Happy sewing!
Frequently Asked Questions (FAQs)
How to prevent the thread from tangling?
Sure, tangles can be frustrating, but you’ve got this.
Keep tension even, and feed the thread smoothly.
Use quality thread, check the spool placement, and make sure your machine’s tension settings are just right.
Can you wash and reuse sewing machine threads?
Typically, when working with sewing threads, recognizing and adjusting sewing machine thread tension is crucial for smooth stitches, as threads with incorrect tension can lead to issues like uneven stitches, thread breakage, and fabric puckering, and mastering thread tension adjustments. Washing and reusing sewing machine threads isn’t recommended.
Water can weaken and fray them, leading to breakage during sewing.
To keep your projects smooth and untangled, it’s best to use fresh, high-quality thread.
What type of thread is strongest for denim?
For sewing denim, use a 100% polyester or heavy-duty cotton-wrapped polyester thread.
These threads boast strength to withstand the dense fabric’s demands, ensuring durable seams without breaking.
Explore both for a balance between flexibility and toughness.
How often should needles be replaced in machines?
Change your sewing machine needle after 8-10 hours of sewing or at the first sign of wear, like skipped stitches, typically caused by a dull needle that needs to be replaced by following a step-by-step needle change guide. Change your sewing machine needle after 8-10 hours of sewing or at the first sign of wear, like skipped stitches.
Using a fresh needle guarantees smooth sewing, just like keeping a sharp pencil handy for crisp notes!
What causes thread to break during sewing?
Broken threads? Check your tension!
A dull needle or incorrect thread size also causes problems.
Make sure your bobbin’s wound correctly, too.
Troubleshooting these issues will get you sewing smoothly again!
Conclusion
With only 20% of sewing enthusiasts claiming mastery over their machines, these sewing machine needle threading tips can set you apart.
By keeping your thread ends trimmed, embracing handy tools like needle threaders, and ensuring bright lighting, you’ll breeze through the threading maze.
Remember, choosing the right thread and needle combo is essential.
Practice makes perfect—soon threading will just be a quick prep before diving into your creative projects.
Happy sewing, and keep those stitches straight!

