This site is supported by our readers. We may earn a commission, at no cost to you, if you purchase through links.

To get started, unplug your machine and remove the needle, thread, and bobbin compartment.
Use a soft-bristled brush or lint-free cloth to gently sweep away dust and debris from crevices and the bobbin area.
Regular cleaning will help prevent lint buildup and keep your machine running smoothly, ensuring peak performance for years to come, with more tips to follow, and maintaining a lint-free sewing machine.
Table Of Contents
Key Takeaways
- You’ll keep your sewing machine in top shape by regularly removing dust and lint, which can cause problems like thread breakage and poor stitch quality if left unchecked.
- To clean your machine, you’ll need to unplug it, remove parts like the presser foot and bobbin case, and use a soft brush or vacuum to gently sweep away debris from tight spaces.
- You should clean your sewing machine after every project, or at least monthly, to prevent lint and dust buildup, and don’t forget to oil it regularly to keep it running smoothly.
- By following these sewing machine dust removal tips, you’ll extend your machine’s life, improve its performance, and prevent costly repairs, so it’s worth taking the time to clean and maintain it regularly.
Cleaning Sewing Machines
When you clean your sewing machine, start by removing the presser foot, needle plate, and bobbin case.
Clean your sewing machine regularly for smooth operation
This lets you reach hidden lint and dust, helping your machine run smoothly and last longer.
Remove Presser Foot
One simple step to start sewing machine cleaning is presser foot removal. Always unplug first for safety.
Most machines use a lever or screw—know your screw types for Foot Removal Ease. Store the presser foot safely to avoid reattachment issues later.
Removing it gives you better cleaning access for dust removal and lint removal. Proper foot storage keeps parts safe, making future cleaning and reassembly much smoother.
Remove Needle Plate
After removing the presser foot, it’s time to tackle the needle plate.
Needle plate types vary, so check your manual for screw removal tips.
Use a small screwdriver, keeping screws in a safe spot.
Carefully lift the plate to expose hidden lint.
Cleaning the underside is key for proper sewing machine dust removal.
Check for damaged plate signs before reassembly alignment—good maintenance keeps sewing machine cleaning simple and effective.
Remove Bobbin Case
With the machine unplugged, gently lift the bobbin case out, paying close attention to bobbin removal safety.
For vertical bobbin cases, follow the case disassembly steps in your manual.
Use a lint brush for thorough bobbin case cleaning, targeting lint accumulation in the bobbin area. It’s also important to inspect for obstructions while cleaning.
When done, make certain of proper bobbin case reassembly. Double-check tension after removal, as even a small shift can affect your sewing machine dust control.
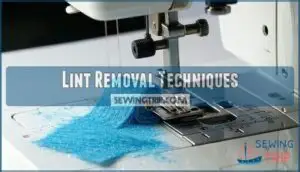
Lint Removal Techniques
You need the right tools and careful techniques to remove lint from your sewing machine.
By using a lint brush or a small vacuum and avoiding compressed air, you’ll keep your machine running smoothly and prevent hidden buildup.
Use Lint Brush
Every sewing machine cleaning routine should start with a quality lint brush.
Choose brush types with firm bristle stiffness for effective lint removal.
Angle the brush to reach tight corners, especially around the bobbin and feed dogs.
Regular brush maintenance keeps dust removal tips sharp.
A sewing machine lint brush is your best friend for fabric dust removal, ensuring smooth operation and fewer surprises mid-project.
Use Vacuum Cleaner
Grab your minivacuum with vacuum attachments designed for delicate parts, and get ready for safe vacuuming.
Use gentle vacuum power—too much can harm your machine.
Vacuum sewing machine areas like the bobbin case and feed dogs, reaching into tight spots for thorough dust removal.
Regular cleaning helps prevent sewing machine jams.
Remember, vacuum alternatives like a lint brush work too, but a vacuum cleaner makes sewing machine dusting quick and efficient, which is important for preventing sewing machine jams.
Avoid Compressed Air
While a vacuum helps pull out loose lint, steer clear of compressed air or canned air.
Blasting air may seem like a quick fix, but it only pushes displaced lint into tight spots, leading to deeper problems and hook contamination.
These sewing machine cleaning risks cause long-term damage.
For a targeted approach, consider a portable cleaning solution.
Instead, try alternative methods like brushes or a mini-vacuum for dust prevention—a safer canned air alternative for thorough cleaning.
Sewing Machine Parts
You need to know the main parts of your sewing machine to clean it well and keep it running smoothly.
Focus on the bobbins is not ideal, instead: Focus on the bobbin case area, hook race, and feed dogs, as these collect the most lint and dust during regular use.
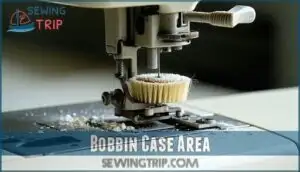
Bobbin Case Area
The bobbin case area is a magnet for lint buildup, especially if you sew often.
Start by unplugging your machine, then remove the bobbin case and check for trapped threads.
Use a lint brush for bobbin area cleaning and inspect the shuttle hook.
Regular case disassembly helps maintain proper bobbin tension. Don’t forget the vertical bobbin and bobbin winder—cleaning here keeps your sewing machine cleaning routine effective.
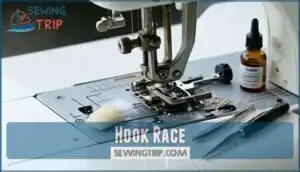
Hook Race
Your hook race works like the heart of your sewing machine, catching the top thread and forming stitches with the bobbin thread.
Lint accumulation effects here cause skipped stitches and thread bunching. Hook race cleaning requires a soft lint brush and tweezers for stubborn debris.
Remove the bobbin case first, then gently brush the metal hook race. Machine lubrication is essential for smooth operation.
Apply one drop of sewing machine oil for shuttle hook oiling after cleaning. This preventative maintenance keeps your machine running smoothly, ensuring a long machine life.
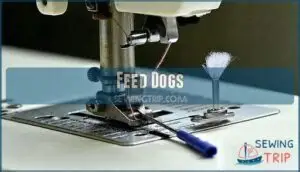
Feed Dogs
Feed dogs work like tiny conveyor belts, moving fabric through your machine with each stitch.
These metal teeth grip fabric from below, but fabric lint loves to jam between them.
Clean feed dogs prevent uneven feeding and fabric bunching issues.
Use your lint brush to sweep debris from the teeth, then vacuum loose particles.
Knowing how feed dogs work is essential for maintaining stitch quality.
Check for adjusting feed dogs if fabric feeding problems persist after cleaning.
Regular Maintenance
You’ll want to establish a cleaning routine that matches your sewing habits to keep your machine running smoothly.
Clean after each use for heavy projects, monthly for regular sewing, or bi-weekly if you frequently work with cotton thread that produces more lint.
Clean After Use
You’ll protect your machine by brushing away fabric lint right after each project.
This immediate cleaning prevents thread residue from settling into moving parts.
Different fabric types produce varying amounts of lint, so cotton projects need more attention than synthetic materials.
Post-sewing habits like quick brush strokes keep your sewing machine running smoothly.
This preventative action takes seconds but saves hours of deep cleaning later, and is a crucial part of maintaining your machine, making it a valuable preventative action.
Monthly Cleaning
Setting a monthly Cleaning Schedule keeps your sewing machine humming along.
Deep Cleaning once a month helps catch hidden lint and dust. During this time, focus on:
- Part Inspection for wear or damage
- Troubleshooting odd noises or skipped stitches
- Preventative Measures like checking tension
Monthly sewing machine maintenance and lint cleaning prevent costly repairs. Regular cleaning sewing machine routines boost performance and extend sewing machine life.
Bi-Weekly Cleaning
If monthly cleaning keeps your machine in good shape, bumping up to a bi-weekly cleaning schedule is smart when you sew often or use linty thread types.
Busy projects or a dusty workspace environment call for more frequent sewing machine cleaning.
Focus on the bobbin case, feed dogs, and hook race. These preventative measures keep lint cleaning manageable, improve sewing machine maintenance, and help avoid problems between deeper cleanings.
Cleaning Tools Needed
You’ll need a few basic tools to keep your sewing machine clean and running smoothly.
A soft cloth, a small brush, and a screwdriver help you reach dust and lint in tight spaces.
Soft Cloth
You’ll often reach for a soft cloth during sewing machine cleaning.
Choose a lint-free cloth material for surface wiping and residue removal. Gently wipe away dust, oil smudges, and stray threads from every exposed area.
Soft cloths won’t scratch surfaces or leave behind fibers. They’re perfect for quick lint removal after each use, keeping your sewing machine dust cover and exterior spotless between deeper cleans.
You can find resources for soft cloths sewing online.
Small Brush
Once you’ve used a soft cloth, reach for a small brush to tackle stubborn lint.
The right sewing machine brush makes a difference—choose angled brushes or a lint brush with synthetic bristles for tight spaces.
An angled brush is ideal for detailed cleaning.
Consider brush size; a cleaning brush that fits your machine’s nooks is best.
Store your sewing machine cleaning tools together, so you’re always ready to whisk away dust with the proper bristle types.
Screwdriver
After brushing away lint, you’ll need a screwdriver to tackle sewing machine cleaning.
The right screwdriver makes sewing machine disassembly safe and easy. Keep these in mind:
- Choose the correct screwdriver sizes for each screw.
- Match head types—Phillips or flathead.
- Use magnetic screwdrivers to prevent dropped screws.
- Precision screwdrivers help with tiny parts.
- Torque control avoids overtightening.
Pair with a lint brush for best results, ensuring a safe and easy cleaning process.
Oil and Lubrication
You need to use sewing machine oil and apply it carefully to the right spots, such as the wick.
Don’t use too much oil, since over-lubrication can cause problems and attract more dust.
Use Sewing Machine Oil
Once you’ve gathered your cleaning tools, it’s time to focus on sewing machine oiling.
Use only sewing machine oil for best results—never substitute with cooking or motor oil.
There are different Oil Types, but mineral and synthetic oils work well for most machines.
Apply oil sparingly, as Over-Oiling can attract lint and cause issues.
Stick to the recommended Oiling Frequency to avoid damage and keep your machine humming smoothly.
Apply Oil to Wick
After choosing the right sewing machine oil, it’s time to apply oil to the wick.
Find the wick material under the bobbin case. Use only a drop—too much can attract lint.
Stick to the recommended oil type and follow the oiling frequency in your manual. Avoid alternative lubricants.
Regular sewing machine cleaning and maintenance, using your sewing machine cleaning kit, keeps everything running smoothly.
Avoid Over-Lubrication
After applying oil to the wick, remember that more isn’t always better.
Too much oil can lead to sticky buildup, attracting lint and dust.
For safe sewing machine maintenance, focus on these sewing machine cleaning tips:
- Use only the Proper Amount at Lubrication Points
- Stick to recommended Oil Types
- Follow correct Application Methods
- Wipe away excess to avoid Oil Consequences
Keep your machine running smoothly with proper care, including the use of the right amount of oil.
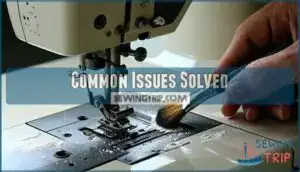
Common Issues Solved
When you keep your sewing machine free of dust and lint, you solve problems like thread breakage, fabric bunching, and poor stitch quality.
Regular cleaning helps your machine run smoothly and prevents these common issues from slowing you down, which is crucial for maintaining good stitch quality and ensuring smooth operation.
Thread Breakage
After oiling, don’t overlook thread breakage—a headache for any sewist.
Lint buildup in the bobbin case or tension disks can lead to Tension Problems, Needle Issues, or even Machine Timing errors.
Regular sewing machine cleaning helps prevent sewing machine lint issues and thread breakage. Always use good Thread Quality, and follow sewing machine troubleshooting steps for consistent stitches.
| Cause | Symptom | Solution |
|---|---|---|
| Lint buildup | Thread snaps | Clean bobbin area |
| Poor thread | Uneven stitches | Use quality thread |
| Bobbin problems | Frequent jams | Rethread, check tension |
Fabric Bunching
After tackling thread breakage, let’s talk about fabric bunching. That “bird’s nest” mess under your fabric is often caused by lint buildup or missed sewing machine cleaning.
Regular sewing machine maintenance keeps feed dog height and Tension Adjustment in check.
Prevent sewing machine fabric bunching by:
- Cleaning the bobbin area
- Checking Needle Type and Stitch Length
- Using Fabric Stabilizers
- Inspecting feed dogs for lint
Keep your sewing machine performance smooth!
Poor Stitch Quality
When your sewing machine stitch quality takes a nosedive, debris is often the culprit.
Dust and lint can clog up the works, leading to skipped stitches and odd noises.
Regular sewing machine cleaning is key.
Check your Needle Type, Thread Quality, and Fabric Choice, too.
Don’t forget Tension Adjustment and Bobbin Issues—these all play into sewing machine performance and help prevent common sewing machine problems.
Benefits of Cleaning
When you clean your sewing machine regularly, you help it last longer and work better. Removing dust and lint prevents damage, reduces repairs, and keeps your stitches smooth.
Extended Machine Life
When you fix common problems like thread breakage, you’re not just making quick repairs—you’re also extending your machine’s lifespan.
Preventative Maintenance through regular sewing machine cleaning is key. Dust and lint removal helps reduce downtime, keeps parts moving smoothly, and saves you money on repairs.
Quality Stitching and sewing machine longevity go hand in hand, making cleaning one of the top sewing machine maintenance benefits.
Improved Performance
With regular sewing machine cleaning, you’ll notice smoother operation and fewer sewing machine performance issues.
By keeping lint at bay, you guarantee superior stitching and consistent tension, which leads to enhanced reliability.
This routine boosts sewing machine efficiency and keeps your projects running without hiccups, delivering sewing machine cleaning benefits that translate into improved performance and reduced downtime, so every stitch lands right where it should.
Reduced Repairs
Once your machine runs smoother and stitches improve, you’ll also notice fewer trips to the repair shop.
Cleaning Reduces Downtime and keeps Preventative Maintenance Costs low.
By staying on top of sewing machine cleaning, you Avoid Major Issues, Minimize Part Replacement, and Extend Sewing Life.
Think of it as keeping small problems from turning into big, expensive sewing machine repair or long-term sewing machine problems.
Cleaning Frequency
You need to clean your sewing machine regularly to keep it running smoothly.
How often you clean depends on how much you sew, but most machines need daily, weekly, and yearly attention.
Daily Cleaning
After seeing the benefits of cleaning, let’s talk about daily habits that keep your sewing machine humming.
A Quick Wipe-Down and Thread Snipping should be part of your sewing machine cleaning routine. Each day, take a minute for:
- Surface Dusting with a soft cloth
- Needle Check for burrs or bends
- Brushing the Bobbin Area
This daily sewing machine cleaning frequency helps prevent buildup and keeps things running smooth.
Weekly Cleaning
After your daily brushing, it’s smart to set a weekly cleaning schedule.
This routine tackles lint hiding in tricky spots.
Use a small brush or a sewing machine vacuuming attachment, especially if you sew with cotton threads or large projects.
Check the table below for guidance:
| Thread Type | Project Size |
|---|---|
| Cotton | Large/Heavy Use |
| Polyester | Small/Light Use |
Weekly care means fewer surprises and better stitch quality.
Annual Servicing
Professional sewing machine service visits your authorized stores annually, delivering performance optimization that transforms your machine’s capabilities.
Think of it as your machine’s yearly physical examination, ensuring peak functionality while reducing costly downtime.
Benefits include:
- Deep cleaning – Professionals access internal components unreachable during regular sewing machine cleaning
- Calibration services – Technicians fine-tune tension and timing for ideal stitch quality
- Cost savings – Preventive machine servicing reduces expensive repair needs substantially
Annual professional servicing costs $55-$65, delivering exceptional value for serious sewers.
Machine Longevity
Your sewing machine’s lifespan depends on how well you prevent lint buildup from settling into its moving parts.
Regular dust removal keeps feed dogs clear and maintains the precision your machine needs to perform at its best for years to come.
Prevent Lint Buildup
To prevent lint buildup, pay close attention to your thread choice; polyester threads shed less, making sewing machine cleaning easier.
Create DIY covers to shield your equipment from dust, and use smart storage solutions for fabric and supplies.
Material matters—cotton or fuzzy fabrics release more lint.
Regular sewing machine brushing, static reduction efforts, and consistent sewing machine maintenance help you avoid costly sewing machine blockages and keep everything running smoothly.
Avoid Clogged Feed Dogs
Once you minimize lint buildup, your next step is to keep those feed dogs clear of clogs. If they get blocked, fabric won’t move right, causing skipped stitches or jams.
To keep things humming:
- Clean the feed dogs after each project
- Watch for stuck thread removal
- Use correct needle size and stitch length
- Check for proper threading
- Adjust tension settings regularly
If the feed dogs aren’t moving, check for timing issues. This is crucial to prevent skipped stitches and ensure smooth operation.
Maintain Optimal Performance
By sticking to a good sewing machine cleaning routine, you’re laying the groundwork for consistent stitching and smooth operation.
Preventative care, like following the right sewing machine cleaning steps and using proven techniques, keeps reduced downtime a reality.
Long-term savings come from regular sewing machine maintenance. Treat each cleaning process as an investment—your machine will reward you with steady performance for every project ahead.
Frequently Asked Questions (FAQs)
How do you clean a sewing machine?
As you tackle the task, remember, a clean machine is a happy machine; you’ll unplug, remove parts, and brush away lint to keep your sewing machine in top shape always.
Where does Dust go on a sewing machine?
You’ll find dust accumulating in the bobbin case, hook race, and feed dog areas, causing issues with stitch quality and machine performance if not regularly cleaned and maintained properly.
What should you do after cleaning your sewing machine?
What’s next after cleaning? You should reassemble, add oil, and test your sewing machine to verify it’s working smoothly and quietly again, ready for your next project.
How to remove lint from a sewing machine?
You’ll remove lint from your sewing machine by using a soft brush, vacuum, or tweezers to gently sweep away debris from the bobbin area and other parts.
How do I know if my sewing machine needs cleaning?
You’ll know your sewing machine needs cleaning when it’s ridiculously loud, slow, or skipping stitches, indicating a desperate need for some serious dust and lint removal.
Why does my fabric keep getting caught in my sewing machine?
You’re likely experiencing fabric catching due to clogged feed dogs or lint buildup, so clean and oil your machine regularly to prevent this common issue.
What is used to remove gummy dirt on the sewing machine?
You’ll use a soft cloth or brush to remove gummy dirt, as 90% of sewing machine issues stem from poor maintenance, making regular cleaning a must.
How often should a sewing machine be oiled?
You should oil your sewing machine regularly, checking the manual for specific guidance, as oiling frequency depends on usage and machine type, typically every 1-3 months.
How often should I clean my sewing machine?
You should clean your sewing machine regularly, ideally after every project or at least monthly, to prevent lint and dust buildup and maintain peak performance.
What causes dust in sewing machines mostly?
You’ll find that fabric lint and thread residue mostly cause dust in your sewing machine, affecting its performance and longevity over time with prolonged use.
Conclusion
Ironically, neglecting sewing machine dust removal can lead to costly repairs.
You’ll prevent this by following these tips, ensuring your machine runs smoothly.
Regularly cleaning your sewing machine using sewing machine dust removal techniques will keep it in top shape, extending its life and improving performance, so remember to prioritize sewing machine dust removal.
- https://pubs.nmsu.edu/_c/C102/index.html
- https://sewcanshe.com/how-clean-your-sewing-machine-in-8-simple-steps-plus-expert-tips/
- https://www.diaryofaquilter.com/how-to-clean-your-sewing-machine/
- https://www.asg.org/care-of-sewing-machine/
- https://www.thecraftygentleman.net/2020/04/14/how-to-clean-a-sewing-machine/

