This site is supported by our readers. We may earn a commission, at no cost to you, if you purchase through links.
Thread breaks mid-seam. The tension goes haywire. You re-thread, adjust, and try again—same result. Most sewists blame the thread or the machine, but the culprit is usually a mismatch between thread diameter and needle eye size.
A needle eye that’s even slightly too narrow generates friction and heat fast enough to snap the thread before you finish a single row.
The fix isn’t complicated once you understand one core rule: your needle eye must be at least 40% wider than your thread’s diameter. Get that ratio right, and everything else—tension, stitch formation, fabric integrity—falls into place.
Table Of Contents
- Key Takeaways
- Match Thread to Needle Size
- Why Needle Eye Size Matters for Smooth Stitching
- The 40% Needle Eye Width Rule
- How Thread Diameter Affects Needle Choice
- Cotton Thread Needle Sizes: 75/11 to 90/14
- Polyester Thread Needle Sizes: 80/12 to 110/18
- Heavy-duty Nylon Needle Sizes: 100/16 to 120/19
- Fine Silk Thread Needle Sizes: 60/8 to 70/10
- Monofilament and Waxed Thread Needle Sizes
- Read Needle Size Labels
- Choose The Right Needle Eye
- Match Needle Type to Fabric
- Universal Needles for Mixed Fabrics
- Sharp Needles for Woven Fabrics
- Ballpoint Needles for Knits
- Stretch Needles for Elastic Fabrics
- Denim Needles for Thick Woven Fabric
- Leather Needles for Hides and Vinyl
- Specialty Needles for Metallic and Embroidery Thread
- Balancing Fabric Weight, Thread Size, and Needle Eye
- Fix Needle and Thread Problems
- Frequently Asked Questions (FAQs)
- Conclusion
Key Takeaways
- Your needle eye must be at least 40% wider than your thread’s diameter — get that ratio wrong and you’ll fight breakage, skipped stitches, and puckered seams every single time.
- Every thread type has a matching needle size range: cotton needs 75/11–90/14, polyester spans 80/12–110/18, silk stays delicate at 60/8–70/10, and heavy nylon demands 100/16–120/19.
- Needle size numbers aren’t random — the metric number tells you the shaft diameter in hundredths of a millimeter, so a size 80 means a 0.80 mm shaft, with bigger numbers always meaning thicker needles and wider eyes.
- Replace your needle every three to four hours of sewing and match your needle type to your fabric — sharps for wovens, ballpoints for knits, stretch needles for spandex, and denim needles for thick layers.
Match Thread to Needle Size
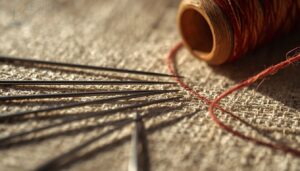
Getting the needle and thread to work together starts with one simple idea: size matters. The eye of your needle must be wide enough for your thread to pass through without friction or resistance.
If you’re unsure where to start, matching thread weight to needle size is easier once you browse a curated guide to sewing machine threads that breaks down the options.
Here’s how different thread types line up with the right needle sizes.
Why Needle Eye Size Matters for Smooth Stitching
The needle eye is the real gatekeeper of stitch quality. Get it wrong, and everything downstream suffers.
Here’s what a mismatched eye actually costs you:
- Increased Thread Friction Reduction failures that snap thread mid-seam
- Uneven Tension Balance that loosens or tightens unpredictably
- Fabric Distortion Prevention breaks down, leaving puckered seams
- Poor Stitch Consistency from skipped or loopy stitches
The enlarged eye design minimizes friction for specialty threads.
Eye Shape Impact matters too — oval eyes glide smoother than square openings.
The 40% Needle Eye Width Rule
There’s a simple rule that removes the guesswork from eye width calculation: the needle eye must be at least 40% wider than your thread’s diameter. This clearance isn’t arbitrary—it’s governed by thread clearance physics. Without it, friction builds fast, heat buildup prevention fails, and the thread snaps.
| Thread Type | Minimum Eye Width |
|---|---|
| Standard cotton | 40% of blade width |
| Metallic/decorative | Slightly beyond 40% |
Adhering to this principle ensures balanced thread tension follows naturally.
How Thread Diameter Affects Needle Choice
Thread diameter drives every needle decision you make. Think of it as a diameter-to-size ratio: thicker thread needs a wider shaft and larger eye.
Thread gauge impact is real — get it wrong and you’ll fight tension problems throughout the session. Use a needle size chart to cross-reference thread weight against needle shaft compatibility.
That’s Material Thickness Matching working for you, keeping Thread Tension Calibration consistent.
Cotton Thread Needle Sizes: 75/11 to 90/14
Cotton thread keeps things simple — work within the 75/11 to 90/14 range and you’re covered. Use a 75/11 for mid-weight fabrics like flannel or quilting cotton; the finer shaft protects fabric drape and maintains thread tension without pulling.
Move to a 90/14 for dense twills or canvas. Selecting appropriate needle size for thread weight directly improves stitch visibility and needle lifespan.
Polyester Thread Needle Sizes: 80/12 to 110/18
Polyester thread covers a wide range — and the right needle makes all the difference. Match thread weight to your needle size chart: 80/12 manages lightweight sheers, while 110/18 powers through upholstery. Watch thread tension settings too.
- 80/12: fine polyester, delicate fabrics
- 90/14: everyday midweight projects
- 100/16: heavier decorative threads
- 110/18: thick upholstery-grade polyester
Coated needle benefits include reduced friction and cooler running — worth it for long sessions.
Heavy-duty Nylon Needle Sizes: 100/16 to 120/19
Nylon thread is thick, smooth, and unforgiving — so your needle has to keep up.
For heavy-duty sewing, 100/16 to 120/19 needles are your range. Start at 100/16 for medium-heavy layers, step up to 110/18 for dense weaves, and reach for 120/19 when multi-layer penetration is the challenge.
Shaft reinforcement and heat management keep long seams clean.
Check your needle size chart — precision alignment matters here.
Fine Silk Thread Needle Sizes: 60/8 to 70/10
Silk demands a light touch — and your needle has to match that delicacy.
For fine silk thread, stay in the 60/8 to 70/10 range. Check your needle size chart and pair it with 60-weight or lighter thread to keep stitches clean and tiny.
- Use sharp-point needles to slice cleanly through tightly woven silk
- Apply needle lubrication techniques to reduce shaft friction on slippery fibers
- Silk stitch length runs shorter — adjust accordingly for clean seam edges
- Polished needle shaft finish (Silk Needle Polishing) prevents snags and fraying
- Follow the needle eye width rule: eye must be 40% wider than thread diameter for smooth tension
Thread tension adjustment is critical here — too tight and you’ll pucker the fabric instantly.
Monofilament and Waxed Thread Needle Sizes
These two thread types play by different rules. Monofilament threads — usually 70/10 to 80/12 — stay nearly invisible, and denier correlation matters: finer denier means a smaller needle. Waxed threads need 90/14 to 110/18 because stiffness impact and thread coating effects widen the required clearance.
Always apply the needle eye width rule: the eye should be at least 40% wider than thread diameter for clean stitch visibility.
Read Needle Size Labels
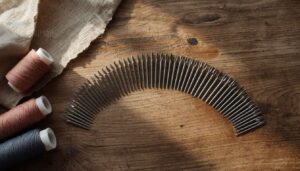
Those little numbers printed on every needle pack actually tell you a lot—if you know how to read them. The system isn’t random; it follows a clear logic that makes choosing the right needle much easier.
Here’s what each part of the label means.
What European Needle Sizes Mean
European needle sizes use the metric system — the number tells you the shaft diameter in hundredths of a millimeter. That’s your Bore vs Gauge foundation. A size 80 means a 0.80 mm shaft.
Use a European Size Chart or Cross-Reference Tables to apply Metric Gauge Conversion accurately:
- Sizes range from 60 to 110+ for specialty work
- Higher numbers always mean thicker needles
- Labels follow standard Labeling Conventions showing both metric and alternate references
- Larger sizes indicate wider eye openings for heavier thread weights
What U.S. Needle Sizes Mean
U.S. needle sizes follow a straightforward historical numbering system — higher numbers mean thicker needles, full stop.
Size 8 is fine; size 18 is heavy. scale step difference in plain terms.
Industry standards place the common range at 8 through 18, matching European metrics at each step.
Your selection checklist starts here: know your US size, then cross-check it.
How 70/10, 80/12, and 90/14 Compare
Think of these three as small, medium, and large.
The 70/10 manages fine thread on lightweight fabric — stitch strength stays delicate, seam visibility is minimal. Step up to 80/12 for everyday cottons; feed rate stays smooth, thread tension is balanced.
The 90/14 drives heavier thread weight through denim without struggle.
Each bump in number widens the needle eye width, improving fabric penetration.
Needle Diameter and Thread Clearance
Needle shaft diameter directly controls your clearance gap — the breathing room between thread and needle. If that gap is too tight, thread passage speed drops and friction builds fast.
Aim for a thread fit ratio where the eye is about 40% wider than your thread.
Eye size optimization starts here: match needle diameter to thread weight measurement, or expect skipped stitches.
Using Needle Size Charts Correctly
Charts are only as good as how you read them. A needle and thread size conversion chart pairs thread weight mapping with needle eye width calculation — but you still need to verify fabric type before committing. Use these Chart Interpretation Tips to stay accurate:
- Cross-check thread weight against the metric conversion guide column
- Confirm fabric type matches the needle point recommendation
- Apply the 40% needle eye width rule to validate eye clearance
- Use reference tables to align Tex weight with Nm needle size
- Run chart accuracy checks on a scrap before full production
Why Bigger Numbers Mean Thicker Needles
Once you’ve read a chart correctly, the numbers themselves tell the story. The metric needle scale runs on simple diameter increment logic — Nm 80 means a 0.80 mm shaft.
Size naming conventions follow that same pattern straight up the gauge‑thickness correlation: Nm 90 is thicker than Nm 80, always. Bigger number, bigger needle, wider eye.
No guessing required.
Choose The Right Needle Eye
The needle eye isn’t one-size-fits-all — different threads need different openings to flow smoothly and stitch cleanly.
Getting this right comes down to knowing which eye type matches your thread. Here’s what you need to know.
Standard Needle Eyes for Everyday Sewing
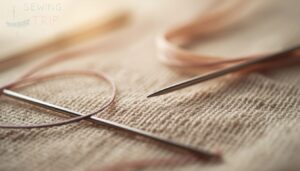
For most everyday sewing, standard needle eyes get the job done quietly and reliably. eye width normally runs 0.6 to 1.0 mm — enough for a single strand of cotton or polyester to glide through without friction fighting you.
needle eye width rule says the eye must be at least 40% wider than your thread. Follow that, and thread glide ease takes care of itself.
Enlarged Eyes for Metallic Threads
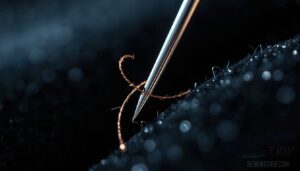
Metallic threads are unforgiving — even a slightly snug eye causes thread breakage quickly. That’s why metallic needles use an Oval Eye Design with Heat Reduction Features built in. The elongated shape acts as a Coating Friendly Eye, protecting thread coatings from friction.
Follow these steps for stitch quality:
- Choose needles with 0.6–0.8 mm extra clearance
- Apply Precision Eye Alignment before stitching
- Enable Thread Slip Prevention by lowering machine speed
- Test on scrap fabric first
Long Eyes for Embroidery Threads
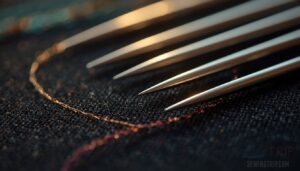
Embroidery threads — cotton perle, rayon, multi-strand floss — need room to breathe. A long eye increases clearance by 15–30% over standard eyes, and that extra space is what drives real Thread Glide Optimization.
Eye Clearance Ratio stays within the 40% needle eye width rule, so Embroidery Thread Tension stays consistent. Think of it as your Visual Threading Aid built right into the needle.
Larger Eyes for Heavy Decorative Threads
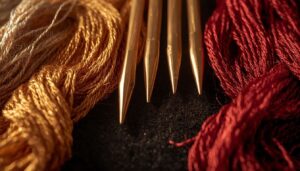
Heavy decorative threads are where needle eye designs make or break your project. Chunky metallics, thick rayon, and multi‑strand floss demand Eye Size Calibration — a larger opening that honors the needle eye width rule and keeps Thread Feed Efficiency running smoothly.
The payoff is real:
- Heat Buildup Reduction as friction drops
- Thread Snag Prevention through the shaft
- Stitch Consistency Boost on dense fabrics
When a Needle Eye is Too Small
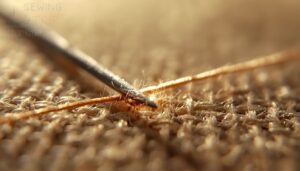
A too-small needle eye functions like a clogged drain, causing backups when thread diameter exceeds the eye’s capacity. This triggers Eye Clogging, which escalates rapidly.
Key symptoms include Thread Shredding, Tension Inconsistency, and Heat Buildup from excessive friction. As the needle eye occupancy ratio surpasses safe thresholds, Needle Wear Acceleration begins.
Switch to a larger size immediately to resolve these issues.
When a Needle Eye is Too Large
Too much room is just as bad as too little. When the eye is oversized for your thread weight, you’re breaking the needle eye occupancy principle — and the results show fast.
- Thread slips sideways, causing skipped stitches
- Eye Induced Distortion warps lightweight fabrics like chiffon or satin
- Fabric Snag Risk spikes near seam edges
- Needle Fatigue increases as the blade weakens
- Stabilizer Workaround and Scrap Test Procedure help confirm fit before committing
Automatic Needle Threader Size Limits
Automatic threaders have a real ceiling. Most handle needles sized 70/10 to 110/18 — that’s your practical Threader Hook Capacity window.
Push past that, and the hook strains or bends. Each brand’s Compatibility Chart lists its Maximum Eye Diameter, so check Brand Limits before grabbing a denim or specialty needle.
The needle eye width rule matters here too — a tight eye stops the threader cold.
Match Needle Type to Fabric
Thread and fabric have to work together, but the needle is what brings them both into line. Pick the wrong type and you’ll fight your machine the whole way through.
Here’s how each needle type lines up with the fabric on your table.
Universal Needles for Mixed Fabrics
Universal needles are your go-to for blended projects. Their slightly rounded tip works with both woven and knit fabrics without switching needles mid-project — that’s real Dual‑Fabric Compatibility.
Mid‑range Size Balance: sizes 70/10 to 90/14 cover most cotton-poly blends.
Seam Consistency Tips, remember:
- Match thread weight to needle size
- Follow the needle eye width rule — eye must be 40% wider than thread diameter
- Test on a scrap first
Sharp Needles for Woven Fabrics
Where universal needles handle mixed work, sharp point needles are built for precision on woven fabrics.
Microtex Point Geometry delivers a steep angle that slices cleanly through Dense Weave Penetration without tearing fibers. Polished Shaft Finish reduces drag.
Sizes 60/8 to 80/12 suit delicate silks; heavier linens need 90/14.
For ultra-tight weaves, Wedge Tip Alternatives cut cleanly where standard sharps struggle.
Ballpoint Needles for Knits
Knit fabric handling calls for a completely different approach. Where sharps cut through woven fibers, ballpoint needles push fibers aside — protecting knit stitch flow and preventing runs.
For cotton knits, use sizes 70/10 to 80/12. Heavier jersey needs 80/12 to 90/14.
Eye size tolerance matters too: thread glide suffers when the eye pinches the thread, throwing off stitch tension adjustment entirely.
Stretch Needles for Elastic Fabrics
Elastic fabrics fight back — and that’s exactly where stretch needles earn their place. Designed with a modified Needle Hook Profile and a smaller scoop, they prevent skipped stitches on spandex‑rich fabrics where standard needles fail repeatedly.
Use sizes 75/11 to 90/14, matching thread weight to fabric thickness:
- 75/11 for lightweight lycra blends
- 90/14 for heavier compression fabrics
- Polyester thread enables Thread Tension Optimization on stretch seams
- Replace needles early — Needle Wear Indicators show fast on elastics
Denim Needles for Thick Woven Fabric
Denim doesn’t forgive weak equipment. Its tight twill weave demands a needle with Wedge Point Design and Reinforced Blade Strength — built to pierce multiple layers without deflecting.
| Fabric Weight | Needle Size |
|---|---|
| Light to medium denim | 80/12 – 90/14 |
| Heavyweight denim | 100/16 – 110/18 |
| Multi-layer/thick seams | 110/18 – 120/19 |
Match thread weight carefully — Thread Feed Mechanics break down quickly when your needle eye is too narrow for thick topstitching thread.
Leather Needles for Hides and Vinyl
Leather and vinyl don’t play nice with the wrong needle. For leather stitching needle selection, your two main options are diamond-point (DI) for dense, dry hides and round-point for delicate leather — both built for fabric type matching without tearing fibers.
Here’s what controls your results:
- Eye shape optimization keeps thread tension tweaks minimal.
- Thread weight must match needle gauge — use 100/16–120/19 for thick hides.
- Stitch density control improves when needle wear monitoring stays consistent.
- Vinyl-specific tips start with widened eyes to prevent thread shredding.
Specialty Needles for Metallic and Embroidery Thread
Metallic and embroidery threads are demanding — they shred, skip, and snap if your needle isn’t built for them. Use a DBx7 embroidery needle with a long, smooth eye and thread guidance grooves that feed specialty thread evenly. Titanium coated needles cut heat buildup during dense satin stitching. Low-friction coatings and coated needle tips protect metallic threads from fraying fast.
| Thread Type | Recommended Needle | Key Feature |
|---|---|---|
| Metallic | 90/14 Metallic | Enlarged eye, low-friction coating |
| Embroidery | DBx7 Embroidery | Long eye, thread guidance grooves |
| Fine Metallic | 75/11–80/12 | Polished eye, titanium coating |
The needle eye size rule applies here too — the eye must clear your thread by at least 40% for clean stitching.
Balancing Fabric Weight, Thread Size, and Needle Eye
Think of it as a three-way handshake: fabric density matching drives your thread choice, which then dictates ideal needle proportions.
A heavy canvas needs a size 100/16 needle with adequate eye clearance tolerance — pair it with fine silk thread and you’ve broken the weight-to-thread ratio.
Get the thread tension balance right by honoring the needle eye width rule: eye friction kills stitches fast.
Fix Needle and Thread Problems
needle and thread problems come down to one simple mismatch — wrong needle for the thread, or wrong needle for the fabric.
good news is each issue has a clear fix once you know what to look for. Here are the most common problems and exactly how to solve them.
Thread Breaking From a Small Needle Eye
A needle eye that’s too small is one of the most common thread breakage causes — and easy to overlook. When the eye grips the thread too tightly, thread friction heat builds up fast, weakening the fiber with every stitch.
Eye geometry impact matters here: a cramped, poorly shaped eye creates drag.
Check for burrs through eye burr inspection, apply thread tension adjustment, and respect the needle eye width rule — your thread will thank you.
Skipped Stitches From Poor Needle Matching
Thread breakage fixed but still getting skips? Poor needle matching is usually next in line.
Here’s what causes skipped stitches:
- Wrong needle point type for your fabric grain direction
- Eye burr inspection skipped — tiny nicks stall thread mid-stitch
- Thread path alignment is off, disrupting loop formation
- Machine speed effects overwhelm a mismatched needle-thread combo
- Thread tension adjustments alone won’t fix a wrong needle eye size rule violation
Match point, eye, and size together.
Fabric Puckering From Oversized Needles
Puckering usually means your needle is too wide for the fabric. Needle Diameter Drag increases Fabric Feed Resistance, forcing the fabric to compress around the stitch line.
seam puckering as wavy ripples, especially on slippery or lightweight fabrics.
presser foot pressure, shorten your stitch length, and add a stabilizer. Switching down one needle size often fixes it immediately.
Large Holes Caused by Thick Needles
Oversized needles don’t just pucker fabric — they punch visible holes through it.
Needle Tip Thickness drives Hole Enlargement Mechanics: a thicker shaft pushes yarn fibers aside instead of sliding between them. Fabric Density Impact matters too — tightly woven fabrics show damage most.
Add Thread Bulk Effect and Repeated Pass Damage, and those holes widen fast. Drop one needle size immediately.
Fraying Thread From Needle Friction
Holes weaken seams — fraying unravels them. When the needle eye is too small, friction builds fast.
Heat buildup at the eye softens fibers, creating tiny cuts that spread. Check for eye burrs first; even a microscopic nick shreds thread.
Slow your fabric feed speed, balance thread tension, and apply thread lubrication. That combination stops needle eye friction before it starts.
When to Increase Needle Size
Sometimes your machine is telling you something — you just have to listen. If you’re seeing thread abrasion, skipped stitches, or trouble piercing layered fabrics, it’s time to go up a needle size.
Gauge alignment matters here. Increase when:
- Stitch density causes drag or thread strain
- Fabric thickness exceeds your current needle’s clearance
- Thread abrasion appears at the eye
- Needle wear accelerates unusually fast
When to Replace a Dull or Bent Needle
A needle doesn’t announce when it’s done — you have to catch the signs. Check needle condition before every session: burrs, bends, or flat spots, mean replace it now.
Your continuous sewing limit is roughly three to four hours. fabric change cues and project milestones to track needle wear frequency.
Don’t wait for breakage. Fresh needles cost pennies; damaged fabric doesn’t.
Replace your needle before it fails you — a few cents now saves fabric you cannot undo
Frequently Asked Questions (FAQs)
Can hand-sewing needles follow the same eye rules?
Yes — the same needle eye width rule applies.
Your hand needle sizing follows the same logic: the eye must offer enough thread clearance variance for smooth, friction‑free passage without damaging the thread.
Does needle coating affect thread glide or friction?
Coated needles cut friction noticeably. NIT coatings improve thread glide by around 20%.
Carbon coatings reduce insertion friction by roughly one-third, keeping heat buildup low and thread integrity intact.
How does thread twist direction impact needle choice?
Thread twist direction quietly shapes your needle choice.
left-twist thread needs slightly more Twist Eye Clearance, while right-twist flows cleaner through standard eyes — mismatches cause uneven Twist Tension Impact and skipped stitches.
Can humidity or heat affect thread and needle performance?
Both humidity and heat quietly sabotage your stitching. Moisture-induced swelling tightens thread in the needle eye, causing skipped stitches.
Heat-driven oxidation accelerates needle wear and tear, while static buildup, humidity increases thread breakage and tension adjustment headaches.
Conclusion
Funny how the smallest part of a needle carries the most weight. That tiny eye—easy to overlook, easier to blame last—is where every thread break, skipped stitch, and puckered seam actually start.
Once your needle eye size, thread guide, knowledge clicks into place, you stop guessing and start controlling the outcome. Match the eye to the thread, match the needle to the fabric, and your machine finally stops fighting you.
- https://help.singer.com/en-US/choosing-the-right-singer-machine-needles-389061?utm_source=openai
- https://www.schmetzneedles.com/pages/needle-guide
- http://jjneedles.com/images/about-us/how-needles-are-made.jpg
- https://www.ft.tul.cz/document/3688
- https://www.coats.com/en/industries/performance-threads/faqs/