This site is supported by our readers. We may earn a commission, at no cost to you, if you purchase through links.

A dull rotary blade doesn’t just make cutting harder. It drags through fabric, snags threads, and forces you to press down harder, which throws off your accuracy on every seam. Most of that damage traces back to one thing: how the cutter gets stored between projects.
Toss it in a drawer with pins and scissors, and the edge dulls fast. Leave it near a damp corner of your sewing room, and rust creeps in within weeks.
The best way to store rotary cutters comes down to a few simple habits: locking blades, choosing the right case, and keeping moisture in check. Get those right, and your blades stay sharp, safe, and ready for the next cut.
Table Of Contents
Key Takeaways
- Lock the blade every time before storing your rotary cutter, since an engaged lock prevents accidental exposure if the case gets jostled.
- Use rigid, UV-resistant cases or dividers that are rigid and UV-resistant to protect blade edges from impact and keep sizes organized for quick, safe access.
- Clean lint and adhesive residue with alcohol, then air dry blades fully before storage, since trapped moisture invites rust fast.
- Keep humidity between 40-60% using silica packets or a dehumidifier, and store cutters away from kids and near your cutting mat for a safer, smoother workflow.
Choose Safe Rotary Cutter Storage

A rotary cutter’s blade stays sharp enough to cut through skin as easily as fabric, so storage isn’t something to guess at. You need a system that locks the blade, protects the edge, and keeps curious hands away. Here’s what to check off before you put your cutter down for the day.
If you’re working with a rotary cutter on a project like this step-by-step guide to cutting sleeves off a shirt, retract the blade the moment you set the tool down, even between quick cuts.
A rotary blade cuts skin as easily as fabric, so safe storage means locking it, capping it, and keeping it away from curious hands
Lock Blades Before Storing
Lock the blade every time before you tuck your rotary cutter away. An engaged lock stops accidental blade exposure, especially if the storage bin gets jostled or knocked around later.
To prevent accidents, consider storing sharp objects in locked drawers or high cabinets.
Some cutters flash a visual indicator once locked—trust it. Check the mechanism before each storage session; a faulty lock invites nicks, cuts, or worse. Manual blade retraction models still need this step. Never skip it.
Use Rigid Blade Covers
Locking mechanisms handle one job; rigid covers handle the rest. Polycarbonate or ABS shells shield edges from impact, preventing chipping during storage.
Three benefits worth noting:
- UV-resistant plastic resists sun damage in windowed workshops
- Tactile color coding speeds up blade identification
- Single-handed retrieval keeps your grip steady and safe
They slide right into existing bins—no extra adapters needed.
Keep Handles Easy to Grab
Grabbing a cutter shouldn’t feel like a claw grip workout. Store grips facing outward, oval-shaped grips up, so your hand curls naturally around 5.5 inches of contact.
| Handle Feature | Storage Tip | Hand Benefit |
|---|---|---|
| Textured surface | Face grip up | Better traction |
| Oval shape | Avoid stacking | Less wrist strain |
| Ergonomic grip | Slot vertically | Even pressure |
Prevent Rolling on Tables
A cutter that rolls off the table is a hand injury waiting to happen. Rubberized matting or nonslip backing under your workspace stops that instantly.
- Add adhesive grippers under table legs
- Install a low-profile edge guard
- Try a magnetic strip for upright storage
Check table leveling too. A wobbly surface sends tools sliding, even with good mats underneath.
Store Away From Children
Little hands are curious hands, and rotary blades don’t forgive mistakes. A high shelf or locked cabinet with childproof latches keeps cutters out of reach entirely.
Add a dual key system for extra security, then label the area hazardous. Set a clear workspace boundary so kids stay clear during cutting sessions — this simple habit prevents most workshop injuries before they happen.
For more tips on keeping young ones safe around blades and tools, check out this guide on essential sewing room safety practices.
Use Cases, Bins, or Organizers
Once your cutters are locked and capped, they still need a proper home. The right case, bin, or organizer keeps blades protected and easy to find when you need them. Here are five storage options worth setting up in your sewing space.
Hard Zippered Storage Cases

A hard zippered case turns your rotary cutter drawer from chaos into control. Polycarbonate shells resist impact twice as well as standard plastic, and UV coatings stop yellowing over time.
- Fits 28mm to 60mm cutters
- Elastic mesh bands secure blades
- Customizable dividers organize gear
- Reinforced corners prevent damage
- Zippered access speeds cutting sessions
This protects blade edges and prevents accidental cuts during storage.
Labeled Sewing Tool Bins

A clear polycarbonate bin turns guesswork into instant recognition for your quilting shelf.
| Feature | Benefit |
|---|---|
| Transparent lid | See contents fast |
| Color-coded labels | Sort blade sizes |
UV-resistant labels stay legible for years. Stackable 6x8x4 inch bins fit any sewing room layout while reinforced corners boost tool longevity across daily workshop use.
Drawer Dividers for Cutters

Turn a junk drawer into a real workshop tool with the right dividers. Pick acrylic dividers for quick visual ID or foam for irregular shapes.
- Narrow slots isolate blades
- Rounded corners protect tips
- Telescoping fit for 11-17" drawers
- Locking end caps stop shifting
- Clamshell walls prevent chatter
Wipe dividers down after each session, and replace cracked panels every 2-3 years for tool longevity.
Desk Organizers With Slots

Slot organizers keep your rotary cutter upright and visible, unlike a drawer where it hides under scissors. Choose steel with powder coat finish for durability, or wall-mount to save desk space.
| Feature | Benefit |
|---|---|
| 1.5-2.5" slot depth | Secures handle firmly |
| Anti-slip base | Stops sliding |
| Modular slots | Expand as needed |
| Wall mounting | Saves desk space |
| Rubber-lined slots | Prevents scratching |
Mesh Pockets for Spare Blades

Mesh pockets keep spare blades visible and rattle-free. Each blade gets its own slot in a grid layout, so you can check blade sharpness at a glance without unzipping anything.
The elasticized edge holds blades snug, while airflow through the nylon mesh keeps moisture away, protecting cutting precision. Machine washable and durable, these pockets fit easily into your rotary cutter case for organized workshop storage.
Protect Blades From Damage

A sharp blade only stays sharp if you take care of it before it goes into storage. Lint, residue, and moisture do more damage than daily use ever will. Here’s what to check before you put your cutter away.
Clean Lint Before Storage
Trapping fibers before they settle in is half the battle. Wipe the blade with a microfiber cloth, then vacuum your workspace.
- Brush lint from the tool body
- Vacuum shelves and bins
- Wipe surfaces with a lint-free cloth
Let everything air dry completely—damp tools bond lint fast, inviting rust and residue buildup before you even close the case.
Remove Sticky Adhesive Residue
Adhesive buildup dulls a blade faster than fabric ever will. Dab a cotton swab in isopropyl alcohol (70% or higher) and work it along the edge—it cuts through residue in under a minute without pitting the metal.
Skip acetone; it’s too harsh for coated blades. For stubborn spots, a warm hair dryer softens the gunk first, then wipe clean with a lint-free cloth.
Dry Blades Completely
Once that alcohol dries, don’t rush the blade into storage. Shake off any excess moisture, then wipe with a lint-free cloth. Air dry 5–10 minutes on a flat surface, uncovered.
Rust doesn’t ask permission—it just shows up.
- Trapped moisture invites corrosion
- Rushed drying ruins sharp edges
- Winter storage demands extra care
Stainless resists rust better than carbon steel, but skipping this step still risks damage.
Add Silica Gel Packets
Air drying takes care of surface moisture, but trapped humidity inside your storage case is a different battle.
Drop a silica gel packet in with your cutters—it’ll absorb trapped moisture before rust gets a foothold. A 10-gram packet pulls roughly 1 gram of water, enough for small cases. Watch the color indicator: once it stops changing, regenerate by heating at 120–150°C, or swap in a fresh one.
Avoid Damp Sewing Rooms
Rust doesn’t care how good your blades are—it just needs moisture and time. Keep relative humidity between 40 and 60 percent using a dehumidifier, and place a hygrometer away from windows for accurate readings.
Run exhaust fans 15 minutes after cutting sessions, hold room temperature at 18-21°C, and fix leaks fast. Rotate seasonal storage checks to catch damp corners before they cause corrosion.
Store Cutters Near Cutting Supplies
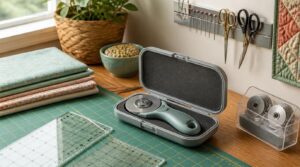
Where you store your rotary cutter matters just as much as how. Keep it close to the tools you actually use it with, and your whole cutting station starts working smarter. Here’s how to set that space up right.
Keep Beside Cutting Mats
Reaching across your workspace for a cutter breaks your rhythm and risks a slip. Keep the cutter right beside your self-healing mat for smooth workflow efficiency.
- Faster cuts, fewer interruptions
- Reduced risk of dropped blades
- Better cutting accuracy from steady positioning
Good setup ergonomics means everything within arm’s reach. This small layout choice keeps your cutting zone organized and your hands where they belong: on the task.
Separate From Fabric Scissors
Grabbing whichever blade’s closest? That’s how fabric scissors end up dulling on paper labels while your rotary cutter meets stray threads. Dedicated tooling matters: fabric scissors handle woven and knit materials only, preserving edge integrity for clean quilting cuts.
Store them in a separate drawer or case. Preventative labeling stops mix-ups fast, protecting cutting accuracy and keeping your workshop organization sharp, literally.
Organize by Blade Size
Six inch, eight inch, ten inch, twelve inch — every blade has a job, so give it a home.
- Group by length in labeled slots
- Add color-coded labels for fast grabs
- Keep frequent sizes at eye level
- Run quick inventory audits monthly
Length-specific slots stop mix-ups and speed up quilting projects, keeping your workshop organization tight and every sewing accessory exactly where it belongs.
Include Replacement Blades Nearby
A dull blade mid-project kills momentum fast, so stash spares within two feet of your cutter station.
- Store in original packaging for edge integrity
- Add color-coded, compatibility labels by size
- Use a small tray or magnetic strip
Track your count after each project. When stock runs low, reorder before your next quilting session stalls out.
Maintain a Clear Cutting Zone
Clutter is where accidents start. Extend your clear cutting zone at least 12 inches beyond the line, with shadow-free lighting near 1000 lux and a stable, non-slip mat underneath.
Use boundary marking techniques like painter’s tape, sweep away debris between cuts, and stack scrap material neatly nearby. A tidy zone protects your hands and keeps every cut clean and safe.
Handle Spare and Used Blades

Not every blade in your sewing space is ready for use, and some are done for good. Spare and used blades both need the right handling to stay safe. Here’s how to manage them from first cut to final disposal.
Keep New Blades Packaged
Leave replacement blades sealed until you’re ready to load them. That factory seal confirms integrity and blocks tampering.
- Protective inserts guard carbide teeth from chipping
- Packaging resists crushing under shelf loads
- Labels identify blade type and size instantly
Don’t mix packaged blades with used tools. This habit extends rotary cutter lifespan and keeps blade maintenance simple down the road.
Mark Old Blade Containers
Once a rotary cutter blade is done, don’t just toss it in a drawer. Label the container "Old Blade" with a high-contrast tag, batch code, and date.
Good containers include tamper evident seals and material compatibility tags confirming steel or carbide safety. A QR code linking to safety steps adds extra peace of mind for workshop organization.
Use Sharps Containers
Once a blade’s labeled and set aside, a puncture-resistant sharps container is your best final stop. These containers meet strict safety standards, resist leaks, and use clear walls so you can track fill level at a glance.
Stop adding blades once it hits three-quarters full. Place the container in a stable spot, away from foot traffic, to prevent tipping and injury.
Wrap Blades Before Disposal
Not every household has a sharps container on hand, and that’s fine.
Wrap each blade in several layers of thick cardboard first, folding it flat to stop edges from poking through. Seal tightly with sturdy tape, then label it "SHARP" for handlers. Slip on cut resistant gloves during this step, and check local disposal regulations before tossing it out.
Replace Damaged Blades Promptly
Dull blades don’t just slow you down — they put your fingers at risk. Inspecting edge quality every time you sit down catches nicks before they cause tears or slips.
- Check the blades for rounded spots or rust
- Test scrap pieces before real cuts
- Log each blade replacement date and type
Watch for dragging fabric or frayed edges. Swap the blade fast to prevent injury and keep cuts clean.
Frequently Asked Questions (FAQs)
How do you store a rotary cutter?
Leaving it loose on the table is easy—until it rolls onto the floor blade-first. Lock the blade, cap it, and stash your rotary cutter handle-up in a labeled drawer or case, away from kids, moisture, and clutter.
How often should you change your rotary cutter blade?
Swap blades once cuts start snagging or fraying — usually around 100 meters of cutting for heavy fabrics. Frequency, fabric weight, and blade material all affect longevity, so check sharpness at every project’s start rather than waiting for resistance to build.
What to put under a rotary cutter?
Think of your cutting mat as a shield, not just a surface. A self-healing cutting mat on a sturdy table gives non-slip stability and proper thickness, protecting blades while keeping your workspace level for smooth, accurate fabric cutting.
Do rotary cutters wear out?
Yes. Material density impact, cutting pressure fatigue, and heat deformation risks all wear down edge geometry over time. Watch for fabric fraying indicators or dulling — blade replacement and proper equipment maintenance keep your rotary cutter performing well between preventative maintenance checks.
How often should rotary cutter blades be oiled?
More oil isn’t better—it’s how paste and lint build up. Oil only when rotation feels stiff, not on a schedule. One drop per pivot point, wipe excess, and you’ll prevent rust without gumming up the blade.
What lubricant works best for rotary cutter pivots?
Light sewing machine oil works best for pivot points—thin viscosity flows into tight spots without buildup. Wipe excess to prevent residue and lint attraction.
Avoid silicone-based lubricants; they degrade over time and hurt compatibility with your rotary cutter’s metal parts across temperature swings.
Can silicone spray be used on rotary cutters?
Silicone spray works fine for corrosion protection on non-cutting metal parts, but keep it off the blade edge—it can alter sharpness. PTFE lubricants offer cleaner, longer-lasting results with less lint buildup than standard silicone.
How do I know if a blade needs replacing?
Check for nicks, chips, or rounded teeth on your tungsten steel blade, plus ragged cuts, snagging, odd vibration, or grinding noise. Cracks, rust, or a bent edge mean immediate blade replacement, not more sharpening or realignment.
What are signs of rust or wear on blades?
Watch for reddish speckling, pitting, or flaking rust, plus dull edges, chips, and micro-serrations. Cracks near mounting holes, coating blistering, and rising cutting friction all point to blade replacement before your rotary cutter fails mid-project.
Conclusion
Lock the blade, clean the edge, store it dry. These three habits define the best way to store rotary cutters, and they take seconds once they become routine.
A blade treated with care stays sharp for months; a neglected one dulls within weeks.
Keep cutters near your mats, away from moisture, sorted by size.
Your next seam will thank you, smooth, accurate, and safe from the first cut to the last.