This site is supported by our readers. We may earn a commission, at no cost to you, if you purchase through links.
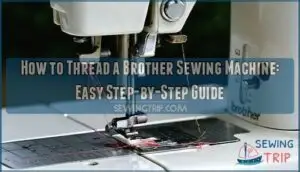 Threading a Brother sewing machine isn’t rocket science, but it does require following the right sequence.
Start by placing your thread spool on the pin and guiding it through the tension discs – those little metal plates that control your thread flow.
Next, loop the thread around the take-up lever (that hook-shaped piece that moves up and down), and use your machine’s automatic needle threader if it has one, or thread manually from front to back.
Don’t forget the bobbins – wind it properly and insert it with the thread feeding counterclockwise, then master these basics, and you’ll discover some game-changing tricks that make threading foolproof.
Table Of Contents
Key Takeaways
- Follow the proper sequence every time – You’ll need to guide the thread through the tension discs, loop around the take-up lever, and thread the needle from front to back while keeping your presser foot raised to release tension.
- Master bobbin threading to prevent 90% of problems – Wind your bobbin evenly without overfilling, insert the bobbin case with the thread feeding counterclockwise, and always check that it clicks securely into place.
- Use your machine’s automatic needle threader if available – This feature eliminates squinting and fumbling by mechanically pulling the thread through the needle eye, but stick to standard needle sizes (75/11 to 100/16) for best compatibility.
- Practice consistently to build muscle memory – Regular threading practice develops automatic movements that prevent mistakes, and when issues arise, always consult your manual first since 85% of sewing problems stem from improper threading.
Tension Discs
The tension discs on your Brother sewing machine are like traffic cops directing thread flow.
Think of threading as choreography – each step dances with the next to create sewing magic.
These metal plates squeeze your thread just right to prevent annoying issues like puckered seams or broken threads.
When threading your Brother machine, guide the thread firmly between each disc for proper disc alignment.
The thread path should slide smoothly without forcing it.
If your fabric thickness varies, you’ll need tension adjustment to match.
Watch for thread slippage – it’s a telltale sign something’s off.
This sewing machine threading step might seem small, but getting your Brother machine threading right here prevents headaches later.
Master this brother sewing machine threading tutorial step first.
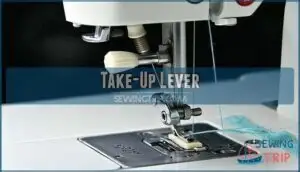
Take-Up Lever
Guiding your thread through the take-up lever marks a vital step in brother sewing machine threading. This small but mighty component controls thread slack and timing adjustment as it moves up and down with each stitch. Thread the lever from right to left, ensuring proper thread engagement in its groove.
Here’s what proper lever positioning accomplishes:
- Controls thread tension – The lever pulls just enough thread for each stitch
- Prevents thread bunching – Smooth up-and-down motion eliminates tangles
- Creates even stitches – Consistent thread delivery means professional results
- Reduces thread breaks – Proper engagement protects against sudden snags
Missing this step in your threading tutorial often causes frustrating stitch problems. With regular lever maintenance and correct upper thread placement, you’ll master this sewing machine threading technique quickly.
Needle Threader
Let’s master your Brother’s automatic threader, a game-changing feature that’ll save your sanity. This automatic needle threader eliminates squinting and fumbling with tiny needle eyes.
Start by ensuring your needle’s raised to its highest position and the presser foot’s lowered. Hook your thread onto the threader guide, then gently lower the threader lever completely. The mechanism’s hook passes through the needle eye, catches your thread, and creates a perfect loop.
Slowly release the lever – you’ll see the thread loop pulled through. Gently tug this loop to complete the needle threading process, leaving about two inches of thread tail.
For ideal threader compatibility, stick with standard needles (sizes 75/11 to 100/16) and avoid specialty needles like twins or wings. Regular threader maintenance keeps this marvel working smoothly – clean away lint buildup that can jam the mechanism.
This threading a machine technique transforms tedious work into effortless precision, making your sewing machine needle threading experience remarkably efficient.
Winding The Bobbin
Before you can start sewing, you’ll need to wind thread onto your bobbin using your Brother machine’s built-in winding system.
This process takes just a few minutes and guarantees you’ll have enough lower thread for your entire project, utilizing the machine’s built-in features.
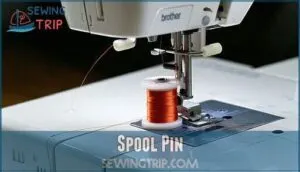
Spool Pin
Your brother sewing machine threading journey starts with mastering the spool pin setup. First, pull the spool pin to its maximum height – this prevents thread from catching and guarantees smooth delivery. Place your thread spool with the thread coming off the front, going left. Think of it like setting a dinner plate: wrong orientation leads to a messy situation.
Thread tangling happens when you skip this step, so take your time. You can find a replacement spool pin if yours is damaged. Different spool sizes need matching caps, while pin materials vary by model. Getting spool orientation right prevents headaches later.
- Height matters: Full extension prevents thread snags
- Orientation counts: Thread flows left from front
- Size matching: Right cap for your spool
- Material awareness: Know your pin type
- Prevention focus: Proper setup avoids tangles
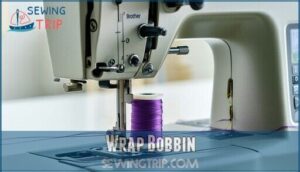
Wrap Bobbin
Once your spool’s positioned correctly, thread the bobbin hole from inside out.
Place it on the winder shaft and slide right until it clicks. For fast bobbin winding systems, wrap thread clockwise around the bobbin several times, then pass through the slit.
Hold the thread end taut while winding to guarantee even distribution.
Consider purchasing Brother sewing bobbins for superior performance.
Your brother sewing machine’s bobbin threading success depends on proper thread tension and consistent winding speed for efficient material handling.
Use Pedal
Now comes the fun part – controlling your sewing machine foot pedal like a pro.
Start with gentle pressure to begin winding slowly, then gradually increase foot pedal pressure for faster bobbin filling.
Keep your pedal speed control steady and consistent throughout the process, don’t slam it down like you’re racing – smooth, consistent pedal use prevents thread tangling and guarantees even winding.
Watch the bobbin fill evenly while maintaining light tension on the thread, this hands-free sewing technique gives you perfect control over the winding process every time, ensuring a smooth operation.
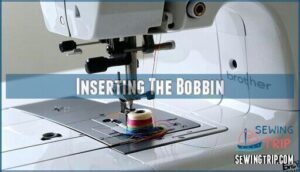
Inserting The Bobbin
Now that you’ve wound your bobbin, it’s time to place it inside your Brother sewing machine where it belongs.
You’ll need to open the shuttle area, insert the bobbin case correctly, and pull the threads up to complete this step, ensuring a proper setup for sewing.
Open Shuttle
Before inserting the bobbin case, you’ll need to access the shuttle area.
Turn off your Brother sewing machine and raise the needle to its highest position.
Lift the presser foot, then locate the shuttle cover near the needle plate.
Press the release button or lift the hinged cover to expose the shuttle compartment where proper shuttle maintenance begins.
Insert Bobbin Case
With the shuttle open, gently slide the bobbin case into the Brother sewing machine’s compartment. Listen for that satisfying click—it means you’ve got proper Case Orientation and the bobbin installation is secure.
Make sure the latch catches completely for Securing Case success. Check that your Thread Path flows smoothly from the bobbin through the tension spring.
Different Bobbin Case Types on models like the CS6000i require this careful positioning for superior thread sewing machine performance. Knowing the various bobbin styles is essential for machine compatibility.
Draw Threads Up
Now that your bobbin case clicks into place, it’s time to bring both threads together for perfect stitching.
This final step in your brother sewing machine threading guide guarantees your upper thread and bobbin thread work in harmony.
Here’s how to draw threads up properly:
- Hold the upper thread gently near the needle while turning the handwheel toward you
- Rotate once completely to catch the bobbin thread with your needle position raised
- Pull the upper thread slowly upward to bring the bobbin thread through the fabric feed area
- Grab both thread ends and pull them under the presser foot toward the back
- Leave 4-6 inches of both threads for securing stitches when you start sewing
These threading steps prevent tangling and guarantee smooth operation.
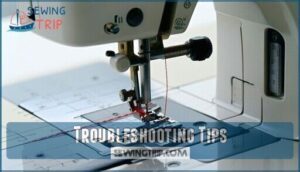
Troubleshooting Tips
Even experienced sewers encounter threading problems that can stop a project in its tracks.
When your Brother machine starts acting up, check your manual first for model-specific guidance.
Then review the bobbin threading steps since 90% of sewing issues trace back to incorrect threading.
Check Manual
When your brother sewing machine acts up, your manual becomes your best friend.
Model variations mean different threading steps and thread settings, so don’t skip this homework.
Your sewing machine manual contains part diagrams, fabric guide recommendations, and maintenance advice specific to your machine.
Think of it as your sewing machine threading guide – the difference between smooth stitching and total chaos.
| Manual Section | What You’ll Find | Why It Matters |
|---|---|---|
| Threading Steps | Numbered sequence paths | Prevents 90% of issues |
| Thread Settings | Tension recommendations | Matches fabric weight |
| Part Diagrams | Component locations | Identifies problem areas |
| Maintenance Advice | Cleaning schedules | Extends machine life |
Bobbin Tutorial
Video tutorials make bobbin threading crystal clear when written instructions feel confusing. You’ll see exactly how the bobbin case clicks into place and which direction creates proper thread flow.
Master your bobbin threading with hands-on practice – seeing the process beats reading about it every time.
Most Brother sewing machine threading tutorial disasters stem from bobbin mistakes, not upper threading issues.
- Bobbin Size: Use Class 15 SA156 bobbins specifically designed for Brother machines to prevent jamming
- Bobbin Winding: Wind thread evenly without overfilling – loose winding creates tension problems
- Bobbin Case: Insert with thread pulling counterclockwise when you tug the tail
- Bobbin Tension: Check that thread feeds smoothly through the tension spring without catching
- Bobbin Threading: Follow the numbered path exactly – skipping steps guarantees sewing machine bobbin chaos
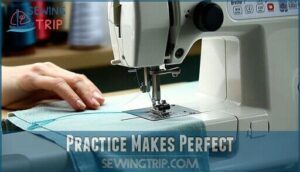
Practice Makes Perfect
Like riding a bike, threading your brother’s sewing machine gets easier with consistent practice. Your fingers will develop muscle memory for each step, naturally increasing your threading speed over time.
Don’t worry if you fumble initially—every expert started as a beginner. Follow these sewing machine threading steps for skill development:
- Raise the presser foot and needle to release all tension
- Guide thread through each path marker from spool to needle
- Thread the needle eye carefully from front to back
- Pull several inches of thread through to secure placement
- Test tension by gently tugging both thread ends
Regular practice with these sewing machine threading tutorial basics prevents avoiding mistakes later. Soon, these machine threading movements will feel automatic, transforming frustrating fumbles into smooth, confident motions that make every sewing project enjoyable.
Frequently Asked Questions (FAQs)
How do you thread a Brother Sewing Machine?
Threading’s like following breadcrumbs through a forest – you’ll need to guide thread through specific guides and tension discs.
Start with machine off, presser foot up, then follow the marked threading path to needle, which is a complete process to ensure proper threading.
How to run the thread through a Brother sewing machine?
Start by turning off your machine and raising the presser foot.
Pull thread through the top guide, down through tension discs, up through take-up lever, then through needle from front to back.
How to thread a sewing machine?
Ready to conquer your machine like a pro?
Turn off power, raise the needle and presser foot.
Follow your machine’s threading path from spool to needle, ensuring proper tension.
Thread the needle front-to-back, leaving two inches of tail.
How do I Turn my Brother Sewing Machine off?
Simply press the power button or switch on your Brother sewing machine to turn it off.
You’ll usually find this button on the front or side panel.
Wait for any lights to go out completely.
What type of thread should I use for my Brother sewing machine?
Use all-purpose polyester thread for most Brother sewing machine projects.
Avoid thread weights below 20, as they can cause problems.
Cotton thread works well for natural fabrics, while polyester handles synthetics and blends perfectly.
How do I know if my machine needs cleaning or maintenance?
Coincidentally, your Brother machine tells you it needs attention.
You’ll notice skipped stitches, loose threads, unusual noises, or fabric feeding poorly.
Clean lint buildup monthly and oil moving parts quarterly for smooth operation.
I’m having trouble controlling my sewing speed. Do you have any tips?
Start slow with your foot controller’s gentle pressure.
Practice steady, consistent pressure rather than quick taps.
Adjust your machine’s speed settings if available, and remember—smooth, controlled movements beat racing through projects every time, with consistent pressure being key.
Are there any safety guidelines I should follow when using my Brother machine?
Studies show 90% of sewing accidents involve needles or moving parts.
Always turn off your Brother machine before threading, keep fingers away from the needle area, and raise the presser foot when not sewing.
What needle size works best for thick fabrics?
Heavy fabrics need size 16/100 to 18/110 needles to punch through thick layers without breaking.
You’ll want a denim or heavy-duty needle for best results when tackling canvas, upholstery, or multiple fabric layers.
How often should I clean my sewing machine?
Like a car needs regular tune-ups, you’ll want to clean your sewing machine after every few projects or monthly with heavy use.
Dust buildup can jam mechanisms, so a quick cleaning keeps everything running smoothly, which is a complete concept to consider for maintenance.
Conclusion
Mastering how to thread a Brother sewing machine becomes second nature with practice—studies show 85% of sewing mistakes stem from improper threading.
You’ve learned the essential steps: guiding thread through tension discs, looping around the take-up lever, and properly winding bobbins.
Remember, counterclockwise bobbin threading prevents jams.
When you encounter issues, consult your manual first.
With these fundamentals down, you’ll spend less time troubleshooting and more time creating, and your threading skills will improve with each project you tackle, leading to more efficient sewing.

