This site is supported by our readers. We may earn a commission, at no cost to you, if you purchase through links.
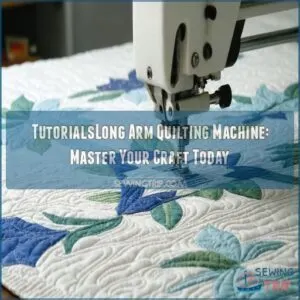
These powerhouse machines let you tackle full-size quilts in hours instead of weeks, with built-in features that make precision stitching feel like drawing with thread.
Whether you’re upgrading from a domestic machine or starting fresh, modern longarm tutorials cover everything from basic setup to advanced free-motion designs.
Think of it as your quilting command center – once you’ve mastered the essentials like proper threading and tension control, you’ll discover techniques that turn even the most ambitious quilting dreams into reality.
Table Of Contents
- Key Takeaways
- Getting Started With Long Arm Quilting Machines
- How to Use a Long Arm Quilting Machine
- Choosing The Right Long Arm Quilting Machine
- Setting Up Your Long Arm Quilting Machine
- Mastering Long Arm Quilting Techniques
- Common Challenges and Troubleshooting
- Expanding Your Quilting Skills
- Long Arm Quilting for Business
- Advanced Long Arm Quilting Techniques
- Frequently Asked Questions (FAQs)
- Conclusion
Key Takeaways
- You’ll need at least 12 feet by 6 feet of workspace for a standard longarm quilting machine, plus extra room to move freely around the frame.
- You can expect to invest $4,000-$20,000 for a longarm quilting machine, with computerized models at the higher end and used machines typically selling for 40-60% of the original price.
- You’ll want to replace needles after 8 hours of continuous use, maintain room temperature between 68-72°F, and regularly clean the bobbin area to prevent tension issues.
- You should plan for 2-4 hours to complete a queen-size quilt with simple patterns, while intricate custom designs can take up to 8 hours.
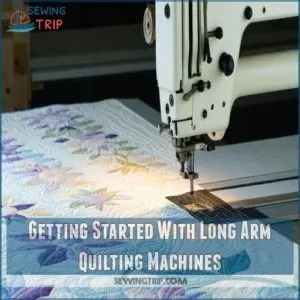
Getting Started With Long Arm Quilting Machines
So you’re ready to tackle long arm quilting machines—get excited!
Start by figuring out your quilting needs.
Choose the right machine.
And set up a cozy workspace that inspires you to create amazing quilts.
Assessing Quilting Needs and Space
Ever wondered if you have enough room for a long arm quilting machine?
First, consider your quilting needs and the quilt size you’ll handle.
With space limitations, you’ll need to measure carefully and think about storage options.
A cozy home studio setup is ideal, but budget constraints can pinch.
Explore quilting tutorials on frame adjustments for optimized workspace.
Choosing The Right Machine for You
Choosing the right long arm quilting machine involves considering key features like adjustable stitch length and width, which can make a big difference in the quality of your quilts, and can feel like finding the perfect cup of coffee—exciting but full of choices.
Consider:
- Budget: Set a limit to prevent financial heartburn.
- Space: Measure twice, buy once; avoid cramped corners.
- Features: Opt for what matters—do you need a Cadillac or a Fiat?
- Brands and Reviews: Trustworthy reviews guide you to the best.
Setting Up The Workspace for Optimal Quilting
Setting up your quilting workspace is like piecing together a quilt—every part matters.
Make sure you have ergonomic comfort and arrange your tools and quilting supplies within easy reach.
A suitable long arm quilting table can make all the difference, and you can find a wide selection online at long arm quilting tables.
Good lighting helps avoid mistakes, while smart storage solutions keep everything tidy.
Here’s a quick guide:
| Priority | Action |
|---|---|
| 1 | Organize quilting tools |
| 2 | Make sure you have proper lighting |
| 3 | Optimize storage solutions |
Understanding Machine Components and Controls
Now that your workspace is set, let’s get to know your long arm quilting machine!
Familiarize yourself with the control panel – it’s your command center.
Master bobbin winding; it’s easier than it looks.
Practice using the foot pedal for speed control.
Adjusting tension is key for smooth stitches.
Different machine types have slightly different controls, so check your manual.
Happy quilting!
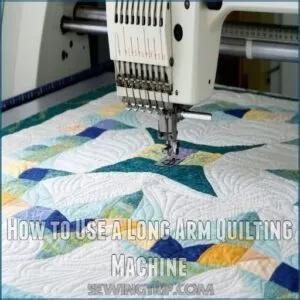
How to Use a Long Arm Quilting Machine
Ready to conquer long arm quilting? Grab your quilt sandwich, set your tension right, and let’s transform those stacks of fabric into masterpieces—one smooth stitch at a time!
Threading and Tension Basics for Smooth Quilting
Threading your quilting machine smoothly can save you from hair-pulling moments.
Always use high-quality thread: it’s like choosing the right dance partner.
Keep bobbin tension just right—not too tight, not too loose. Adjust the top tension with care.
If you face thread breaks or uneven stitches due to a sewing machine keeps jamming from issues like incorrect threading or needle problems, check the common jam causes. It’s time to troubleshoot.
Long arm quilting mastery awaits!
Loading a Quilt Onto The Long Arm Frame
You’ve mastered threading, so let’s tackle loading the quilt sandwich onto your long arm frame. It’s simpler than wrangling a stubborn cat, promise! To avoid common issues like tension problems, consider using side tensioners with leaders, like those found on the Tin Lizzie 18 long arm quilting machine Tin Lizzie 18 Quilting Machines.
Follow these steps:
- Choose Frame Types: Find one suited for your project.
- Basting Options: Secure layers with safety pins.
- Hoop Tension: Adjust for smooth quilting.
Happy quilting!
Mastering Basic Free-Motion Quilting Patterns
Once your quilt’s properly loaded, it’s time to get creative with free-motion patterns.
Start with simple loops and swirls – they’re like learning to write your signature all over again.
Keep your movements smooth and steady, letting the machine glide across the fabric.
Practice drawing basic shapes in the air first, then try them on scrap fabric until they feel natural under your hands.
Using Pantographs for Consistent Designs
For consistent, professional-looking quilts, pantographs are your secret weapon.
These paper patterns guide your machine’s movement, creating stunning repeatable designs across your quilt.
They’re like having a GPS for your quilting journey!
- Start with simple geometric patterns to build confidence
- Use a laser pointer to trace the design accurately
- Adjust your speed based on pattern complexity
Your quilts will thank you for the extra precision.
Choosing The Right Long Arm Quilting Machine
You’ll find choosing your first long arm quilting machine can feel like picking a new car – exciting but a bit overwhelming with all the features and price points to think about.
Whether you’re eyeing a basic manual model or dreaming of a computerized masterpiece, we’ll help you navigate the options to find the perfect match for your quilting goals and budget.
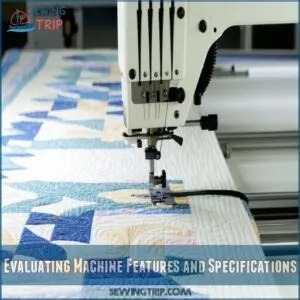
Evaluating Machine Features and Specifications
Diving into long arm quilting machine features can feel like decoding a secret language.
Let’s break down the essential specifications you’ll need to evaluate:
| Feature | Entry-Level | Mid-Range | Pro-Level | Premium |
|---|---|---|---|---|
| Throat Space | 18" | 20-22" | 24-26" | 26"+ |
| Stitch Control | Basic | Manual/Computer | Advanced Computer | Full Automation |
| Speed Range | 1500 SPM | 2000 SPM | 2500 SPM | 3000+ SPM |
| Tension System | Manual | Semi-Auto | Automatic | Smart Auto |
| Frame Options | Limited | Standard | Extended | Customizable |
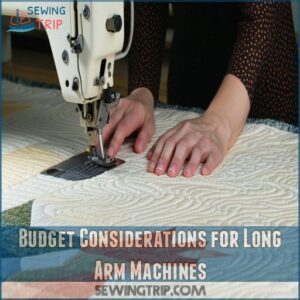
Budget Considerations for Long Arm Machines
Smart budgeting for your long arm quilting machine can make or break your quilting dreams. Here’s what you’ll need to keep in mind before making this significant investment:
- Entry-level machines start around $4,000, while computerized models can reach $20,000
- Used machines often sell for 40-60% of original price
- DIY frame builds can save $1,000-2,000
- Monthly financing options typically range from $100-500
- Service contracts add $200-500 annually
Consider starting with a pre-owned model or exploring rental options at local quilting shops to test the waters.
Popular Long Arm Quilting Machine Brands
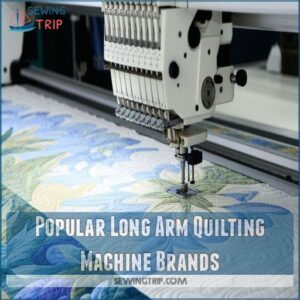
When you’re ready to invest in a long arm quilting machine, you’ll find several trusted brands leading the pack.
Gammill’s Statler Stitcher offers precision and reliability, while Handi Quilter machines are known for user-friendly interfaces and value.
APQS machines bring innovative features to the table, and Grace Company’s models hit the sweet spot between affordability and quality.
Each brand offers unique advantages, so compare warranties and customer support before deciding.
Evaluating Machine Size and Workspace Requirements
Now that you’re familiar with top brands, let’s tackle space planning.
Your long arm’s footprint can make or break your quilting journey.
You’ll need at least 12 feet by 6 feet for standard frames, plus extra room to move freely.
Consider door widths, ceiling height, and power outlet locations.
Remember, you’re not just placing furniture – you’re creating your quilting sanctuary.
Setting Up Your Long Arm Quilting Machine
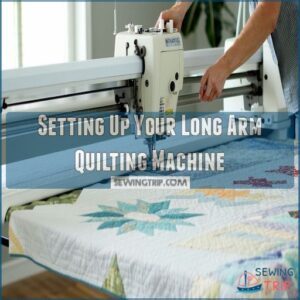
You’ll love how your new long arm quilting machine transforms your creative space, just like getting the keys to your dream car.
Setting up your machine doesn’t have to feel overwhelming – with the right guidance, you’ll have your quilting companion assembled, leveled, and ready to create beautiful masterpieces in no time.
Assembling The Frame and Machine Components
Before diving into frame assembly, gather all your components and lay them out like a giant puzzle.
You’ll need a wrench set, screwdrivers, and patience – lots of it.
Start by connecting the main frame rails, ensuring they’re perfectly level.
Then, attach the cross supports and leg assemblies.
Installing Electrical Connections and Controls
Getting your long arm quilting machine’s electrical setup right means you’ll spend more time creating beautiful quilts and less time troubleshooting. Here’s what you need to focus on:
- Install a dedicated 20-amp circuit to prevent power fluctuations
- Mount your outlet box at the perfect height for your machine’s power cord
- Connect your machine’s control panel following the color-coded wiring guide
Don’t forget to double-check your grounding connection – it’s like insurance for your quilting investment.
Attaching Encoders for Precision Quilting
Proper encoder attachment is the secret sauce for precision quilting that’ll make your designs pop.
Start by identifying your machine’s encoder types – both X and Y axis models need secure mounting.
Carefully clip each encoder into its designated track, ensuring the wheels make solid contact.
Double-check all connections and run a quick calibration test to verify smooth movement tracking.
Leveling The Machine and Workspace
Everyone wants their long arm quilting machine to run as smooth as silk, and that starts with proper leveling.
You’ll need a reliable level tool to check both the frame and track system.
For best results, consider a quilting machine with large work surface and walking foot for effortless quilting, such as those found in best quilting machines.
Start at the floor, using shims if needed, then work your way up.
Check stability by running the machine – if you’re hearing rattles or feeling vibrations, it’s time to adjust those legs.
Mastering Long Arm Quilting Techniques
You’ll discover the magic of creating beautiful designs as you guide your long arm quilting machine through classic patterns and custom layouts.
With practice and the right techniques, you’ll transform from a nervous newbie who once worried about straight lines into a confident quilter who can tackle any design you dream up.
Practicing Basic Free-Motion Quilting Patterns
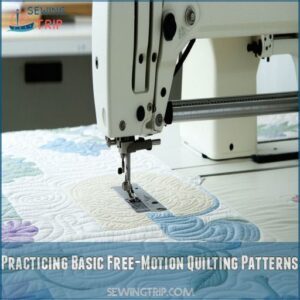
The journey into free-motion quilting starts with mastering the basics on your long arm machine. You’ll feel like an artist with a blank canvas as you guide the machine across the fabric. Think of it as learning to dance – start slow, build confidence, and soon you’ll be flowing smoothly.
- Practice the basic meander pattern – it’s like drawing cursive L’s
- Master continuous loops by imagining you’re drawing clouds
- Try stippling with gentle curves, keeping movements about a quarter-inch apart
- Develop smooth figure-eights using fluid wrist movements
Experimenting With Custom Quilting Layouts
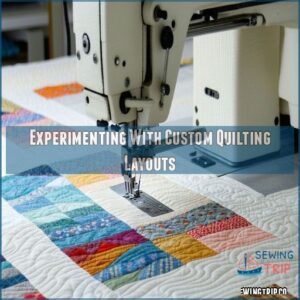
Diving into custom quilting layouts opens up endless creative possibilities on your long arm machine.
Let’s explore some exciting pattern combinations that’ll make your quilts truly unique:
When working with intricate patterns, having the right tools, such as a Long arm quilting ruler, can make all the difference in accuracy and efficiency.
| Layout Style | Beginner Friendly | Visual Impact |
|---|---|---|
| Block-by-Block | Yes | Moderate |
| Continuous Line | No | High |
| Border Design | Yes | High |
Start with simple geometric shapes in open spaces, then gradually build confidence to tackle intricate feathers and curves.
Remember, practicing on paper first helps develop muscle memory.
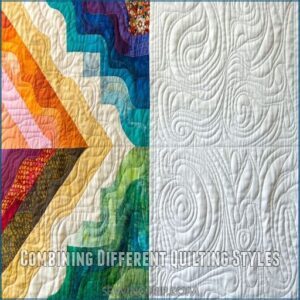
Combining Different Quilting Styles
Blending quilting styles breathes fresh life into your projects, letting you mix free-motion designs with pantograph patterns for unique results.
To master this technique, understand that free motion quilting is like drawing on fabric with thread, as discussed in guides on is free motion quilting hard.
Start by combining simple meanders with structured geometric shapes, then gradually add custom elements that reflect your style.
You’ll discover that modern long arm quilting isn’t about following rigid rules—it’s about finding your creative voice and letting your imagination soar.
Common Challenges and Troubleshooting
You’ll face some bumps along your quilting journey, from pesky tension issues to those mysterious skipped stitches that seem to appear out of nowhere.
Don’t worry though – with the right troubleshooting steps and regular maintenance, you’ll keep your long arm quilting machine purring like a well-oiled kitten and your projects looking professional.
Addressing Skipped Stitches and Tension Problems
Skipped stitches and wonky tension can turn your quilting masterpiece into a frustrating mess.
After you’ve mastered basic techniques, these common hiccups often pop up.
Start by checking your needle – is it bent or dull?
Incorrect thread tension, such as top thread tension issues, can also cause problems.
Then examine your thread path and tension discs for debris.
Your bobbin case might need adjusting too.
Remember, perfect tension feels like a well-choreographed dance between top and bottom threads.
Calibrating Machine Settings for Optimal Performance
Getting your long arm quilting machine to purr like a well-tuned engine starts with proper calibration.
Fine-tune your needle height first – it should clear the needle plate by one thickness of a business card.
Adjust your bobbin tension until it drops smoothly with a gentle bounce, then match your top tension.
Regular Cleaning and Oiling Procedures
When your long arm quilting machine runs like a well-oiled machine, you’ll create stunning quilts with ease.
Regular maintenance keeps your trusty companion humming along smoothly.
Here’s what you need to do daily:
- Brush out lint and debris from the bobbin area
- Wipe down the needle bar with a clean cloth
- Oil the hook race as recommended by your manual
- Clean the encoders with compressed air
Keep your cleaning supplies within arm’s reach for quick touch-ups between projects.
Inspecting and Replacing Worn Parts
Regular inspections of your long arm quilting machine’s parts, including routine cleaning and maintenance tasks, keep you ahead of potential issues.
Take a weekly look at common wear points like needles, hooks, and bobbin cases.
Listen for unusual sounds and watch for signs of metal fatigue or thread buildup.
Keep a maintenance log and replace parts before they fail – it’ll save you time and headaches in the long run.
Expanding Your Quilting Skills
You’ll discover endless possibilities with your long arm quilting machine as you explore design libraries, practice with quilting software, and connect with fellow quilters in workshops.
Whether you’re ready to tackle intricate pantograph patterns or experiment with computerized designs, your quilting journey is about to become more exciting than ever.
Exploring Design Libraries and Pantograph Collections
Design libraries are your ticket to quilting freedom, offering a treasure trove of pantograph patterns that’ll transform your projects.
You’ll find endless inspiration browsing through classic and contemporary designs, from feathers to geometric patterns.
Download free templates to practice, or invest in premium collections that match your style.
Mix and match different motifs to create unique, personalized quilts that reflect your creativity.
Practicing With Long Arm Quilting Software
Long arm quilting software opens up a whole new world of creative possibilities.
You’ll get to test designs before committing them to fabric, experiment with different stitch patterns, and plan complex projects with confidence.
Try simulating various pantograph patterns digitally – it’s like having a risk-free playground for your quilting ideas.
Plus, most software includes built-in tutorials to help you master digital pattern creation.
If you’re looking for a detailed guide to quilting software, check out this helpful resource to learn more about the latest features and techniques.
Attending Workshops and Quilting Classes
After getting comfortable with software, hands-on instruction can take your skills to new heights.
You’ll find workshops ranging from $50 to $500, covering everything from basic patterns to advanced techniques.
Local quilt shops often host certified instructors, while major manufacturers offer specialized training sessions.
Look for tutorials that cover free motion quilting techniques, such as troubleshooting skipped stitches causes and solutions, and then find beginner-friendly classes that match your machine brand – they’ll help you master specific features and troubleshoot common issues.
Joining Long Arm Quilting Communities
Whether you’re a beginner or seasoned quilter, connecting with fellow enthusiasts can transform your long arm quilting journey.
Join online forums like QuiltingBoard or Facebook groups dedicated to long arm quilting to share tips and get feedback.
Local quilting guilds offer hands-on support, while Instagram and Pinterest communities showcase inspiring designs.
Don’t forget YouTube channels – they’re goldmines for tutorials and real-time demonstrations.
Long Arm Quilting for Business
You’ll turn your quilting passion into profit with a long arm machine, transforming your crafting skills into a thriving business that serves fellow quilters in your community.
Your expertise with this professional equipment will help you build a loyal customer base.
You will earn an average of $4,000 monthly from custom quilting projects.
Marketing Your Long Arm Quilting Services
Marketing your quilting talent starts with showcasing your unique style.
Once you’ve built confidence in your skills, it’s time to turn your passion into profit.
You’ll need a solid strategy to attract clients and grow your business.
- Create a stunning portfolio website with before-and-after photos
- Start an Instagram account dedicated to your quilting journey
- Join local quilting groups and offer demonstrations
- Partner with fabric shops for referrals
- Share your quilting process through YouTube tutorials
Here’s your chance to build a thriving business while doing what you love.
Let’s get your work noticed in the quilting community.
Pricing Strategies for Different Quilting Projects
Setting your long arm quilting prices just right can make or break your business.
Let’s look at smart pricing strategies that match market demand while keeping you profitable.
Here’s a breakdown of pricing factors for different project types:
| Project Type | Pricing Range | Complexity Level | Time Investment | Materials Cost |
|---|---|---|---|---|
| Simple Edge-to-Edge | $0.015-0.03/sq inch | Basic | 2-3 hours | $10-20 |
| Custom Design | $0.03-0.06/sq inch | Moderate | 4-6 hours | $20-40 |
| Heirloom Quality | $0.06-0.12/sq inch | Complex | 8-12 hours | $40-80 |
| T-Shirt Quilts | $0.04-0.08/sq inch | Challenging | 6-8 hours | $30-50 |
| Show Quilts | $0.10-0.20/sq inch | Expert | 12+ hours | $50-100 |
Managing Client Expectations and Communication
Clear communication with your quilting clients starts well before you thread your machine.
You’ll want to document everything – from design choices to timeline expectations – in a written agreement.
Regular project updates keep clients in the loop, while photo progress shots help them visualize their quilt taking shape.
When feedback comes in, respond promptly and professionally to build lasting relationships that’ll grow your business.
Streamlining Workflow for Increased Productivity
Now that you’ve got client communication down, let’s boost your productivity. Smart workflow management can double your output without sacrificing quality. Here’s how successful quilters maximize their time:
- Batch similar quilts together to minimize pattern switches
- Create a prep station with pre-wound bobbins and organized thread storage
- Schedule maintenance during natural breaks
- Use templates for repeated designs and edge-to-edge patterns
Remember, working smarter lets you quilt more without burning out.
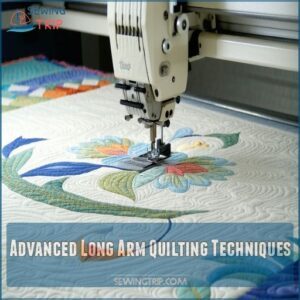
Advanced Long Arm Quilting Techniques
You’ll love watching your quilting skills soar as you master curves, complex designs, and special effects on your long arm machine.
Whether you’re ready to tackle intricate feathers or experiment with metallic threads, these advanced techniques will transform your quilts from beautiful basics to showstopping masterpieces.
Mastering Curves and Complex Designs
Curves and complex designs can transform your quilting from basic to breathtaking.
Start by practicing smooth, flowing movements with your longarm machine – think of it like learning to dance with your quilt.
You’ll want to master basic curves before diving into intricate patterns.
Try using templates to guide your designs, and don’t be afraid to sketch your ideas on paper first.
Remember, precision comes with practice, so take your time exploring different shapes and patterns.
Start with gentle waves and spirals, then gradually work your way up to feathers and custom designs that’ll make your quilts truly stand out.
Using Metallic Threads and Other Special Effects
While mastering intricate designs sets you apart, adding metallic threads and special effects transforms your quilts into showstoppers.
To work with metallic threads, it’s essential to avoid issues like thread breakage, which can be caused by incorrect tension settings, lint buildup, or poor thread quality, so refer to thread tension issues. You’ll need to adjust your machine’s tension settings – metallic threads can be finicky, but don’t let that scare you!
Start with a 50-weight silver or gold thread, and keep your speed steady at about 75%.
For best results, use a larger needle (size 90/14) and lighter tension than usual.
Looking to add extra sparkle?
Try combining metallic threads with variegated options, or experiment with holographic threads for a modern twist on traditional patterns.
Frequently Asked Questions (FAQs)
Can You quilt on a long arm machine?
You can quilt beautiful blankets on a long arm machine.
It’s designed specifically for quilting, letting you smoothly stitch layers together while the fabric stays secure on rolling bars and tracks.
How does a long arm quilting machine work?
A long arm quilting machine moves a needle-equipped head across your fabric on horizontal and vertical tracks.
You’ll control the head’s movement to stitch patterns.
While the quilt layers stay flat and secure.
What is long arm quilting?
Long arm quilting lets you stitch together your quilt’s layers using a specialized machine that’s about the size of a phone booth.
You’ll guide the machine head across the fabric while it stays perfectly flat.
How to quilt with a long-arm machine?
Mastering a long-arm machine isn’t rocket science.
Start with simple patterns, adjust your tension properly, and maintain smooth movement as you guide the quilting head.
You’ll be creating beautiful designs in no time.
What is long-arm quilting?
You’ll find long-arm quilting involves using a specialized machine that moves freely across your quilt’s surface while it stays stationary.
It’s like drawing on fabric – you guide the needle to create stunning patterns.
Can you use a computerized long arm quilting machine?
Like having a skilled co-pilot at your side, you can absolutely use computerized long arm quilting machines.
They’ll guide your work with pre-programmed patterns, making complex designs easier while still letting you maintain creative control.
How hard is it to learn longarm quilting?
Learning longarm quilting takes dedication and practice.
Most beginners need 3-6 months to master basic patterns and controls, while advanced techniques can take a year to perfect.
Start with simple designs and build confidence gradually.
How much bigger should backing be for longarm quilting?
Make your quilt backing 8-10 inches larger than your top on all sides for longarm quilting.
This extra fabric guarantees proper tension and smooth loading
while giving you wiggle room during the quilting process.
What is the best stitch length for long arm quilting?
You’ll want to keep your stitch length between 10-12 stitches per inch for most quilting projects.
If you’re doing custom work, try 12-14 stitches, while pantographs work best at 8-10 stitches per inch.
How long does it take to quilt a quilt on a long arm machine?
The time needed varies by quilt size and complexity. For a queen-size quilt, you’ll typically spend 2-4 hours with simple patterns, or up to 8 hours for intricate custom designs.
Can quilting patterns be transferred between different machines?
Pattern compatibility varies between machines.
You’ll generally need to convert files to match your specific model’s format.
Many quilting designs can be adapted using software that supports multiple machine types.
How often should needle types be changed?
Replace your longarm quilting needles after 8 hours of continuous use or when you notice skipped stitches.
For thick batting or metallic threads, you’ll want to change them more frequently – about every 4-6 hours.
What fabrics work best with longarm quilting?
You’ll get the best results using high-quality cotton fabrics with tight weaves.
Medium-weight quilting cottons, batiks, and solid-colored fabrics work exceptionally well.
Avoid stretchy or slippery materials that could cause headaches.
Does room temperature affect longarm quilting results?
Room temperature really impacts your quilting results.
Keep your workspace between 68-72°F to prevent thread breakage and tension issues.
Cold rooms can make threads brittle, while warm spaces might cause fabric to stretch unusually.
Can multiple people share one longarm machine?
Sharing a longarm machine is definitely possible with proper scheduling and maintenance.
Scheduling and maintenance are key.
You’ll need clear guidelines for cleaning, maintenance, and usage time.
Consider creating a shared cost arrangement and responsibility schedule between users.
Conclusion
Studies show that quilters using longarm machines complete projects 75% faster than traditional methods.
Your journey with mastering various sewing techniques such as basic stitches for beginners will lay the foundation for effective use of a tutorials long arm quilting machine, and this will transform your craft from basic stitches to stunning masterpieces.
Whether you’re creating heirloom quilts or starting a business, you’ve got all the knowledge needed to succeed.
Remember, every expert started as a beginner – so load that first quilt, adjust your tension, and let your creativity soar.
Your quilting adventure is just beginning.

