This site is supported by our readers. We may earn a commission, at no cost to you, if you purchase through links.
To master sewing, you’ll need patience, practice, and the right tools. Start with loose, elastic-waist pants to hone your stitching abilities. Acquire sewing skills through hands-on practice and theoretical knowledge. Utilize beginner-friendly patterns and practice on scrap fabric.
Select a sewing machine that aligns with your requirements and budget. Sharp fabric scissors are essential for cutting tools. Pins, rulers, and un-pickers are necessary tools for every sewer.
Read and comprehend pattern instructions thoroughly before sewing. Choose a pattern that aligns with your skill level and fabric type. Opt for lightweight, breathable fabrics for beginners.
Learn to use different machine types and their functions. Operate your sewing machine by threading techniques, tension adjustments, and stitch type selection.
Prepare to sew by gathering essential supplies, fabric selection, and pattern comprehension. Find local and online sewing classes, embrace mistakes, and learn advanced techniques to continue advancing your sewing skills.
Table Of Contents
Key Takeaways
- Start with loose, elastic-waist pants to hone your sewing abilities.
- Utilize beginner-friendly patterns and practice on scrap fabric.
- Choose a pattern that aligns with your skill level and fabric type.
- Learn to use different machine types and their functions.
How to Master Sewing?
To master sewing, start by learning the basics. Begin by understanding your sewing machine, including threading, changing needles, and understanding thread tension. Practice ripping out seams and learn how to read patterns, lay out fabric, and follow instructions. Additionally, learn various stitches and how to maintain and clean your machine. For quilting, practice quarter inch seams, learn how to square up your fabric, and iron regularly. As you progress, consider adjusting and altering patterns, and take proper measurements to ensure a good fit. Explore different sewing techniques and resources, such as YouTube tutorials, sewing books, and online communities. With practice and patience, you can improve your sewing skills over time.
My Sewing Journey
Your sewing journey may have started with exposure at a young age, but mastering the craft requires patience and practice. As you progress, you’ll learn the basics in high school and eventually start sewing your own clothes. Remember, anyone can get started at any level, so don’t be discouraged if you’re just beginning.
Early Exposure and Progression
Embarking on your sewing adventure can be a thrilling and fulfilling experience, particularly when you have a strong foundation and the appropriate tools. You’ve indicated that you were introduced to sewing at a tender age, with elementary school lessons and high school fundamentals, which is a splendid beginning. It’s also commendable that you’ve taken the initiative to embark on sewing your own garments a few years ago.
The key to becoming proficient in sewing is patience and practice. It’s imperative to take your time and learn at your own pace, as you’ll discover that the more you sew, the more adept you’ll become. Novices often commence with loose, elastic-waist pants, which are straightforward and enable you to hone your stitching abilities without the additional complexity of fitting.
Regarding supplies, you’ll require a sewing machine, fabric scissors, pins, a ruler or measuring tape, and a stitch un-picker. Selecting the appropriate sewing machine for your needs is paramount, as it will profoundly impact your sewing experience. Fabric selection is also significant, and you can find sustainable options online at Fabrics-Store.com.
Acquiring sewing skills entails a blend of hands-on practice and theoretical knowledge. You can uncover beginner-friendly patterns at Fabrics-Store.com, such as the Essential Linen Tank and the Wiksten Shift Dress + Top. As you progress, you can delve into more advanced techniques, such as sewing a zipper, button, or French seam.
Bear in mind to practice on scrap fabric before undertaking your projects, and don’t be daunted by making mistakes. Embrace the learning process and utilize seam rippers to rectify any errors. With patience and dedication, you’ll soon be sewing like a seasoned professional!
The Role of Patience and Practice
Embrace the journey of sewing with patience, persistence, dedication, and perseverance. Like any skill, sewing requires motivation and practice to master the basics. Remember, you’re not alone in your sewing journey. Sewing lessons and tips from experienced sewers can help you develop your skills.
Start with loose, elastic-waist pants, and practice on scrap fabric. As you progress, try on your garment as you go and go slowly, enjoying the process. Remember, everyone starts somewhere, so don’t be discouraged by mistakes. Use seam rippers to learn from them and keep practicing.
With patience and practice, you’ll become a confident and skilled sewer.
Essential Sewing Supplies
Selecting the right sewing machine is your first step toward creating beautiful garments and crafts. You’ll also need sharp fabric scissors, reliable pins, a ruler or measuring tape, and a stitch un-picker for those inevitable mistakes.
Selecting a Sewing Machine
Selecting a sewing machine is a vital step in your sewing journey. It’s imperative to choose a machine that aligns with your requirements, financial constraints, and spatial limitations. Here are some pointers to assist you in making a well-informed decision:
- Machine Selection: Contemplate the kind of machine you require. Mechanical, electronic, or computerized machines all have their strengths. For novices, a mechanical machine might be a suitable starting point, as it’s less complex to operate and less costly.
- Features Comparison: Examine the features of various machines. Some features that can expedite progress and enhance performance include automatic thread trimmers, needle positioning, speed limit, and jam-proof systems.
- Budget Considerations: Establish your budget. There are sewing machines available under $100 that can handle basic sewing projects, such as the Brother XL2600i, which has a heavy-duty frame and a variety of stitch options.
- Location Factors: If you intend to sew while mobile, a handheld or portable machine might be more convenient. For a dedicated sewing space, a larger machine may be more appropriate.
- Online Reviews: Peruse reviews from other users to gain insights into the machine’s performance and reliability. Websites like Amazon, Walmart, and Overstock offer a range of sewing machines at various price points.
- Sewing Machine Types and Functions: Comprehend the different types of sewing machines and their functions. For instance, some machines are better suited for quilting, while others are more appropriate for garment construction.
- Basic Button and Setting Functions: Verify that the machine possesses basic functions like threading, tension adjustment, and stitch type selection.
Fabric Scissors and Cutting Tools
Fabric scissors and cutting tools are essential for any sewing project. Sharpening your scissors is paramount to maintain their effectiveness and longevity. Here are some tips for sharpening your fabric scissors:
- Foil Method: Fold a 10” x 10” piece of aluminum foil in half about three times lengthwise, yielding six layers. Cut smoothly through the foil, ensuring all the blade touches the foil with each cut. Repeat several times, checking the sharpness of the scissors and repeating if necessary.
- Sandpaper Method: Fold your sandpaper in half, rough sides outwards so that as you cut, the rough sides meet the blades. Cut through the sandpaper several times over.
- Steel Wool Method: Use a pot cleaner, such as steel wool, and cut through it over and over. This method is gentle enough to sharpen without causing damage and creating sharp pieces of metal.
- Professional Sharpening: Send your fabric scissors to a professional sharpening service. Expect to pay about $7 – 20 (£6 – 15), plus postage and packaging for a mail-in service.
Pins, Rulers, and Un-pickers
Pins, rulers, and un-pickers are essential tools for every sewer. Pins hold fabric together while sewing, and a pin cushion keeps them organized. Elastic waistbands require pins to keep them in place.
Ruler markings guide your stitching, while un-pickers help fix mistakes. Embroidery and clothing construction often require rulers and un-pickers.
Remember to try on your garment as you go and go slowly to enjoy the process.
Understanding Sewing Patterns
Understanding sewing patterns is vital for beginners to successfully create their own clothing. Sewing patterns are available from various brands such as Butterick, McCall’s, Simplicity, and Vogue, as well as from indie designers for more contemporary and exclusive options. Free patterns can be found at Fabrics-Store.com.
It’s imperative to select a pattern that aligns with your skill level and the fabric you intend to use. Patterns suitable for beginners include the Anna Allen Pomona Pants + Shorts, Fabrics-Store.com Essential Linen Tank, and Wiksten Shift Dress + Top.
When choosing a pattern, take into consideration the fabric type and the complexity of sewing the pattern. Patterns may have different grainlines, which indicate how the pattern should be aligned with the fabric’s selvage edge. Common grainlines include lengthwise, crosswise, and bias, each providing varying degrees of durability and stretch.
It’s essential to thoroughly read and comprehend the pattern instructions before commencing the sewing process.
Pattern Brands and Styles
Regarding pattern selection, conventional styles can be found from brands such as Butterick, McCall’s, Simplicity, and Vogue. For contemporary and distinctive choices, independent designers provide a plethora of options. Complimentary patterns can be found at Fabrics-Store.com, while additional pattern providers include Anna Allen, Sew House Seven, and Wiksten.
Patterns suitable for novices encompass Anna Allen Pomona Pants + Shorts, Fabrics-Store.com Essential Linen Tank, and Wiksten Shift Dress + Top. Pattern alteration, adjustment, and construction can elevate your sewing abilities, while pattern personalization enables a customized touch.
Concealed zippers, a sewing mainstay, can be securely sewn for an immaculate finish.
Sourcing Free and Indie Patterns
Embarking on the sewing journey, you’ll quickly realize that indie designers and complimentary patterns are your clandestine allies. They’re not merely about conserving funds; they’re about selecting fabrics, modifying patterns, and employing eco-friendly sewing techniques that enhance your artistry. Envision metamorphosis—a humble linen fabric transformed into a masterpiece, or a knitted garment that exudes your individuality. It’s all about mastering sewing with a dash of ingenuity.
| Source | Why It Rocks |
|---|---|
| Indie Designers | Innovative, distinctive patterns that defy norms |
| Free Patterns | A budget-friendly avenue for practice and experimentation |
Choosing the Right Fabric
Selecting the appropriate fabric is a vital stage in your sewing endeavor, particularly when shopping online. You’ll encounter eco-friendly options and fabrics that are suitable for beginners, guaranteeing that your projects are both aesthetically pleasing and ethically sound.
Online Fabric Shopping
When sourcing fabric online, there are several crucial considerations to keep in mind. First, it is essential to ensure that the fabric is of excellent quality. This can be achieved by seeking out reputable brands or reading customer feedback to gauge the fabric’s durability and comfort levels.
Second, shipping timeframes may vary, so it is important to plan ahead to prevent any delays in your sewing project. Several online retailers provide free shipping with a minimum purchase threshold, so it is worth considering ordering multiple fabrics simultaneously to save on shipping expenses.
Lastly, fabric samples are an excellent way to get a sense of the fabric before you buy it. Many online retailers offer fabric samples for a nominal fee, which can help you make a more informed choice about your fabric selection.
Sustainable Fabric Options
Significant fabric choices are a vital factor for those concerned about the environment and ethical practices. Here are three ways to procure sustainable fabrics:
- Eco-conscious materials: Opt for organic cotton, linen, or hemp, which are cultivated without harmful pesticides and chemicals.
- Reused fabrics: Look for recycled polyester, denim, or silk, which minimizes waste and conserves resources.
- Transparent sourcing: Choose online retailers that provide details on their fabric sourcing and production processes, ensuring ethical labor practices.
Fabric Types for Beginners
As a beginner sewer, selecting the appropriate fabric is essential for a successful project. Fabric weight, durability, drape, texture, and pattern are key factors to keep in mind.
Commence with lightweight, breathable fabrics such as linen or cotton for ease of use. Durable fabrics like denim or canvas are excellent for mastering more advanced techniques.
Take into account the drape and texture for garments that require more flow, like skirts or dresses. Patterns can add interest, but select simple ones initially.
Sewing Machine Basics
To become proficient in sewing, it’s essential to grasp the fundamentals of operating a sewing machine. Commence by learning how to string the machine, regulate tension, and choose stitch types. Furthermore, acquaint yourself with the different machine types and their purposes, as well as fundamental button and setting functions.
Threading and Setup
Threading and setup are essential aspects of operating a sewing machine. To thread your machine, start by locating the thread guides and tension discs. These devices guarantee that the same amount of thread flows from the needle and bobbin simultaneously, producing a symmetrical stitch.
To adjust the tension, you can use a small screwdriver to turn the screw on the side of the bobbin case. Turn the screw clockwise to increase the tension and counterclockwise to decrease it. Remember to turn the screw in small increments and never more than a quarter-turn between tests.
When selecting stitch types, most machines have a pattern selector dial or a digital panel where you can choose the desired stitch. For beginners, it’s recommended to start with simple stitches like the straight stitch** and zig-zag stitch, as these are versatile and can be used for a wide range of projects.
Troubleshooting common issues, such as looped thread or poor stitch quality, often involves adjusting the tension settings. If you encounter problems, consult your sewing machine manual or seek advice from experienced sewers.
Machine Types and Functions
Having gained proficiency in threading, let’s delve into the core of your sewing machine. It’s a realm where sewing needle types hold sway, each crafted for specific fabrics. Remember the bobbin winding process—it’s crucial for maintaining the uniformity of your stitches. With a simple turn of a knob, you can modify the stitch length, ensuring accuracy for every undertaking.
- Mastering needle threading methods for a seamless commencement
- Discovering presser foot alternatives to address any fabric
- Adjusting stitch length precisely for flawless seams
Basic Button and Setting Functions
Sewing buttons is a common activity when working with garments. While it may appear daunting initially, your sewing machine is designed to handle this task effortlessly. Here’s how to utilize the fundamental button and setting features on your sewing machine:
- Turn off the feed dog: The feed dog is a component of the sewing machine that assists in moving the fabric beneath the needle. When sewing buttons, you desire to control the movement of the fabric yourself. To turn off the feed dog, locate a switch or lever on the side of your machine. This switch will either lower the feed dog so it doesn’t move any fabric or cover it with a plate that accompanies the machine.
- Select the appropriate needle and thread: Choose a needle with a medium to large eye for sewing buttons. The thread should complement the color of the button or contrast pleasantly. Some machines have an integrated button sewing stitch which includes tie-off stitches so the threads remain secure. If your machine only performs zigzag, you can leave the bobbin thread several inches long, beginning and end, and tie these two in a knot, then they can be trimmed close. The top thread can also be cut short and it will be secure.
- Set the stitch width: Most buttonholes are 3.5 mm apart, but not all. Adjust the stitch width on your machine to correspond with the distance between the holes on your button. This can be done manually or by utilizing a specific button sewing setting on your machine.
- Test the stitch width: Before you begin sewing, test the stitch width to confirm that it passes through the next hole. You may require adjusting the stitch width marginally to achieve the best fit.
- Sew the button: Once you have everything established, you can commence sewing. Begin by sewing through one hole, then pull the button slightly in your direction, realign, and sew the next hole. This will create a thread shank that holds the button in place.
- Remove the button and fabric from the machine: After sewing, remove the button and the fabric from the machine. The thread may appear loose and messy, but it will tighten up once the button is in position.
Operating Your Sewing Machine
To operate your sewing machine effectively, you’ll need to understand the basics of threading, tension adjustment, and stitch type selection. Start by threading the machine correctly and adjusting the tension for ideal stitch quality. Once you’ve mastered these techniques, you’ll be able to select the appropriate stitch type for your project and practice on scrap fabric to resolve any issues.
Threading Techniques
Threading your sewing machine is an essential initial step in embarking on your sewing adventure. It may appear intimidating initially, but with practice, it will become automatic. Here’s a step-by-step guide on how to thread your sewing machine:
- Remove the old bobbin: Begin by opening the shuttle cover, situated underneath the needle. Extract the bobbin casing and remove the old bobbin.
- Identify the components: Locate the spool pin, which is a cylindrical piece that accommodates the hole in the spool of thread. It’s typically situated on the top or side of the machine.
- Loosen the thread: If your machine possesses a spool cap, position it atop the thread to secure it. If not, initiate the spool or detach the end of the thread from the hook.
- Place the spool on the spool pin: Insert the extremity of your thread through the thread guide, which is a component with a diminutive hole adjacent to the spool that assists in guiding the thread when winding a bobbin or threading the machine.
- Wrap the thread around the tension disk: This minuscule knob proximate to the thread guide will convey the thread as it’s wound around the bobbin.
- Push the end of the thread through the orifice in your bobbin: Once the bobbin is secured on the winder, grasp the extremity of the thread and depress your foot pedal to replenish the bobbin with thread.
- Sever the thread and remove the bobbin: Upon completion, sever the thread and remove the bobbin from the winder.
Tension Adjustments
Tension adjustments are vital for achieving ideal stitch quality in your sewing projects. Here are three key points to help you master this aspect of sewing:
- Understand Tension Adjustments: Tension adjustments can be made by tightening or loosening the screw on the side of the sewing machine case. Both the upper and bobbin tension mechanisms work similarly, but their locations may vary depending on the machine’s design.
- Fabric Thickness and Tension: Adjust the tension according to the thickness and type of fabric you’re using. Thinner fabrics may require a higher tension, while thicker fabrics may need a lower tension to prevent puckering.
- Top Thread Tension: Keep an eye on the top thread tension when adjusting the bobbin tension. A balanced tension between the top and bottom threads is essential for creating even stitches.
Stitch Type Selection
After mastering tension adjustments, you’re prepared to delve into the realm of stitch varieties. Envision your sewing machine as an enchanter’s wand, where each stitch type can evoke enchantments upon diverse fabrics.
From steadfast straight stitches to ornate decorative stitches, your fabric compatibility guide serves as your incantation book. Allow pattern guidance to beckon you towards embroidered embellishments that transmute the ordinary into the extraordinary.
Mastery lies within the grasp of your thread!
Preparing to Sew
To prepare for your sewing journey, start by gathering essential supplies, such as fabric, thread, pins, scissors, and bobbins. Familiarize yourself with sewing terminology and learn how to choose the right fabric for your project. Comprehend patterns by reading through them carefully and practicing on scrap fabric. Remember, patience and practice are key to mastering sewing.
Gathering Essential Supplies
Gathering essential sewing supplies is a vital step in preparing to sew. As a beginner, you’ll need a variety of tools and materials to get started. First, you’ll need a sewing machine, which can range from budget options to more advanced models with additional features. Sewing needles, bobbins, and thread are also essential, as well as fabric scissors, pins, a ruler or measuring tape, and a seam un-picker.
Sewing terminology is important to understand, and fabric preparation involves choosing the right fabric and preparing it for sewing. Essential supplies include a tape measure, pins, and a pin cushion, as well as a seam ripper for removing stitches when necessary.
Starting simple with loose, elastic-waist pants is a great beginner project. Practice on scrap fabric and read through the entire pattern before starting. Try on the garment as you go, and go slowly to enjoy the process.
To master sewing, it’s important to have a dedicated workspace, choose a suitable sewing machine, and understand machine operation. Learning to insert and remove machine needles, adjust machine tension, and select the appropriate needle type and thread for different fabrics are also key skills.
Beginner-friendly projects include straight lines and minimal embellishments, such as household items like blankets, pillows, and burp cloths. Embrace mistakes and use seam rippers to learn from them. As you advance, you can explore more advanced techniques like sewing a zipper, button, French seam, mitered corners, and scalloped edges.
Fabric Selection and Care
Now that you’ve got your sewing kit essentials, let’s venture into the fabric wilderness. Here’s how to conquer it:
- Fabric Sourcing: Search for the ideal material—explore online stores for an eco-conscious find.
- Fabric Types: Select wisely; cotton is your dependable companion, while silk can be an elusive adversary.
- Fabric Care: Treat your fabrics like exceptional wine—study those labels and adhere to the care guidelines.
- Fabric Storage: Roll or fold? Preserve your textiles smooth and ready for use.
Pattern Comprehension
Pattern comprehension is a key aspect of sewing, as it helps you understand the instructions and layout of your sewing project. Here’s a step-by-step guide on how to read and comprehend a sewing pattern:
- Pattern Layout: Start by unfolding the pattern and examining the layout. The guidesheet, which is like a GPS printout, explains all the information you need to get from the start of a project to the finish.
- Selecting Pattern Pieces: Check the guidesheet to see which pattern pieces you need for the view you have chosen. Unfold the pattern pieces, take out those you need, and return the others to the pattern envelope.
- Pressing Pattern Pieces: Press the paper or tissue pattern pieces with a warm, dry iron to remove wrinkles. Extend the pattern grainline so it’s visible the entire length of the pattern.
- Finding the Correct Layout: Find the correct layout on the pattern guidesheet. This involves finding the view you’re making, the fabric width, and your size.
- Tiling Pattern Pieces: If a digital pattern is printed on multiple pages to create one pattern piece, you may need to tile the pattern pieces.
- Folding the Fabric: Fold the fabric as shown on the pattern layout. Start by placing the larger pattern pieces, following the guidesheet layout.
- Laying Pattern Pieces on the Fabric: Lay the pattern pieces on the fabric, starting with the larger pieces. Locate the grainline arrow and pin one end of the arrow to the fabric. Measure the distance to the fabric fold or the selvage. Shift the pattern until the two distances are equal.
- Pinning Pattern Pieces: Pin the pattern along the fold. Extend pin tips beyond the fold so you don’t accidentally cut along the fold of the fabric. Some pattern pieces may need to be placed on the fabric with their printed sides down.
- Checking Grainlines: Double check the guidesheet to make sure you have included all the pieces needed for the view you’re making. Double check that grainlines are straight.
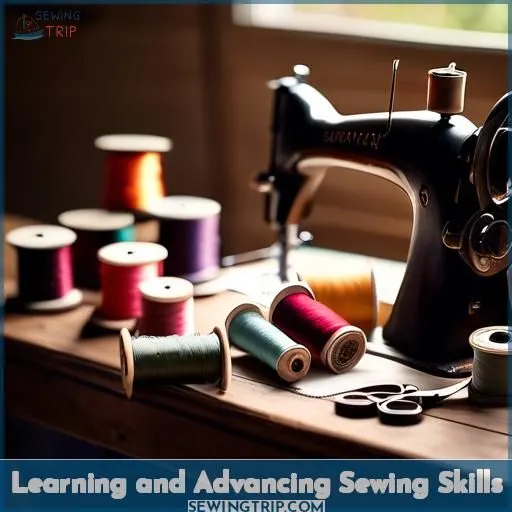
Learning and Advancing Sewing Skills
Beginning your sewing experience, you’ll find that local and online classes can provide valuable direction and encouragement. As you undertake beginner-friendly projects and learn from your errors, you’ll gradually become proficient in complex techniques, improving your sewing abilities.
Finding Local and Online Sewing Classes
Finding local and online sewing classes can be a great way to learn the craft from experienced instructors and meet other sewers. Here are some options to think about:
- In-Person Sewing Classes: These classes provide hands-on instruction and typically offer materials. They’re scheduled and require commuting, but they offer a more traditional classroom experience. Look for classes at local community colleges, sewing studios, and craft stores.
- Online Sewing Classes: Virtual classes offer greater accessibility and a wider range of class options. They eliminate the need to commute and provide more class choices at different times. However, materials aren’t provided, so you’ll need to purchase them beforehand. Websites like CourseHorse and The Sewing Hive offer a variety of online sewing classes, including beginner-friendly options.
- Private and Group Sewing Lessons: Some instructors offer private lessons in their homes or studios. These lessons can be customized to your interests and skill level. They’re often more flexible with respect to scheduling and can be a good option for those who prefer a more personalized learning experience.
- Sewing Workshops: These events often focus on specific techniques or projects and can be a great way to learn from experts in the field. Look for workshops offered by local sewing studios, craft stores, and online platforms.
- Sewing Clubs and Guilds: Joining a sewing club or guild can provide opportunities for learning, socializing, and sharing ideas with other sewers. These groups often offer classes, workshops, and other events for members.
Remember to consider your schedule, budget, and learning style when choosing a sewing class. Many studios offer a range of classes for different skill levels, so don’t hesitate to ask about options if you’re unsure where to start.
Beginner-Friendly Sewing Projects
As a novice, it’s paramount to commence with fabrics that are simple to stitch, such as cotton or flannel. Projects suitable for beginners encompass loose, elastic-waisted trousers, domestic items such as blankets and pillows, and unadorned garments like the Anna Allen Pomona Pants + Shorts or the Fabrics-Store.com Essential Linen Tank.
Exercise machine-sewn methods and hand-sewn adornments to create distinctive, imaginative sewing projects.
Embracing Mistakes and Learning Advanced Techniques
Embrace the journey of learning to sew by accepting mistakes as part of the process. As a beginner, it’s natural to make errors, but with patience and practice, you’ll improve.
To advance your skills, explore advanced techniques like troubleshooting and pattern customization. Don’t be afraid to experiment with different fabrics and try new stitches.
Frequently Asked Questions (FAQs)
Can I sew without a pattern?
Yes, you can sew without a pattern. Many experienced sewers often work without patterns, relying on their knowledge of sewing techniques and their ability to visualize how different pieces fit together. To get started, you can sketch out your design on paper, start small with pattern hacking, or use your own body to measure. Additionally, you can look closely at existing garments to understand how they’re constructed and use that knowledge to guide your sewing. Remember to practice and be open to making mistakes, as these can help you learn and improve your skills.
How do I fix a broken needle?
To fix a broken needle in your sewing machine, follow these steps:
- Check the machine: Make sure no pieces of the broken needle are still inside the machine. Turn the handwheel slowly by hand and listen for any grinding noises. If you hear grinding, there might be remaining pieces of the needle in the machine.
- Replace the needle: Remove the old needle and insert a new one. Make sure the needle is the correct size and type for your sewing machine. If you’re unsure, refer to your machine’s manual or consult with a sewing expert.
- Thread the needle: Thread the new needle with the appropriate thread for your project. Make sure to use the correct thread tension and needle type for the fabric you’re working with.
- Secure the needle: Once the needle is threaded, secure it in the needle bar of your sewing machine. This usually involves loosening a screw on the top of the needle bar, pulling the needle out, and then reinserting it with the flat side facing the back of the machine.
- Tension adjustment: Adjust the needle tension to get the best stitch quality. This can be done by turning a dial on the sewing machine or using a screwdriver to adjust the needle clamp screw.
- Test the needle: Sew a few test stitches on a scrap piece of fabric to make sure the new needle is working properly and not causing any damage to the fabric or the machine.
Remember to replace needles after approximately 10 hours of sewing time to keep your sewing experience at its best.
What are the best fabrics for beginners?
To master sewing, you should start with the right fabric. For beginners, it’s crucial to select fabrics that are effortless to manage, stable, and not too slippery or stretchy. Some of the most suitable fabrics for beginners include cotton lawn and poplin, brocade, double knit (ponte knit), and everyday linen. These fabrics are versatile, easy to sew, and appropriate for a wide range of projects.
As you gain more experience, you can explore other fabrics like silk, wool, and synthetic materials. Remember, practice makes perfect, so don’t be afraid to make mistakes and learn from them.
Can I sew on a budget?
To sew on a budget, consider the following tips:
- Shop at thrift stores for affordable fabric, patterns, and even sewing machines.
- Don’t forget the clothing section when thrifting for fabric.
- Rethink your giveaway pile by fixing clothes with a few alterations to extend their life.
- Be cautious of the stash and prioritize buying only what you have a plan for.
- Look for sales at fabric stores and online retailers like Joann Fabric.
- Choose a sewing machine within a budget of $200, such as the Singer 4411 or Brother XM
- Opt for free patterns available online from sources like Fabrics-Store.com or Mood Sewciety.
- Consider purchasing a used or refurbished sewing machine to save money.
- Join local sewing groups or classes to learn from others and share resources.
- Be patient and persistent in finding bargains and deals on sewing supplies.
How do I clean my sewing machine?
To clean your sewing machine, unplug it, remove lint with a brush or compressed air, oil moving parts if needed, and reassemble. Regular cleaning keeps it humming, ensuring your creative flow isn’t interrupted.
Conclusion
To master sewing, start with loose, elastic-waist pants to hone your stitching abilities. Acquire sewing skills through hands-on practice and theoretical knowledge.
Select a sewing machine that aligns with your requirements and budget. Utilize beginner-friendly patterns and practice on scrap fabric. Read and comprehend pattern instructions thoroughly before sewing.
Choose a pattern that aligns with your skill level and fabric type. Opt for lightweight, breathable fabrics for beginners. Learn to use different machine types and their functions.
Operate your sewing machine by threading techniques, tension adjustments, and stitch type selection. Prepare to sew by gathering essential supplies, fabric selection, and pattern comprehension.
Find local and online sewing classes, embrace mistakes, and learn advanced techniques to continue advancing your sewing skills.

