This site is supported by our readers. We may earn a commission, at no cost to you, if you purchase through links.

We’ll unlock fabric secrets for a flawless frock.
Learn professional tips to cut, press, and seam fabrics so water glides off your DIY divine design.
Stitch windproof warriors with our battle-tested tricks for notions and care.
You’ll be unstoppable in your custom-sewn storm cloak, dry as a bone in sheets of rain.
Let’s dive in to sew a durable waterproof coat.
Table Of Contents
Key Takeaways
- Choose water-resistant or waterproof breathable fabrics like waxed cotton or Gore-Tex for maximum protection.
- Take extra care when cutting and marking waterproof fabric to avoid damage. Use rotary cutters, washable pens, and gentle scoring.
- Seal seams properly with options like stitch-taping or French seams to prevent leaks.
- Follow fabric care instructions closely and change needles and thread often to retain water resistance.
Choosing Waterproof Coat Fabrics
When selecting fabrics for your waterproof coat, you’ll need to balance water resistance with breathability.
Look into water-resistant options like waxed cotton or waterproof breathable fabrics such as polyurethane-coated nylon and Gore-Tex.
Test small swatches first to evaluate weight, feel, and performance before committing to yardage.
Water-resistant Fabrics
When choosing fabrics for your waterproof coat, you’ll want to look into water-resistant options that repel moisture without being completely impervious.
Consider laminated fabrics like nylon taffeta or ripstop nylon, as well as fleece and softshell materials.
These water-resistant fabrics will keep you dry while allowing some breathability.
To ensure maximum protection against leaks, remember to use seam-sealing tape and follow proper stitching techniques when working with these fabrics.
Waterproof Breathable Fabrics
You’ll want to look into waterproof breathable fabrics if keeping dry while active is your main goal.
These high-tech fabrics have a waterproof yet air-permeable membrane between layers, allowing sweat vapor to escape while blocking liquid water.
Popular in performance outdoor apparel, waterproof breathable fabrics strike an optimal balance between protection and comfort through moisture management.
Brands like Gore-Tex use advanced membrane technologies to push the boundaries of functional fabric innovation.
Preparing and Cutting Waterproof Fabric
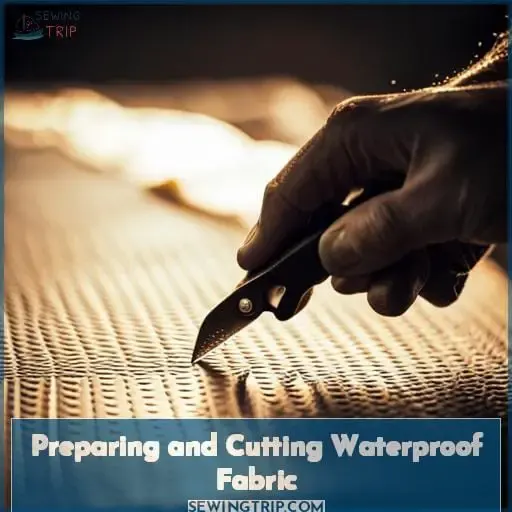
After choosing your waterproof coat fabric, you’ll want to take extra care when preparing and cutting it prior to sewing.
Lay fabric flat and use pattern weights instead of pins to avoid creating holes.
Use a rotary cutter for more accurate cutting.
Try washable pens, chalk, or dressmaker’s carbon for marking.
If necessary, score fabric with a sharp object to create small, hole-free marks.
Working With Waterproof Fabrics
When working with waterproof fabrics, you’ll need to carefully consider your choice of interfacing and stitching method to avoid damaging the fabric.
Test fusible interfacings on scraps first, and be prepared to switch to sew-in interfacing if needed.
You’ll also want to finger press seams when possible and use a pressing cloth and low heat setting if ironing to avoid imprinting or melting.
Interfacing
Upon preparing and cutting your waterproof fabric, fuse or baste interfacing carefully to avoid damaging the coating while providing structure.
Test fusible interfacing on a scrap first, then use a glue stick for temporary hold if needed.
For non-fusibles, clip or pin within seam allowances.
Change needles often and use fine, sharp ones – size 8-10 or microtex.
Finger press or use a press cloth and low heat when possible.
| Interfacing Method | Benefits |
|---|---|
| Fusible | Convenience, permanence |
| Sew-in | Adjustable, removable |
| Glue baste | Temporary hold |
| Clips/pins | Avoid holes |
Stitching
When stitching waterproof fabrics, you’ll want to use a new, sharp needle to prevent skipping stitches.
Choose a fine needle like a size 8-10 or a sharp microtex.
Frequently change needles as they can become sticky.
For slippery fabrics, a walking foot creates an even feed.
With coated fabrics, use a Teflon foot or tissue paper to prevent sticking.
Always test stitch tension since waterproof fabrics can impact tension.
After construction, properly seal seams and care for the coat to retain durability against water.
Pressing
You’ll need to take care when pressing waterproof fabrics to avoid damaging coatings or membranes.
Use a low heat setting and a pressing cloth to protect the fabric.
Test press on a fabric scrap first.
Consider finger pressing seam allowances instead of ironing when possible.
Allow any applied seam sealant to fully cure before pressing.
Carefully following fabric care instructions can help your waterproof coat retain its protective qualities.
Constructing a Waterproof Coat
Here we discuss sealing seams and installing zippers when constructing your waterproof coat.
Proper seam sealing and waterproof zipper installation are crucial to keeping water out.
We’ll cover tips for preparing and sealing seams as well as recommendations for zipper types and installation techniques.
Seams
Get a durable and tight seal on your seams by stitch-taping them with seam sealant adhesive or going with French seams to prevent any water seepage into the coat.
For extra protection against leaks, opt for double-stitched French seams on 3-ply fabric coats.
When using seam-sealing glue, apply a thin, even layer along the seam allowance with a nozzle applicator and smooth with a silicone seam stick.
Let the adhesive cure completely before wearing to ensure waterproof seams.
Zippers
Once you have sealed up your seams, it’s time to think about installing zippers for your waterproof coat.
Use water-resistant zippers designed specifically for rainwear and waterproof fabric.
When constructing the zipper seam, employ topstitching techniques to ensure durability and water resistance.
Consider using exposed zipper construction for added style and functionality.
Before completing the installation, make sure to properly seal the raw edges of the zipper with seam-sealing products to prevent leaks in your finished garment.
Caring for a Waterproof Coat
Before washing your waterproof coat, be sure to first close all zippers, velcro, and snaps to avoid damage during cleaning.
Turn the coat inside out before washing to protect the outer fabric.
Use a front-loading washing machine and mild detergent; avoid bleach or fabric softener.
Let the coat air dry completely before putting it away to prevent mildew.
Proper care is key to getting the most life out of your handmade waterproof coat.
Be gentle when washing, allow adequate drying time, and store the coat properly when not in use.
Following a few simple practices will keep your coat looking great and performing like new, season after season.
With the right fabrics, construction, and maintenance, your custom waterproof coat will withstand years of adventure in the elements.
Troubleshooting Waterproof Projects
When faced with leaks or other issues in your waterproof coat, double-check your seam-sealing and construction techniques to identify and fix any weak spots.
Test each seam and zipper for leaks and make sure seam tape extends at least 1/2 inch beyond stitch lines.
Reapply seam sealant if needed, allowing it to fully cure before washing.
If stitching is skipping, change your needle and thread regularly.
Use a fine needle like a 70/10 microtex and quality polyester thread.
Make sure to pre-shrink interfacing and test fusing small swatches first.
For pressing challenges, use a Teflon sheet and low heat to avoid damaging coat fabric.
With careful construction and finishing, your custom waterproof coat will keep you dry and protected in the elements.
Tips for Home Sewing Waterproof Garments
You’ll want to choose your fabric, needles, and notions carefully when sewing waterproof pieces.
Here are some tips for home sewing waterproof garments:
- Test different interfacing options on fabric swatches before constructing your garment to ensure adhesion.
- Use fine, sharp needles and change them frequently to avoid skipped stitches.
- Consider clean finishing techniques like French seams to seal seams or use seam sealing adhesives/tape.
- Install exposed or placket zippers, sealing the raw edges for waterproofing.
When pressing, use a Teflon sheet to protect the iron and fabric. Finger press seam allowances when possible.
Check your care instructions – many waterproof fabrics require specialist cleaning.
With planning and care, you can sew durable, custom waterproof pieces at home.
Frequently Asked Questions (FAQs)
What types of closures and hardware should I use?
- Use waterproof zippers and storm flaps for full protection.
- Snaps, hook and loop fasteners, and plastic or metal buttons work too.
- Always reinforce buttonholes on waterproof fabrics to prevent tearing.
How do I add lining to a waterproof coat?
Select a lightweight, breathable lining like mesh or taffeta.
Attach it to the main coat pieces at the armholes and side seams using French seams for a clean finish.
Tack the hem up 1/2 to prevent sagging.
Binding the edges creates a polished look.
What sewing machines work best for waterproof fabrics?
Use an industrial machine with a powerful motor and strong needle.
Walking foot or Teflon-coated presser foot to best pierce water-repellent layers without skipping stitches or damaging the fabric.
Where can I find waterproof coat patterns?
Look for waterproof coat patterns from:
- Outdoor gear companies like REI
- Stores like Joann Fabrics
- Independent designers on Etsy
- Sites like McCalls, Simplicity, and Itch to Stitch that offer technical outerwear pieces.
Focus on styles with taped seams.
How do I repair holes or leaks in a finished waterproof coat?
To repair holes or leaks in a finished waterproof coat:
Patch the area using an inner patch and outer patch of heat-activated repair tape.
Once the patch seals the hole, reapply water repellent treatment on the entire coat to maintain performance.
Conclusion
A stitch in time saves nine when crafting your weatherproof wear.
With a few precautions, homemade waterproof coats let you brave the elements in style.
Mind your seams, choose fabrics wisely, and care for them properly.
Then dash through the storm dry as a bone in your custom waterproof coat.
Follow our tips when sewing waterproof coats, and you’ll stay snug whatever the skies throw your way.


